Getting Started with Device Tasks
Follow these quick steps to get started with the Device Tasks extension.
- Understanding Tasks
- Task Templates
- Task Examples
- Deployment and Response
Section 1: Understanding Tasks
A device task represents a specific action to be performed on the device and the resulting response from executing the task. Every command executed on the device via the Device Tasks extension is considered a task. These tasks are defined through the Device Tasks extension and are downloaded to the device for execution. The following tasks can be executed.
Monitoring Tasks
Monitoring Tasks is used to regularly query device attributes to effectively provide you with consistent periodic information about the device. Listed below are a few samples of monitoring tasks:
- Get CPU Load
- Get Memory Usage
- Get Storage Usage
- Get Total Uptime
- Get Display Resolution
While the Device Tasks extension provides you a flexible framework to execute commands across a wide range of protocols, the command will need to exist on the device itself in order for it to be usable.
Advanced Tasks
Advanced Tasks represents a specific action (e.g. reboot device) to be performed on the device while having the Device Tasks extension display all resulting responses from the deployed task. Listed below are a few examples of advanced tasks:
- Install Font Pack
- Install/Update Device Driver
- Deploy Firmware Update
- Retrieve Logs
- Reboot Device
Device Configuration Tasks
Device Configuration tasks allow you to apply configuration parameters and/or settings to a single device or group of devices within a network. Listed below are a few examples of device configuration tasks:
- Set NTP Server Address
- Set Proxy Server Address
- Set Download Speed
- Set Display Resolution
- Set Display Orientation
Section 2: Task Templates
Task Templates are user-defined templates that contain commands to be executed on a device. Templates simplify the process of sharing complex commands, parameters or transform combinations as data can be easily migrated out of one Appspace instance and into another. You have the option of using the pre-configured task templates or importing your own.
Using the Pre-Configured Task Templates
Out of the box, the Device Tasks extension does not contain any task templates. However, there’s a collection of pre-configured task templates aimed to quickly help you configure and monitor your devices. Listed below are some selected task templates.
Monitoring Tasks
| Name | Description |
|---|---|
| Get Storage | Get device’s storage space |
| Get CPU Usage | Get device’s CPU usage |
| Get Current Date and Time | Get device’s current date and time |
| Get Running Processes | Get device’s current running processes |
| Get DMP MIB Property | Get device’s specific MIBs property |
| Get WiFi Mode | Get device’s WiFi mode |
| Get NTP Server | Get device’s NTP server URL |
| Get Memory Usage | Get device’s memory usage |
| Get OS Version | Get device’s OS version |
Advanced Tasks
| Name | Description |
|---|---|
| Delete System Logs | Deletes the device’s system logs |
| File Transfer | Transfers a file to a device |
| Get Download Manager Log | Retrieves the device’s download manager log |
| Get Screenshot | Retrieves the device’s screen output as a screenshot |
| Reboot | Reboots the device |
| Send RS-232 Command | Sends an RS-232 command from a device to a screen |
| Set DMP MIB Property | Set a MIB property on a device |
| Switch Player Mode | Switch between player and desktop mode |
Device Configuration Tasks
| Name | Description |
|---|---|
| Set Display Resolution | Sets the device’s display resolution |
| Set DMP A/V Settings | Sets the device’s brightness, contrast, saturation etc. |
| Set DMP HDMI Auto-detection | Sets the device’s HDMI auto detection mode |
| Set NTP Server | Sets the device’s NTP server URL |
| Set Proxy Server | Sets the device’s Proxy server URL |
Click here to download the collection of pre-configured task templates.
Importing a Task Template
After you’ve downloaded the collection of pre-configured task templates shown in the previous section, you can proceed to import them into the Device Tasks extension.
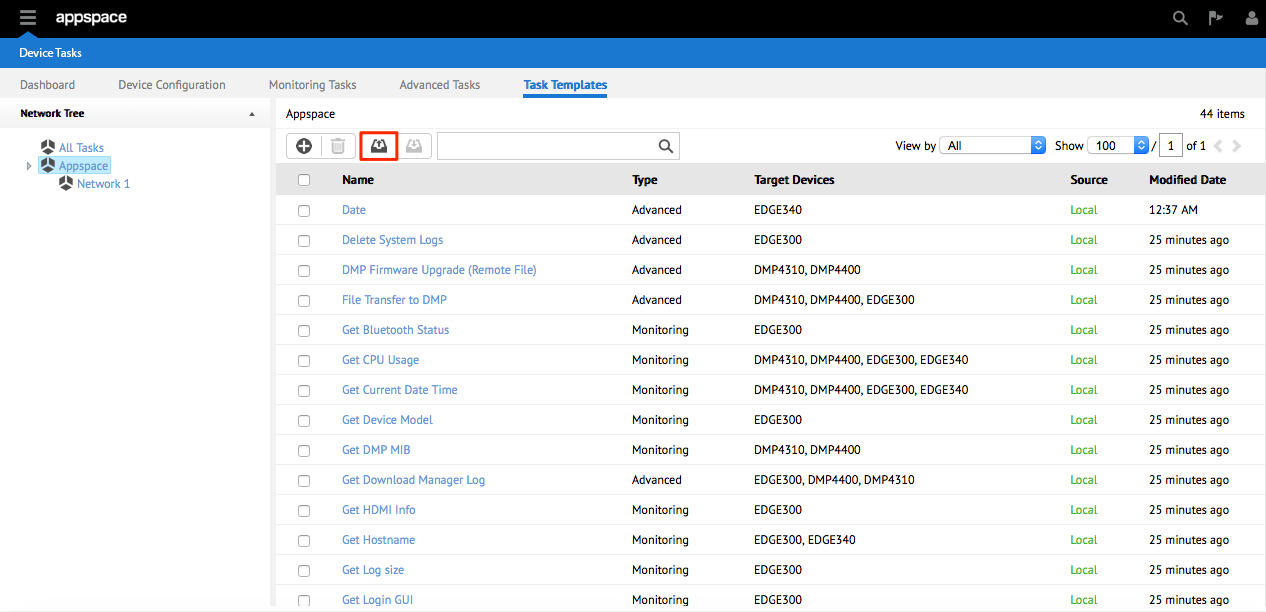
From the Task Templates tab, click the Import button.
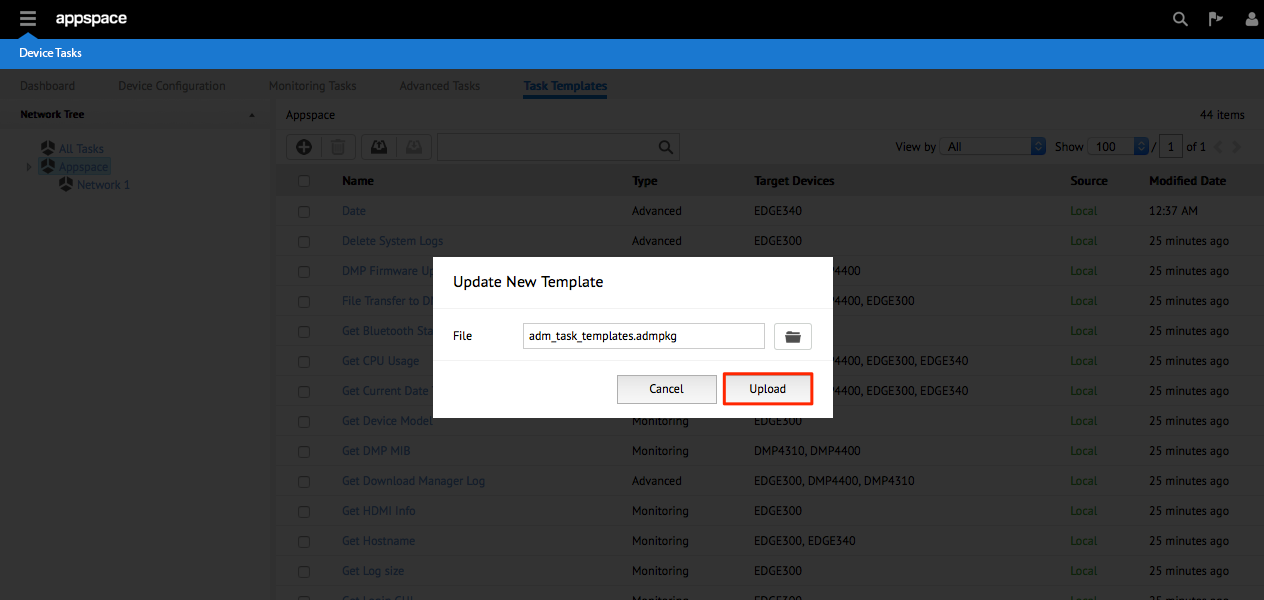
Click the browse button and browse for the task templates. Click Upload to upload the task template.
Note
When importing, always ensure that the package is a valid .admpkg file generated by the extension and not an externally modified file.
Section 3: Task Examples
While new users are encouraged to use the pre-configured task templates, advanced users can choose to write their own tasks to achieve certain outcomes. This section covers a few advanced, monitoring and device configuration task examples.
Monitoring Tasks
Example 1: Get Memory Usage
This task retrieves the current memory usage of the target device.
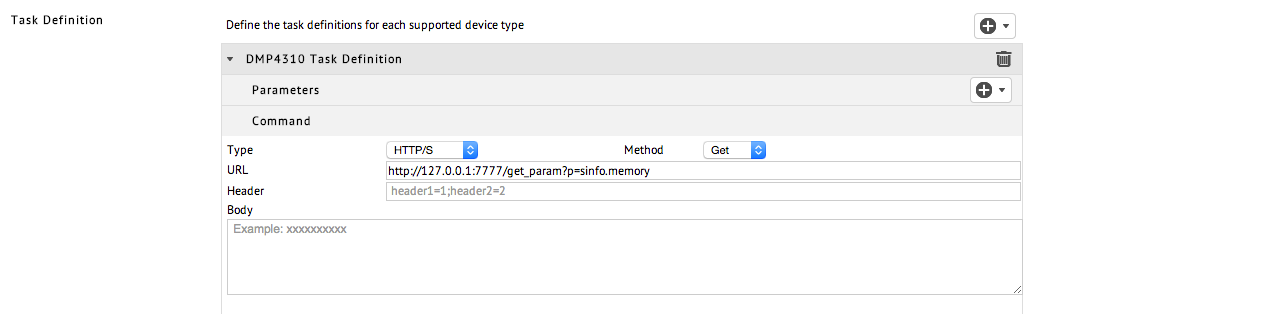
Type: HTTP/S
Method: Get
URL: http://127.0.0.1:7777/get_param?p=sinfo.memory
Parameters: None
Note
- A full list of available DMP 4310/4400 MIBs parameters can be obtained from http://{DMP IP}/get_param?p=*.
- The URL used in this task definition points to localhost (127.0.0.1) as the task is executed on the device itself.
Example 2: Retrieve Download Manager Log
This task uploads the downloadmanagerlog.txt to a handler in Appspace. The user is able to download that log file for troubleshooting purposes.
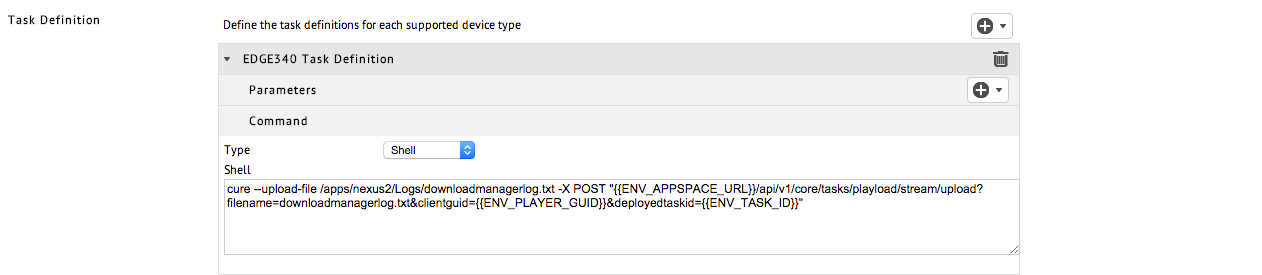
Type: Shell
Device: Edge 340
Command:
  curl --upload-file /apps/nexus2/Logs/downloadmanager/txt -X POST"{{ENV-APPSPACE_URL}}/api/v1/core/tasks/payload/stream/upload?
  filename=downloadmanagerlog.txt&clientguid={{ENV_PLAYER_GUID}}&deployedtaskid={{ENV_TASK_ID}}"
Parameters: None
Note
All ENV parameters defined in the example shown are environment-defined parameters that will be evaluated during task execution and finally replaced with device-dependent values
Advanced Tasks
Example 1: Switch between Player and Desktop mode
This task switches the device’s mode between player and desktop.
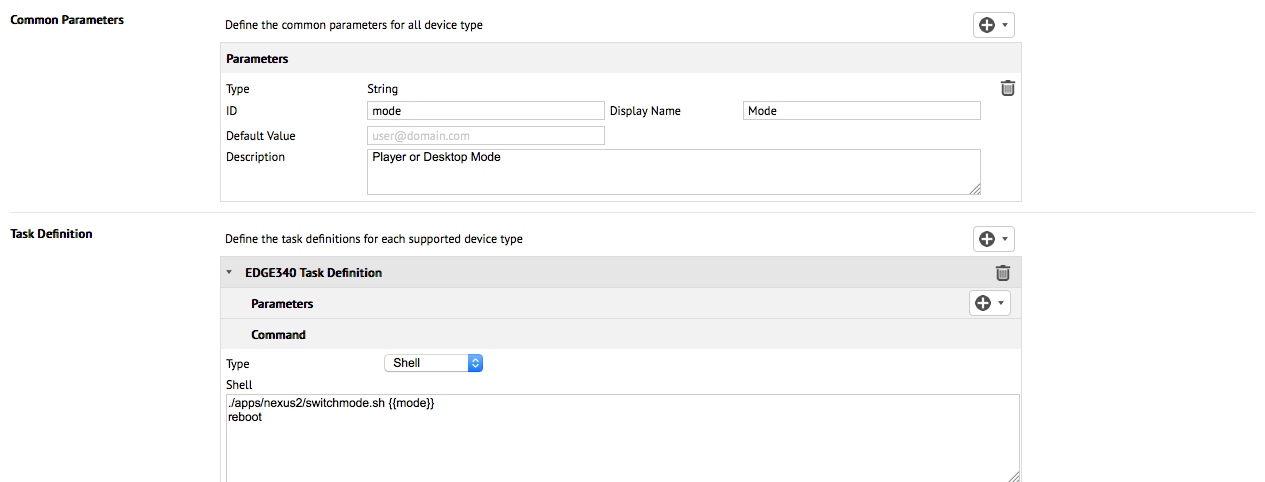
Type: Shell
Device: Edge 340
Command: ./apps/nexus2/switchmode.sh {{mode}} && reboot
Parameters: mode (user defines player or desktop mode during deployment)
Example 2: Replace a file on Device (using nexusmediaplayer.swf)
This task can be divided into two parts:
The first part copies/backs-up the original nexusmediaplayer.swf and uploads it to Appspace. You will be able to retrieve the file when this task is deployed.
The second part replaces the backed-up nexusmediaplayer.swf file with another nexusmediaplayer.swf file that’s located on a local server with a local IP. The parameter defined is local_ip and upon deploying this task, the user will be asked to set the IP of the local server.
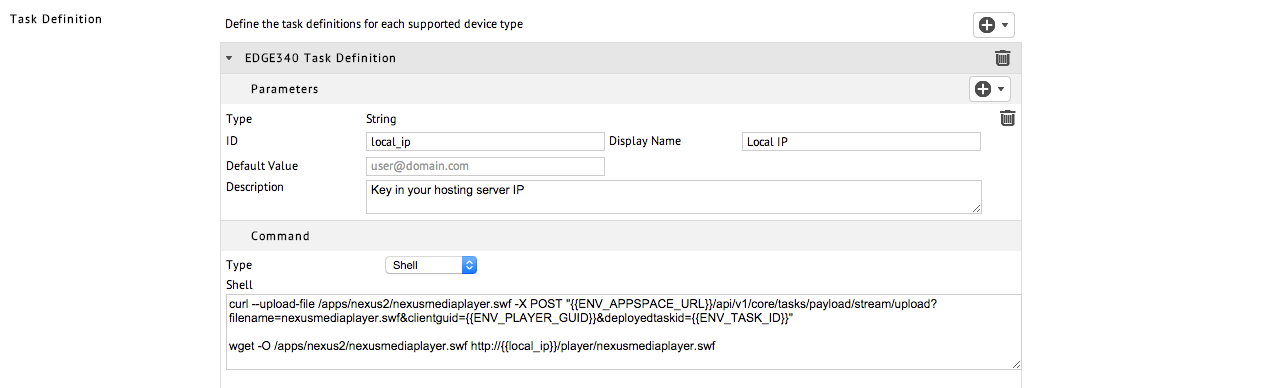
Type: Shell
Device: Edge 340
Command:
  curl --upload-file /apps/nexus2/nexusmediaplayer.swf -X POST"{{ENV-APPSPACE_URL}}/api/v1/core/tasks/payload/stream/upload?
  filename=downloadmanagerlog.txt&clientguid={{ENV_PLAYER_GUID}}&deployedtaskid={{ENV_TASK_ID}}"

  wget -O /apps/nexus2/nexusmediaplayer.swf http://{{local_ip}}/nexusmediaplayer.swf
Parameters: local_ip (user defined during deployment)
Device Configuration Tasks
Example 1: Set Log Size
This task sets the log size on the device.
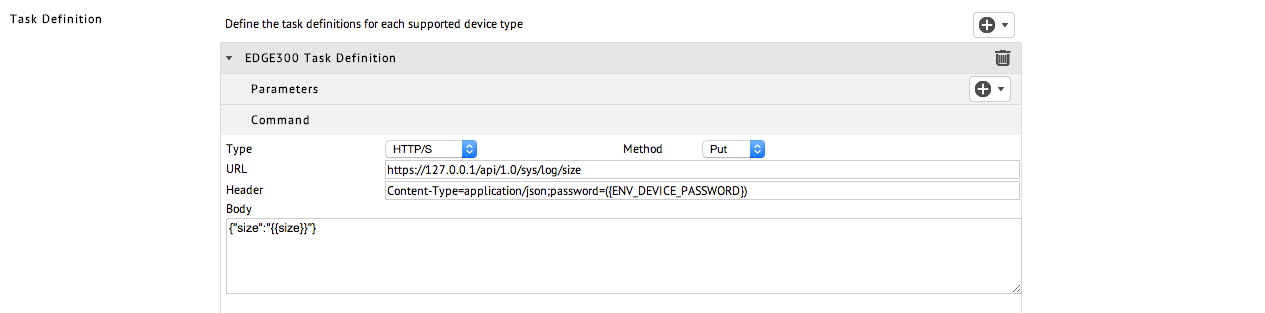
Type: HTTP/S
Method: Put
URL: http://127.0.0.1/api/sys/log/size
Header: Content-Type=application/json;password={{ENV_DEVICE_PASSWORD}}
Body: {"size":"{{size}}"}
Parameters: size
Note
- A list of HTTP APIs is available in the Edge-300-Configuration-Guide-Release-1.5.
- The URL used in this task definition points to localhost (127.0.0.1) as the task is executed on the device itself.
Example 2: Set NTP Server
This task sets the NTP server of the device.
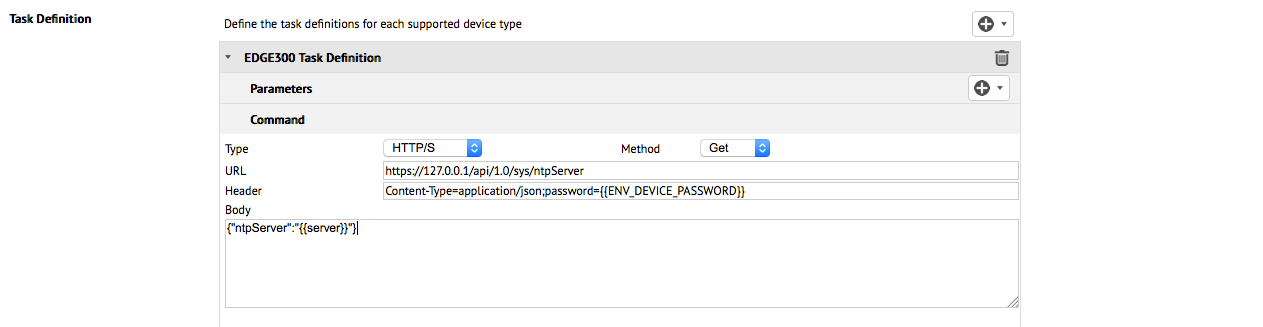
Type: HTTP/S
Method: Get
URL: http://127.0.0.1/api/sys/ntpServer
Header: Content-Type=application/json;password={{ENV_DEVICE_PASSWORD}}
Body: {"ntpServer":"{{server}}"}
Parameters: server
Note
- A list of HTTP APIs is available in the Edge-300-Configuration-Guide-Release-1.5.
- The URL used in this task definition points to localhost (127.0.0.1) as the task is executed on the device itself.
Checklist
At this stage, you would have already:
- Understood the concepts of tasks
- Imported the collection of pre-configured task templates
- Seen a few examples of custom written templates
The next thing you’ll want to do is to deploy your task to your device.
Section 4: Deployment and Response
A task is deployed when the device receives and executes it. Upon executing a task on a device, the Device Tasks extension will feed back all responses from the device through the extension’s interface.
After you’ve selected your desired task template, you’ll now want to deploy that task to your Appspace registered device.
Deploying your Task and Getting a Response
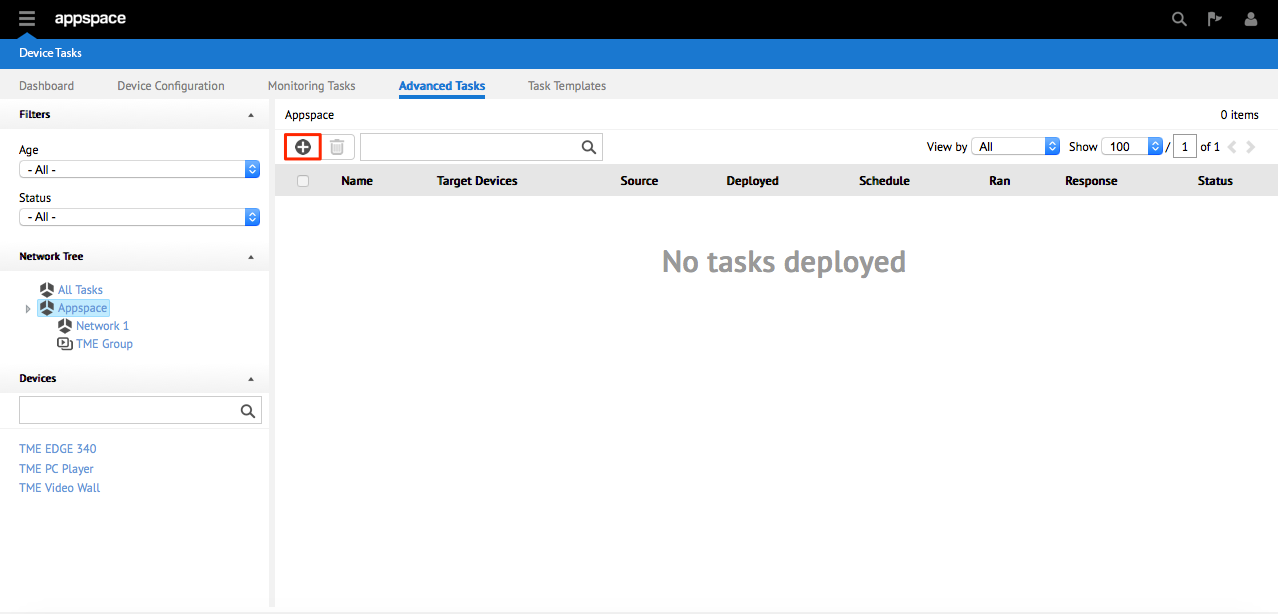
From the Advanced Tasks tab, click on the + button to deploy a task.
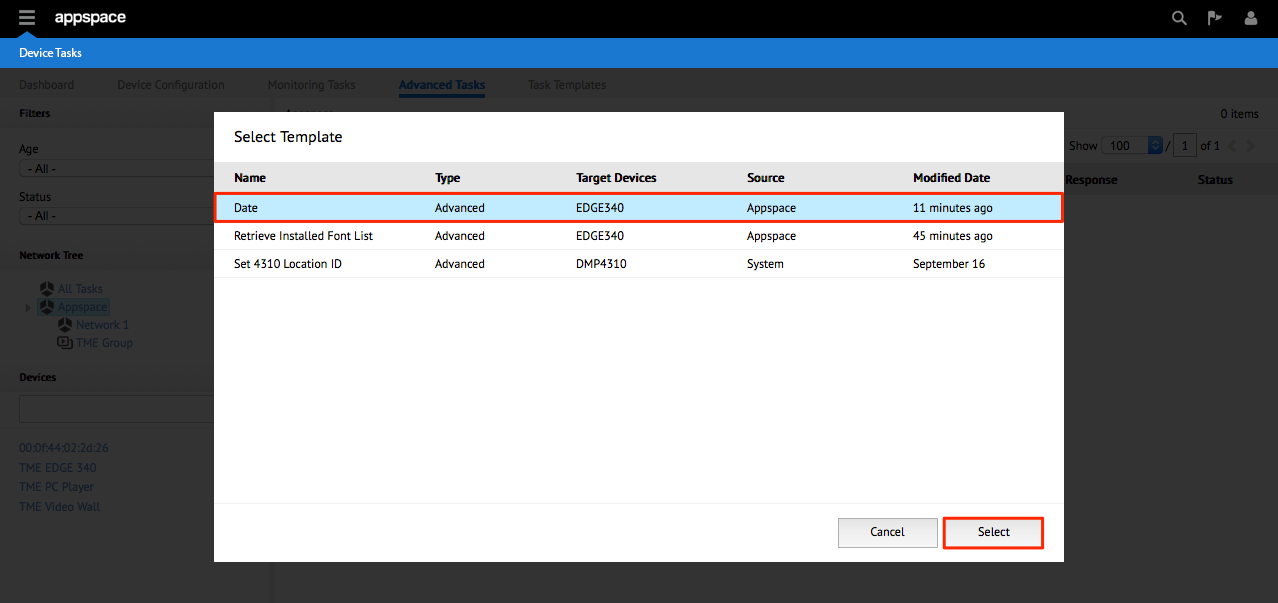
Select one of the task templates from the list in the Select Template window and click select.
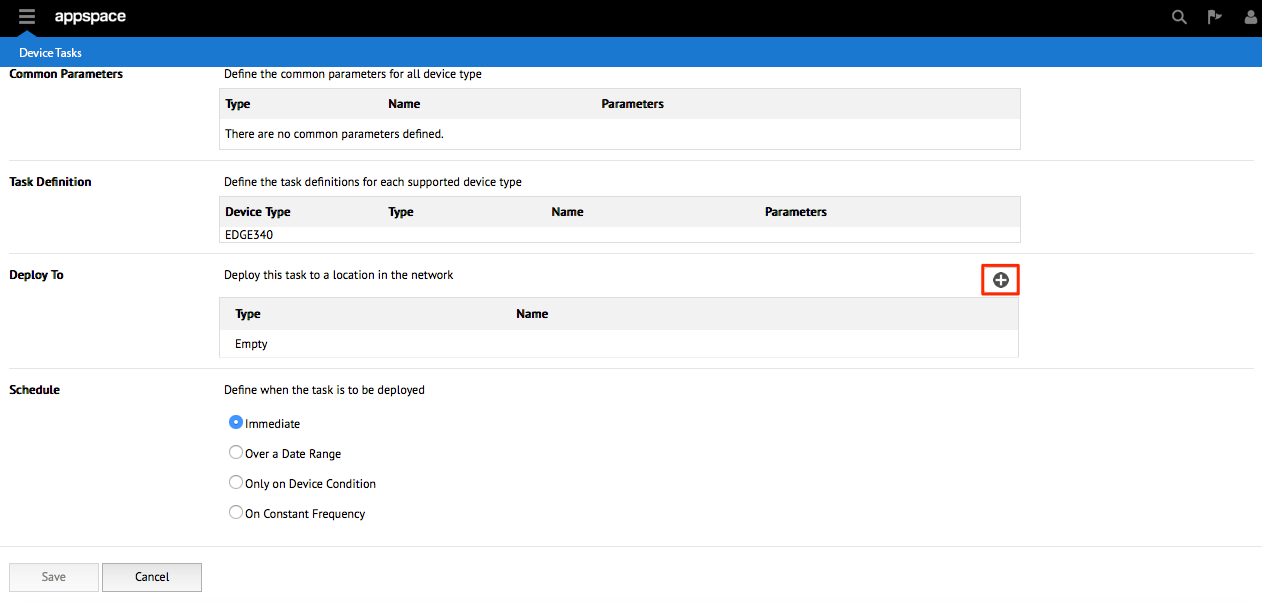
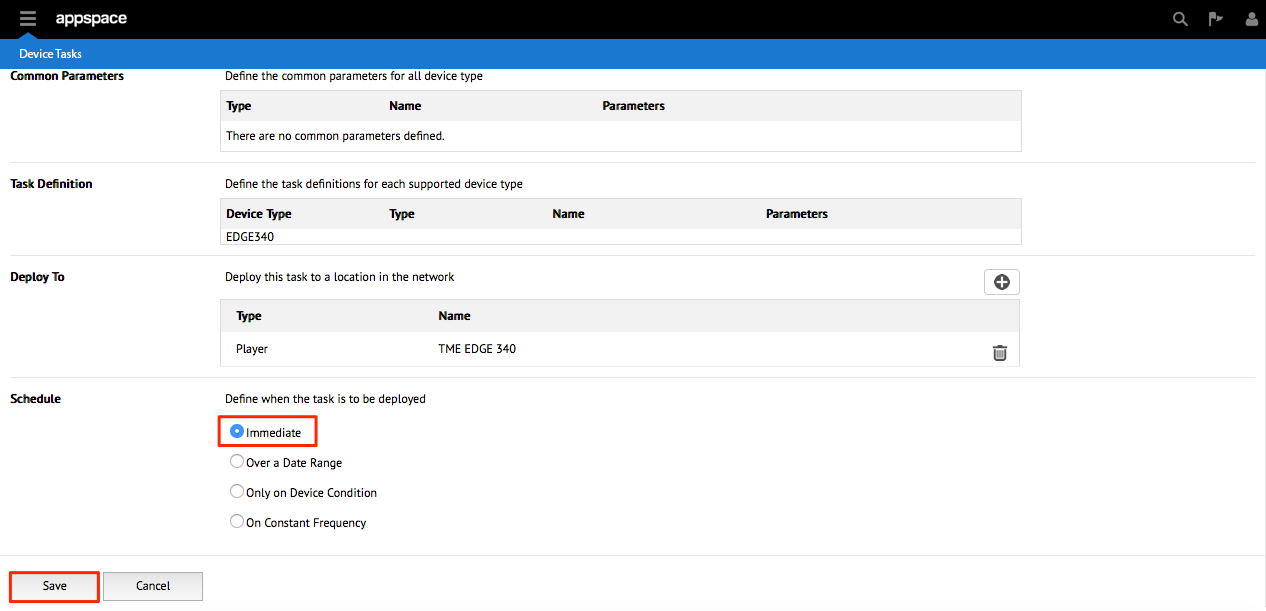
Under the Deploy To section, click the + button to select a location/device to deploy to.
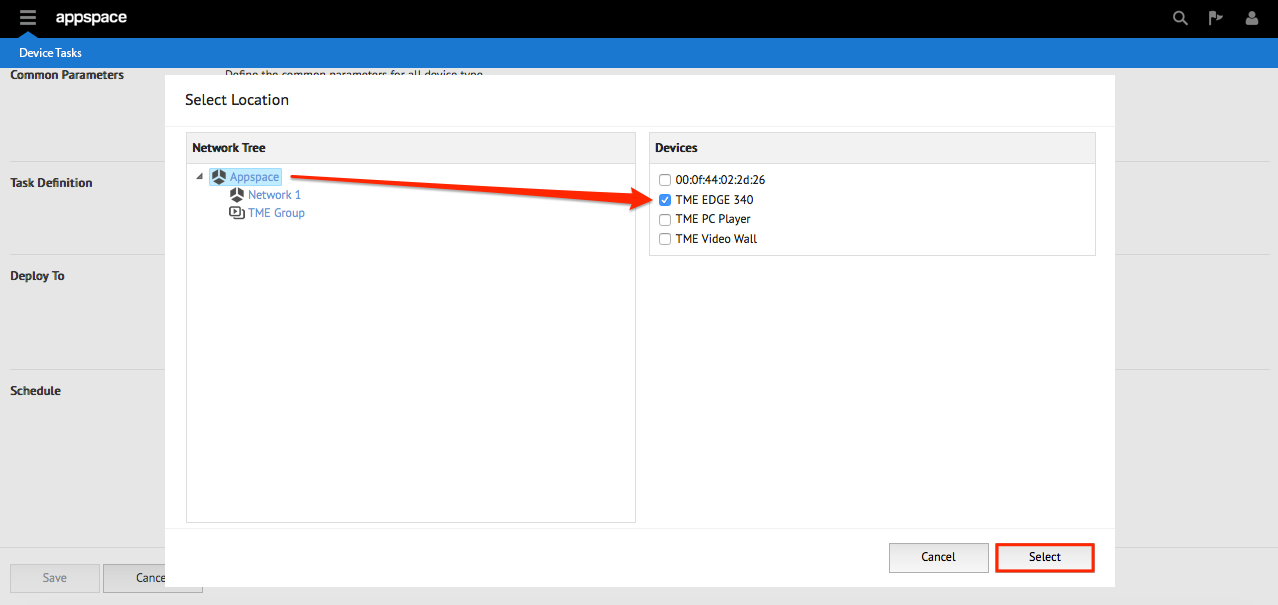
From the network tree, select the network, player group or specific device you would like to deploy the task to. Click Select to confirm your selection.
Note
An application needs to be assigned to the device before you are able to deploy a task.
Select your deployment schedule and click save.
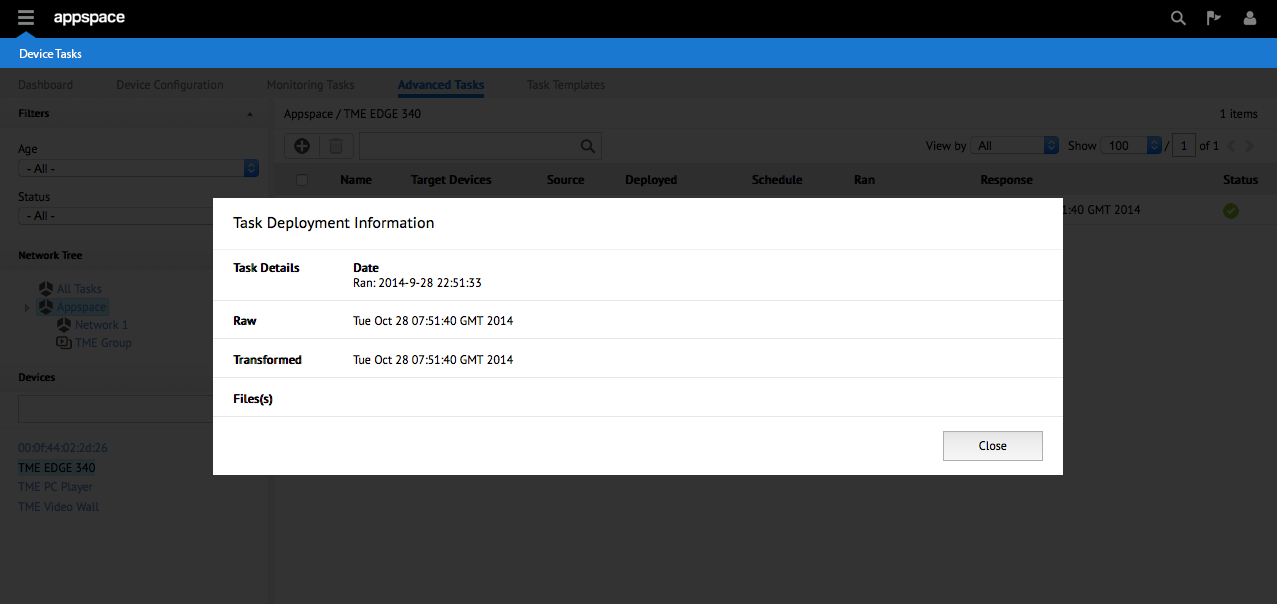
To display the output of the task, click the response of the deployed task.
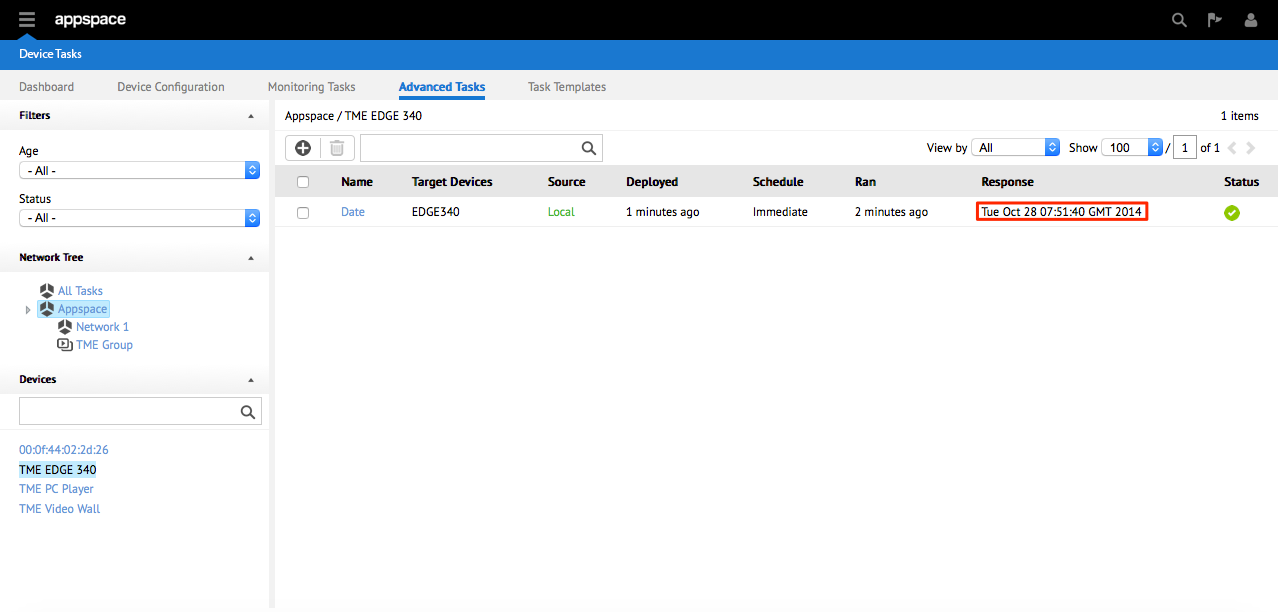
A pop-up will display the raw and transformed (if any) response.
Recap
In this guide, we’ve covered:
- The concept of tasks
- The collection of pre-configured tasks
- Importing the collection of pre-configured tasks
- A few basic task examples
- Deploying your task and getting a response