Single Sign On (SSO) for Single-Tenant Deployments
Introduction
Appspace 5.2 introduces our single sign on (SSO) integration feature for on-premise deployments. With SSO, Appspace allows users to seamlessly and securely connect to Appspace using a single set of credentials, simplifying username and password management.
This guide is based on ADFS being the Identity Provider and Appspace being the Service Provider. As this will be a complicated configuration/installation guide, we’ll break it down into smaller sections:
Section 4: Enabling and Configuring SSO
Section 1: Requirements
Active Directory Server
- Windows Server 2008 R2
- SSL configured
- Windows Server Administrator credentials
Active Directory Federation Services (ADFS)
- Can be installed on the Active Directory Server
- Version 2.0 for Windows Server 2008 R2
- SSL configured
- Windows Server Administrator credentials
Network
- All servers must belong to the same domain or sub domain
Appspace Server
- Version 5.2
- SSL configured
- Windows Server Administrator credentials
- Appspace Portal Administrator, Account Administrator or Account Owner role
- All users created on the Appspace server needs to have an email (can be used as the login as well)
Section 2: How SSO Works
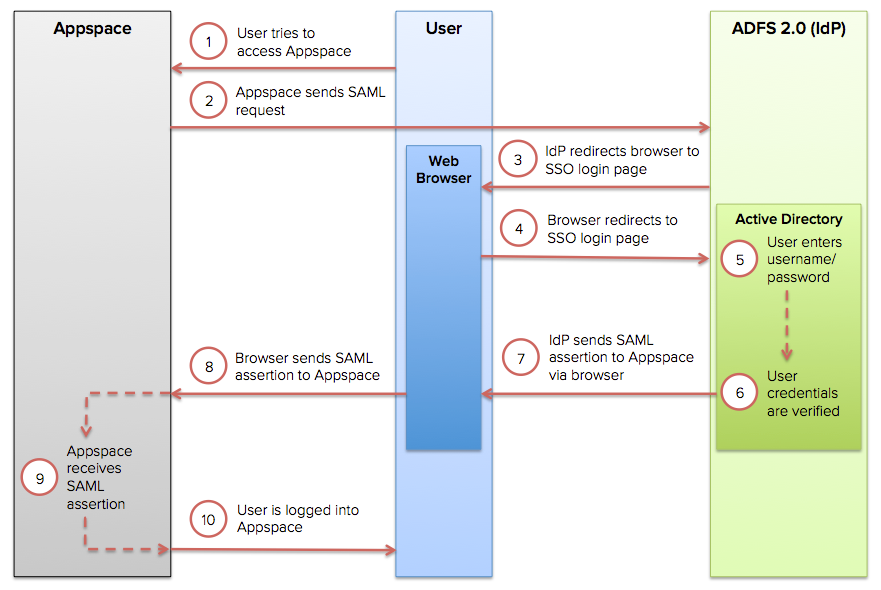
A user starts by trying to log into Appspace. Upon accessing the login page, the user will be redirected to an SSO login page. The user will then have to authenticate his/her login credentials against the Identity Provider. Upon successful authentication, the Identity Provider will send a SAML assertion to Appspace via the web browser to allow the user to log into Appspace.
Section 3: Installing ADFS
Note
This can be performed on the AD server or on a separate server.
Step 1
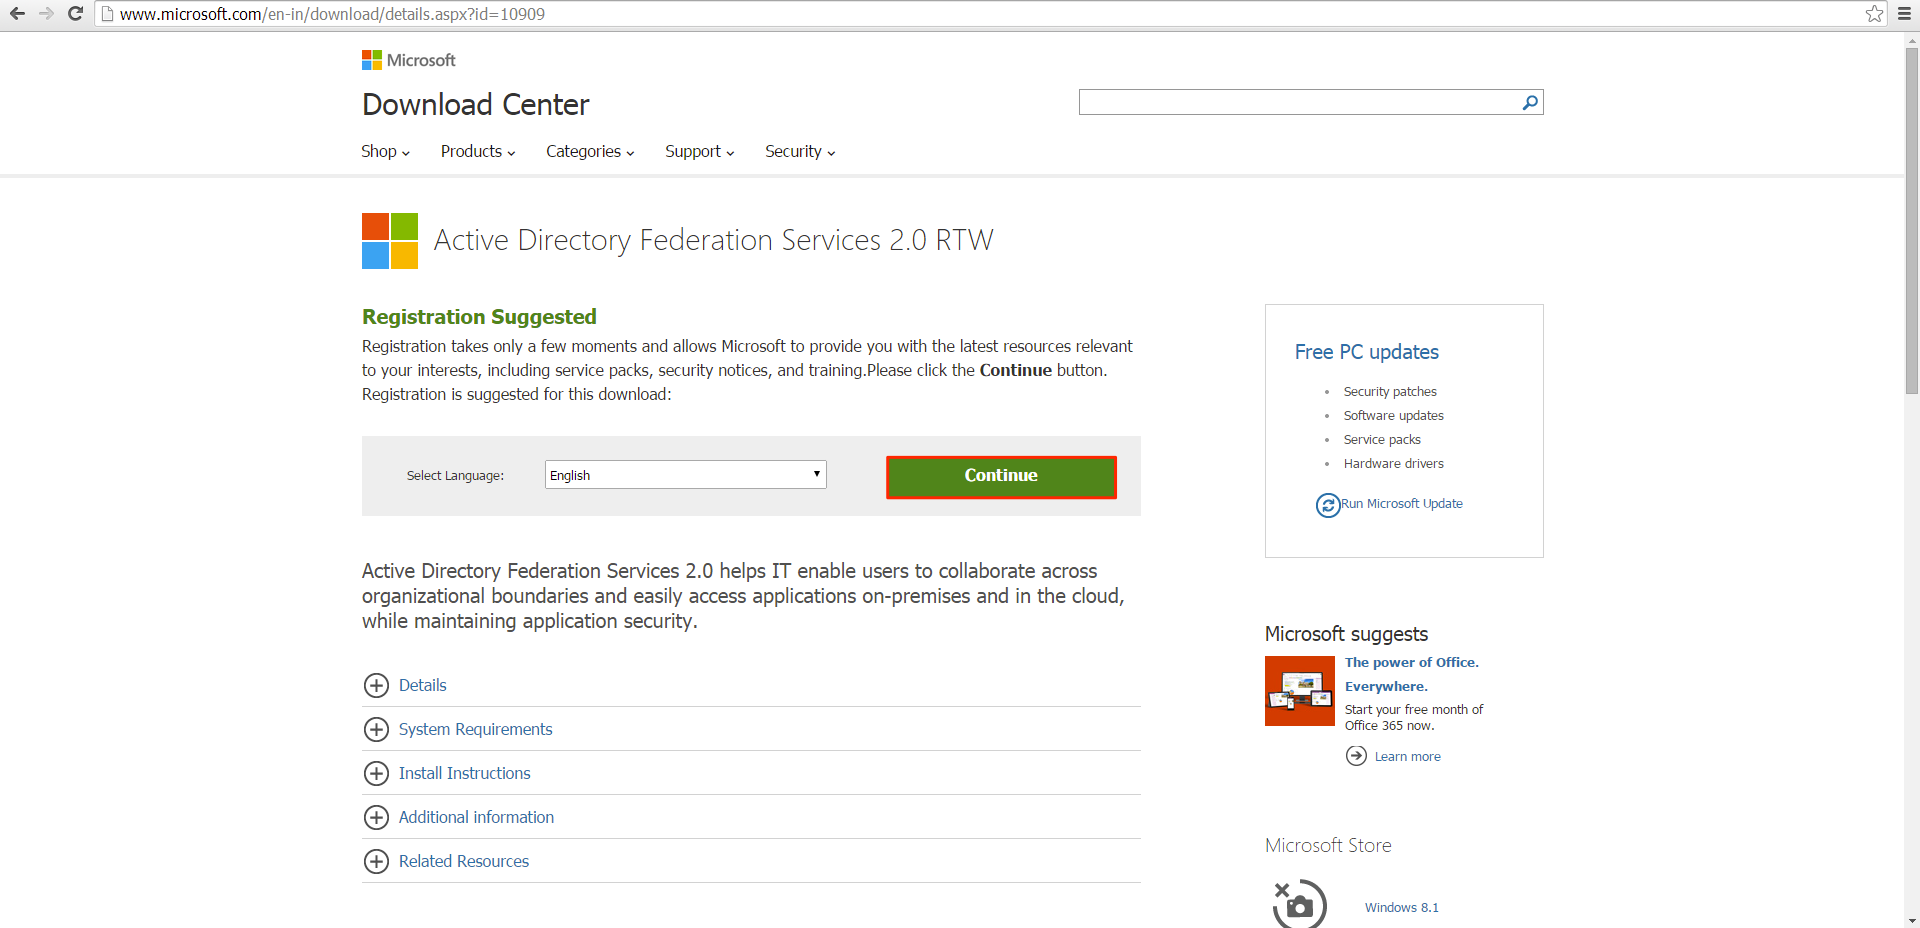
Start by downloading Active Directory Federation Services 2.0. To do so, navigate to http://www.microsoft.com/en-in/download/details.aspx?id=10909 and click Continue.
Step 2
Choose the version based on your Windows Server version and click Next to start the download.
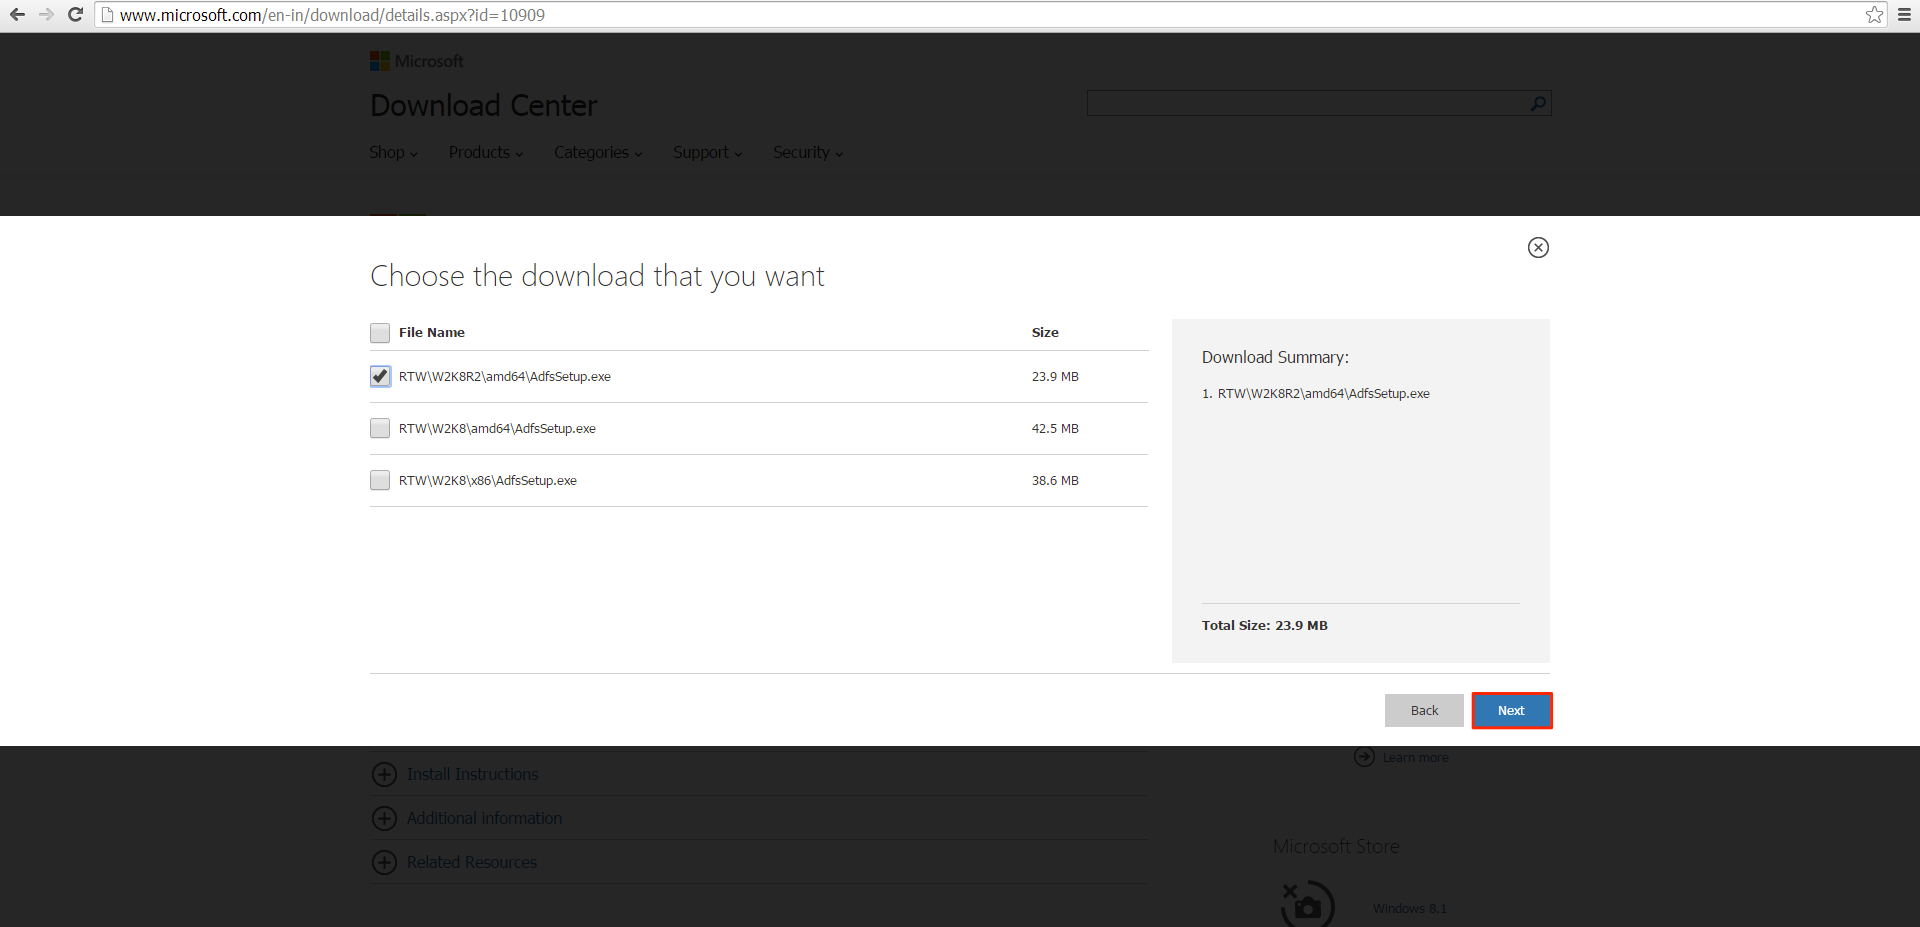
Note
RTW/W2K8R2/amd64/AdfsSetup.exe – This is for Windows Server 2008 R2 SP1
RTW/W2K8/amd64/AdfsSetup.exe – This is for Windows Server 2008 R1 SP2 64bit
RTW/W2K8/x86/AdfsSetup.exe – This is for Windows Server R1 SP2 32bit
Step 3
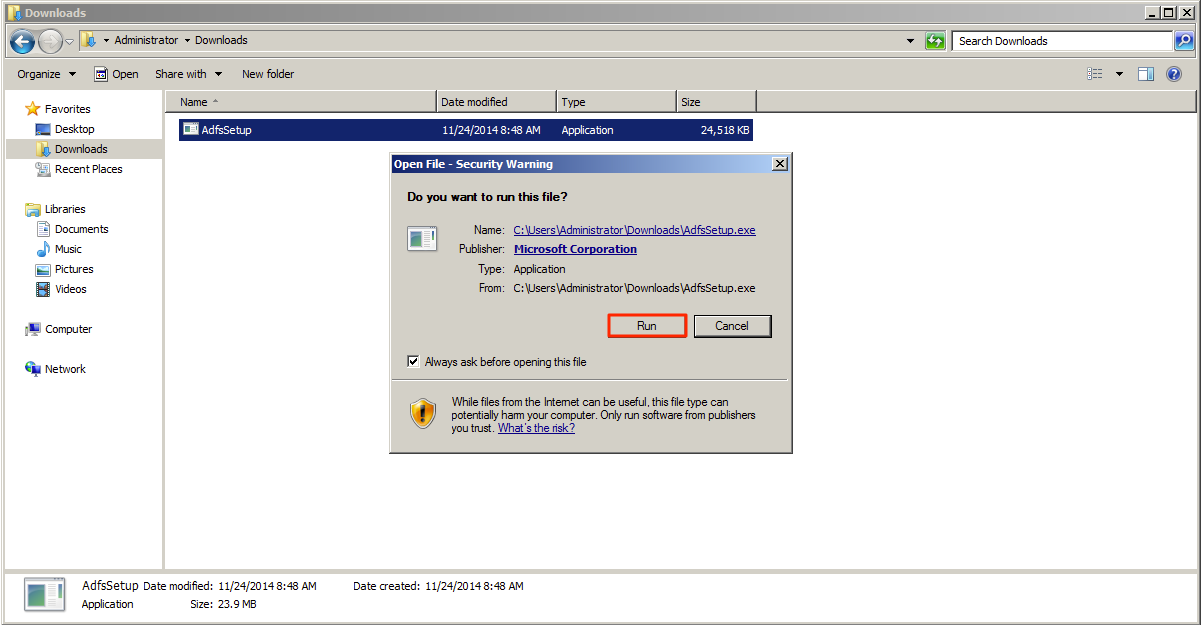
Once the download is complete, locate the .exe file and double click it.

Step 4
Click Run.
Step 5
Click Next.

Step 6
Check the checkbox to agree to the EULA followed by the Next button.

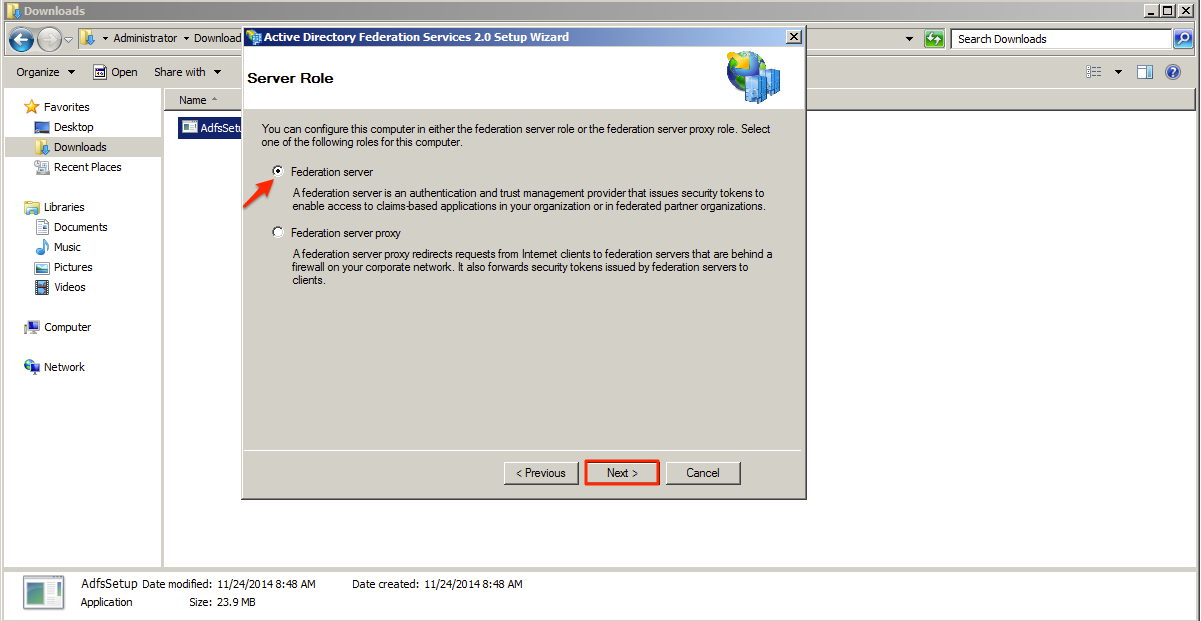
Step 7
Select the Federation server option and click Next.
Step 8
Click Next.

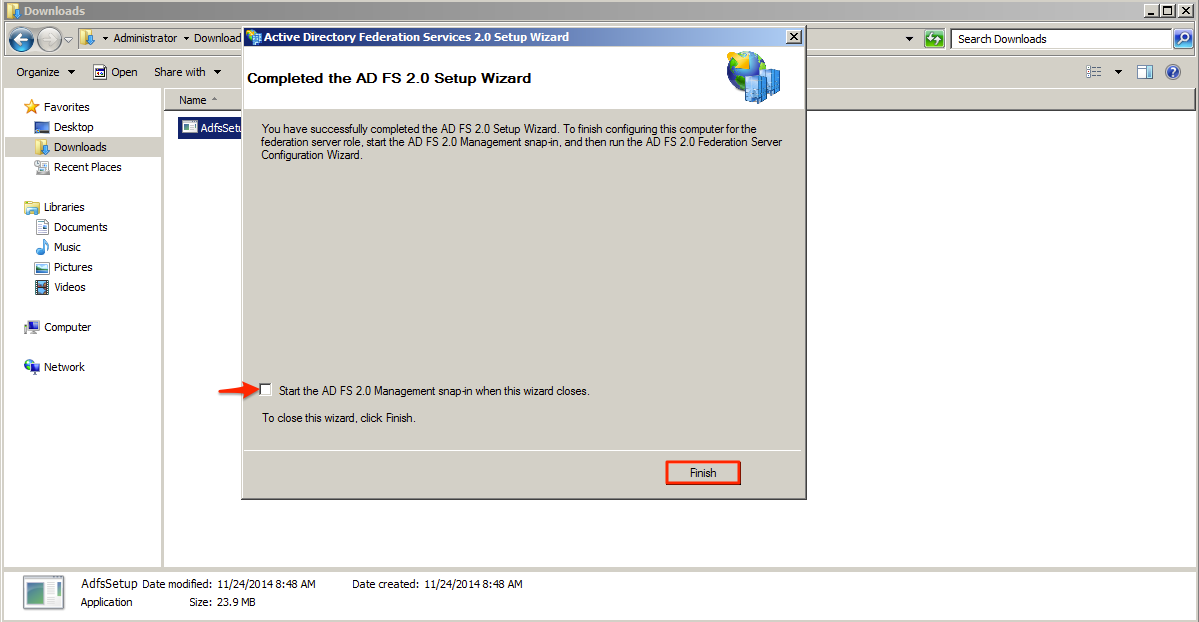
Step 9
Select the option to start the ADFS 2.0 Management snap-in when this wizard closes and click Finish.
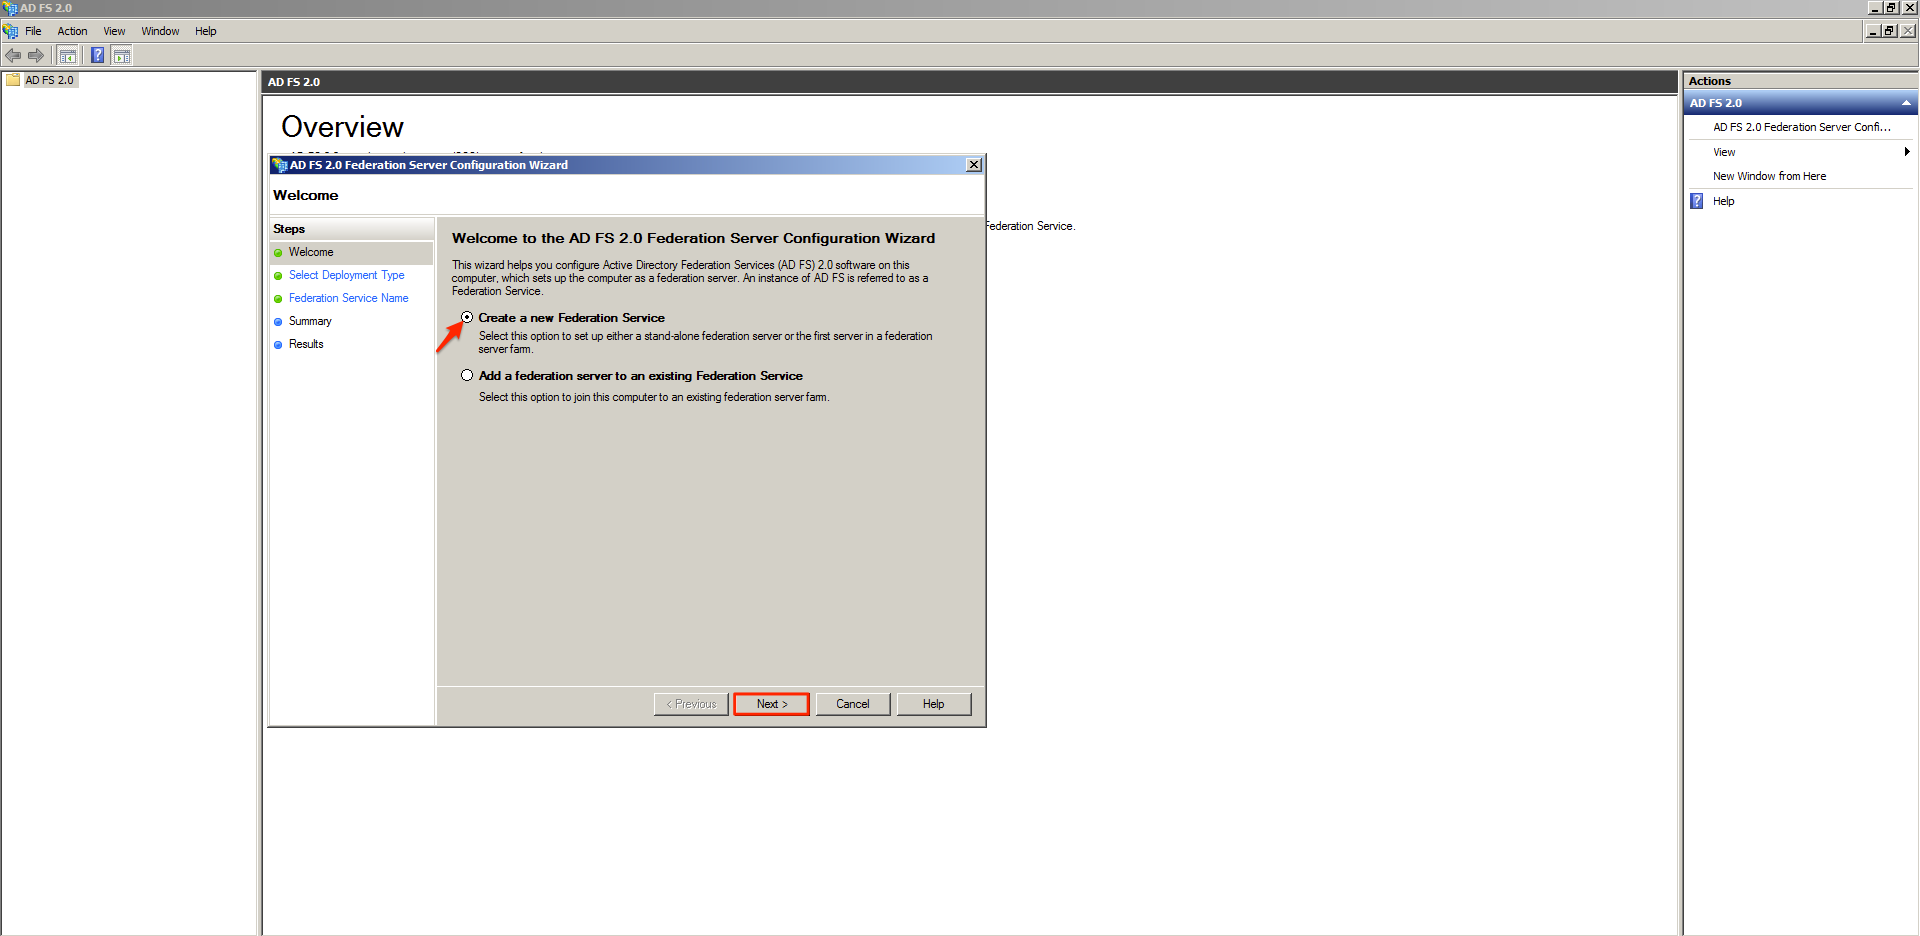
Step 10
On the AD FS Server configuration wizard select the Create a new Federation Service option and click Next.
Step 11
Select the Stand-alone federation server option.
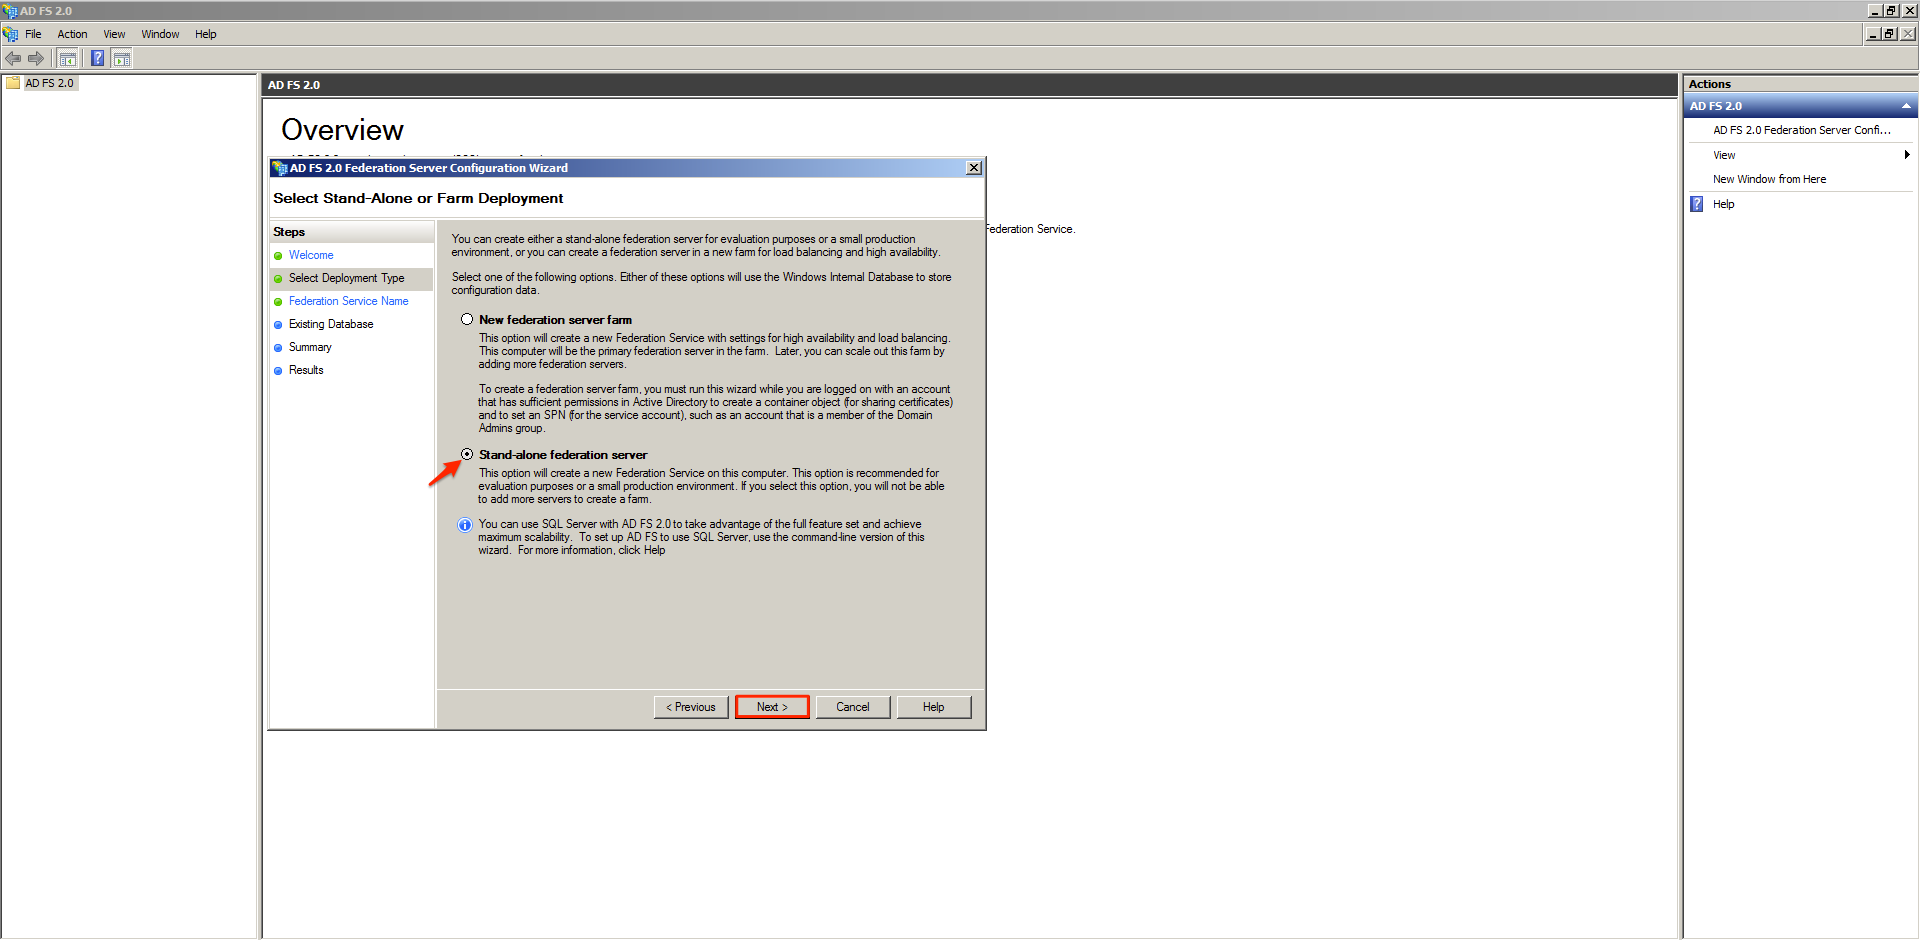
Step 12
The wizard will automatically detect your SSL certificate. The details of the SSL certificate and the Federation Service name will be populated automatically if your SSL certificate is valid. Click Next to proceed.
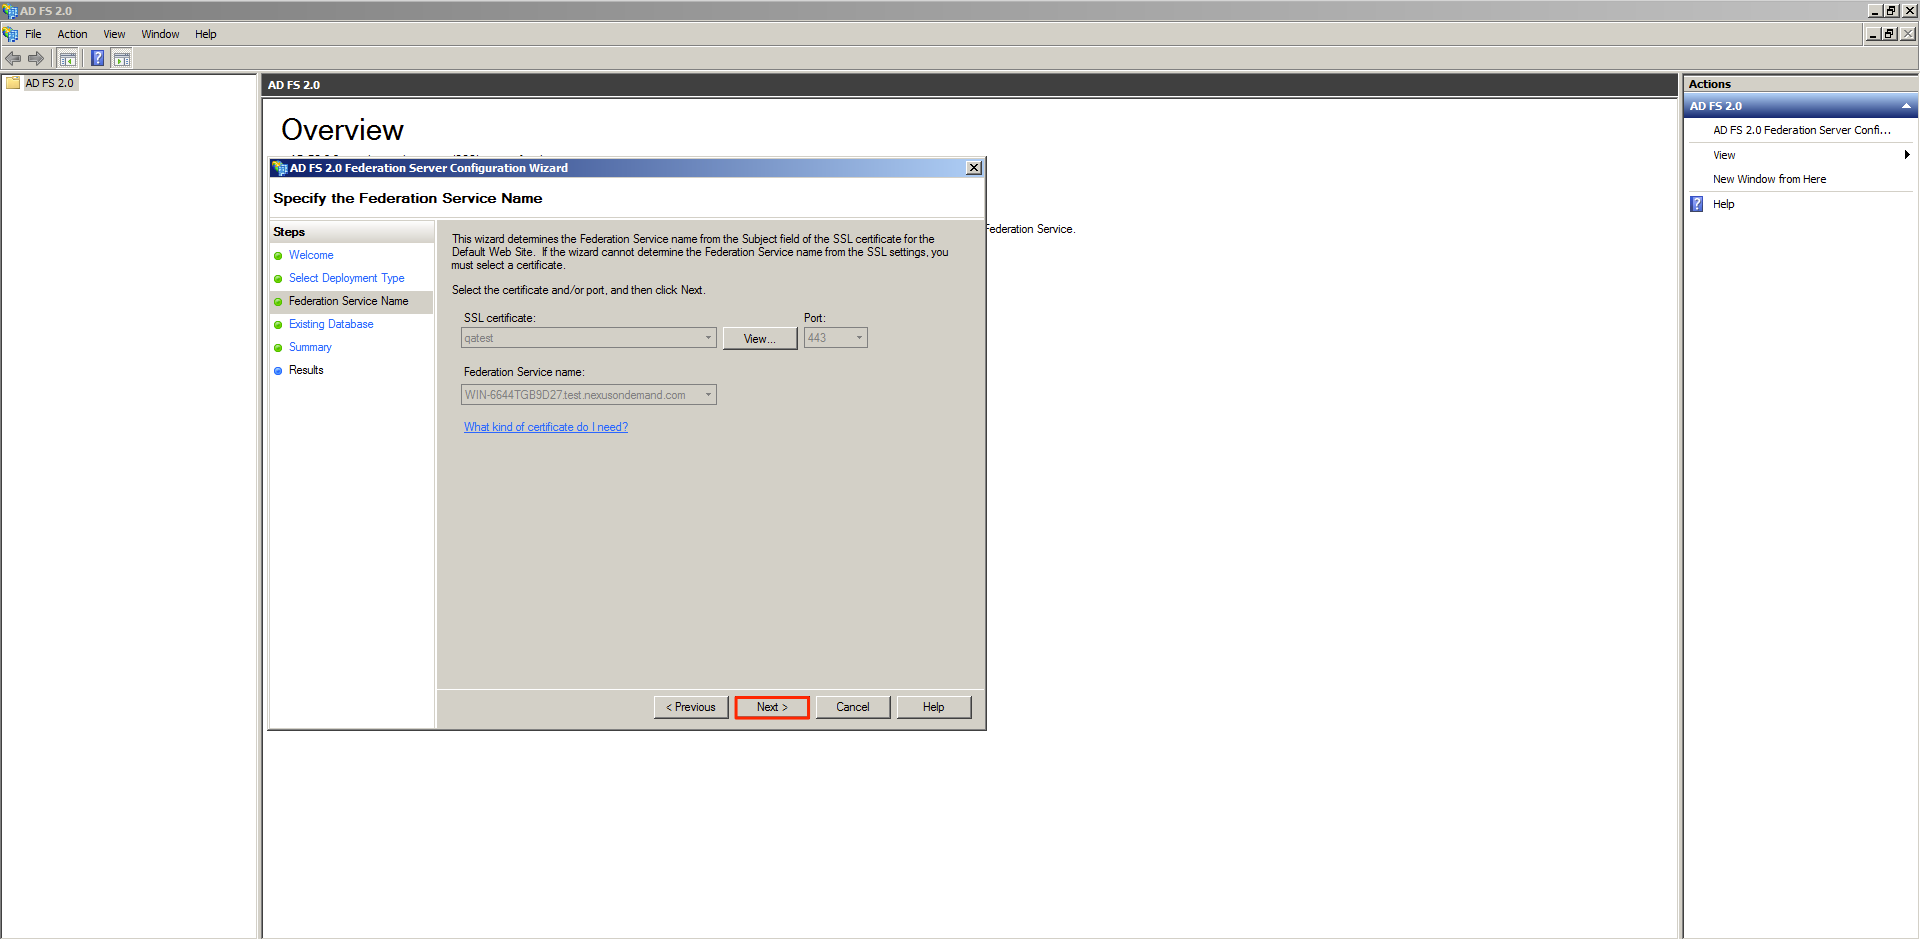
Step 13
Click Next.
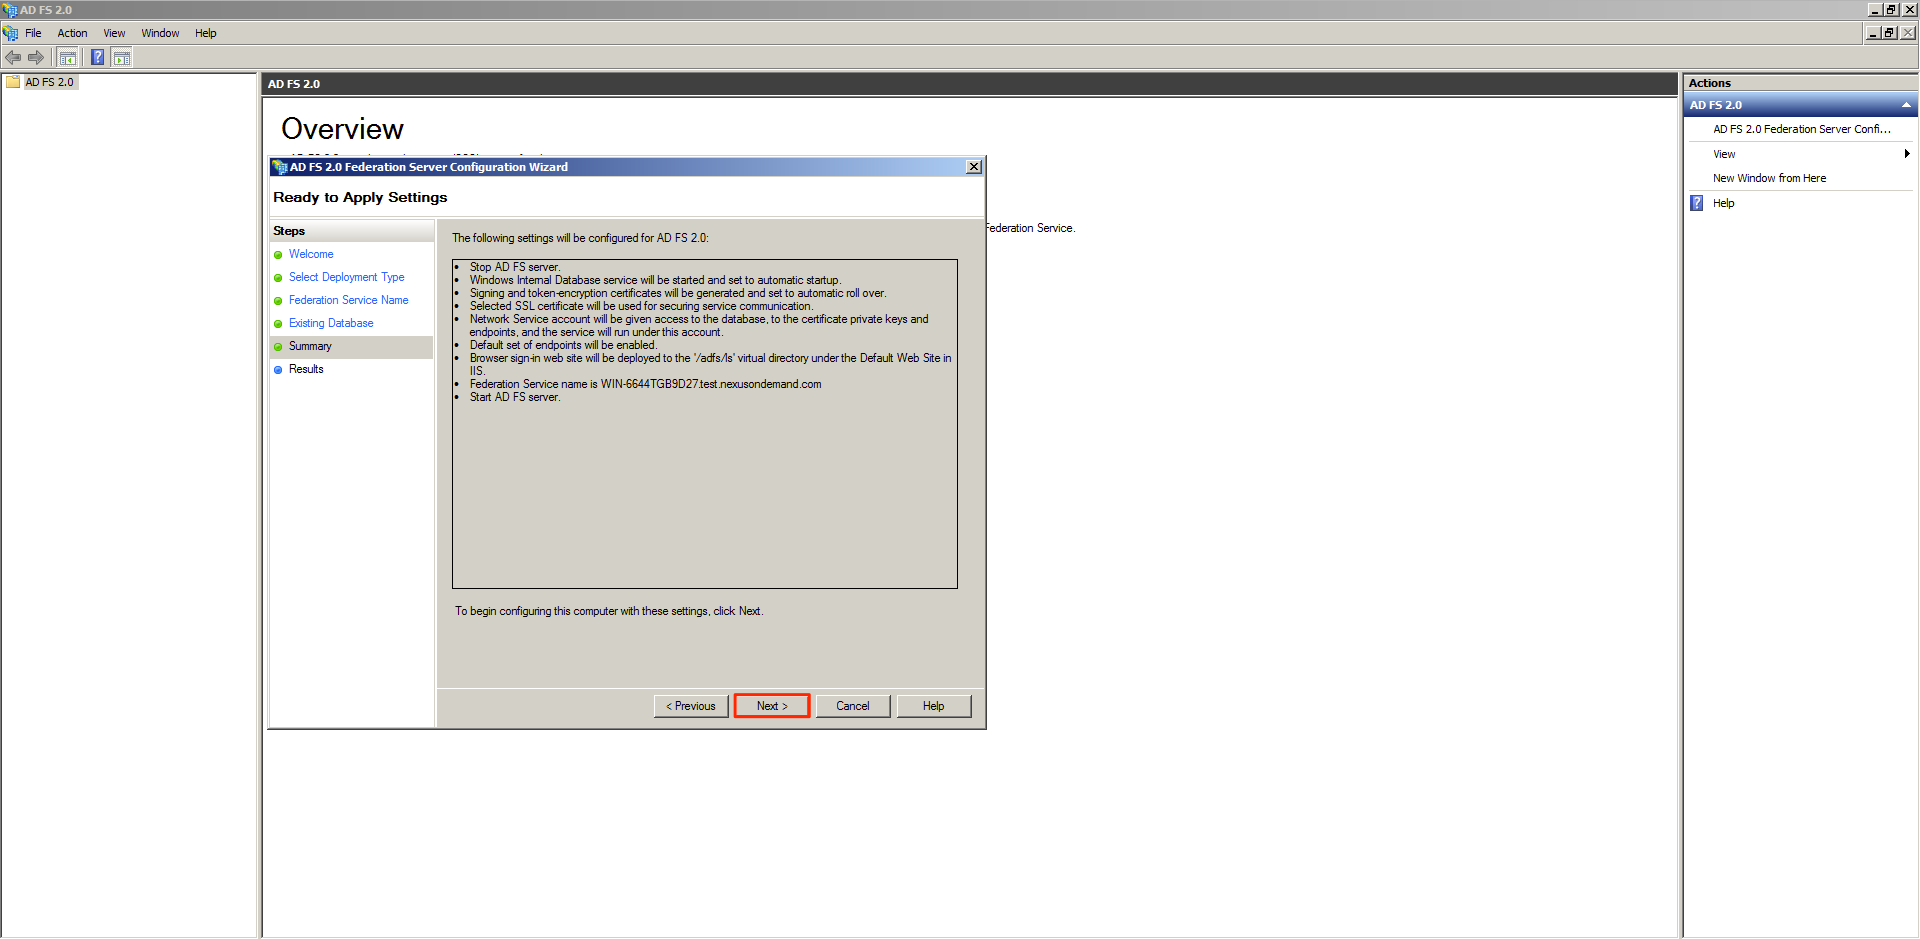
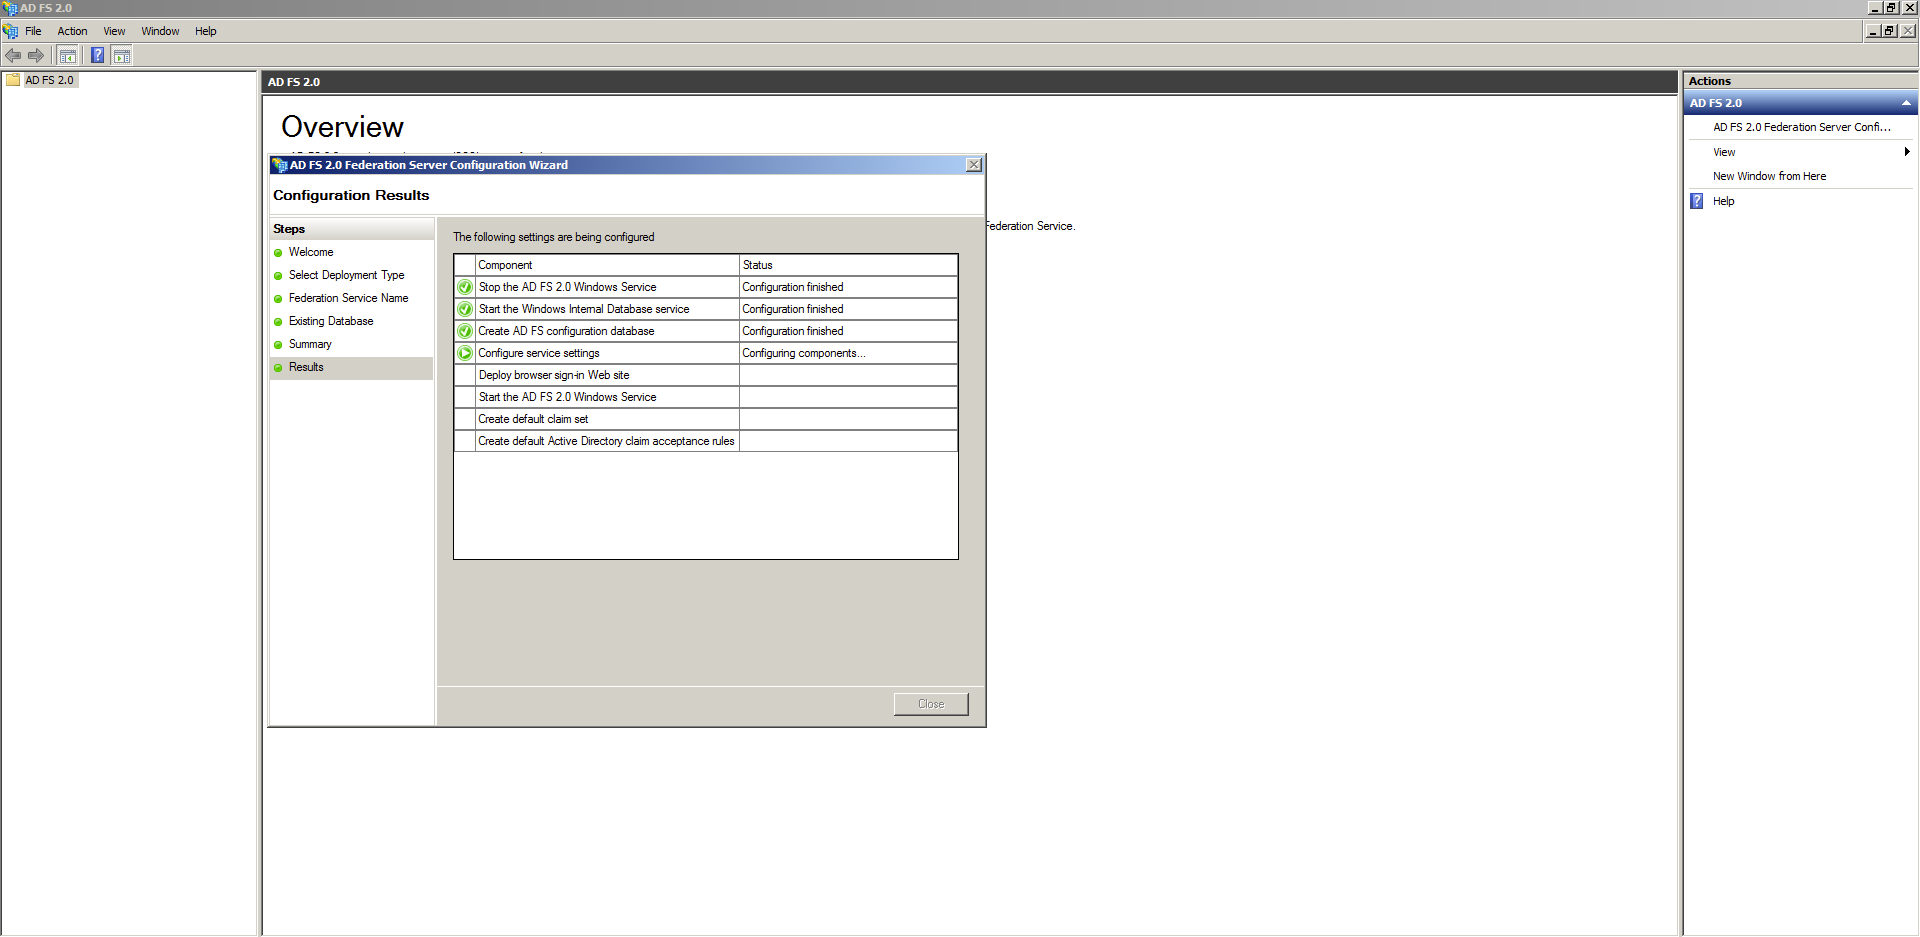
Step 14
Wait for the configuration to finish and click Close.
Section 4: Enabling and Configuring SSO
Step 1
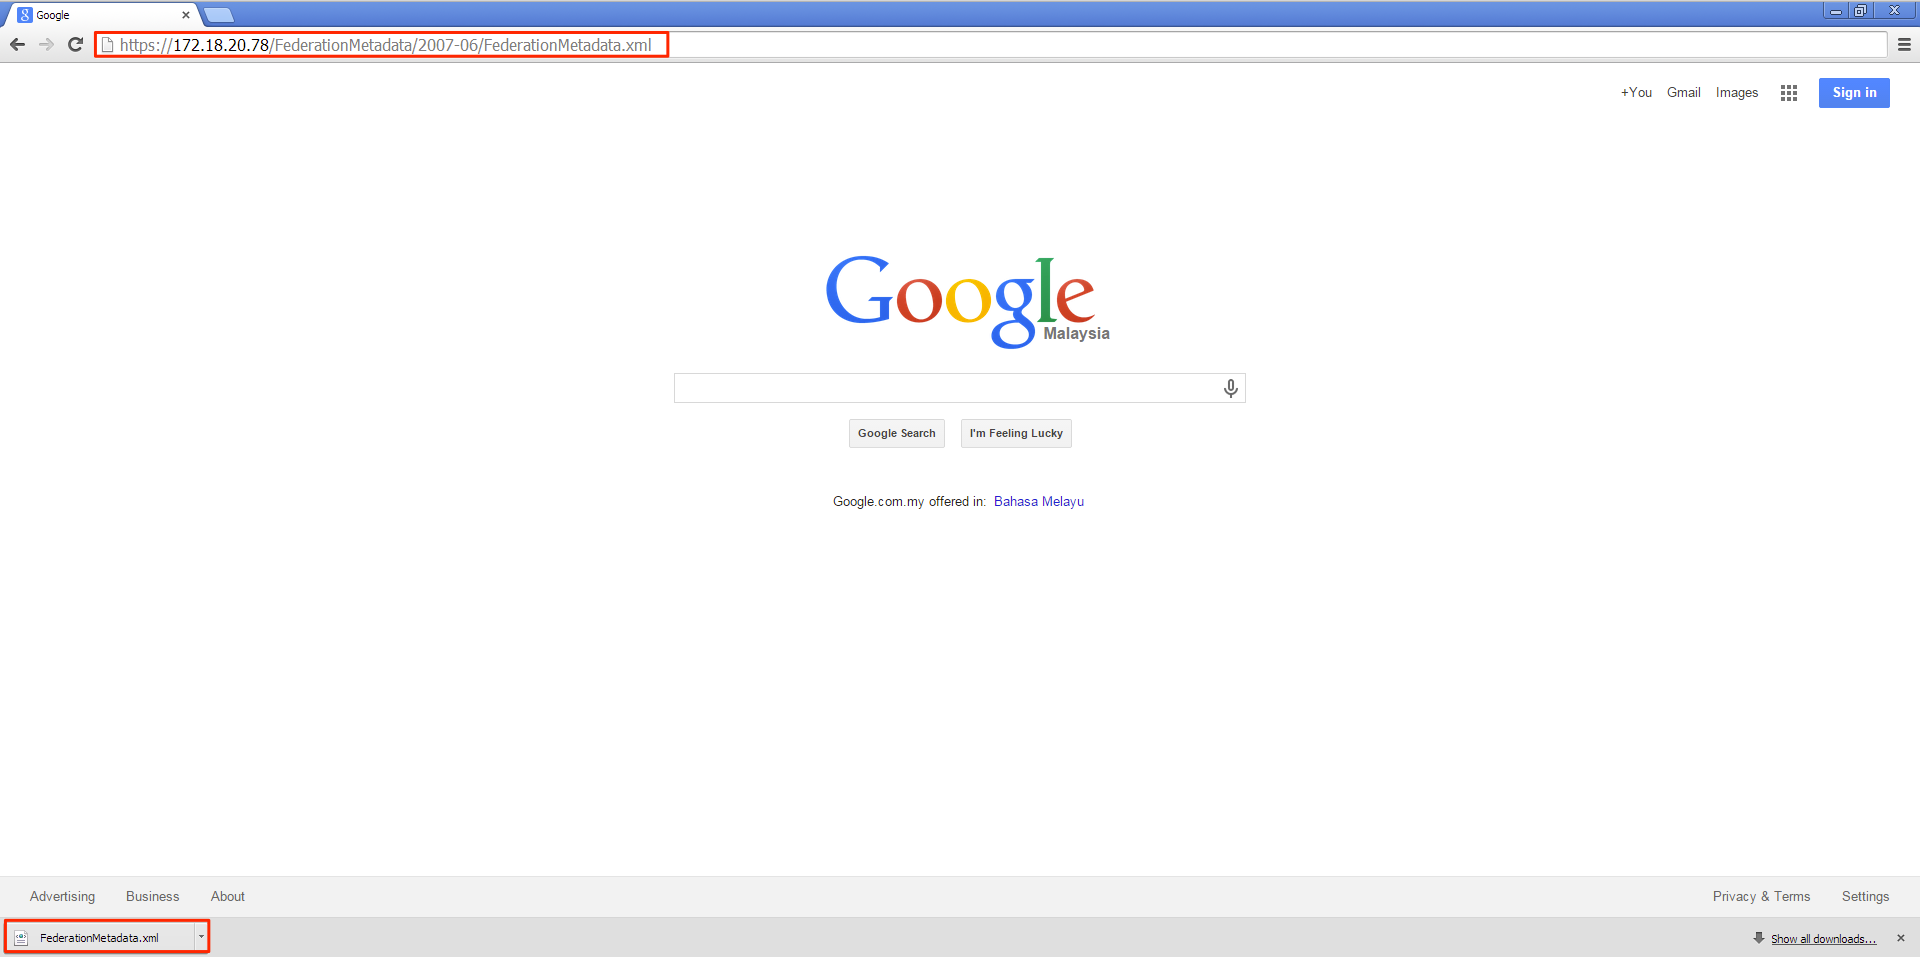
To begin, we will need to download the Identity Provider (ADFS) metadata. Open a browser and key in the URL https://<ADFS FQDN or IP>/FederationMetadata/2007-06/FederationMetadata.xml to download the metadata.
Note
This metadata is used by the Identity Provider (ADFS) to recognise the Service Provider (Appspace). This process involves downloading the metadata in xml format, uploading to and re-downloading from Appspace and finally re-uploading it to the Identity Provider (ADFS).
Step 2
Log into your Appspace instance and click on the user button followed by System.
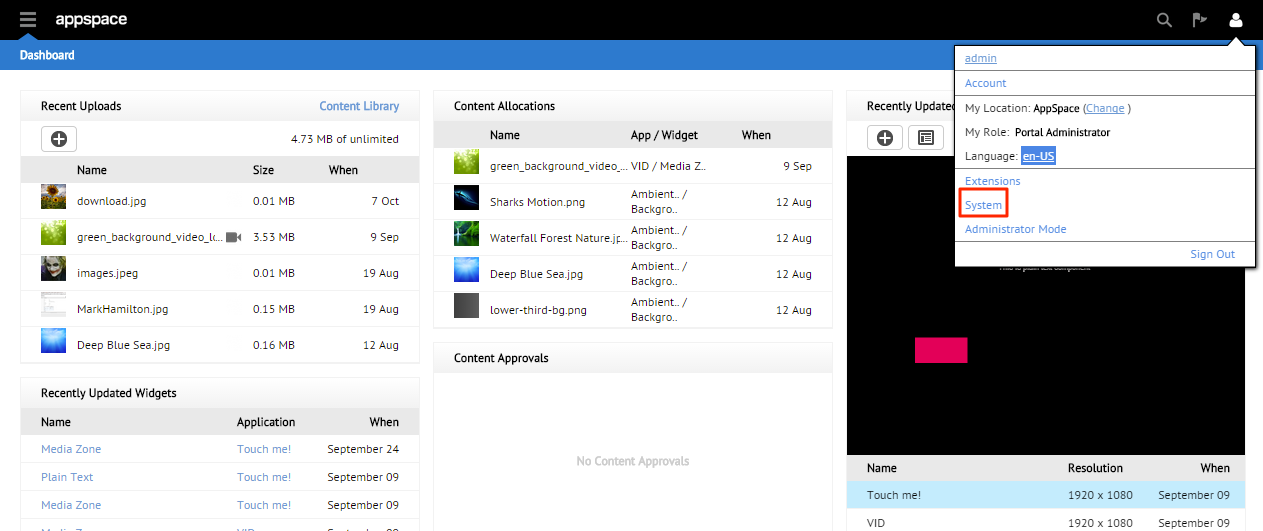
Note
You’ll have to be a Portal Administrator to access system settings.
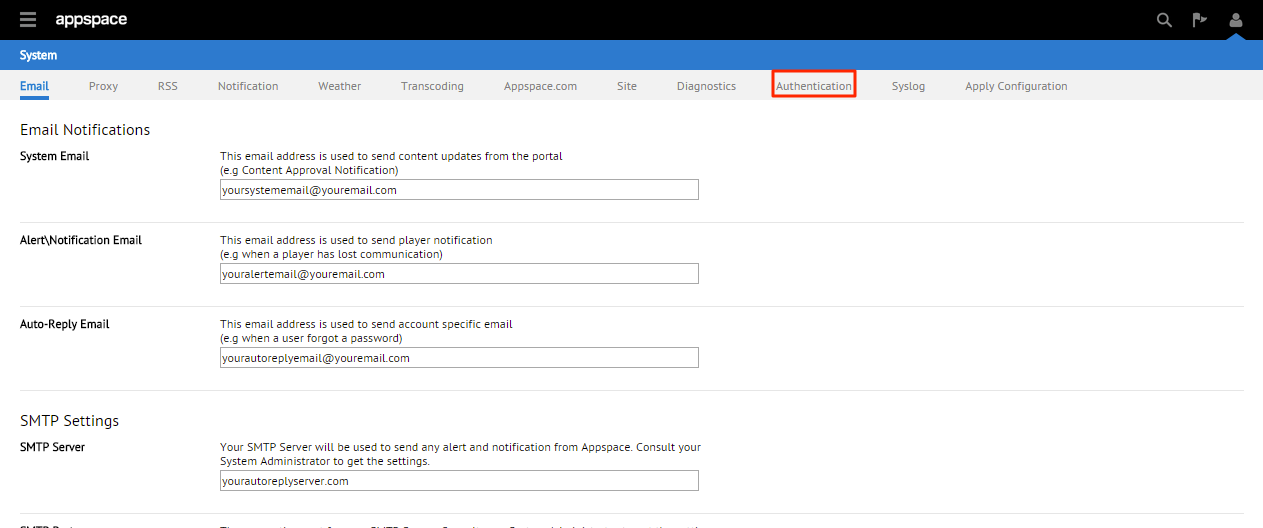
Step 3
Click Authentication.
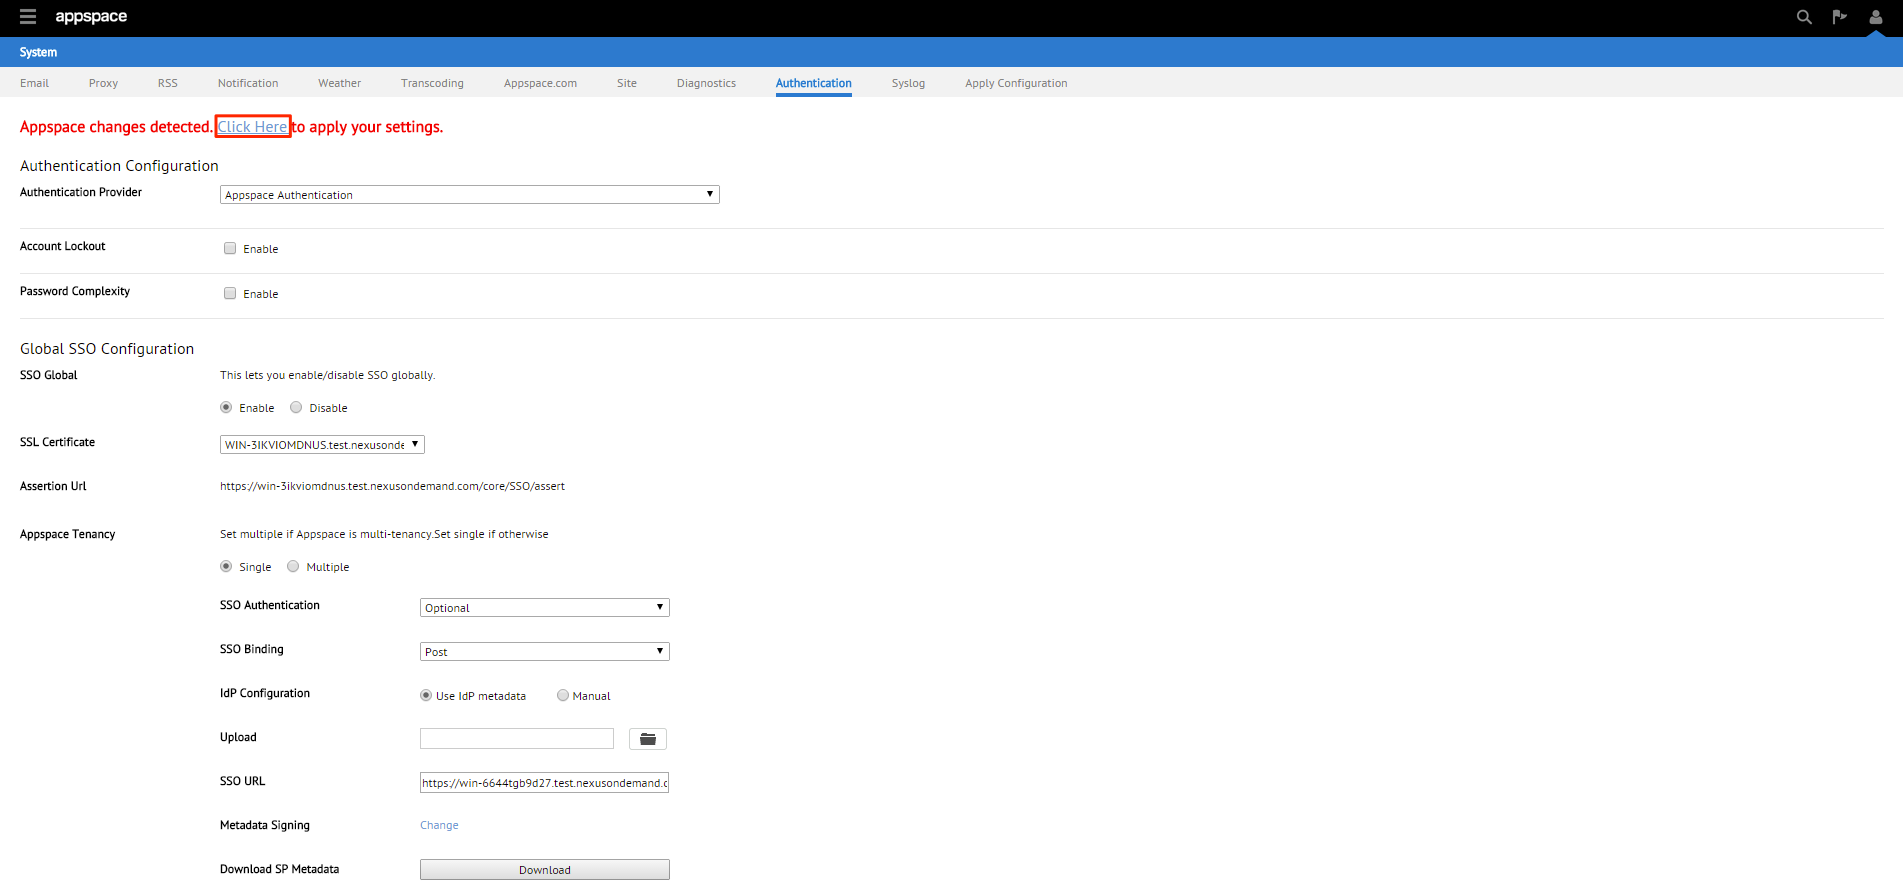
Step 4
Upon enabling SSO globally, the SSO configuration menu will be visible.
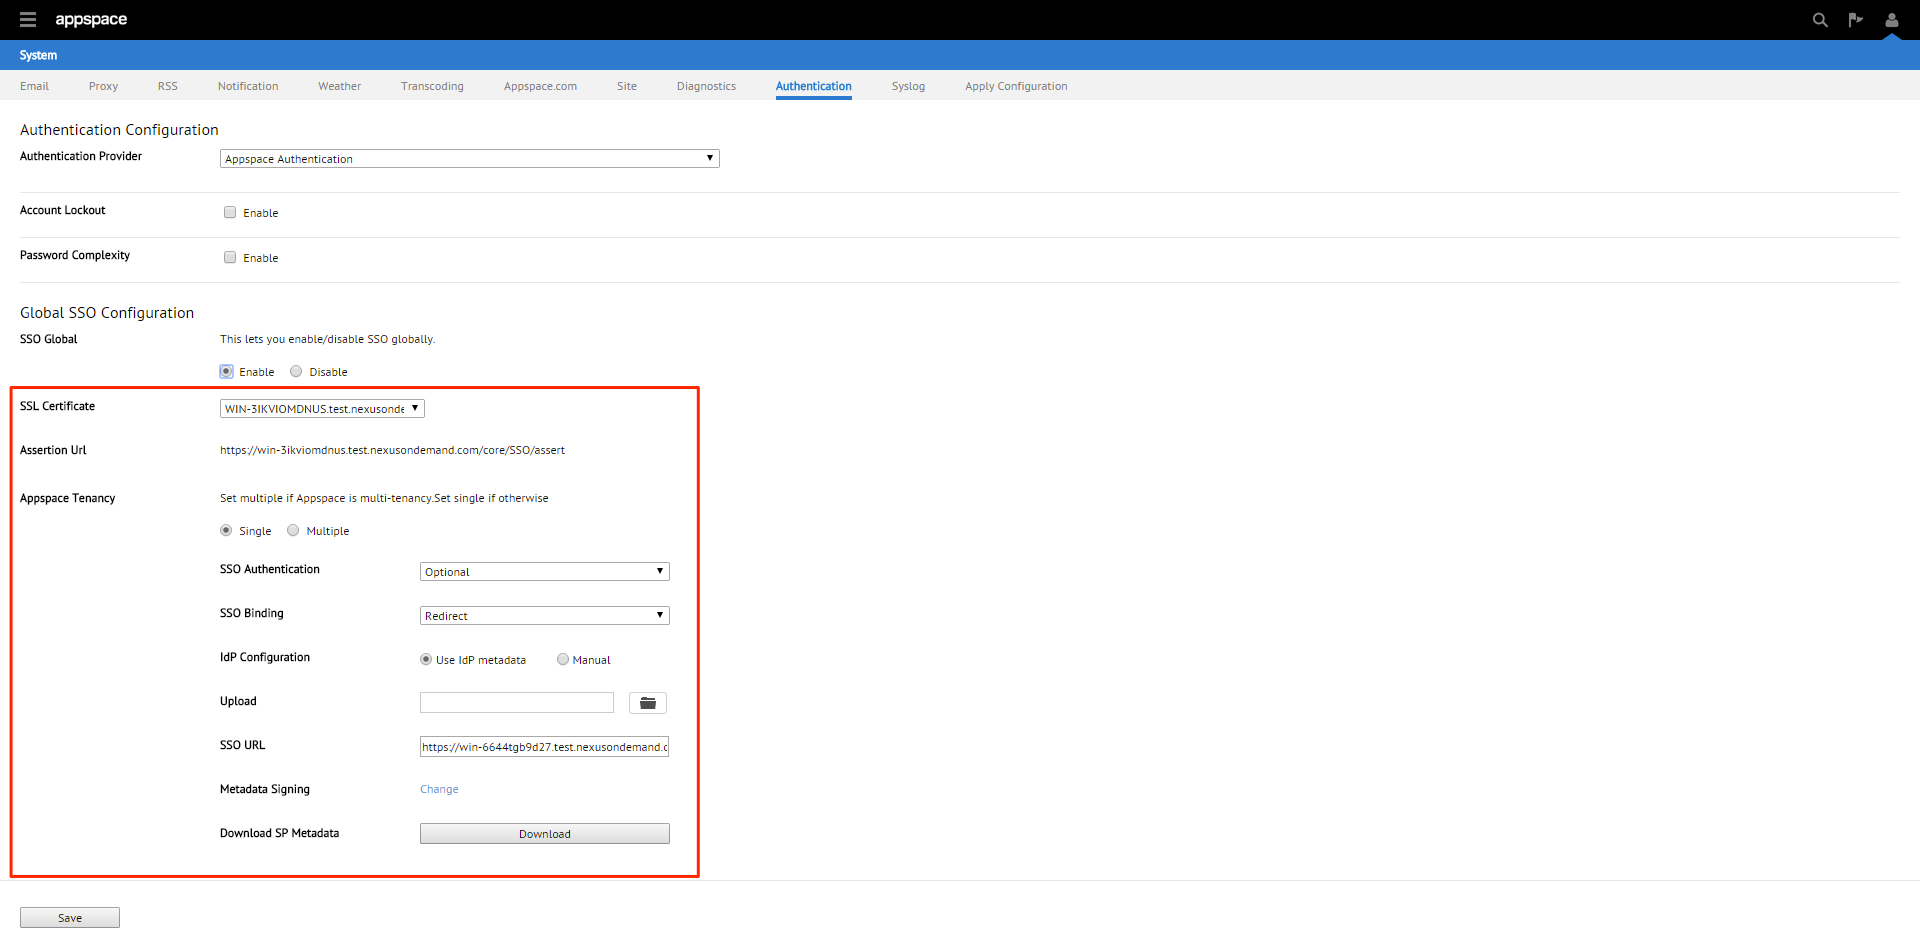
Step 5
If the Appspace server has a valid SSL certificate installed , the SSL Certificate section will be populated automatically.
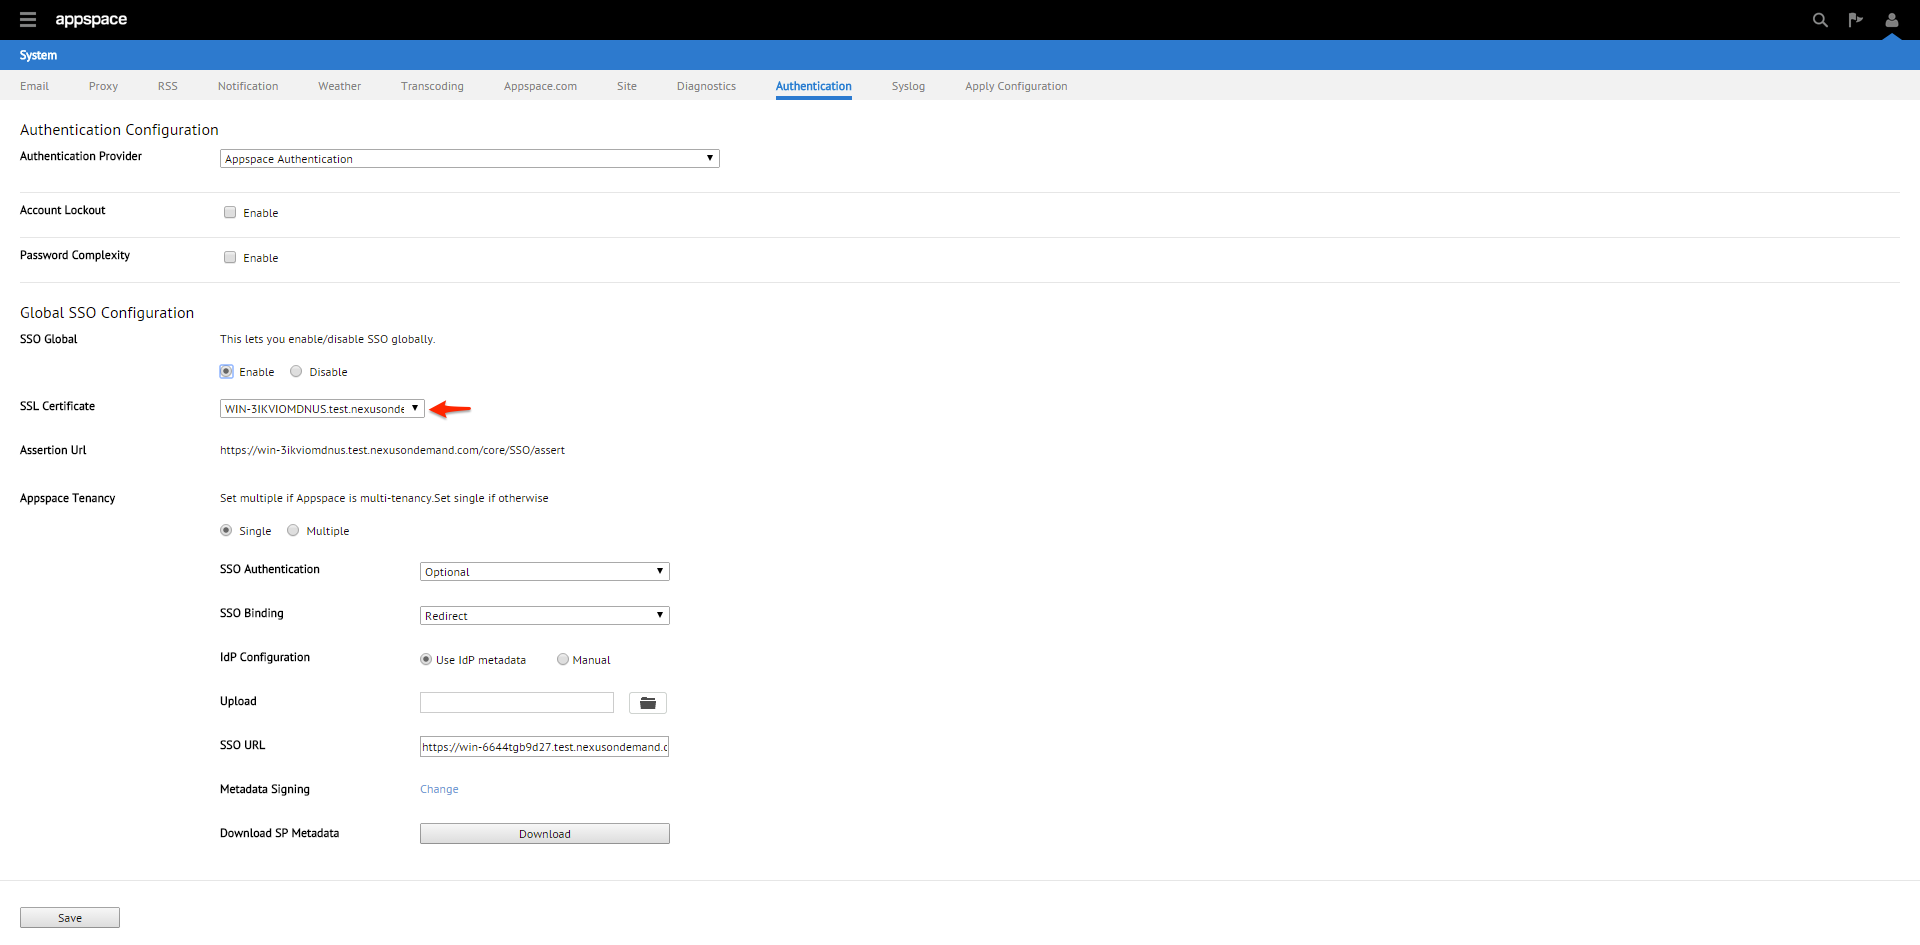
Step 6
Select Single Tenancy.
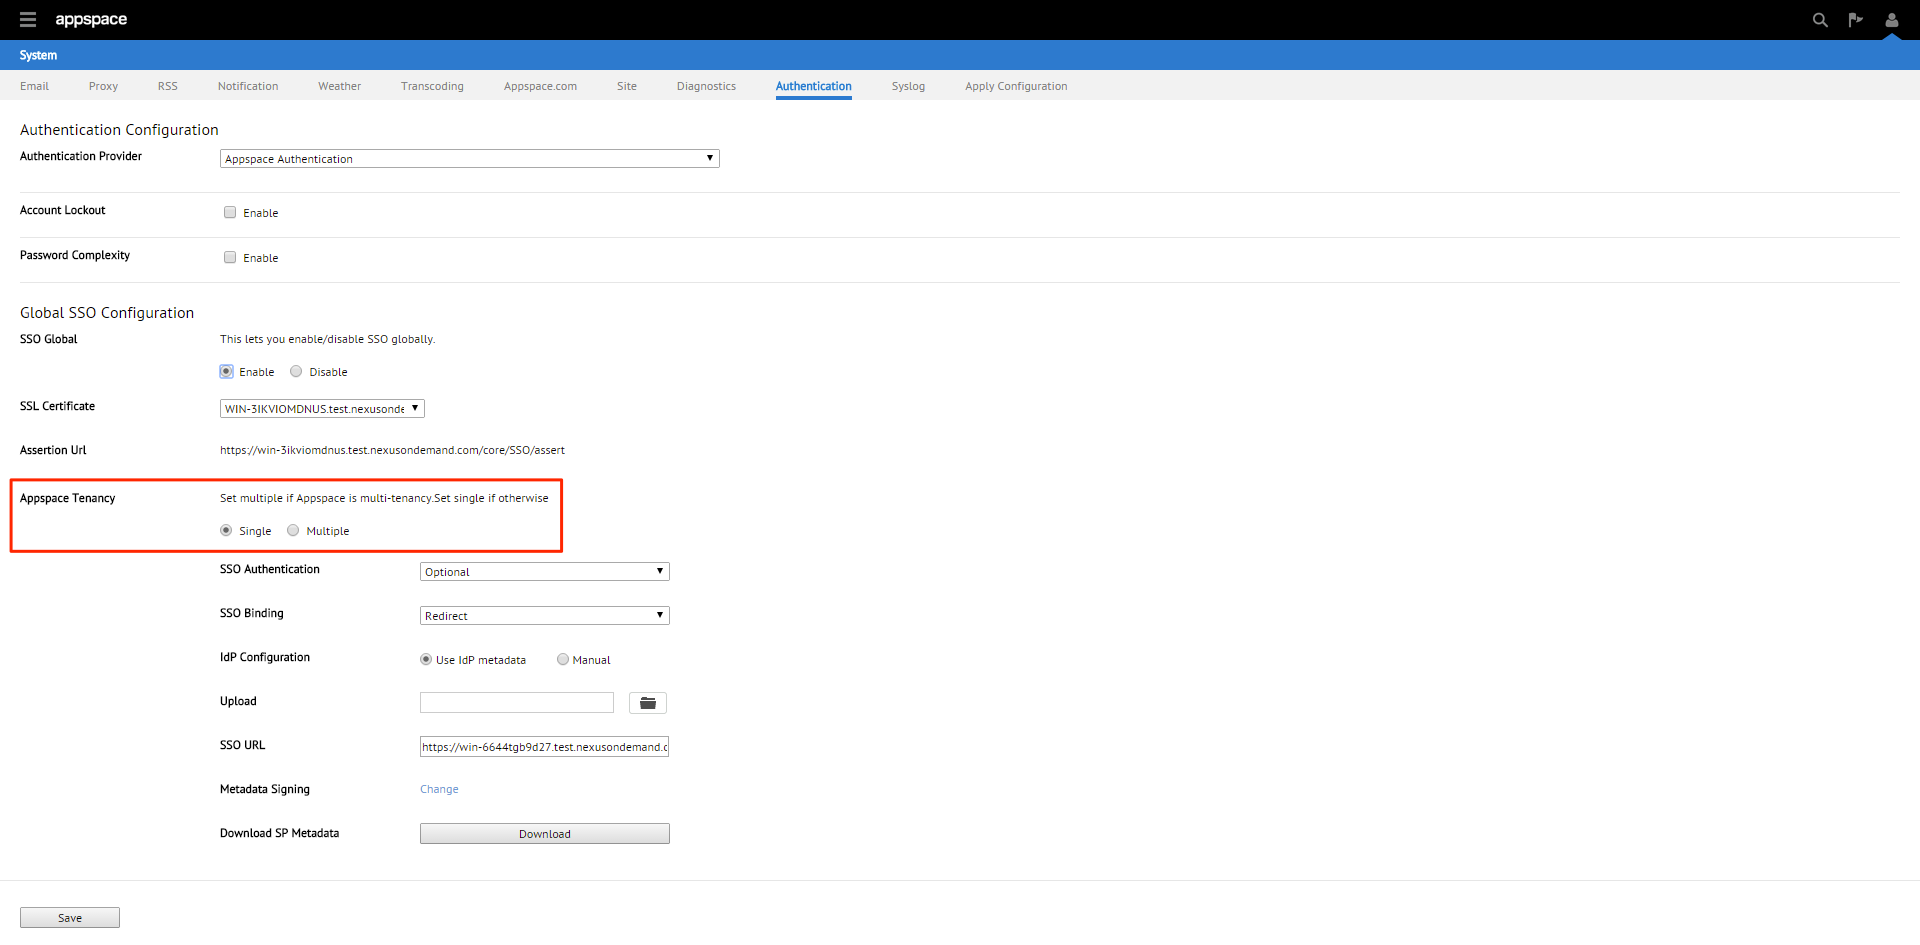
Step 7
You will be given three SSO authentication options: OFF, Optional or Required. We’ll be selecting Optional in this example.

Note
Optional – Users can select between using their Appspace login credentials or via SSO (AD credentials)
Required – Users can only login via SSO (AD credentials)
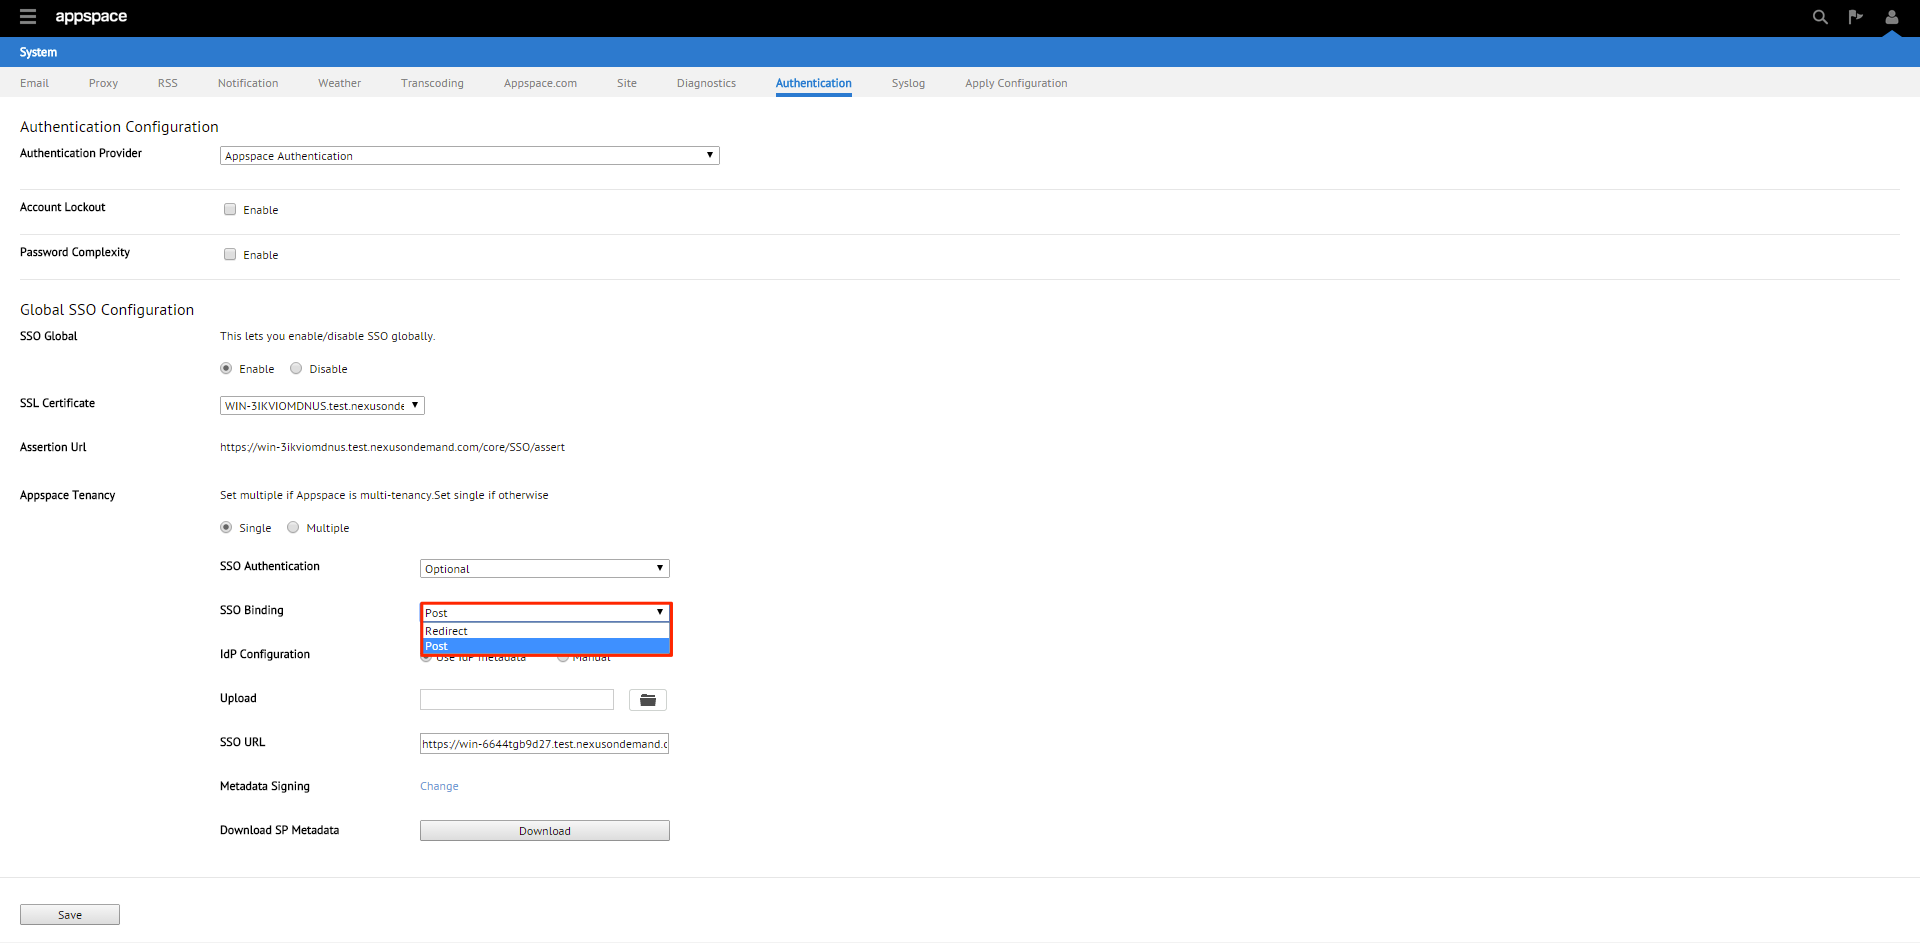
Step 8
You will be given two SSO binding options; Redirect or POST. We’ll be using POST in this example.
Note
Redirect – Users will be redirected to the Identity Provider. SSO details will be passed in a query string with “?SAMLRequest=……” as part of the URL
Post – SSO details will not be passed through a query string but will be passed using the POST method. For this method to work, you must ensure that the Identity Provider has direct access to the Appspace Server.
Step 9
You will be given two Identity Provider (IdP) configuration methods; Use IdP Metadata or Manual. We’ll be using Use IdP Metadata in this example.
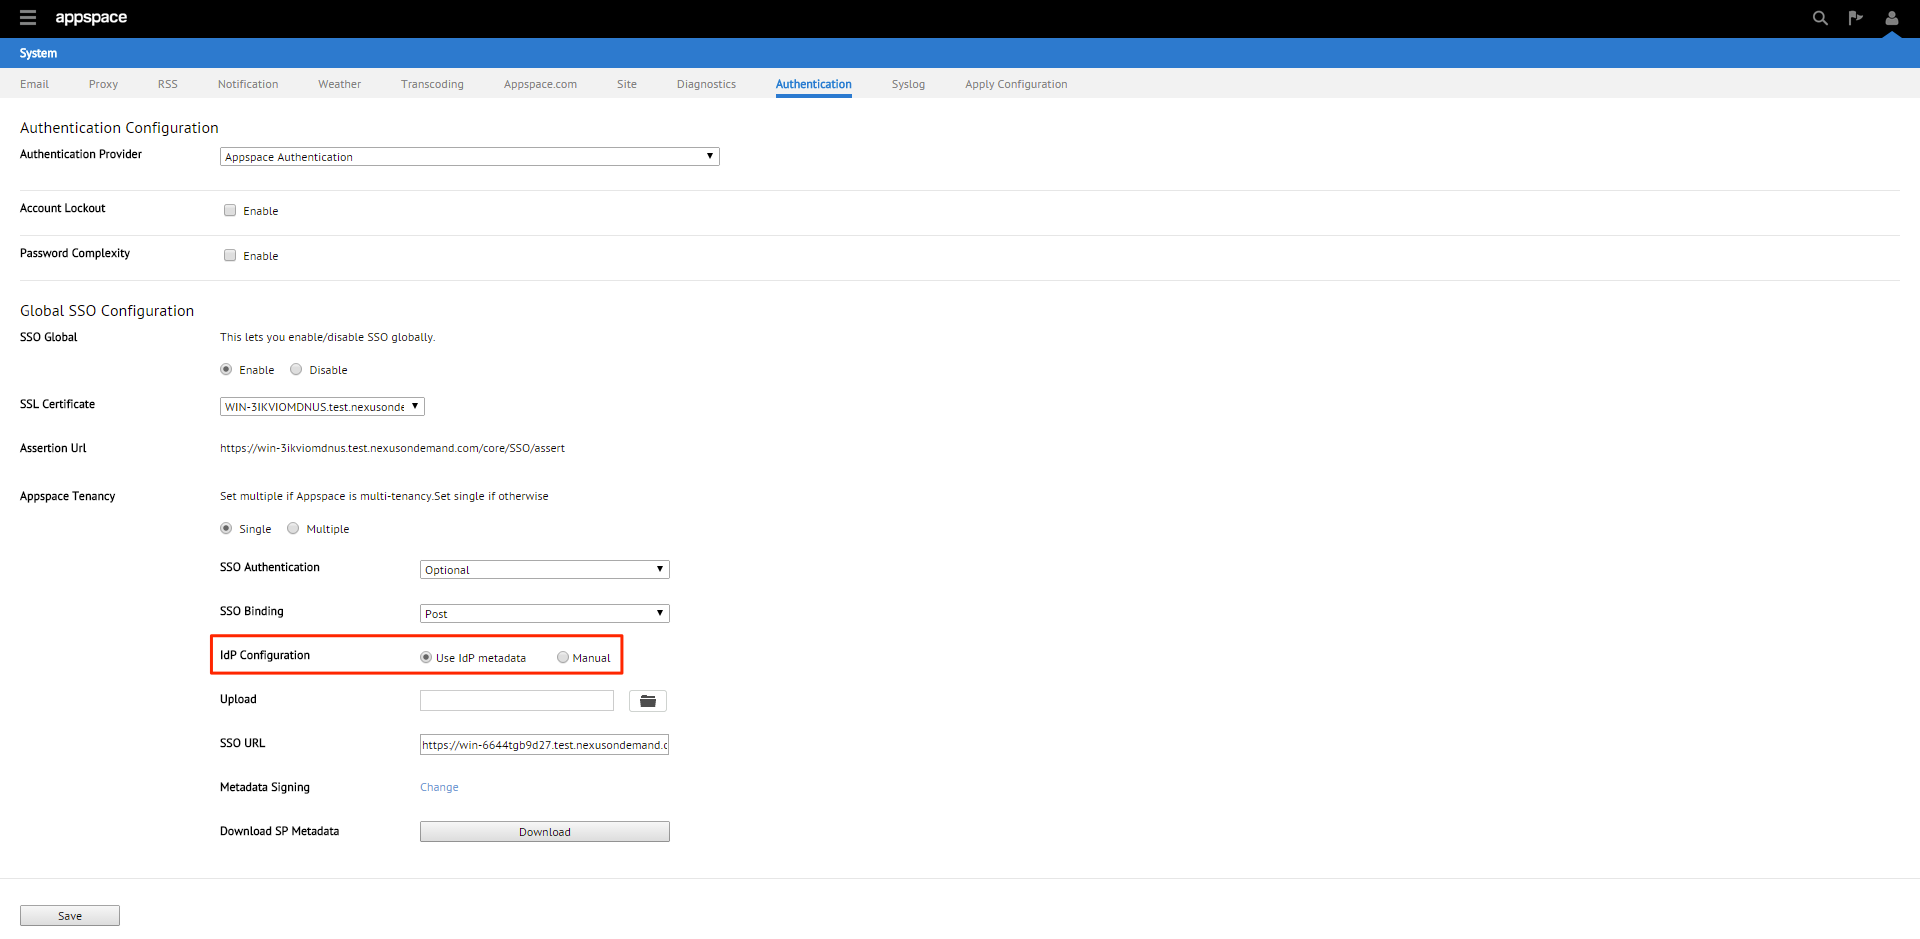
Step 10
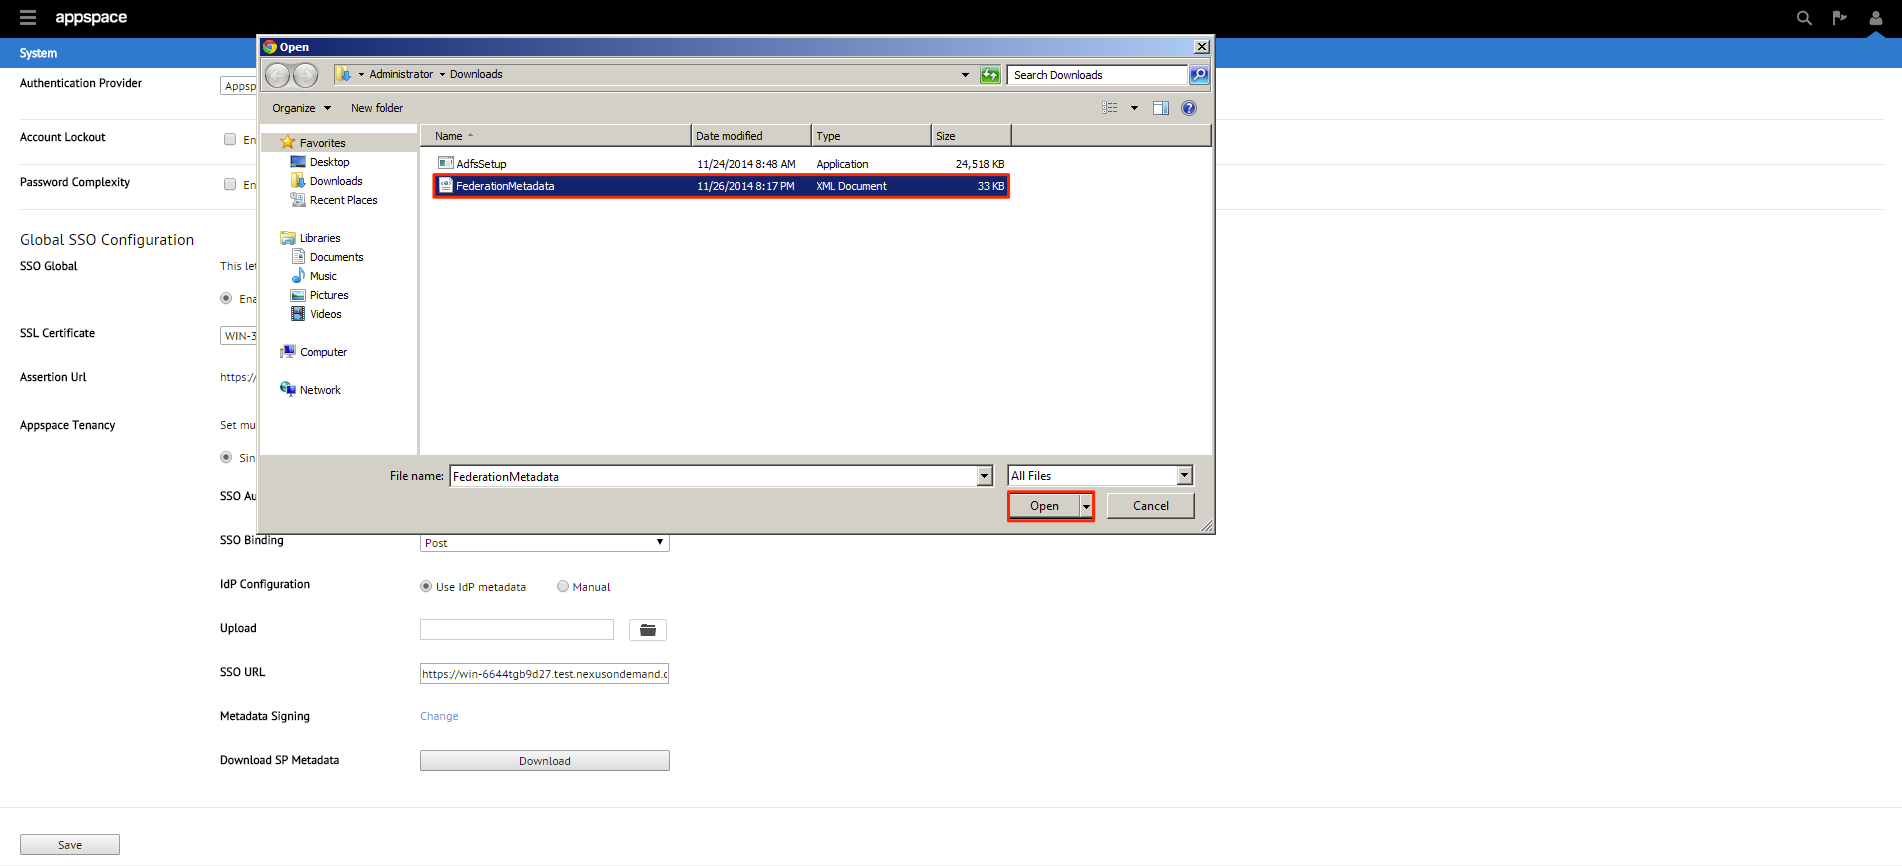
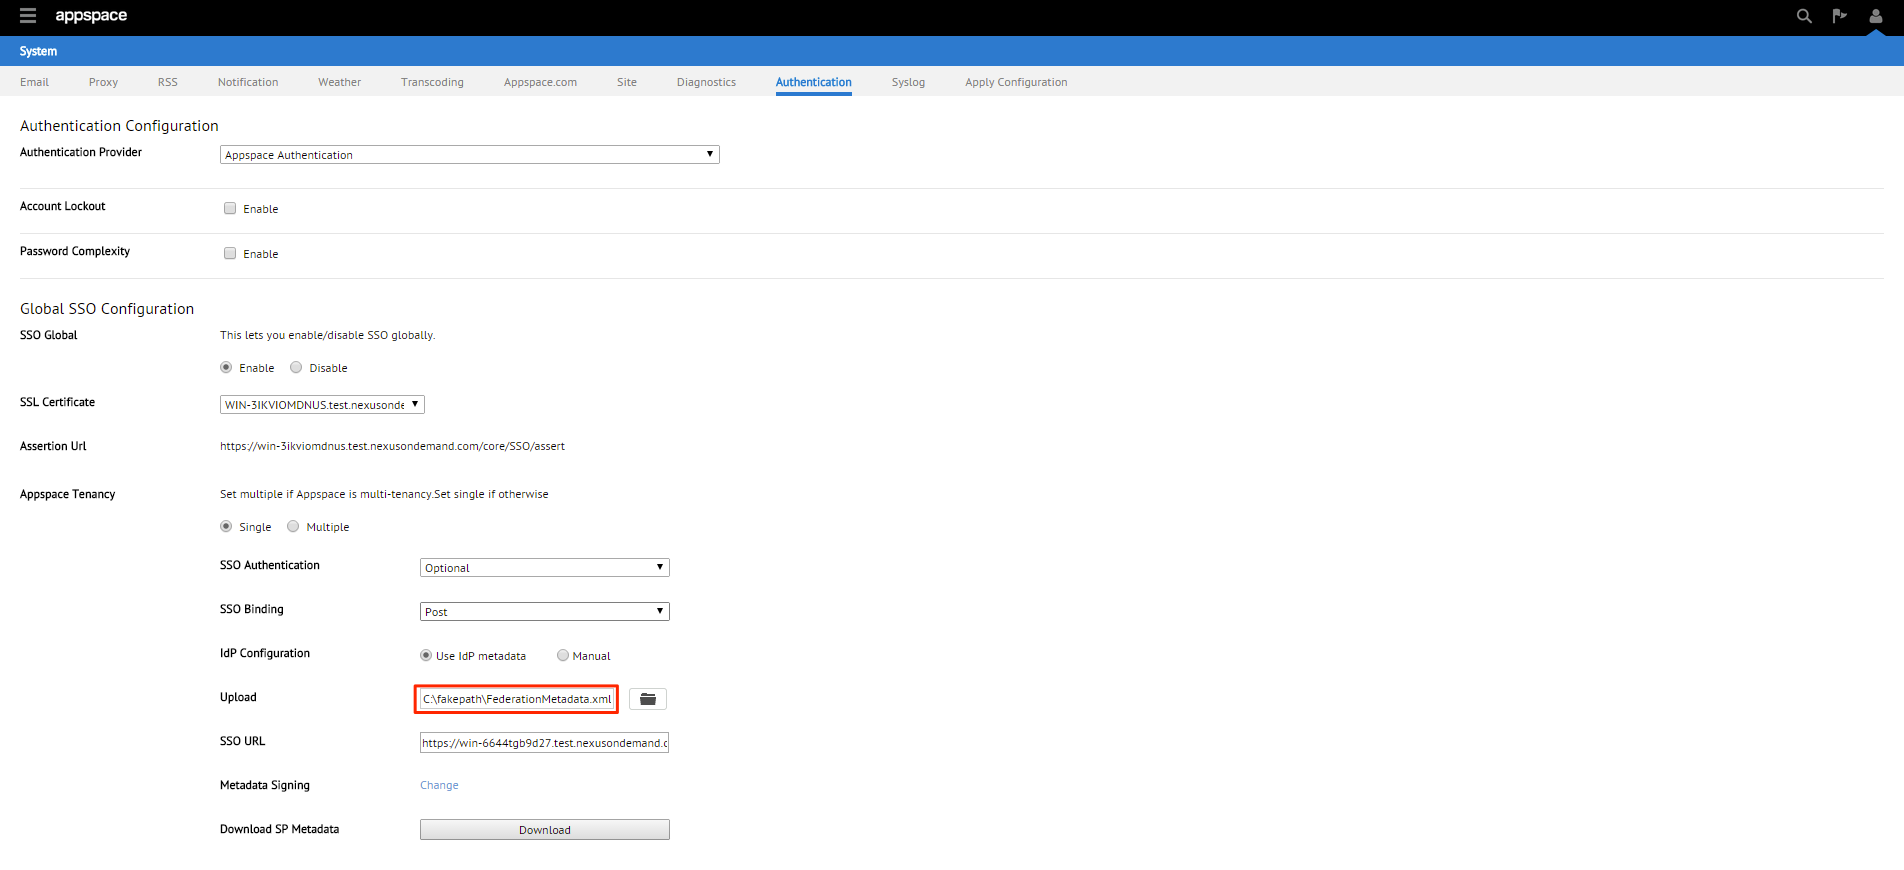
Upon selecting the Use IdP Metadata option, you’ll need to upload the metadata xml file downloaded in Step 1. Click browse and locate that file. Click Open to upload the metadata file to the Appspace server.
Step 11
The upload path will be displayed. You can now skip to Step 17.
Step 12
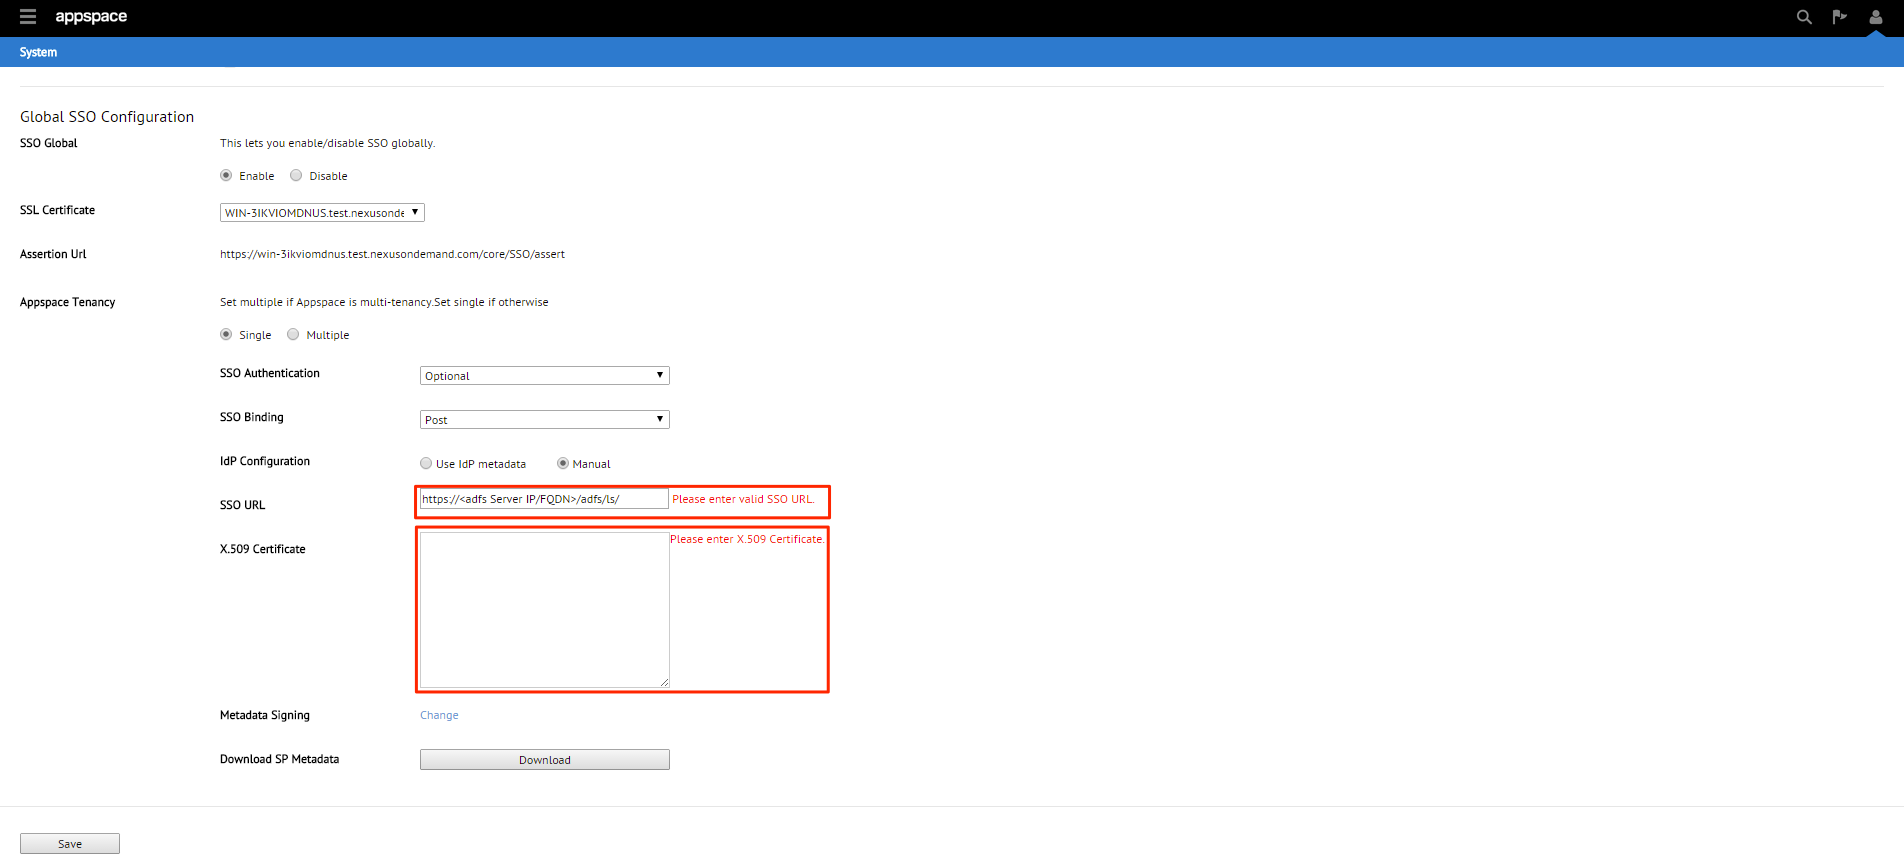
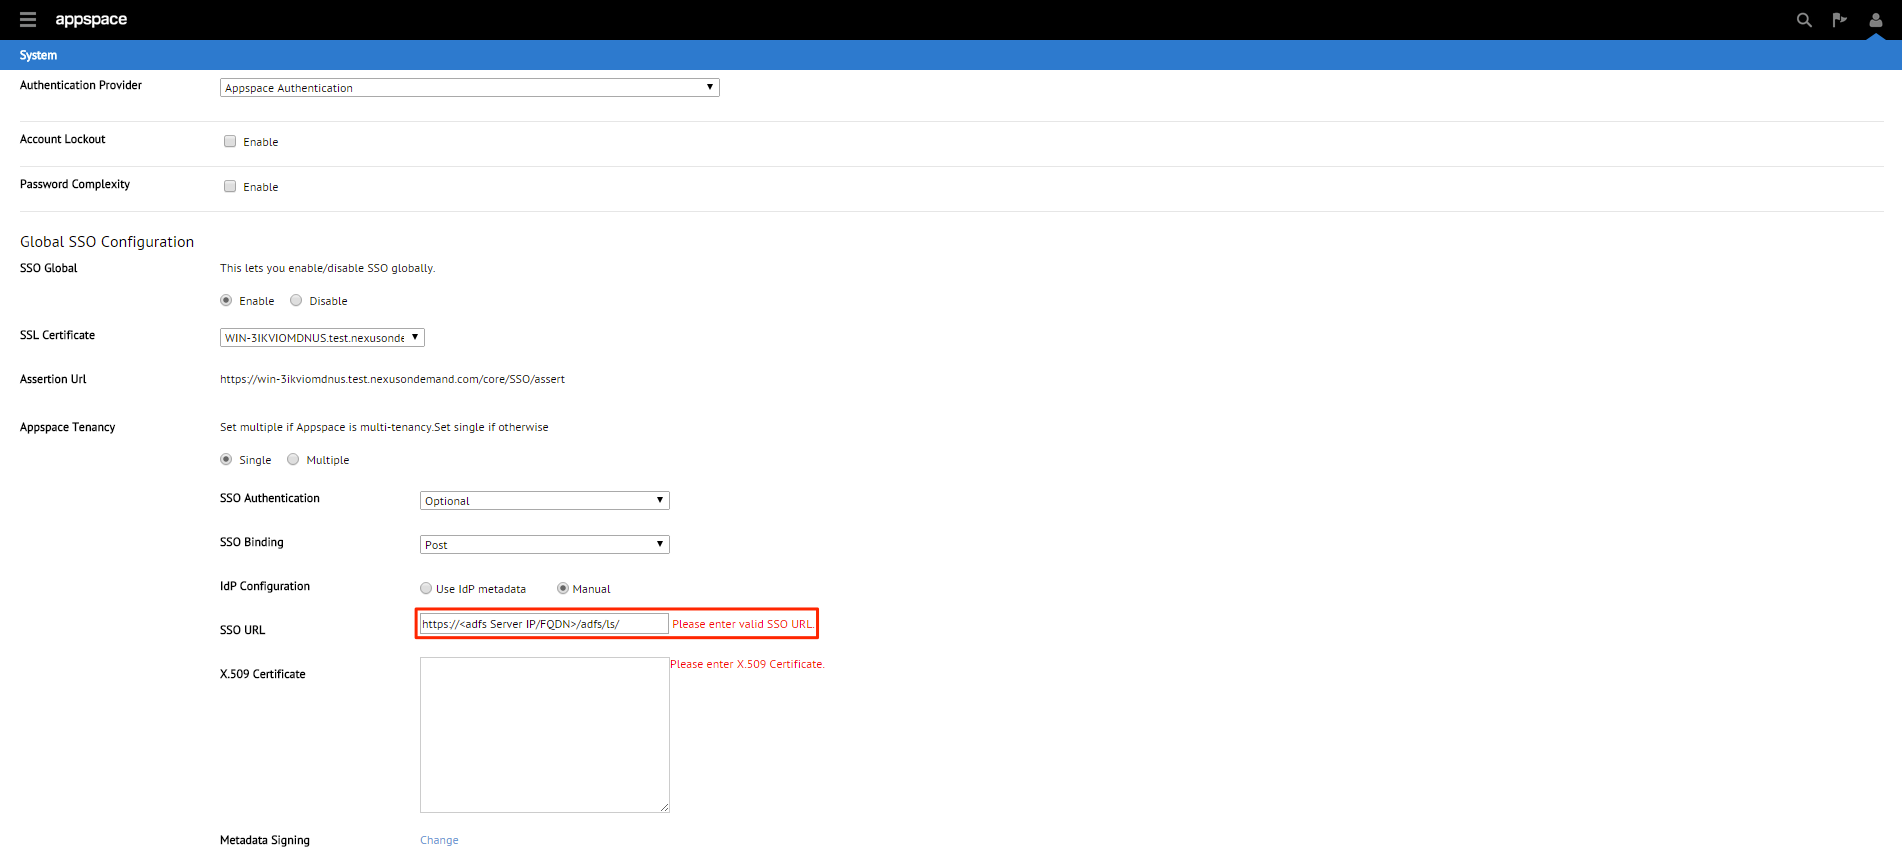
To use the Manual configuration method, you will need to fill in the SSO URL as well as the X.509 certificate.
Step 14
To fill in the X.509 certificate, locate the downloaded FederatedMetadata.xml in Step 1 and open it in a browser.

Step 15
Locate the line <X509Certificate> and copy its associated text.
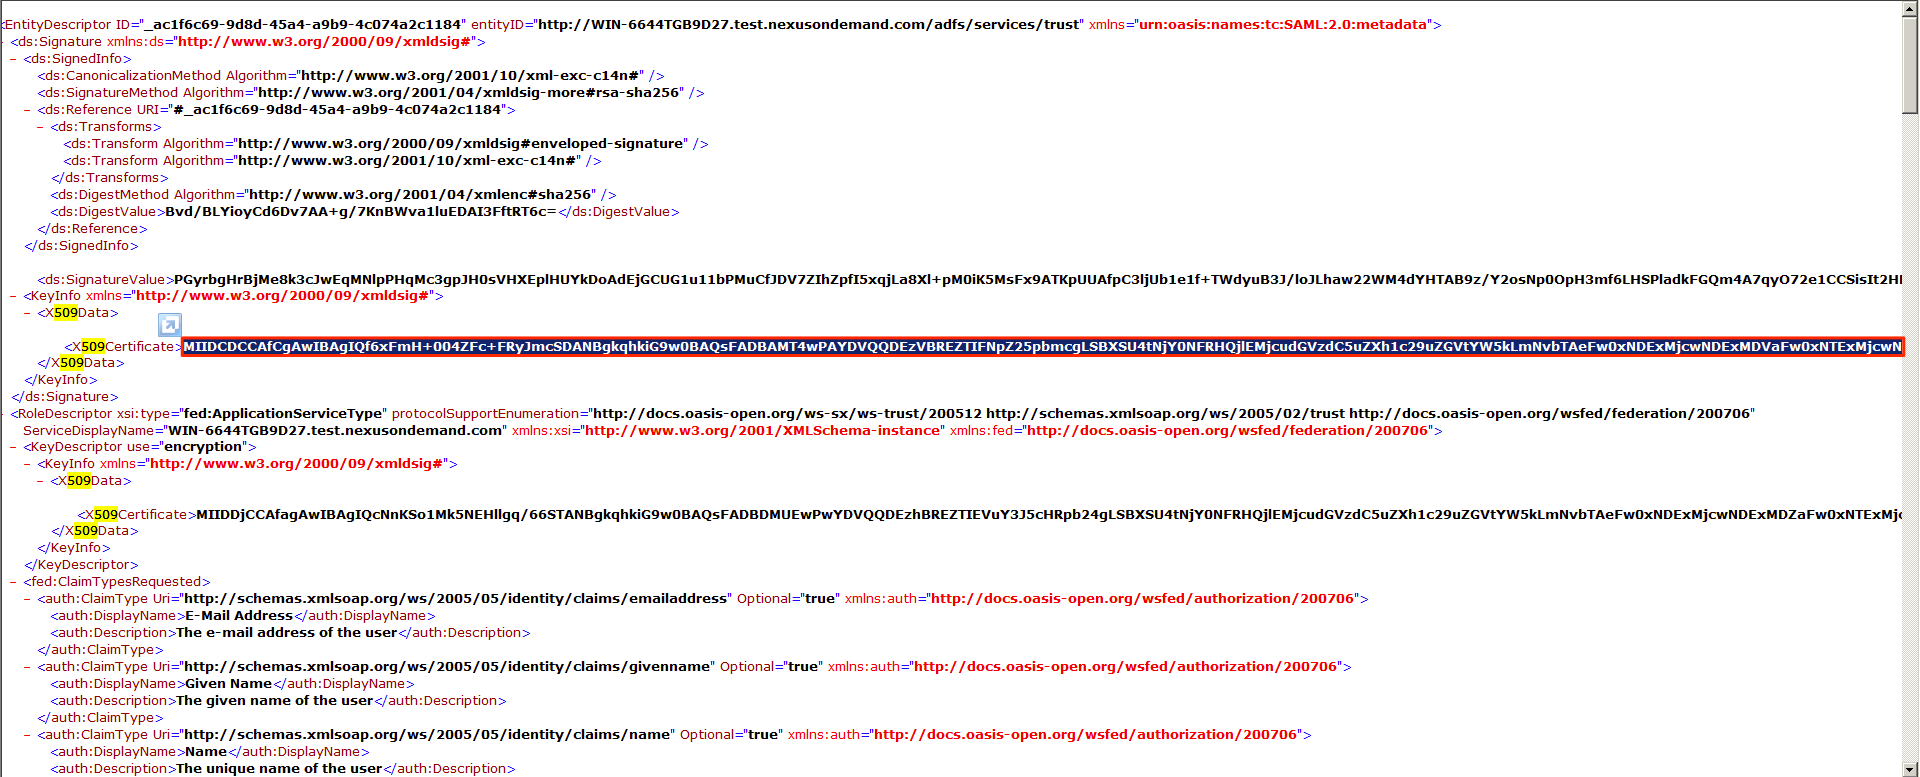
Step 16
Paste the text in the X509 Certificate textbox.

Step 17
You will finally be given the option to enable or disable Metadata Signing. Click Change to show the options. We’ll be disabling this feature in this example.
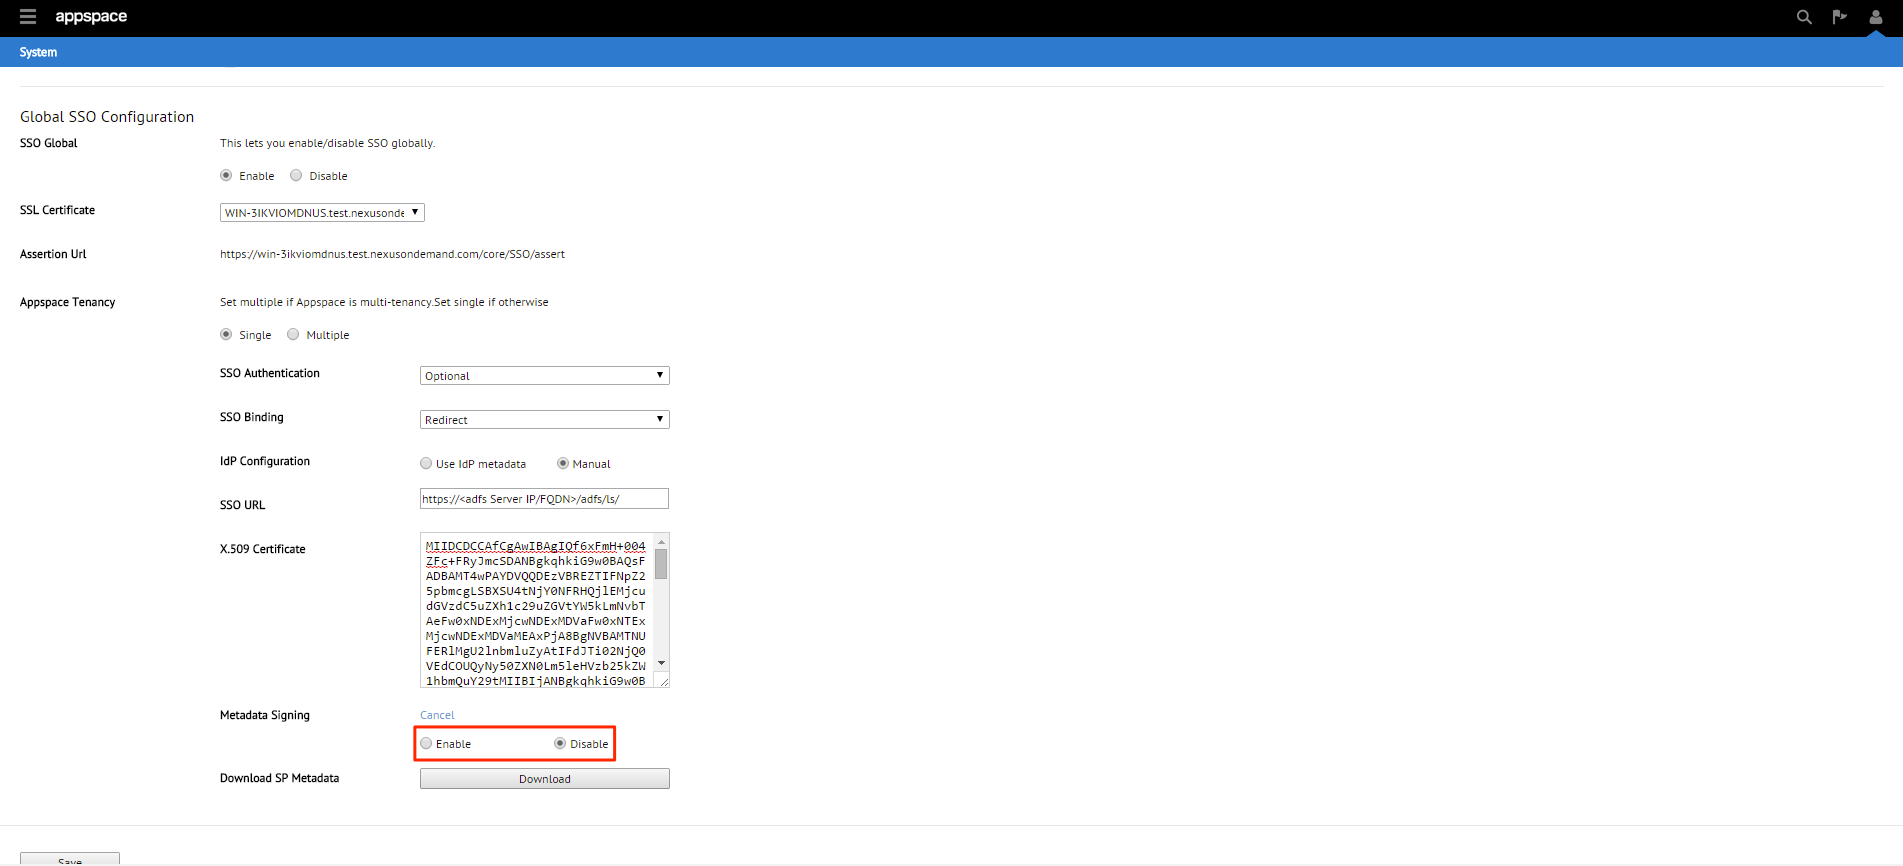
Note
Enabled – The SP metadata file will be generated in an ‘Encrypted’ format
Disabled – The SP metadata file will be generated in a ‘Plain text’ format
Step 18
Click Save.

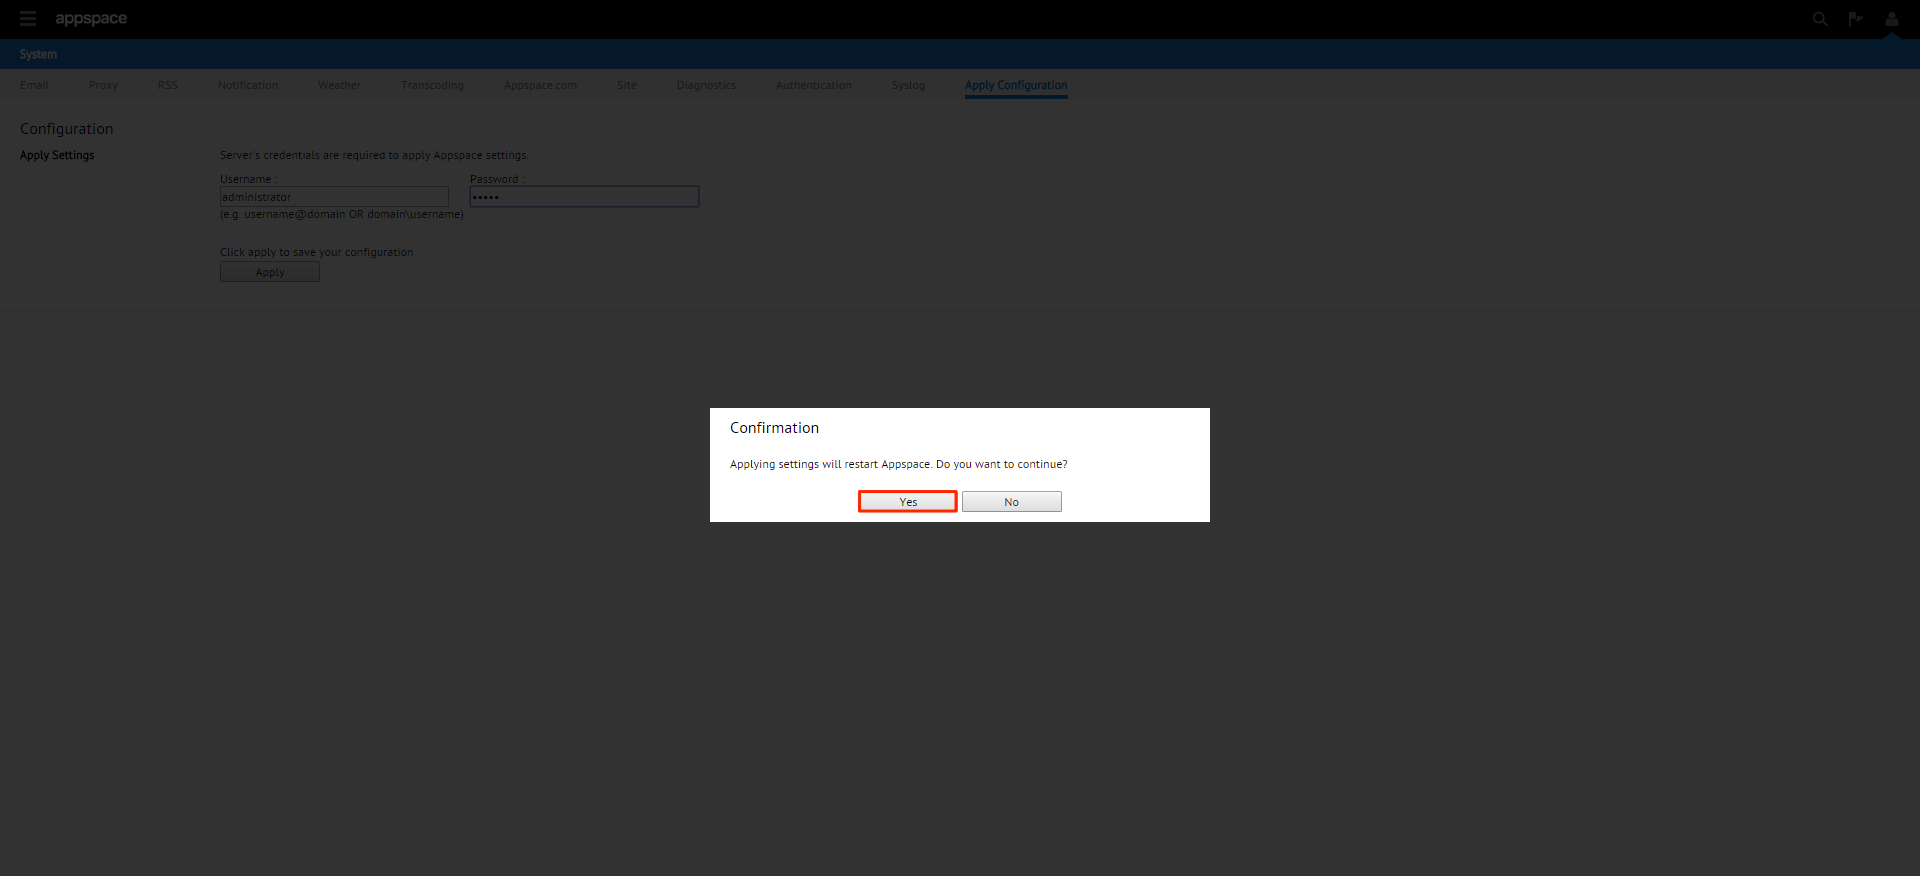
Step 19
Click Yes.

Step 20
Click the Click Here link.
Step 21
Fill in your Windows server administrator credentials and click Apply.
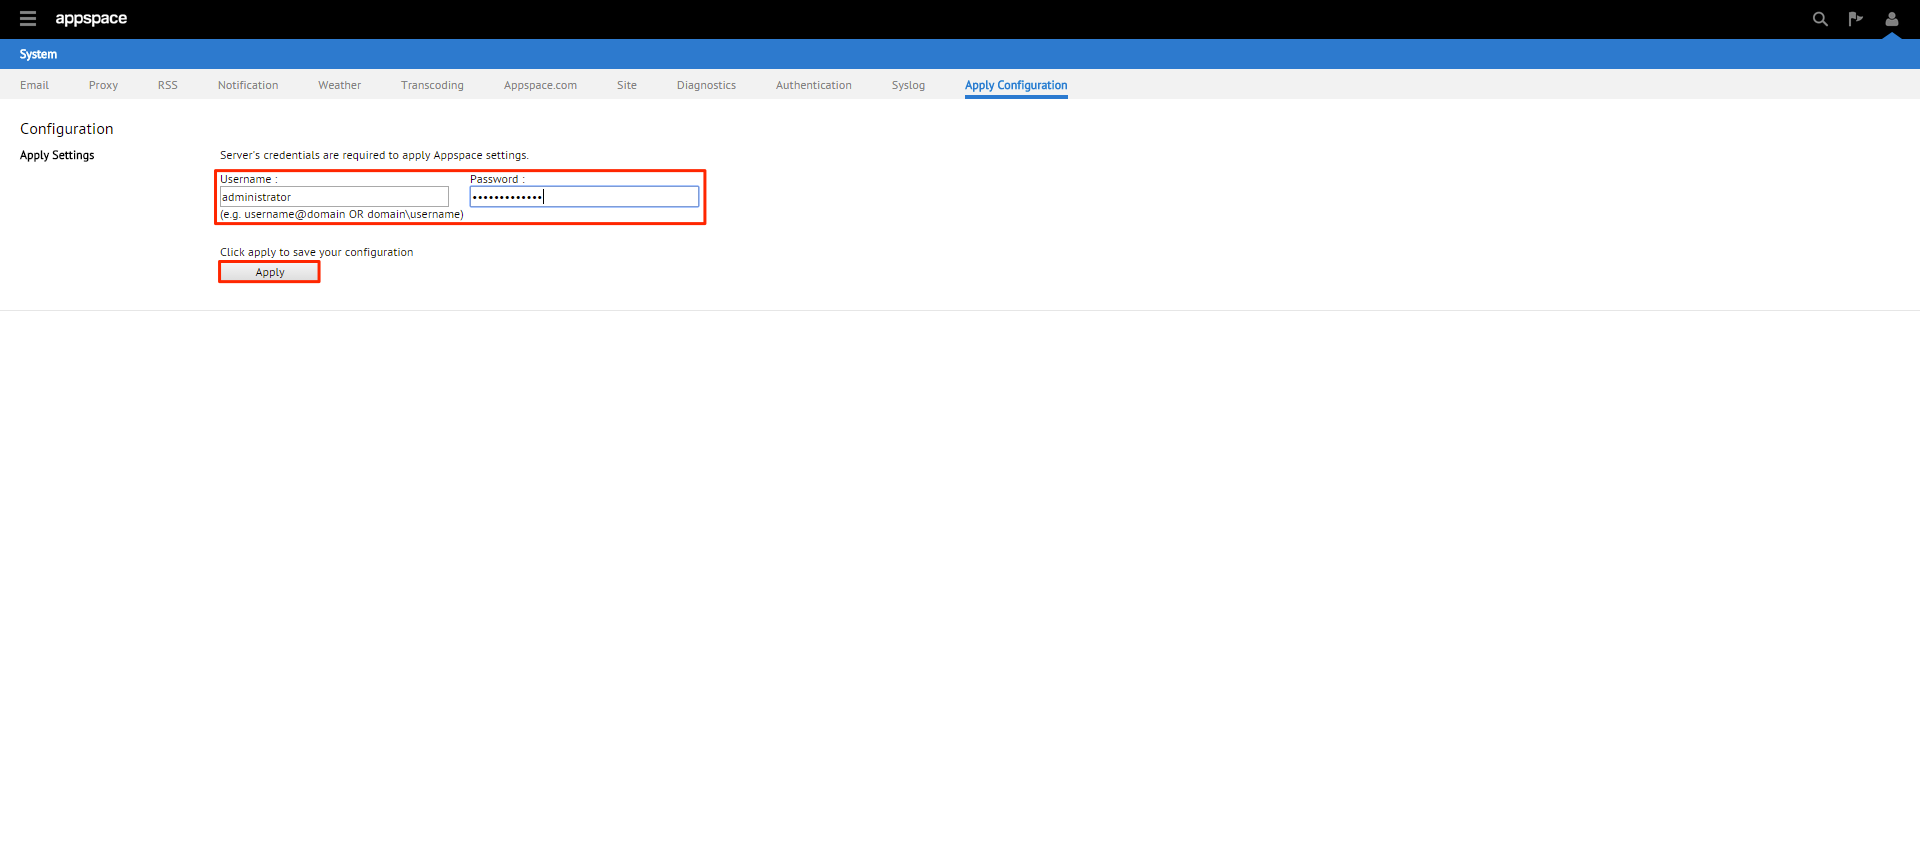
Step 22
Click Yes.
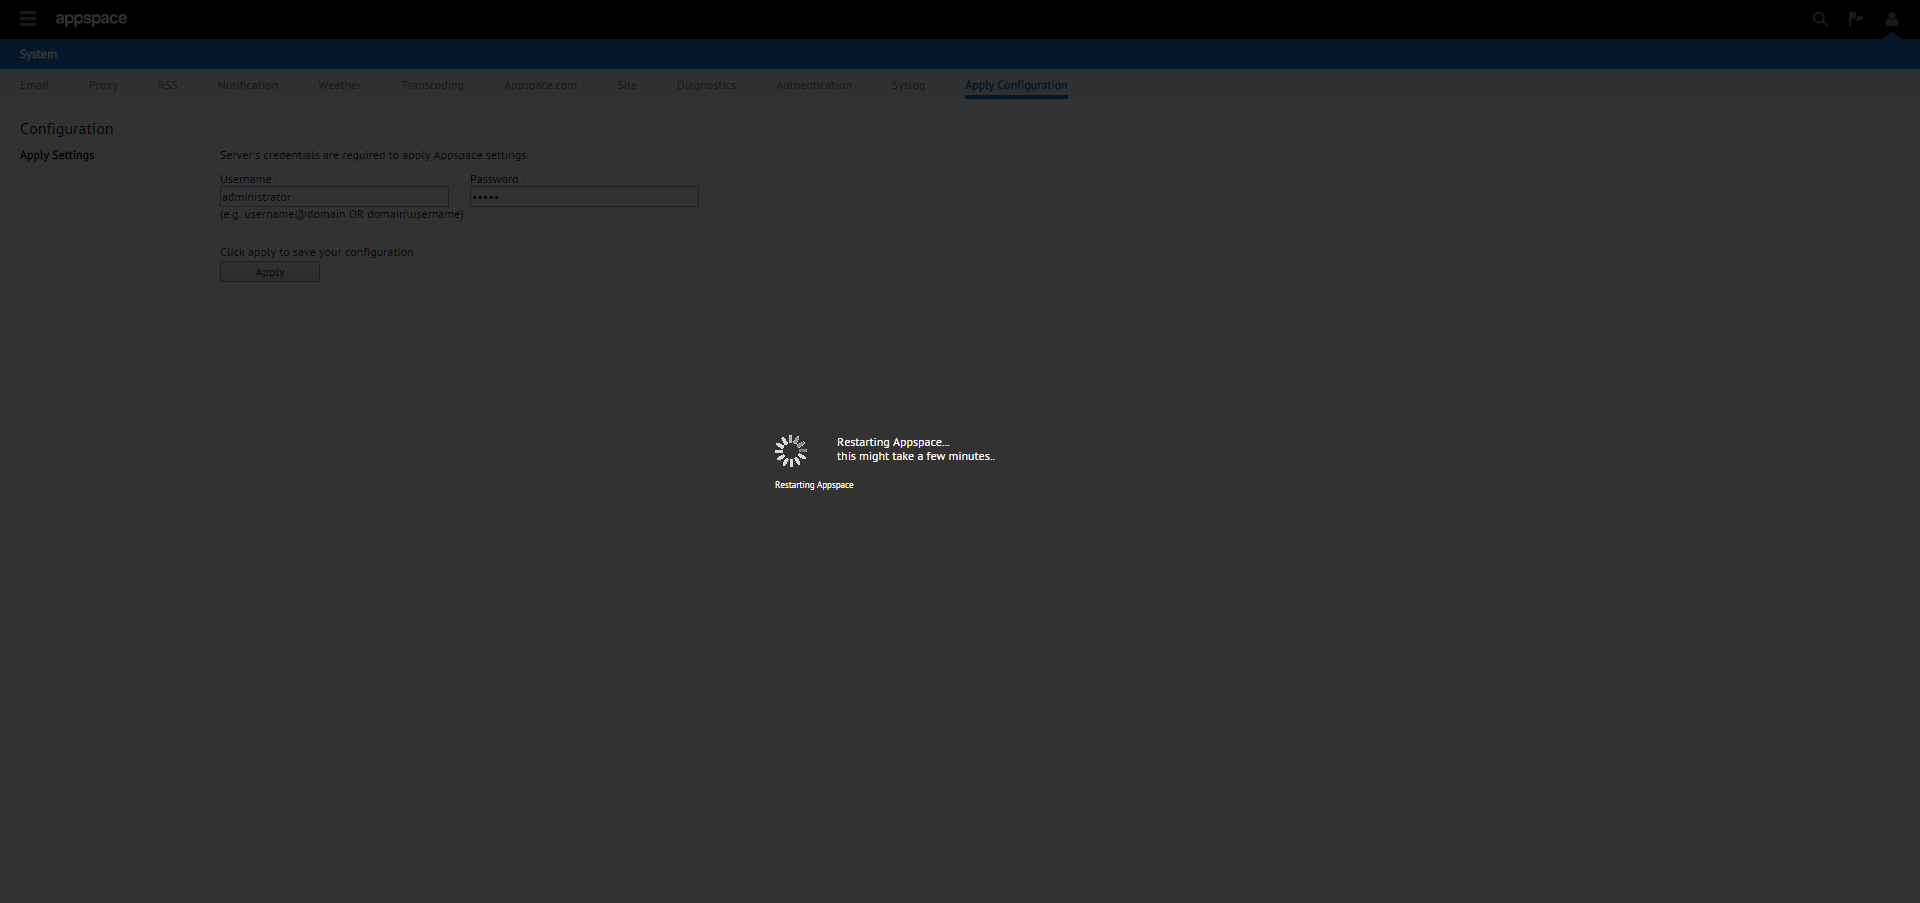
Step 23
Allow some time for the Appspace to restart.
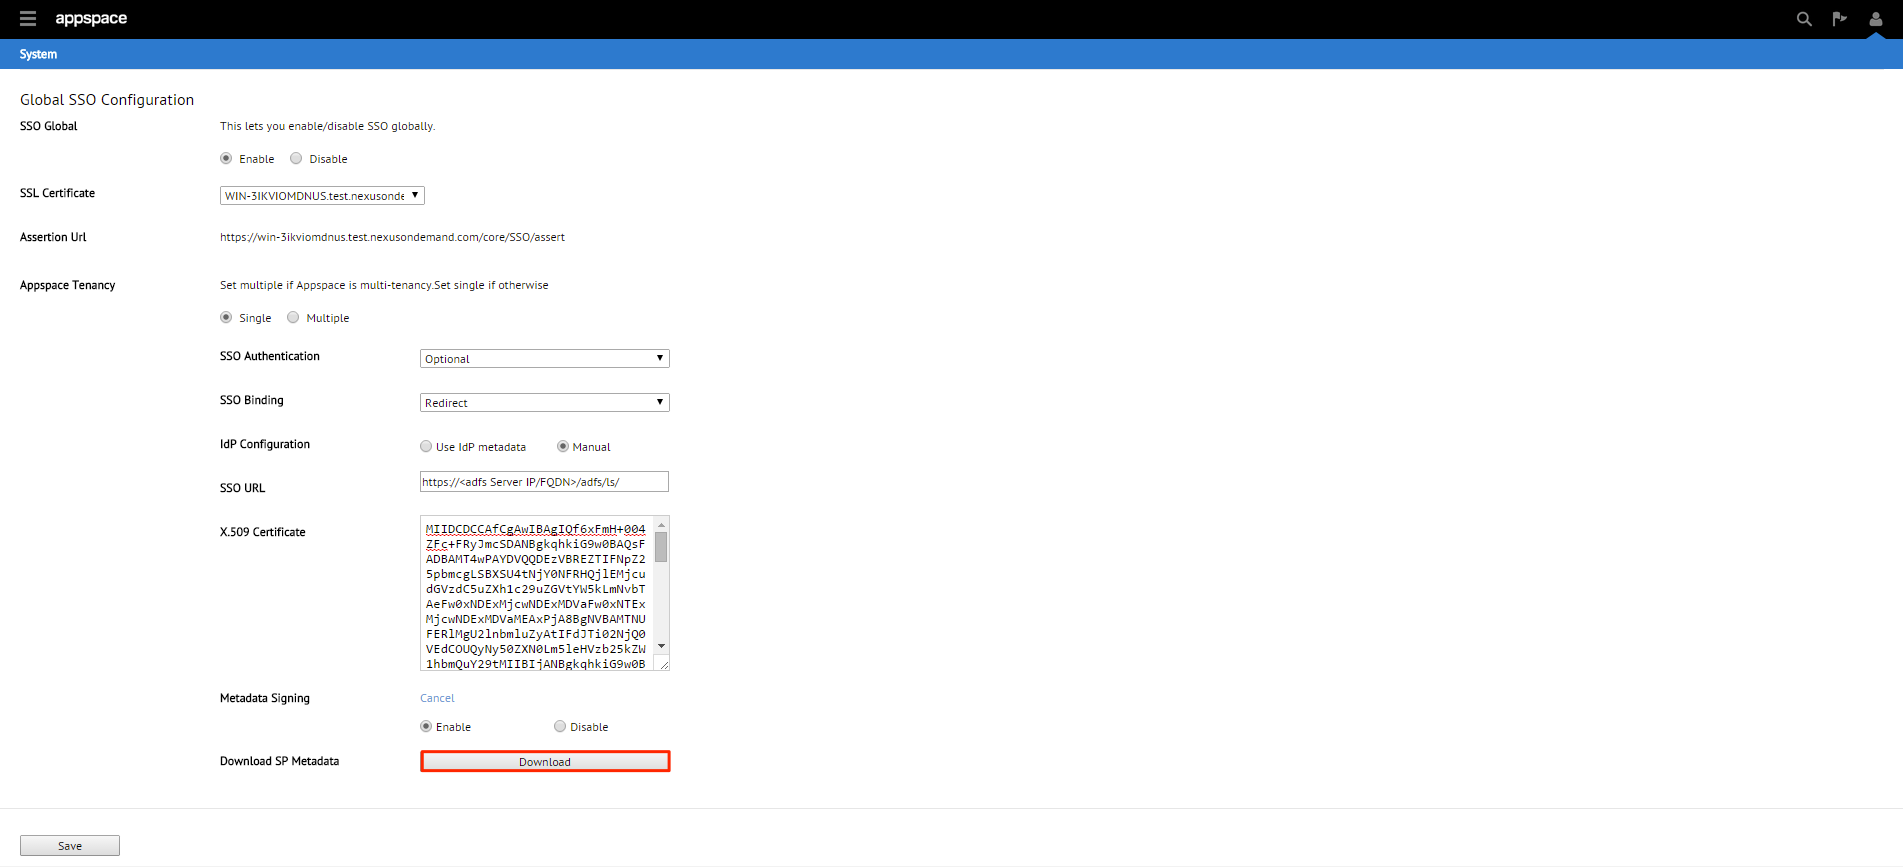
Step 24
From the Authentication tab, click Download to download the Service Provider’s metadata file. Transfer the file to your Identity Provider (ADFS).
Section 5: Configuring ADFS Relying Party Trust
Note
This section is performed on the Identity Provider (ADFS) server.
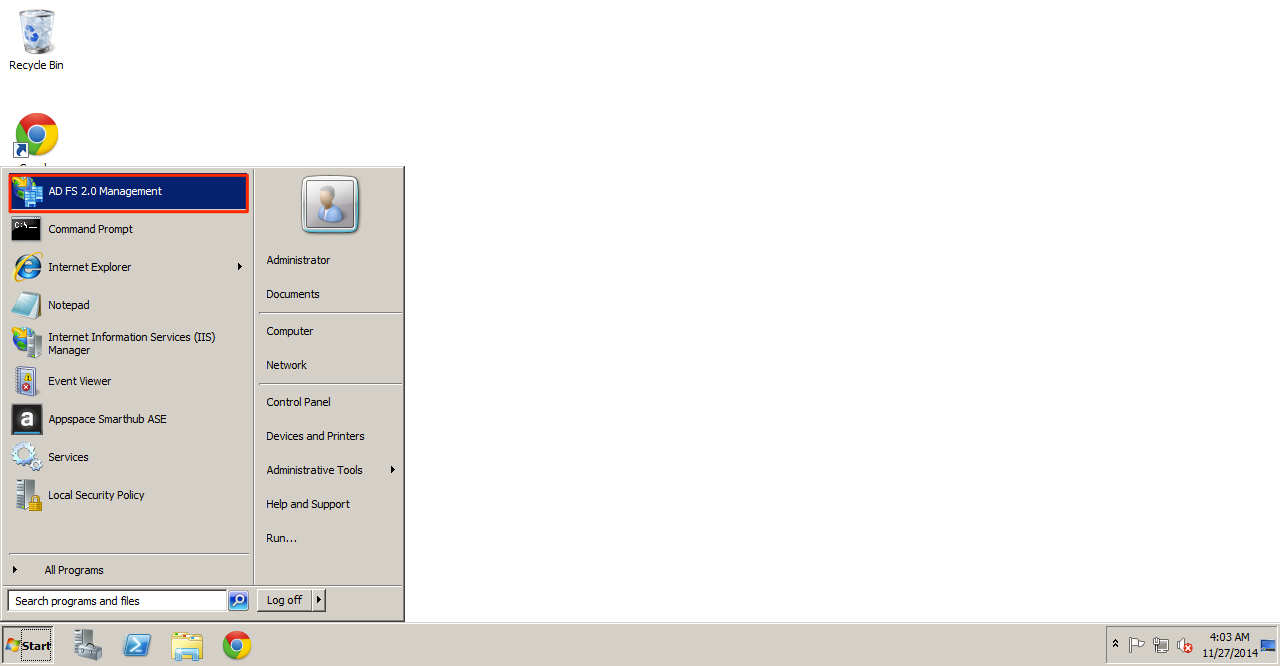
Step 1
On the ADFS server launch AD FS 2.0 Management.
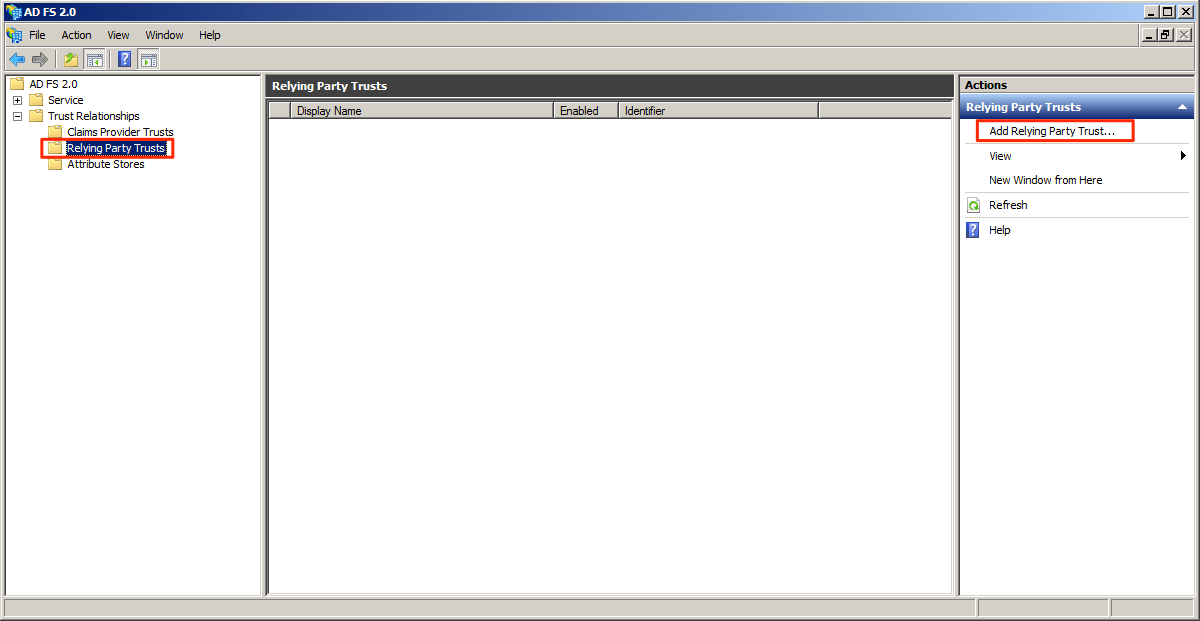
Step 2
Expand the Trust Relationship folder and select the Relying Party Trusts folder. To add a Relying Party trust click Add Relying Party Trust under the Actions pane.
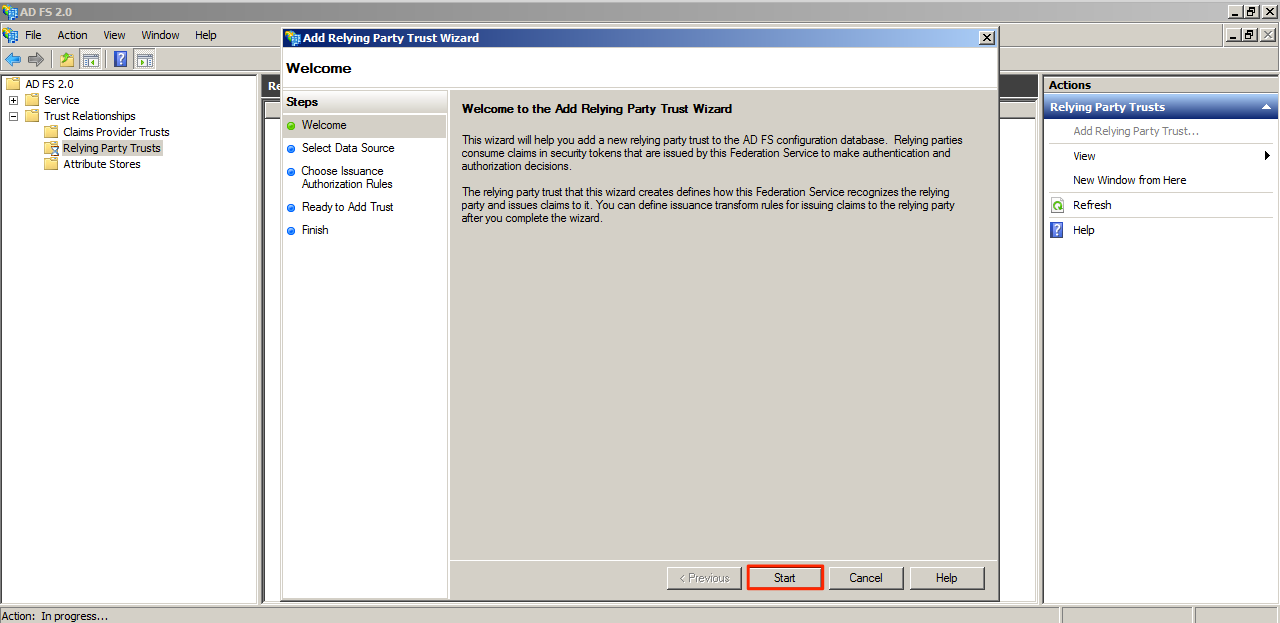
Step 3
Click the Start button.
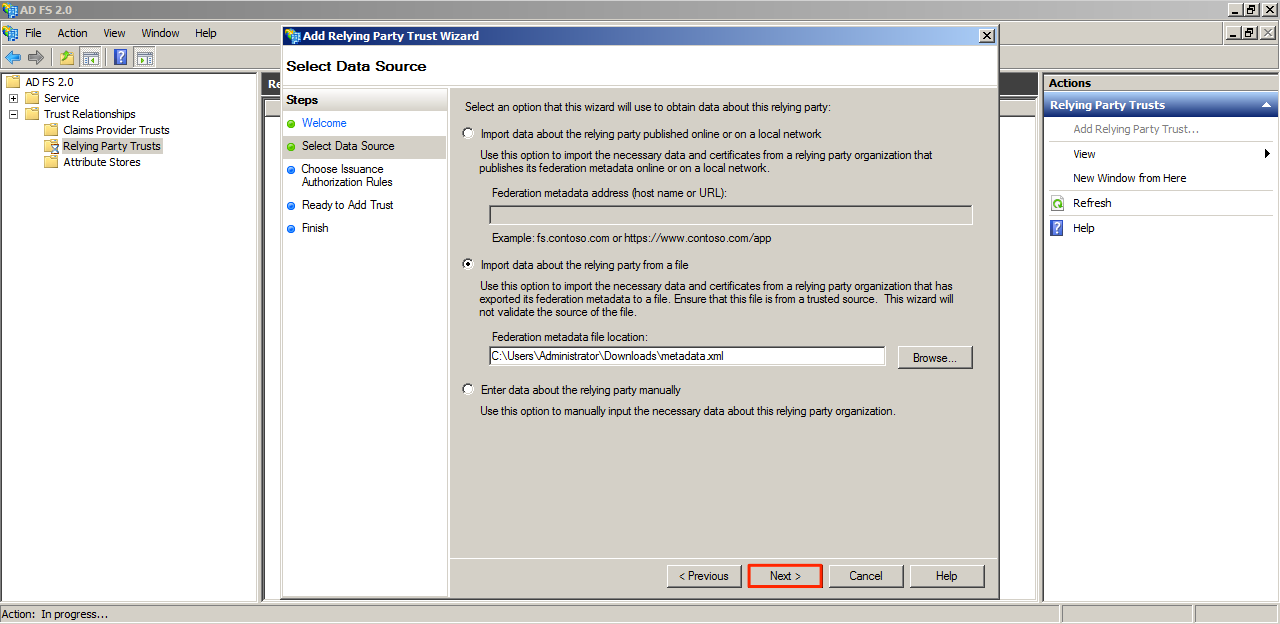
Step 4
Select the “Import data about relying party a file” option and click Browse.

Step 5
Locate and select the metadata file that was downloaded from the Appspace server and click Next.
Step 6
Give the Relying Party trust a name and click Next.

Step 7
Select the “Permit all users to access this relying party” option and click Next.

Step 8
Click Next.

Step 9
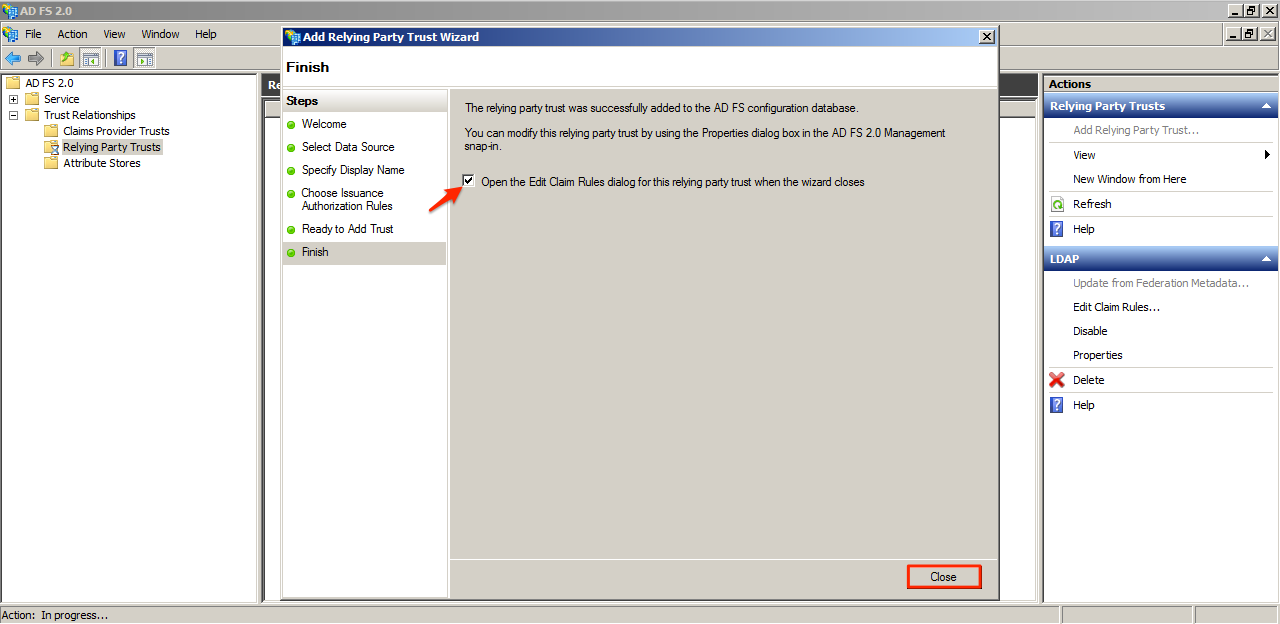
Ensure that the checkbox for “Open the Edit Claim Rules dialog for this relying party trust when the wizard closes” is ticked.
Step 10
On the Edit Claim Rule window, click Add Rule.
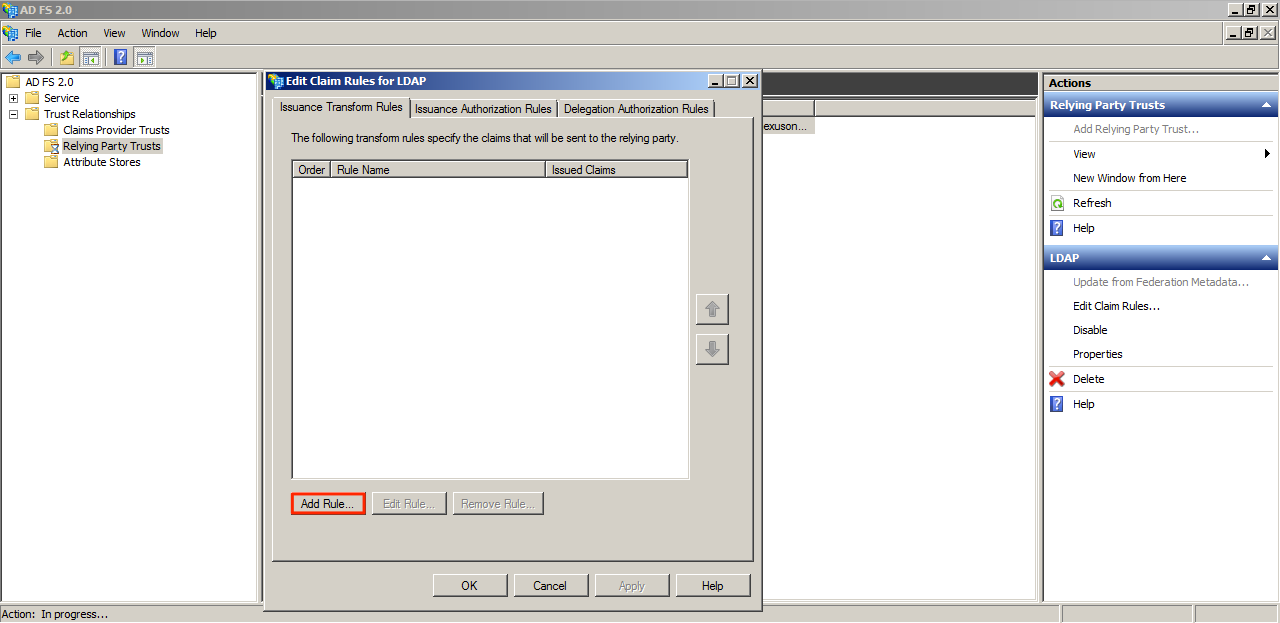
Step 11
Select the “Send LDAP Attributes as Claims” option and click Next.

Step 12
Name the Claim Rule and select Active Directory as the attribute store. Refer to the screenshot below for the Mapping of LDAP attributes to outgoing types value. Click Finish when done.
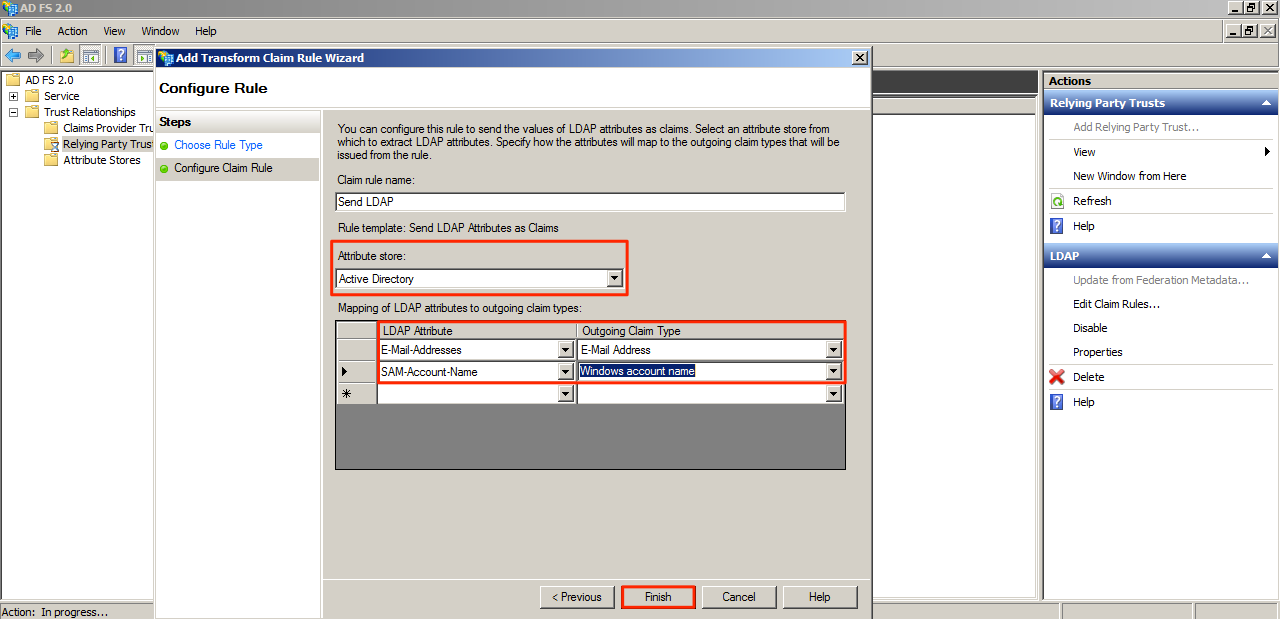
Note
This step mandates that all Appspace users (authenticating via SSO) are required to have email addresses (can be used as the usernames as well).
Step 13
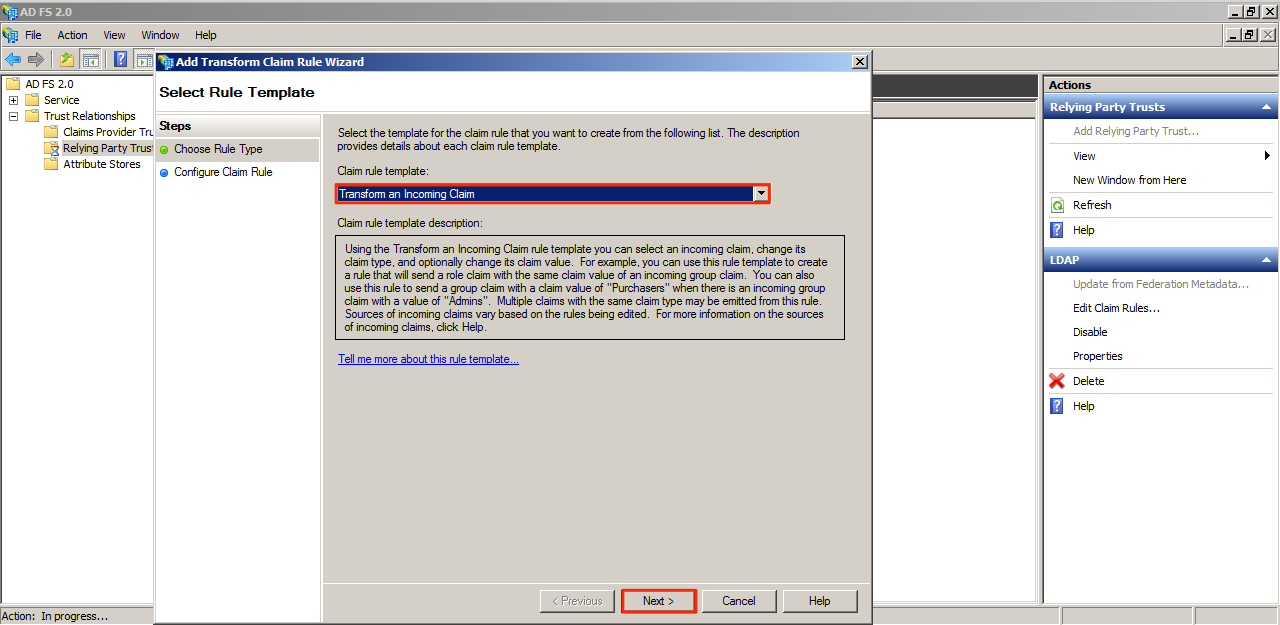
Click Add Rule and select “Transform an Incoming Claim” followed by the Next button.
Step 14
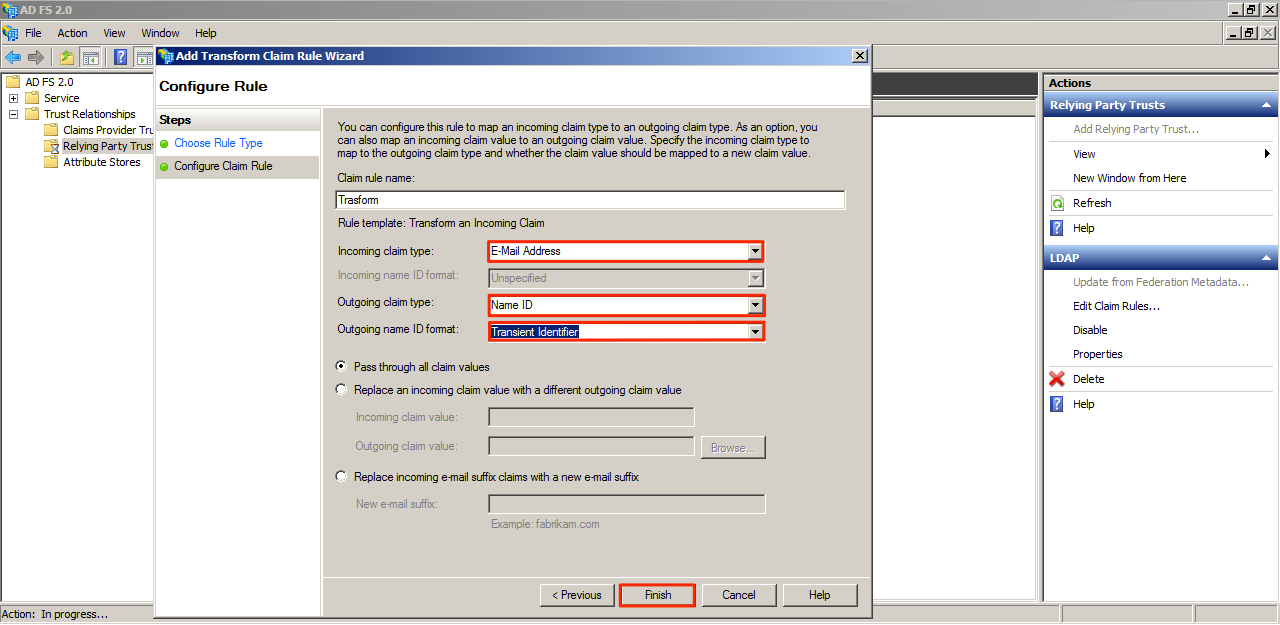
Name the Claim rule and configure the rest of the fields as what is shown on the screenshot below. Click Finish when done.
Step 15
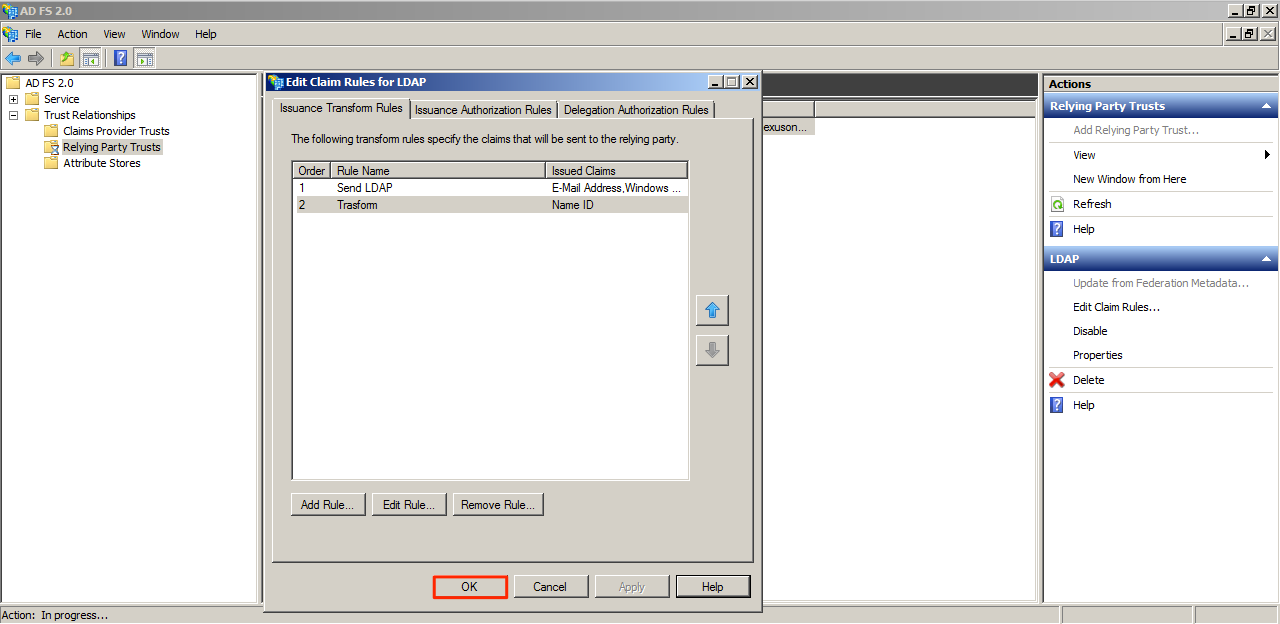
Click Apply.

Step 16
Click OK.
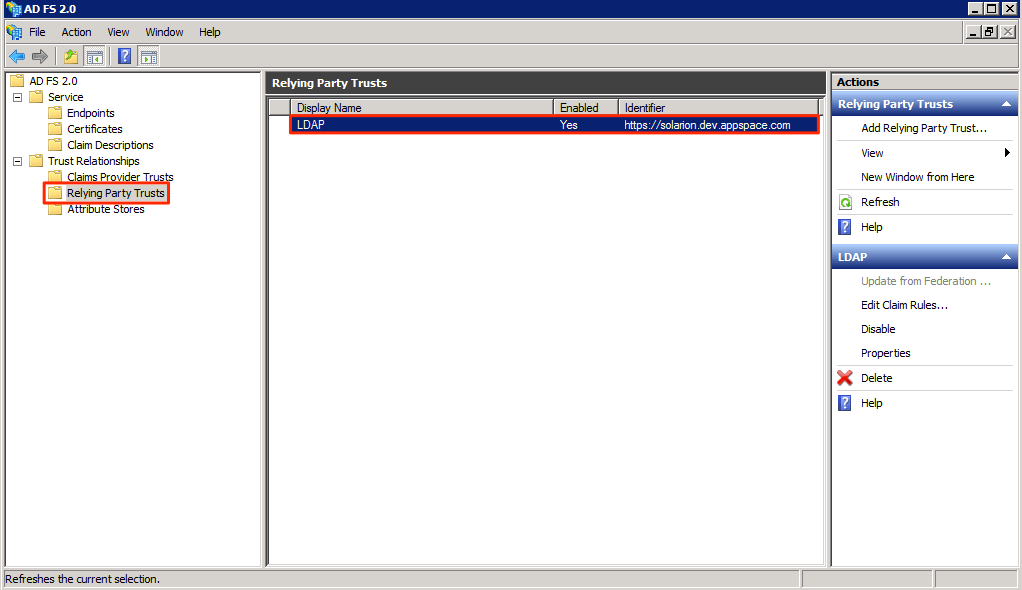
Step 17
Click Relying Party Trusts and select your display name.
Step 18
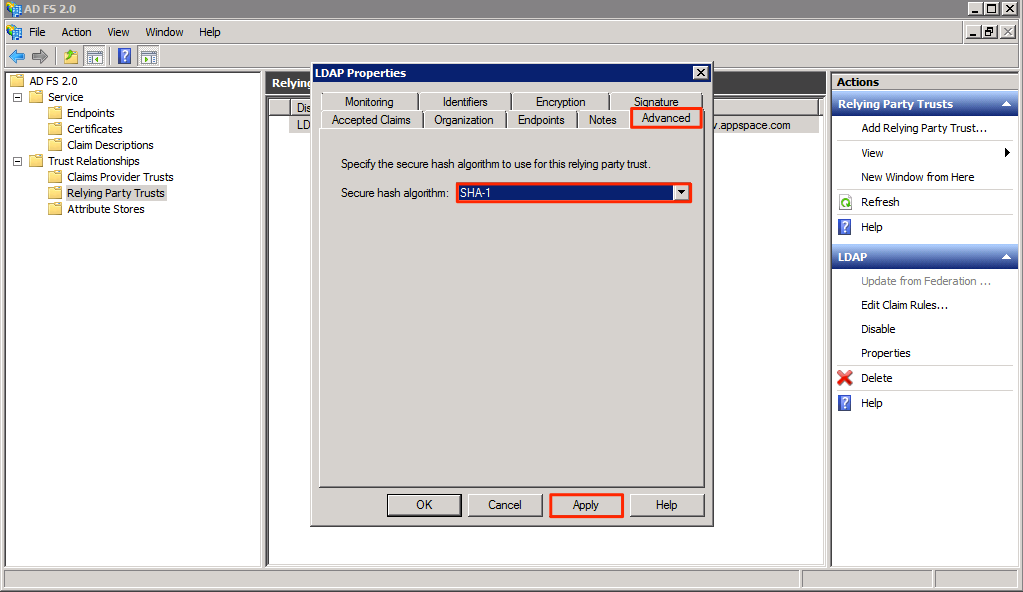
Click Advanced and select SHA-1 as the secure hash algorithm. Click Apply when done.
Section 6: Logging in with SSO
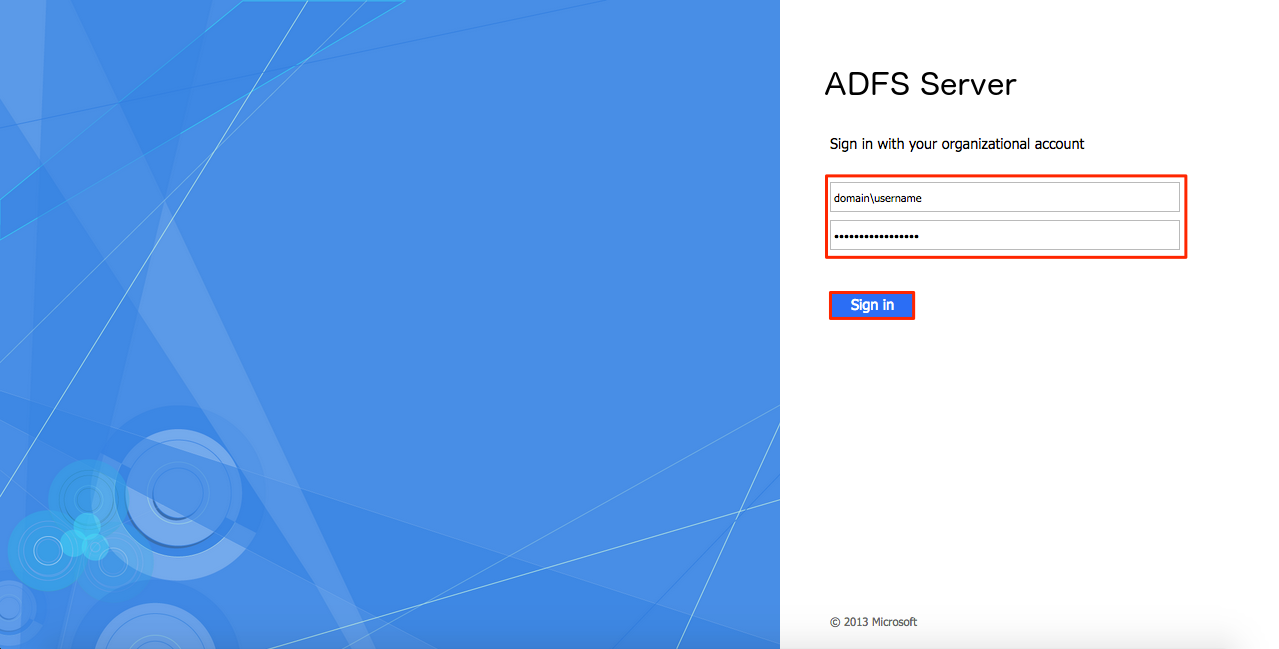
Step 1
Login with your username. (This should be an email). You will be redirected to the SSO login page provided by your Identity Provider.
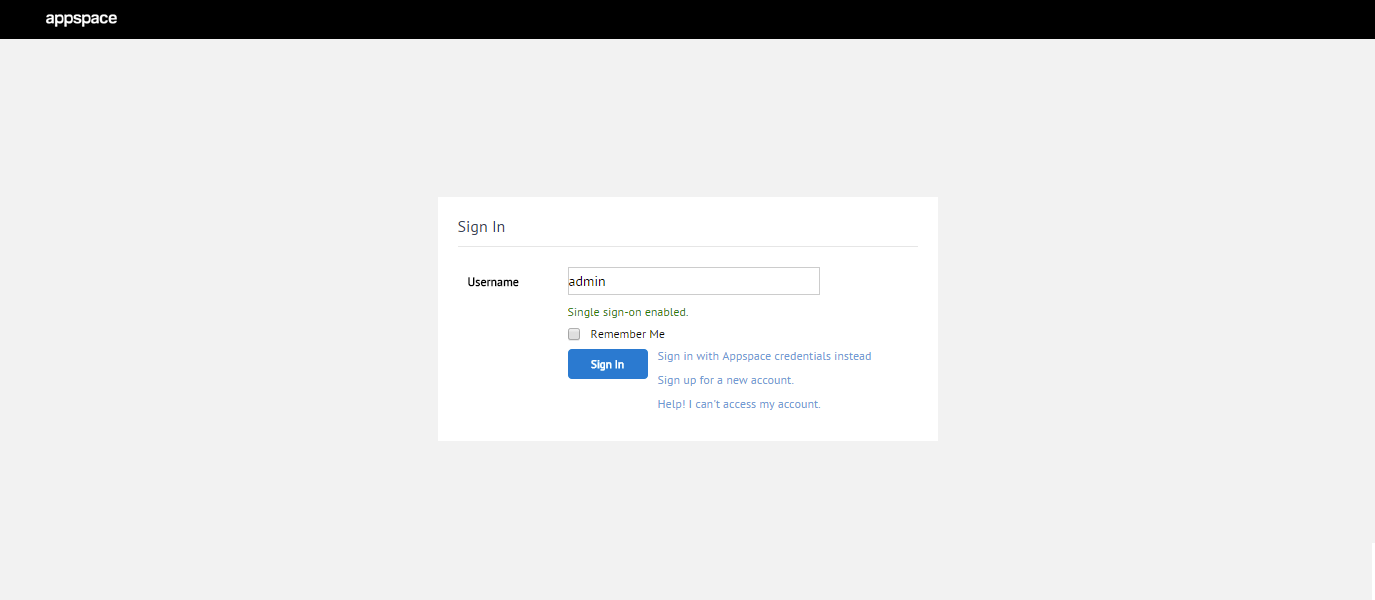
Warning
You must use HTTPS for SSO to work.
Step 2
Enter your credentials. Upon successful authentication, you will be redirected back to your Appspace Dashboard.