Appspace Installation
Introduction
Once the Windows server foundation has been configured with all the required updates and service packs, .NET Framework, Visual C++, and an SQL database, you are now ready to proceed with the installation of the Appspace server.
The installation process involves the following three workflows:
Installing the Appspace Installation Center
Note
The Appspace Installation Center is used for the installation as well as the maintenance or upgrade of Appspace. Before starting the installation process, please ensure that any old instances of the Appspace Installation Center are uninstalled from your system. This can be accomplished and verified by going to the Windows Control Panel and Add/Remove Programs.
Step 1
Locate and launch the Appspace Installation Center setup file on your server machine.
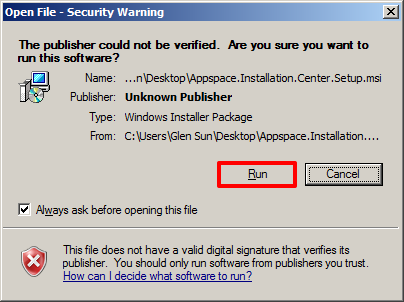
Step 2
If prompted by a security warning, click Run to continue.
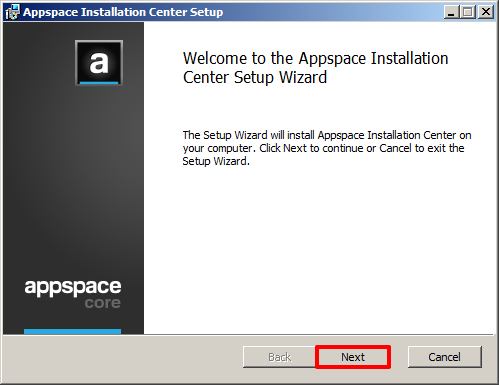
Step 3
Click Next in the ‘Welcome to the Appspace Installation Center Setup Wizard’ window.
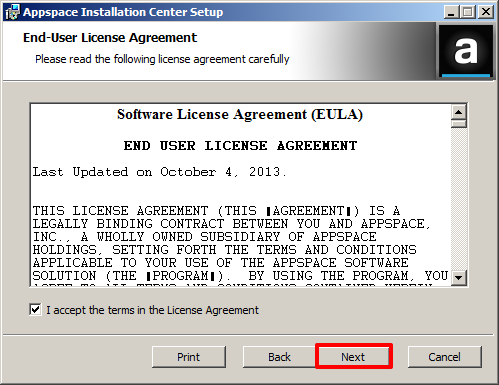
Step 4
In the ‘End-User License Agreement’ window, check the box to accept the terms in the License Agreement and click Next to continue.
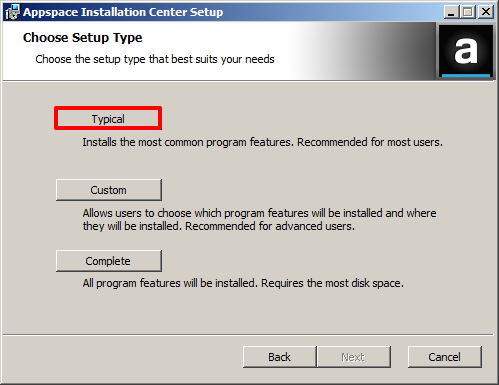
Step 5
In the ‘Choose Setup Type’ window, select Typical (this is the most common type of installation) and click Next.
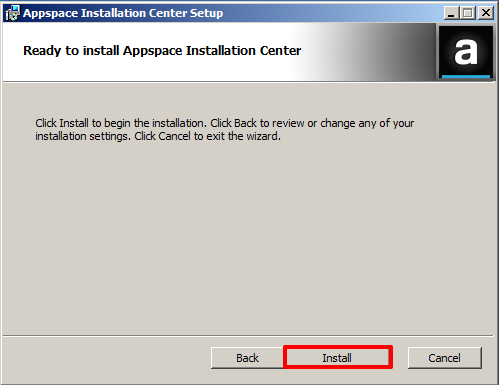
Step 6
Click Install to begin the installation.
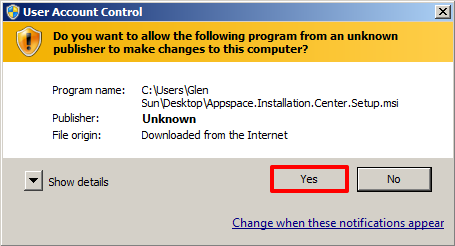
Step 7
If prompted, click Yes to allow the program to make changes to the computer.
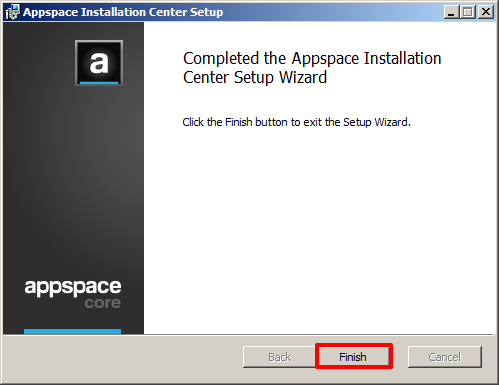
Step 8
Click Finished when you see the ‘Completed the Appspace installation Center Setup Wizard’ message.
Configuring Folder Permissions
Prior to installing Appspace, ensure that the following folders on the Windows server have been granted all the necessary permissions:
- C:/temp
- C:/Windows/Temp
- C:/Appspace
Warning
Failure to set permissions may result in a failed server install due to access restrictions.
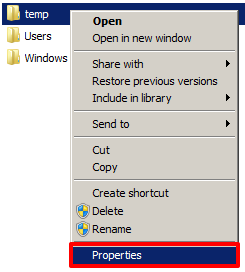
Step 1
Navigate to the ‘temp’ folder on your Windows server. If you do not see the folder, you will have to manually create it.

Step 2
Right-click on the folder and select Properties.
Step 3
Select the Security tab and look for IIS_IUSRS in the ‘Group or user names’ section. If you do not see it, select Edit to continue.
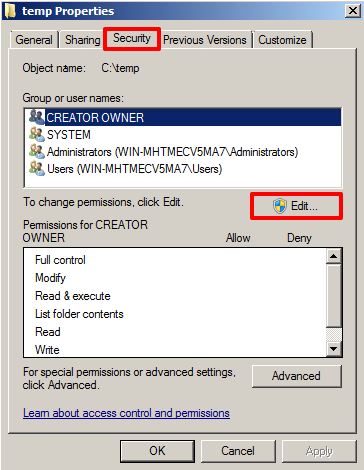
Step 4
On the next window, select the Add… button to create the group name.
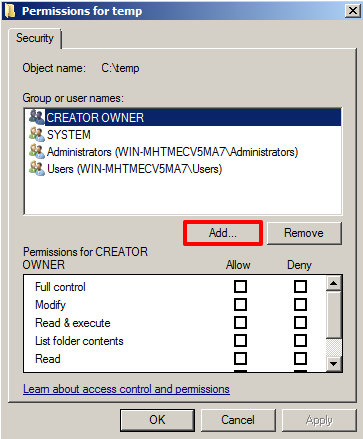
Step 5
Enter the value IIS_IUSRS in the ‘Enter the object names to select’ field. Click OK to continue.

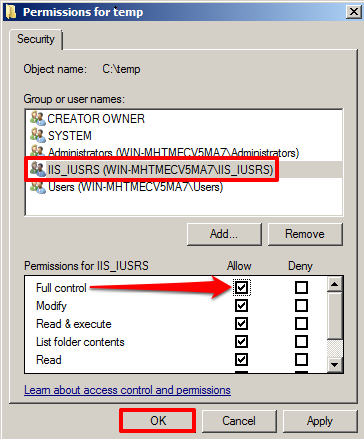
Step 6
The IIS_IUSRS name should now appear. Make sure it is selected and then check the Allow check box for ‘Full control’. Press OK to complete the process of permitting full control access to this folder.
Step 7
Repeat Step 1 to Step 6 for the other two folders listed above.
Installing Appspace
Step 1
Locate and launch the Appspace Installation Center (AIC) on your server machine (a shortcut is most likely on the desktop). Launch the AIC using the ‘Run as Administrator’ option (hold down SHIFT + double-click on the icon).
Step 2
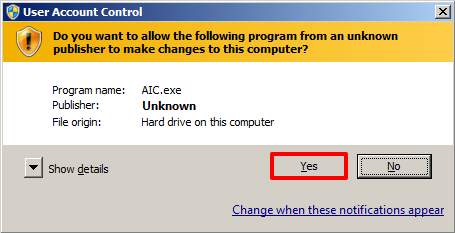
If prompted by a warning, click Yes to allow the program to make changes to the computer.
Step 3
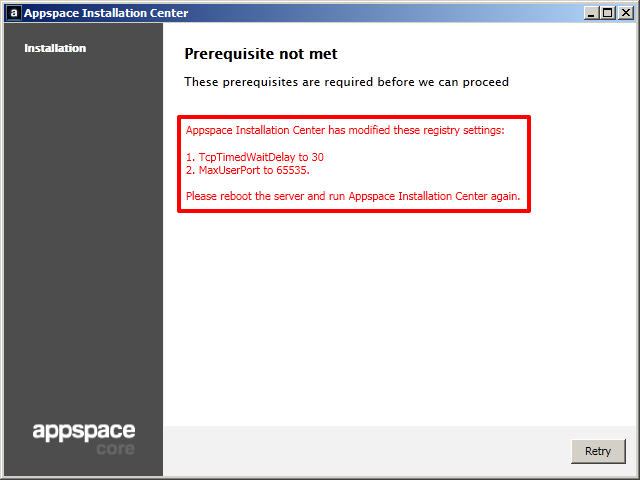
At this point you may see the ‘Prerequisite not met’ window. This is a notification message that informs you of the two Windows registry changes the installation center has just modified (TcpTimedWaitDelay and MaxUserPort). No additional action needs to be performed.
Step 4
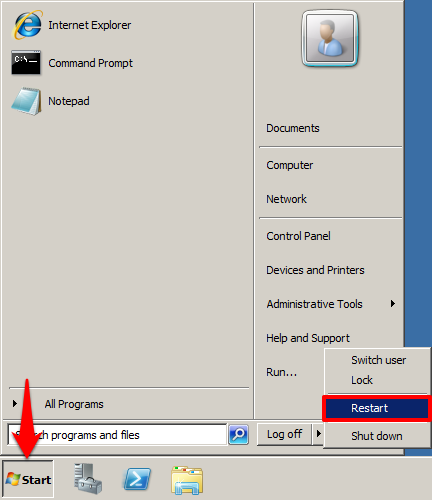
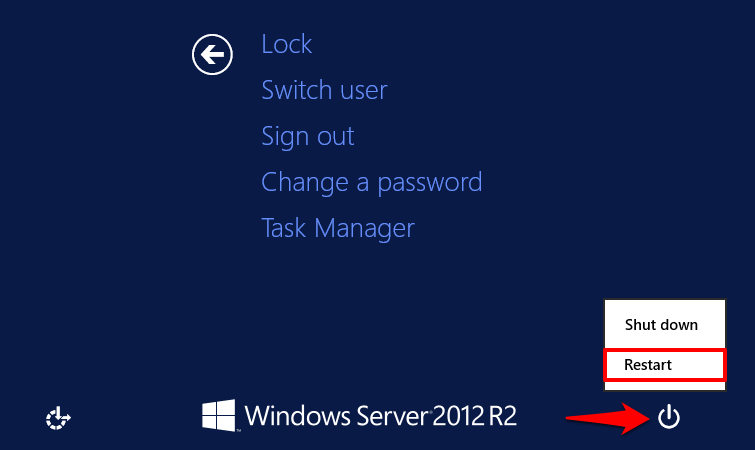
Perform a manual restart of your Windows server.
In Windows 2008, click the Start button and select the Restart option (you may also alternatively use CTRL + ALT + DEL).
In Windows 2012, press CTRL + ALT + DEL and select the Restart option.
Step 5
Once the Windows server has been restarted, launch the Appspace Installation Center using the ‘Run as Administrator’ option (hold down SHIFT + double-click on the icon).
Step 6
Click Install in the ‘Welcome to Appspace Installation Center’ window.

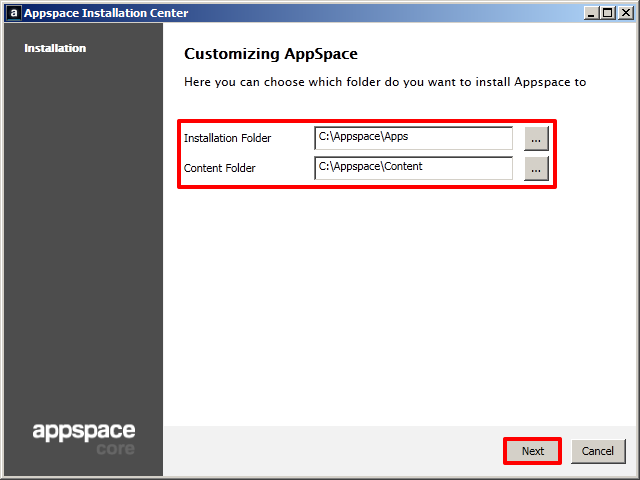
Step 7
(OPTIONAL) You may choose to change the directory/folder in which to perform the Appspace server installation as well as the default content folder. Otherwise, simply click Next to continue.
Example
Installation Folder: F:/Appspace/Apps
Content Folder: F:/Appspace/Content
Step 8
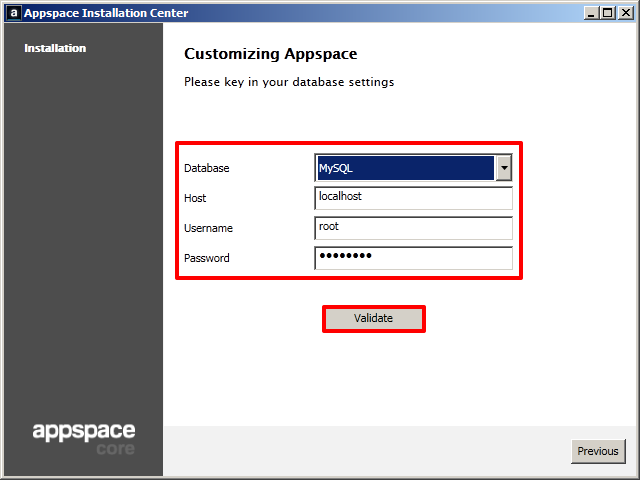
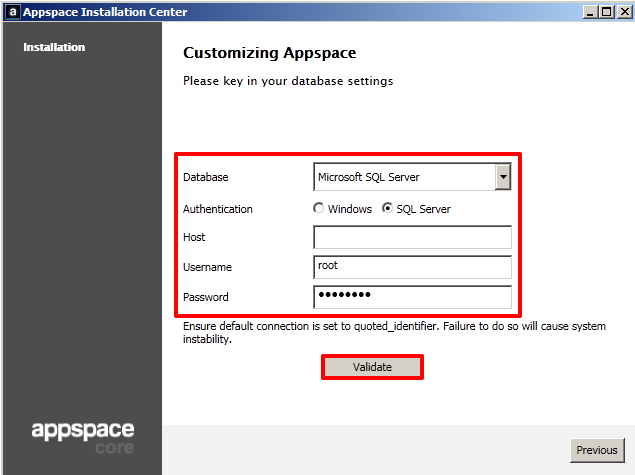
From the Database drop-down menu, select your server’s database type.
If you are using MySQL as the database type, you may leave localhost as the Host (if the database engine is installed on a separate server, replace the Host value with the IP address of the remote database server). Enter the Username (typically kept as root) and the database server’s password, g56*k9lp, or your custom password that was created during the MySQL installation process). Click Validate to proceed with the Appspace server installation.
If you are using Microsoft SQL Server as the database type, select the SQL Server option as the Authentication type. Enter the Host name of the server (this can be obtained from the server connection screen when you launch SQL Server Management Studio). Enter the Username (typically kept as root) and the database server’s password, g56*k9lp, or your custom password that was created during the MS SQL installation process). Click Validate to proceed with the Appspace server installation.
Step 9
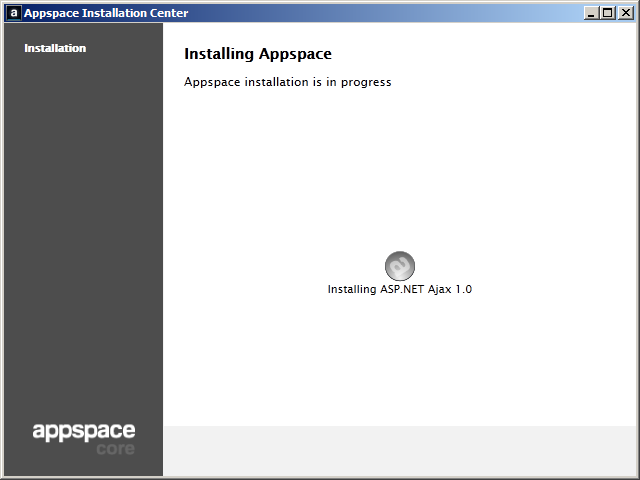
Please wait while Appspace is being installed. Installation durations will vary depending on the system’s resources and hardware specifications. Typical installations will require at least 20 minutes. During installation, you may see various messages and status updates.
Step 10
Click OK when you see the “Appspace Installation Complete” message.
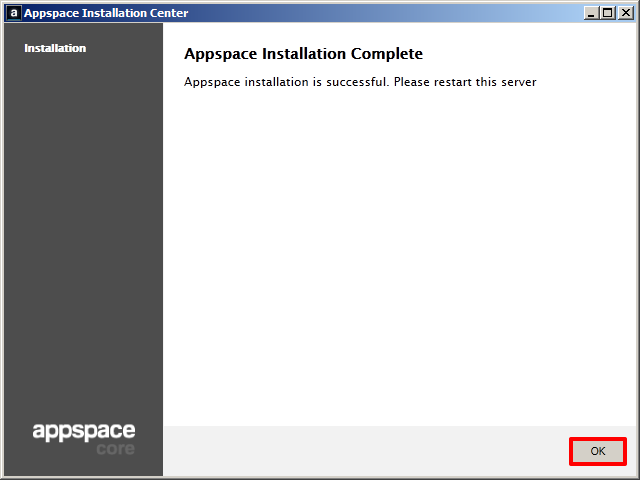
Step 11
Perform a manual restart of your Windows server.
In Windows 2008, click on the Start button and select the Restart option (you may also alternatively use CTRL + ALT + DEL).
In Windows 2012, press CTRL + ALT + DEL and select the Restart option.
Note
You have completed the Appspace Installation process. You may now proceed to the Accessing Appspace article.