Configuring SSL on SmartHub ASE
Introduction
This article will guide you through the steps to configure and enable your SmartHub ASE for HTTPS connectivity/communication with all player devices and the Appspace server.
This guide provides two options for SSL configuration and installing an SSL certificate into IIS:
Once the SSL certificate has been properly added into IIS, you will complete the configuration within Appspace and the SmartHub ASE management interface:
Prerequisites
- A valid SSL certificate (.crt file or .pfx file) from a trusted Certificate Authority (CA)
- Windows Server user credential on the Appspace server with local administrator privileges
- Basic knowledge of navigating Windows Server 2008 and IIS (Internet Information Services)
- Appspace version 5.1 or above
Option 1: SSL Certificate (.crt)
The first option to installing an SSL certificate is by completing the certificate request with an SSL cert (.crt) file.
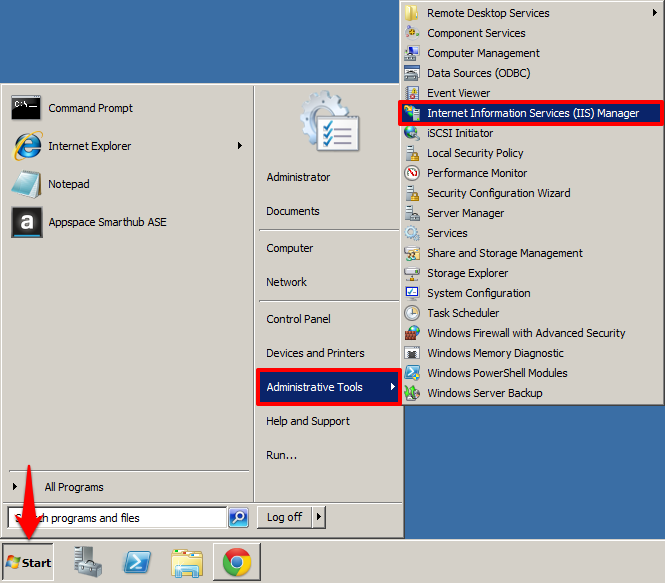
Step 1
To install the SSL certificate, begin by opening the Internet Information Services (IIS) Manager IIS from the Windows Start menu (through the Administrative Tools).

Step 2
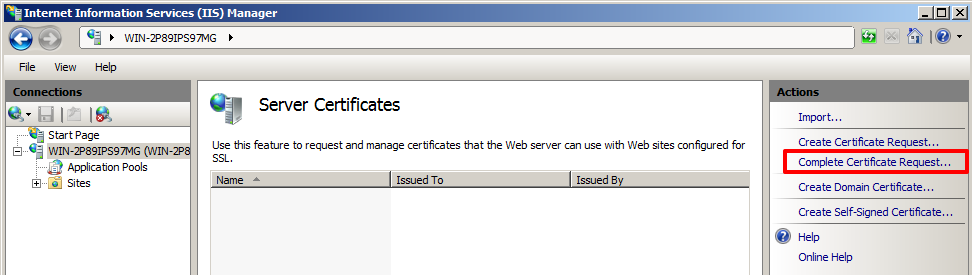
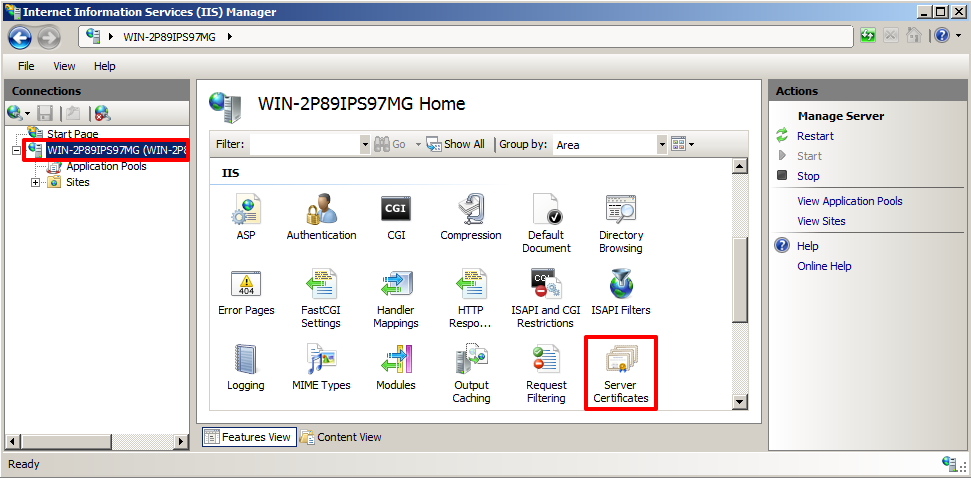
Select the root server node from within the Connections pane. Once selected, find the Server Certificate feature in the IIS section and double-click to open the feature.

Step 3
Under the Actions column, click on ‘Complete Certificate Request...’ to continue.
Step 4
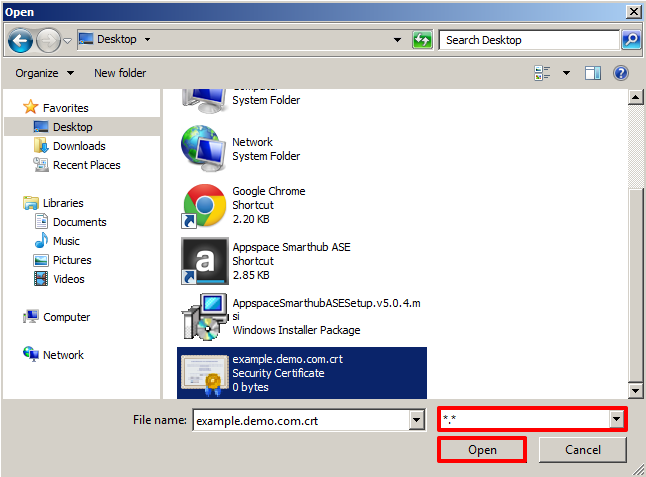
Click on the file browse button (…) and locate your SSL certificate (.crt) file on the server.
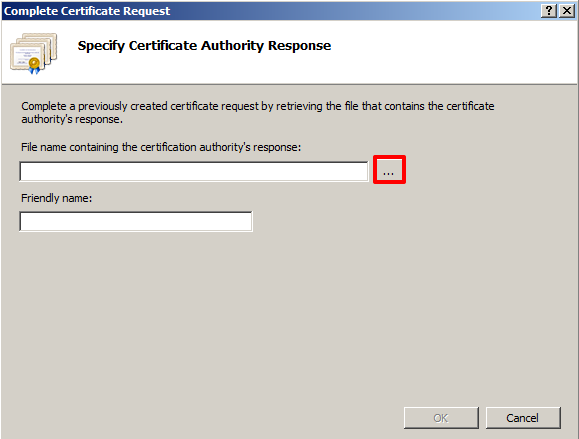
While browsing for the certificate, change the file type filter to all (*.*) in order to properly see your certificate.
Step 5
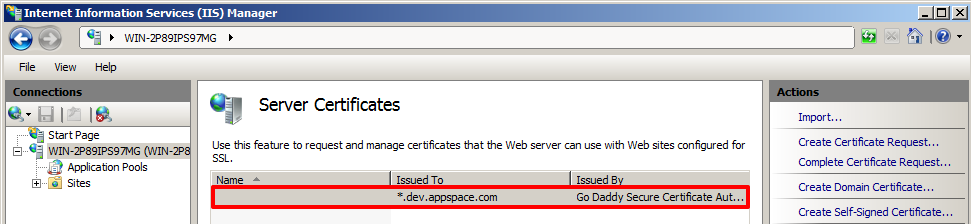
Enter the SmartHub server’s domain name in the Friendly name field. Click OK to proceed.
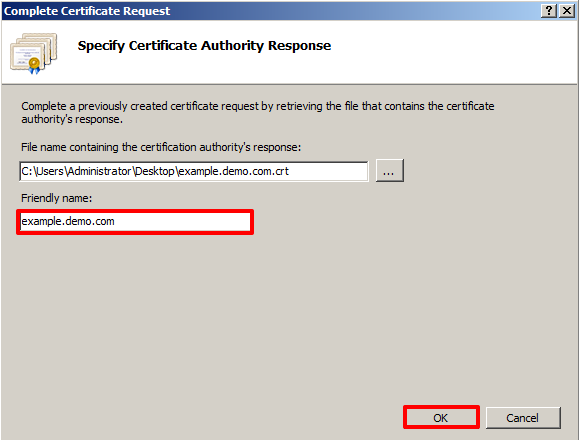
Note
Your SmartHub instance must have a valid unique domain name.
The installed SSL certificate should be visible under Server Certificates.

Step 6
From within the Connections pane, expand Sites and select Default Web Site. Under Actions (on the right-hand side) click ‘Bindings...’ to continue.

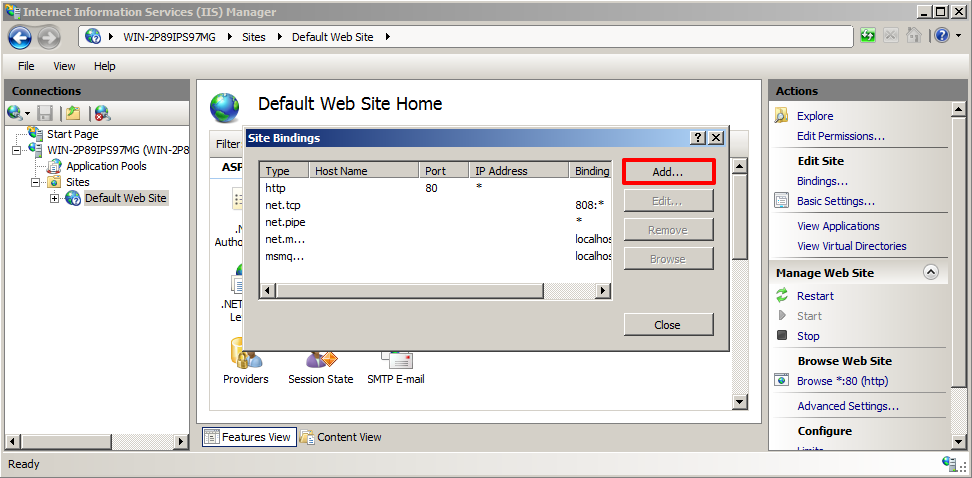
Step 7
In the Site Bindings window, click the ‘Add...’ button.
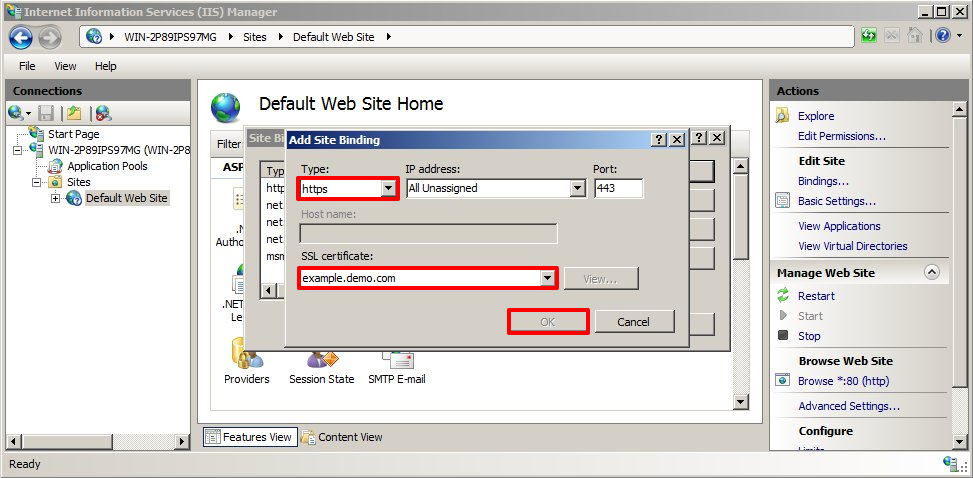
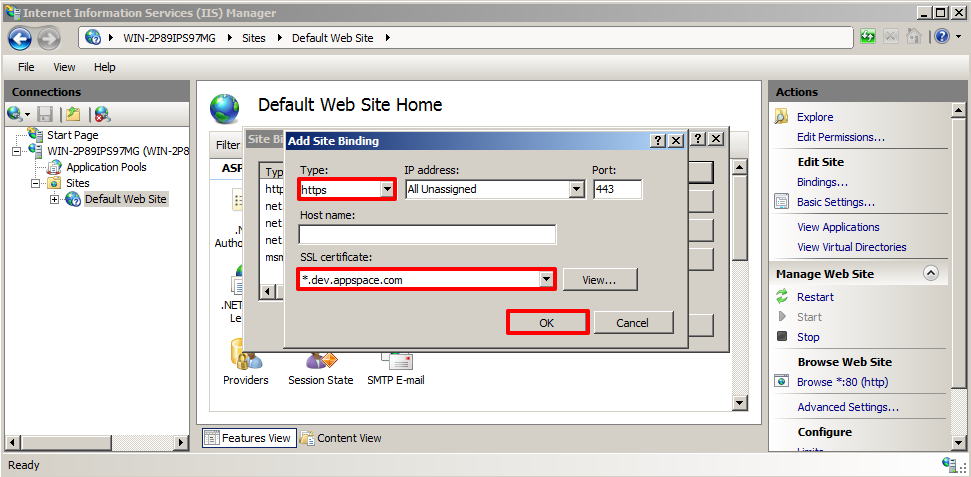
Step 8
In the Add Site Binding window, select https from the Type drop-down menu. Select the SSL certificate based on the friendly name that was previously used (Step 5) and click OK to add the binding. This completes the overall SSL certificate installation process.
Option 2: Personal Information Exchange (.pfx)
The second option is to import an SSL certificate using a Personal Information Exchange (.pfx) file.
Step 1
To install the SSL certificate, begin by opening the Internet Information Services (IIS) Manager IIS from the Windows Start menu (through the Administrative Tools).
Step 2
Select the root server node from within the Connections pane. Once selected, find the Server Certificate feature in the IIS section and double-click to open the feature.
Step 3
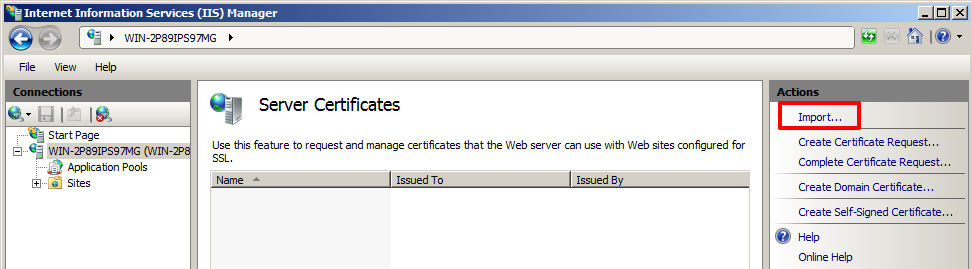
Under the Actions column, click on ‘Import...’ to continue.
Step 4
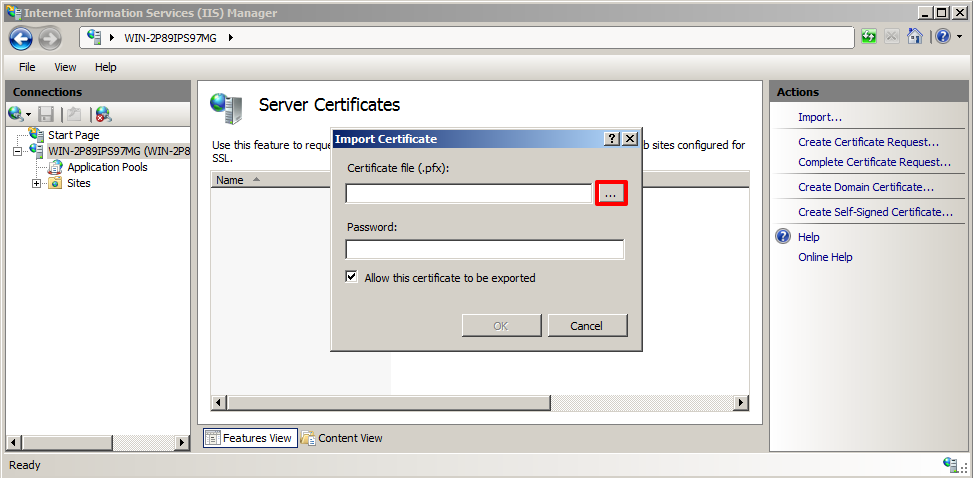
In the Import Certificate window, click on the file browse button (…) and locate your SSL certificate (.pfx) file on the server. Select the SSL certificate and click Open.
Step 5
Enter the password associated with this certificate file and click OK to continue.
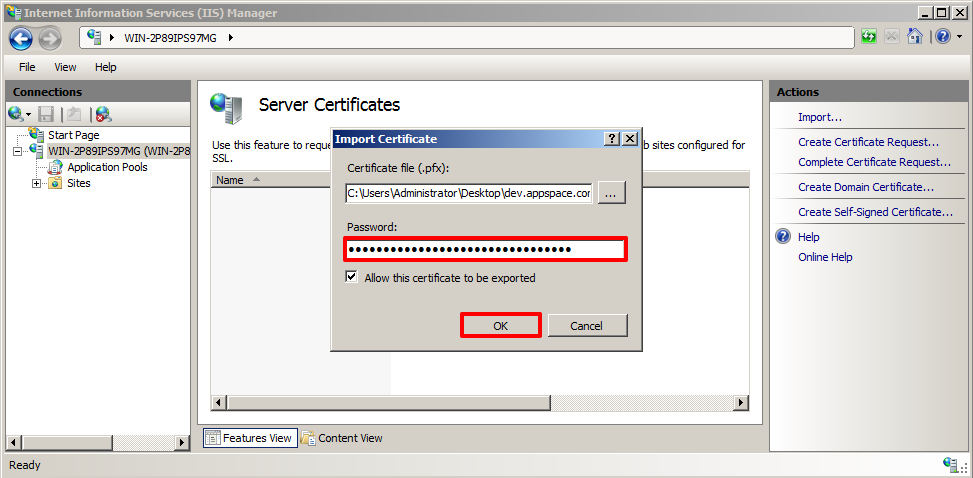
The installed SSL certificate should be visible under Server Certificates.
Step 6
From within the Connections pane, expand Sites and select Default Web Site. Under Actions (on the right-hand side) click ‘Bindings...’ to continue.

Step 7
In the Site Bindings window, click the ‘Add...’ button.

Step 8
In the Add Site Binding window, select https from the Type drop-down menu. Select the SSL certificate and click OK to add the binding. This completes the overall SSL certificate installation process.
Configuring SmartHub ASE for SSL
For each SmartHub ASE device that you wish to enable SSL operations/communication, you will need to properly configure them within the SmartHub ASE management tab.
Step 1
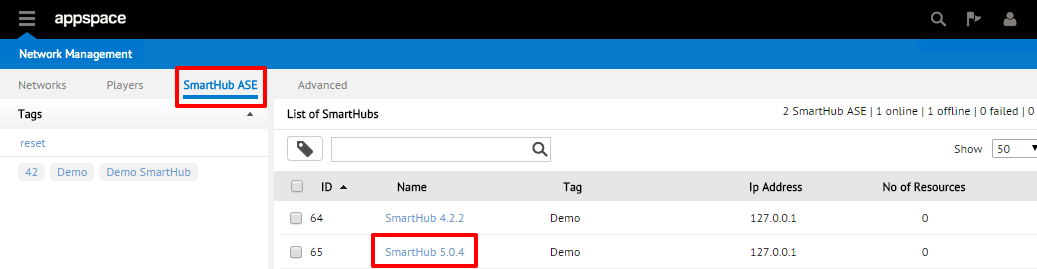
From within the Network Management extension, click the SmartHub ASE tab. This sub-tab will list all SmartHubs registered to the Appspace server. Locate the SmartHub to enable for SSL and click on its name link.
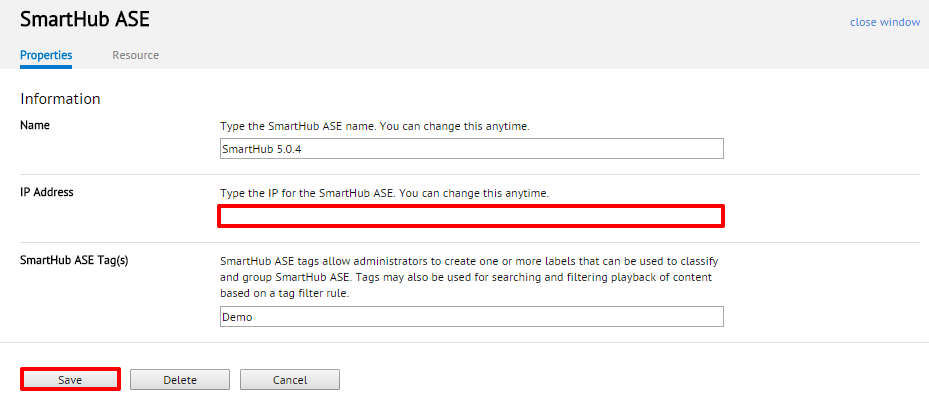
Step 2
On the SmartHub ASE properties tab, enter the DNS of the SmartHub server in the IP Address field. Click Save when finished to apply your changes. This completes the process to enable the SmartHub for SSL.