Configuring Windows Server 2008 for SmartHub ASE
Introduction
The steps in this guide will help you prepare the various resources and configurations needed for your SmartHub ASE deployment. The goal is to configure the Windows Server 2008 settings as summarized in the table below:
| Roles | Features | Local Security Policy |
|---|---|---|
| Web Server (IIS), IIS Role Services | Remote Server Administration Tools, Role Administration Tools, Web Server (IIS) Tools | Account Policies, Password Policy, Password must meet complexity requirements = Disabled, Maximum password age = 0 |
| ASP.Net | Windows Process Activation Service, Process Model.Net Environment, Configuration APIs | |
| .Net extensibility, ASP, CGI, ISAPI Extensions, ISAPI Filters | .Net Framework 3.5.1 Features, .Net Framework 3.5.1, WCF Activation, HTTP Activation, Non-HTTP Activation |
Adding Web Server (IIS) Roles
Step 1
Click on the Server Manager icon from the quick launch toolbar (or alternatively you may select it from the Windows Start menu from the Administrative Tools).

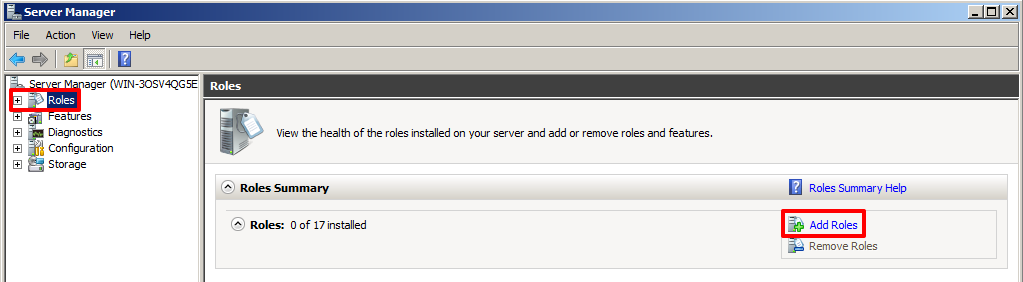
Step 2
To add Web Server (IIS) Roles, select the Roles node from the left panel in the Server Manager tree. Proceed by clicking on Add Roles in the main Roles pane.
Step 3
The Add Roles Wizard should appear. Click Next to continue.

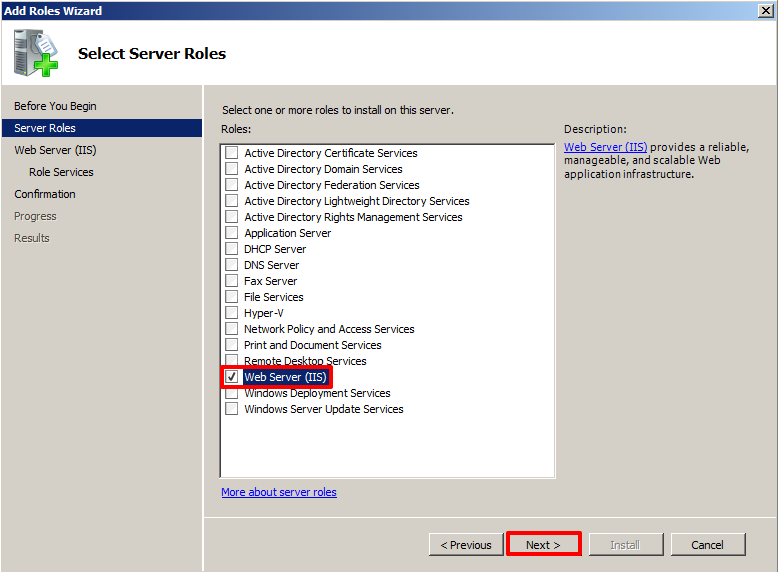
Step 4
Check the box for Web Server (IIS). Click Next to continue.
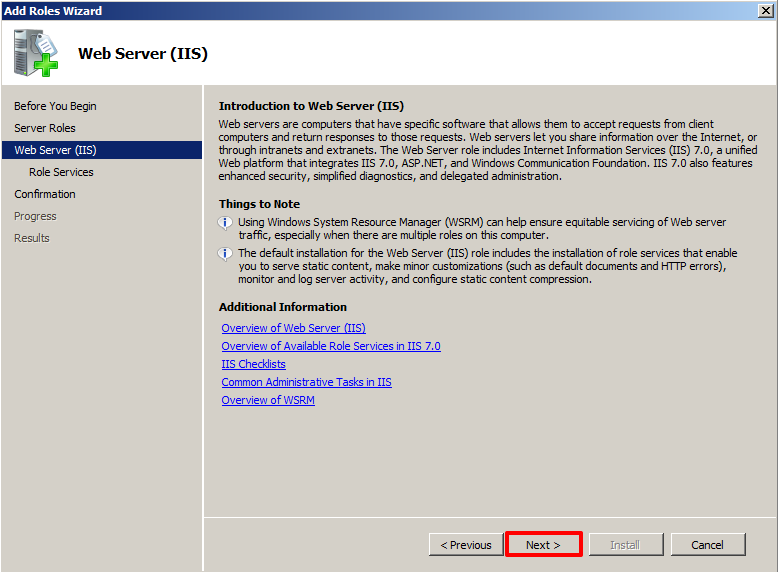
Step 5
At the Introduction to Web Server (IIS) screen, simply click Next to continue.
Step 6
At the Select Role Services screen, keep the default selections (do not make any additions or changes). Click Next to continue.

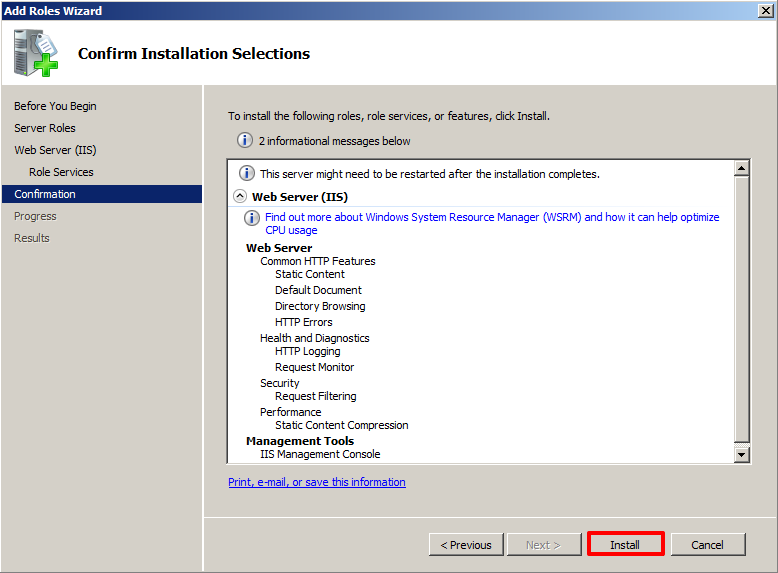
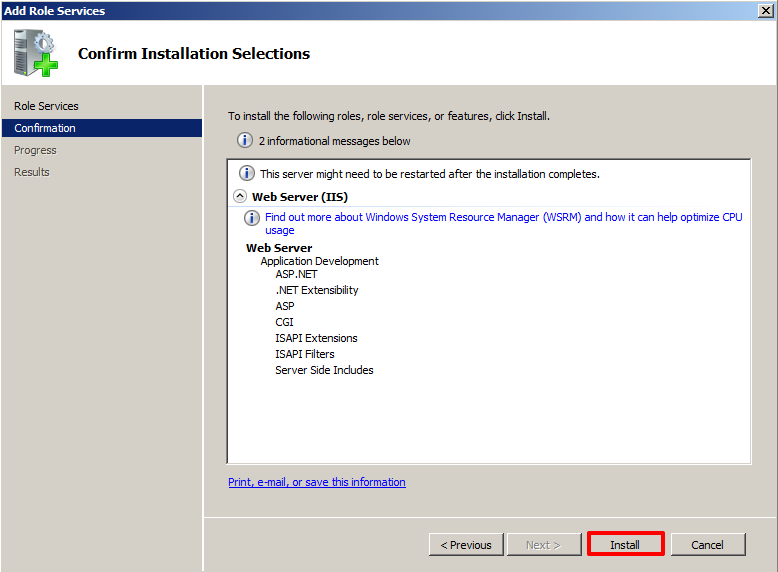
Step 7
At the Confirm Installation Selections screen, click Install to begin the installation process.
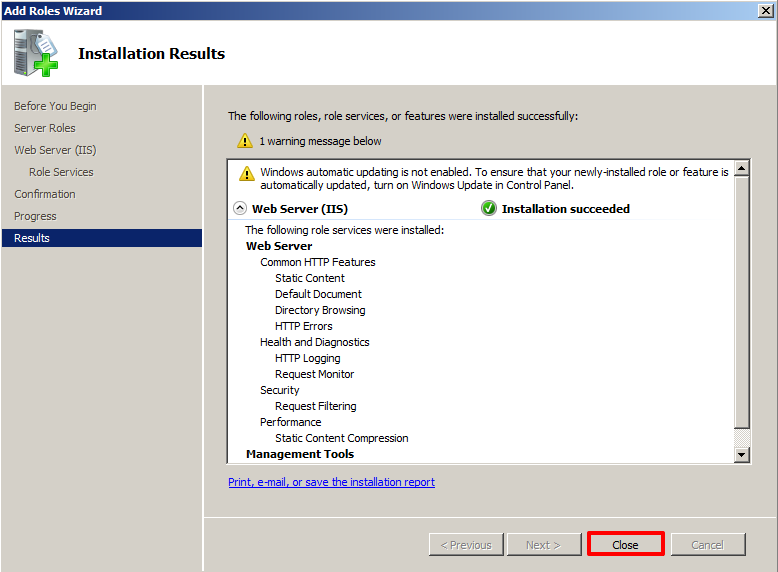
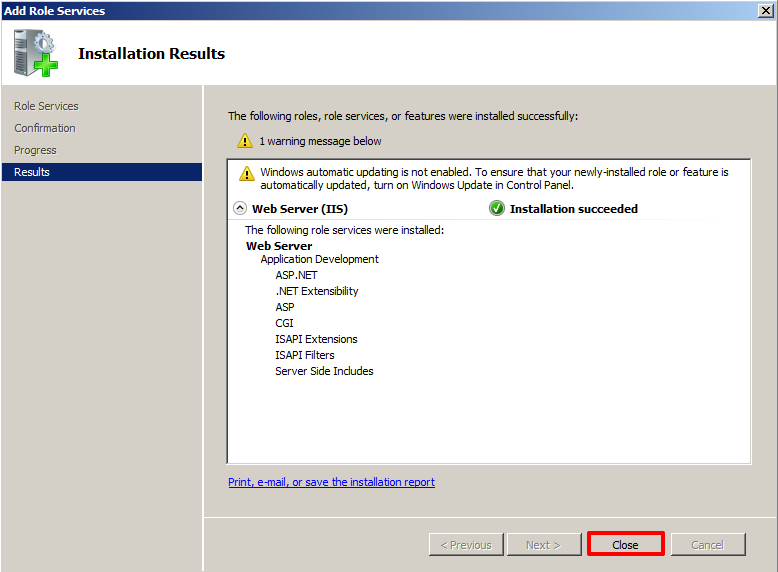
Step 8
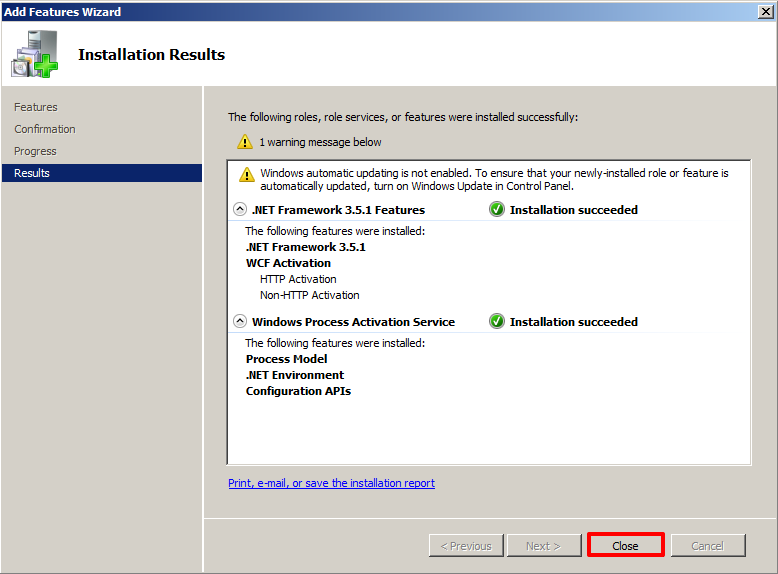
Once the roles have been installed, you will be presented with the Installation Results. Click Close to exit the wizard.
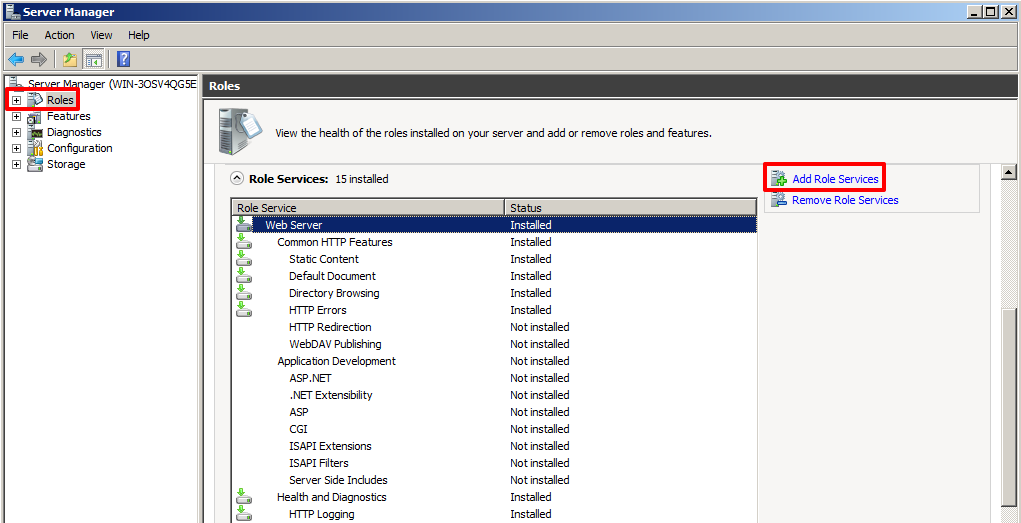
Step 9
Once the Web Server (IIS) roles have been installed, return to the Server Manager. In the main pane, scroll down in the Role Services section and you should see a listing of all installed services. The following list of services must be installed:
- ASP.Net
- .Net extensibility
- ASP
- CGI
- ISAPI Extensions
- ISAPI Filters
- Server Side Includes
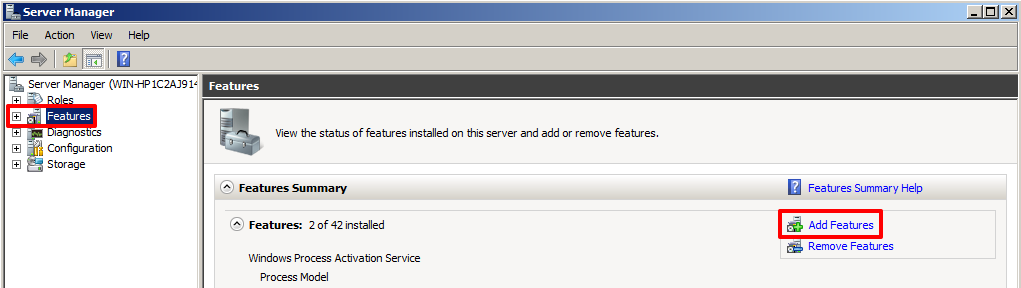
Some of these will likely be missing. Click on Add Role Services to make begin adding the missing services.
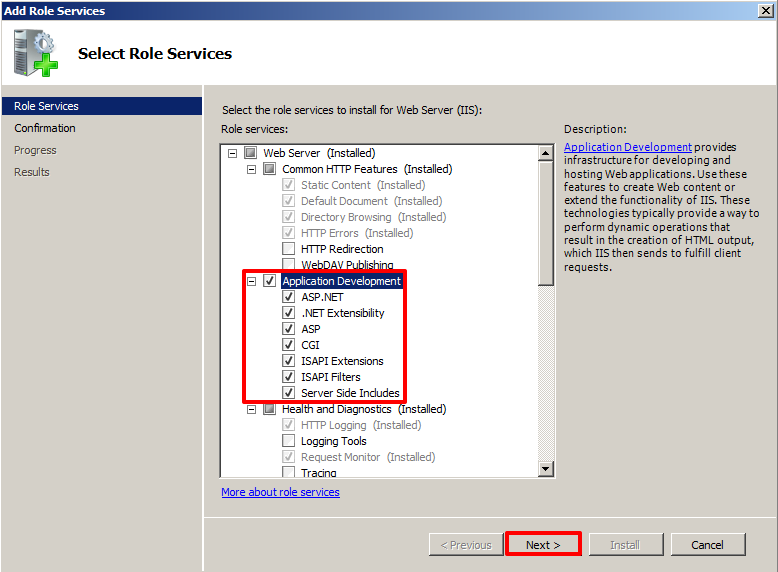
Step 10
From the Select Role Services screen, select any (all) of the missing Role Services to install by checking their respective boxes. When finished, click Next to continue.
Step 11
Confirm the installation selections and click Install.
Step 12
Once the installation has completed, you will be presented with the Installation Results. Click Close to exit.
Installing Windows Features
Step 1
Begin by opening up Server Manager if it is not already running. To install the required Windows features, select the Features node from the left pane in the Server Manager tree. The main Features pane should list all of the currently installed features. The following is a list of required features:
- .Net Framework 3.5.1 Features
- .Net Framework 3.5.1
- WCF Activation
- Non-HTTP Activation
- Remote Server Administration Tools
- Role Administration Tools
- Web Server (IIS) Tools
- Windows Process Activation Service
- Process Model
- .Net Environment
- Configuration API’s
Some of these will likely be missing. Click on Add Features to make begin adding the missing features.
Step 2
If any of the above mentioned features are missing, check the box(es) next to them on the Select Features window.


When finished, click Next to continue.
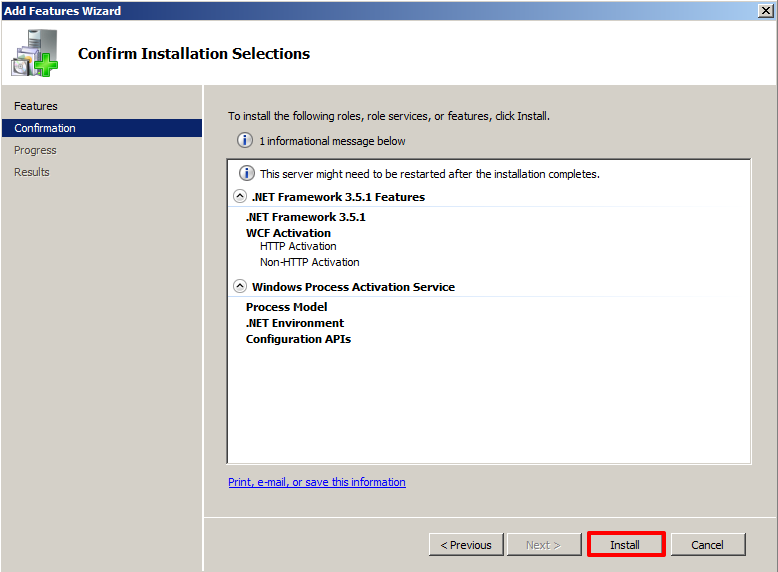
Step 3
Confirm the installation selections and click Install.
Step 4
Once the installation is complete, you will be presented with the Installation Results. Click Close to exit.
Configuring Windows Security Policies
Step 1
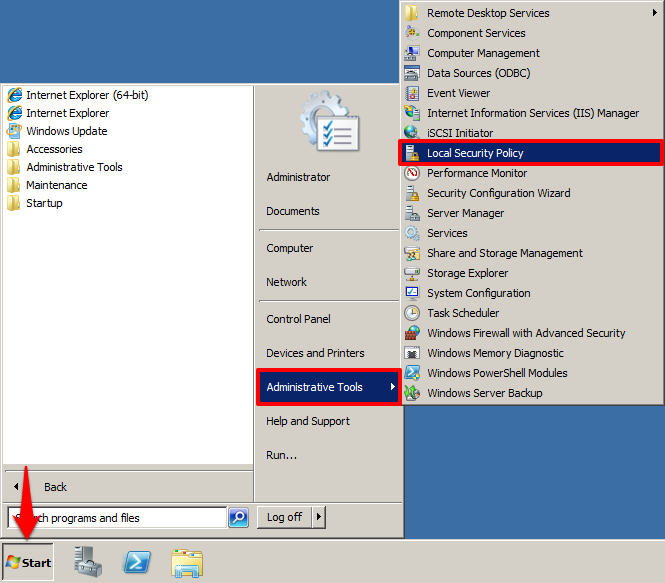
Begin by launching the Local Security Policy tool through the Windows Start menu and selecting Administrative Tools > Local Security Policy.
Step 2
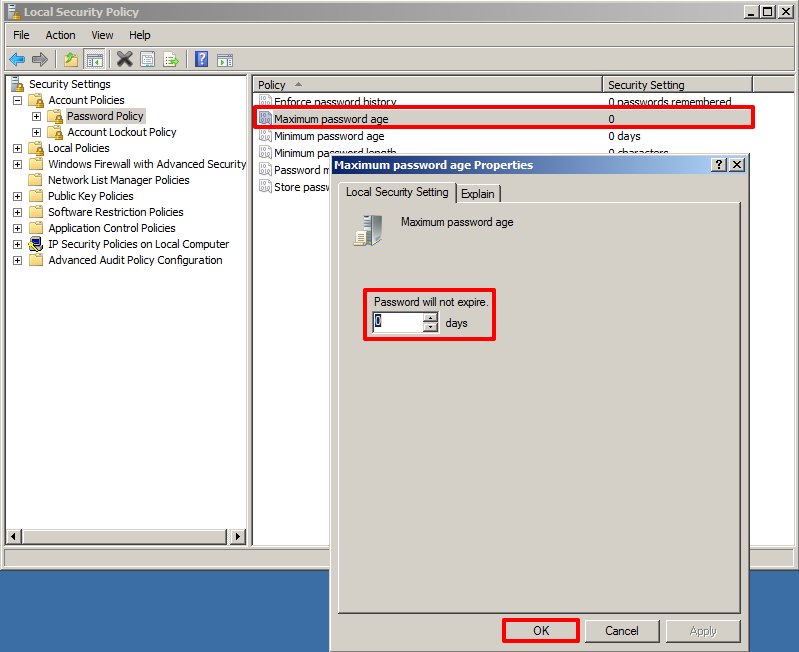
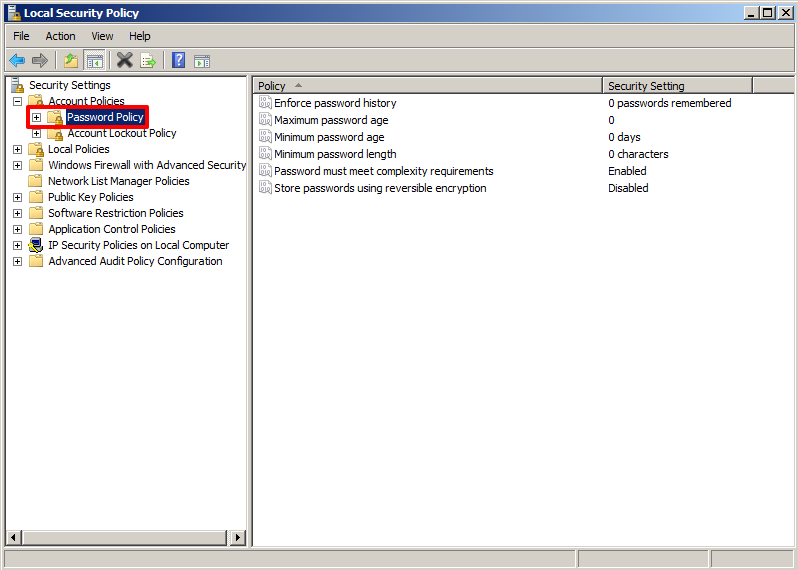
From the Security Settings tree in the left navigation pane, select the Password Policy folder (located under/within the Account Policies folder).
Step 3
Double-click on the Maximum Password Age entry to bring up the Properties page. Enter the value 0 (zero) days in the ‘Password will not expire’ field. Click OK to save the settings.