Deploying a Video Wall
Introduction
This guide covers the deployment and post-deployment configuration for both hardware setup scenarios below:
- Single, six-output device (MediaVue SureVue D6)
- Single, dual-output GPU with DVI Splitters (Nvidia GeForce GTX 760 with two Matrox TripleHead2Go splitters)
- Single, six-output GPU (ATI Radeon HD 5870 Eyefinity 6)
Deployment Scenario 1: Single, Six-output Device
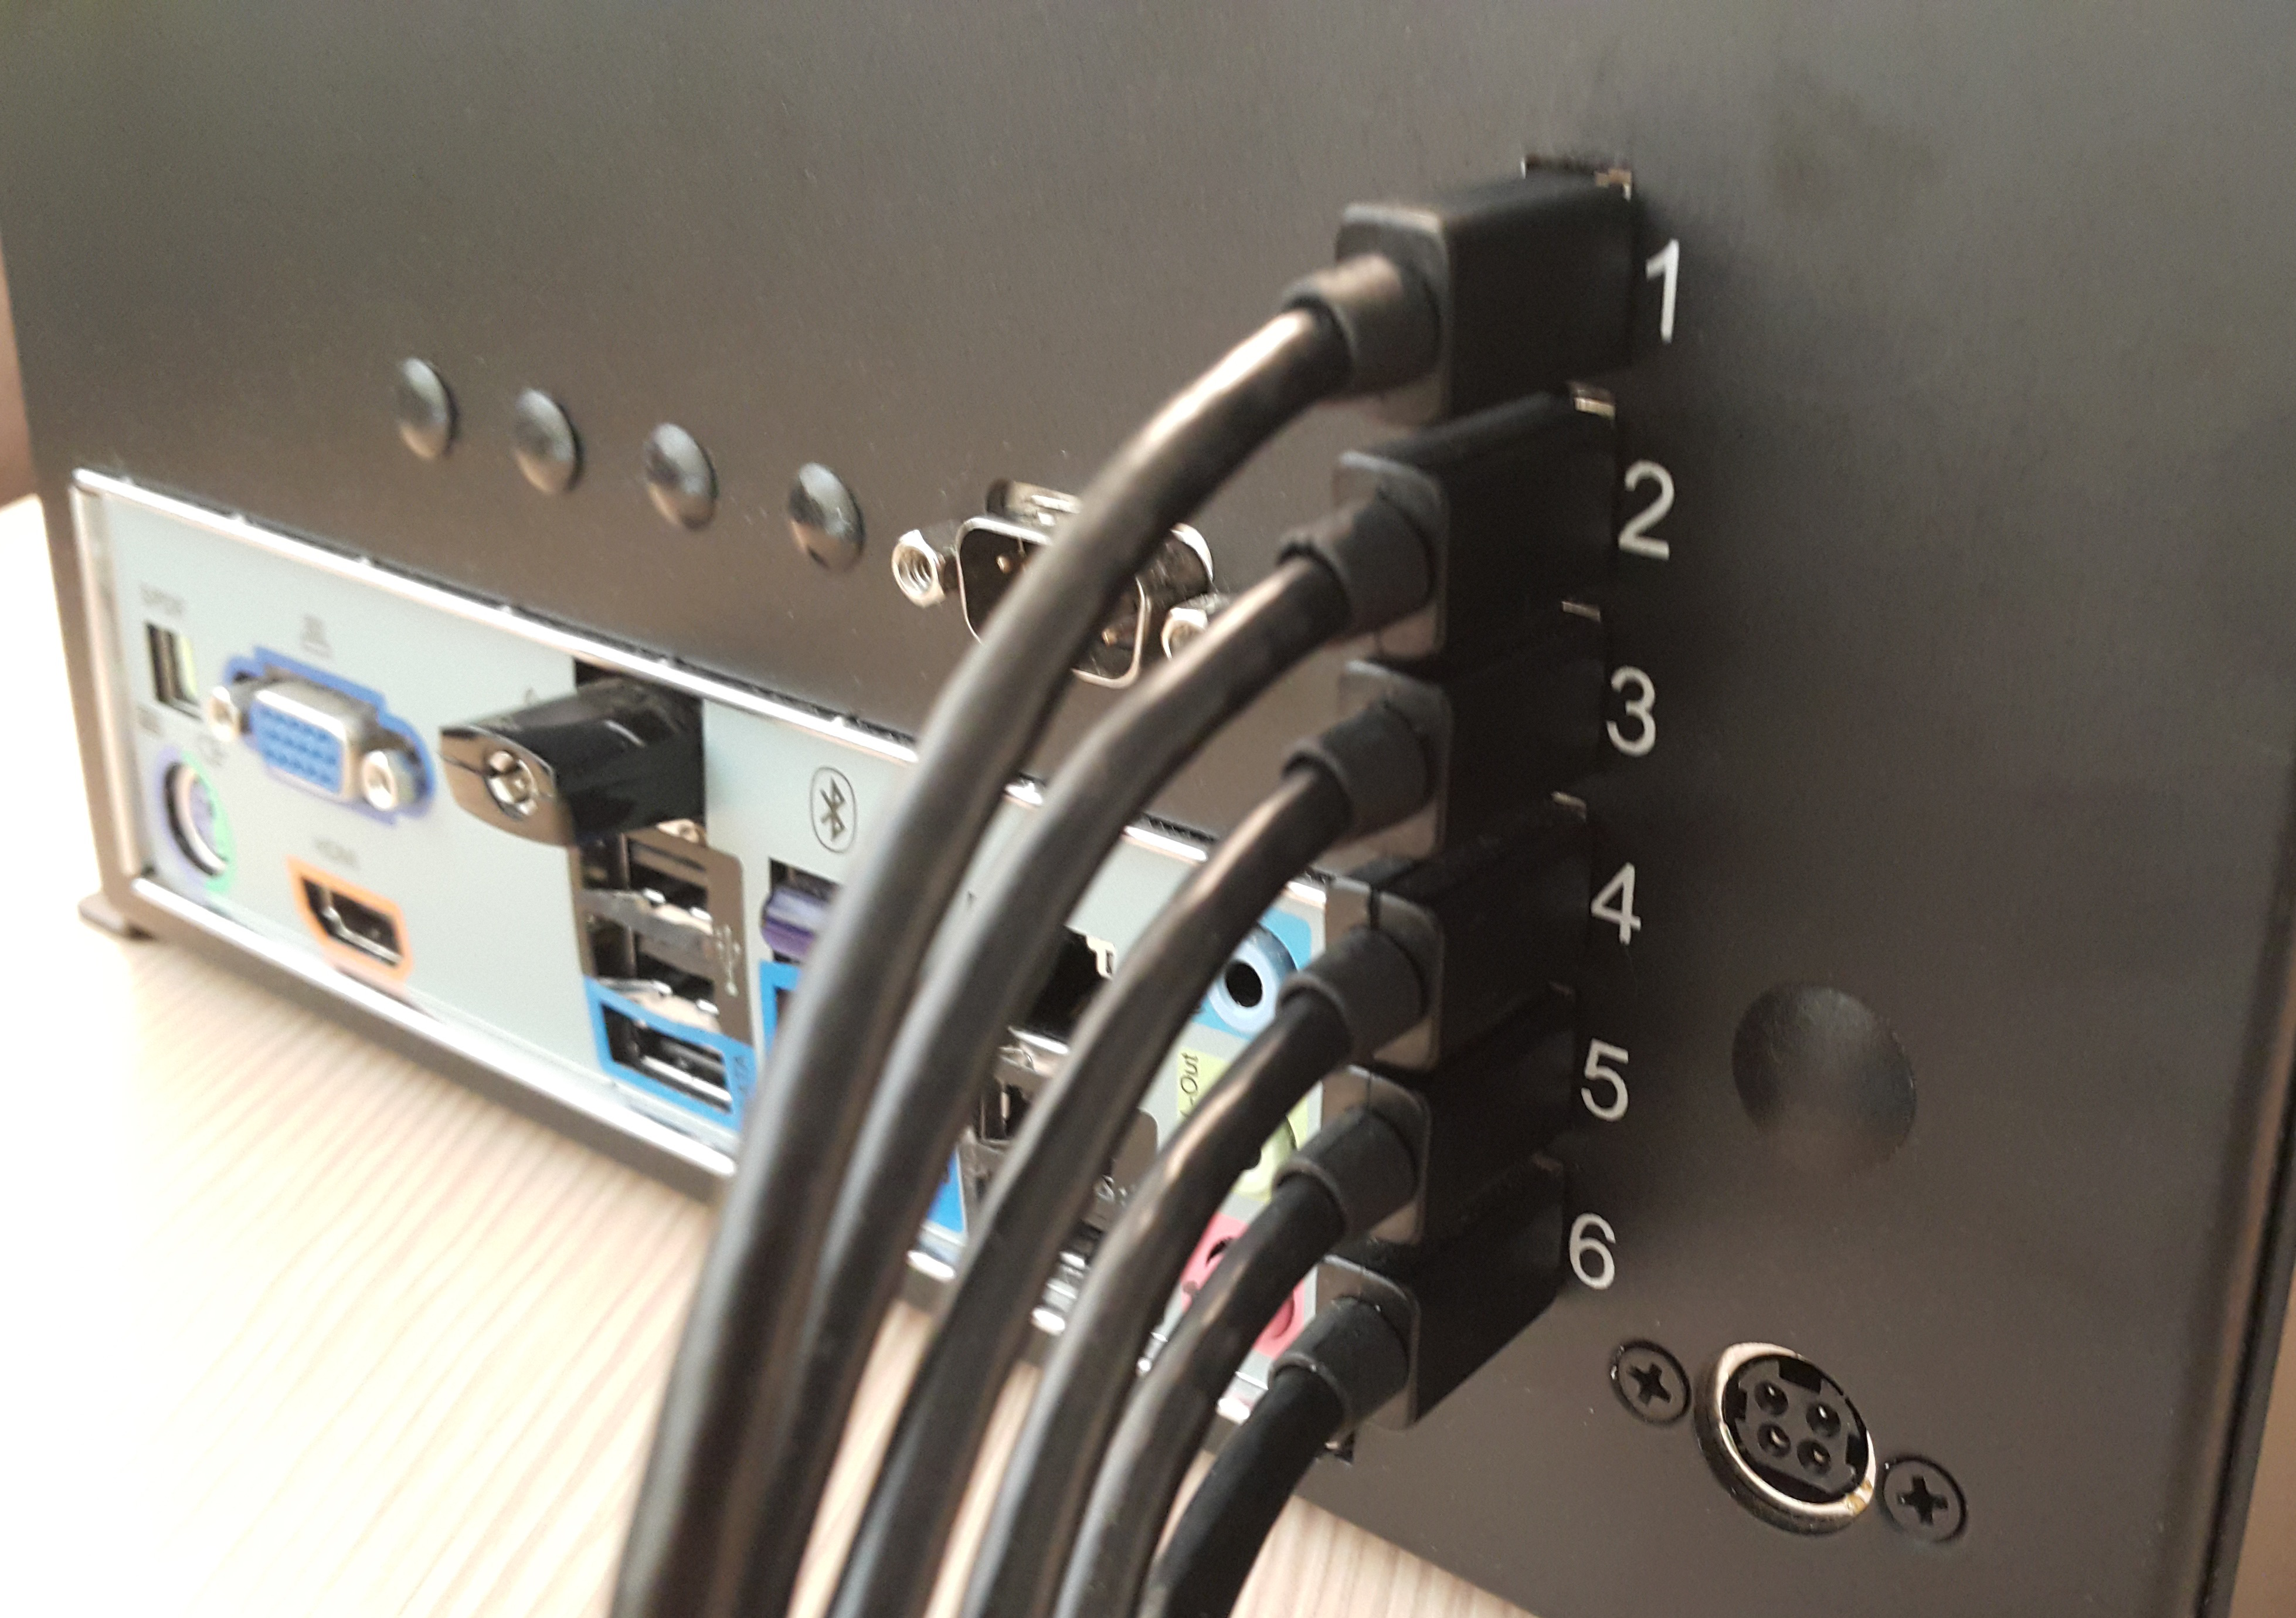
In this deployment scenario, the hardware setup utilises one MediaVue SureVue D6 to power six LCD panels, forming the 3×2 video wall.
The hardware layout will be based on the following diagram:

Step 1
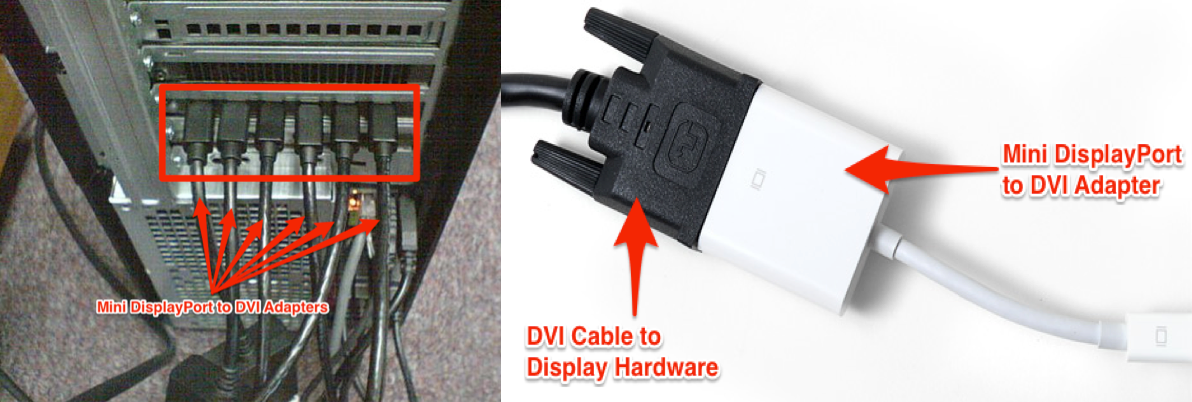
Connect all the DVI cables to to a mini DisplayPort to DVI adapter and connect al the corresponding mini DisplayPort adapter to the MediaVue SureVue D6.
Important
Please ensure that all the power cords and connections are initially turned off/disconnected to avoid accidental electrical shocks.
Step 2
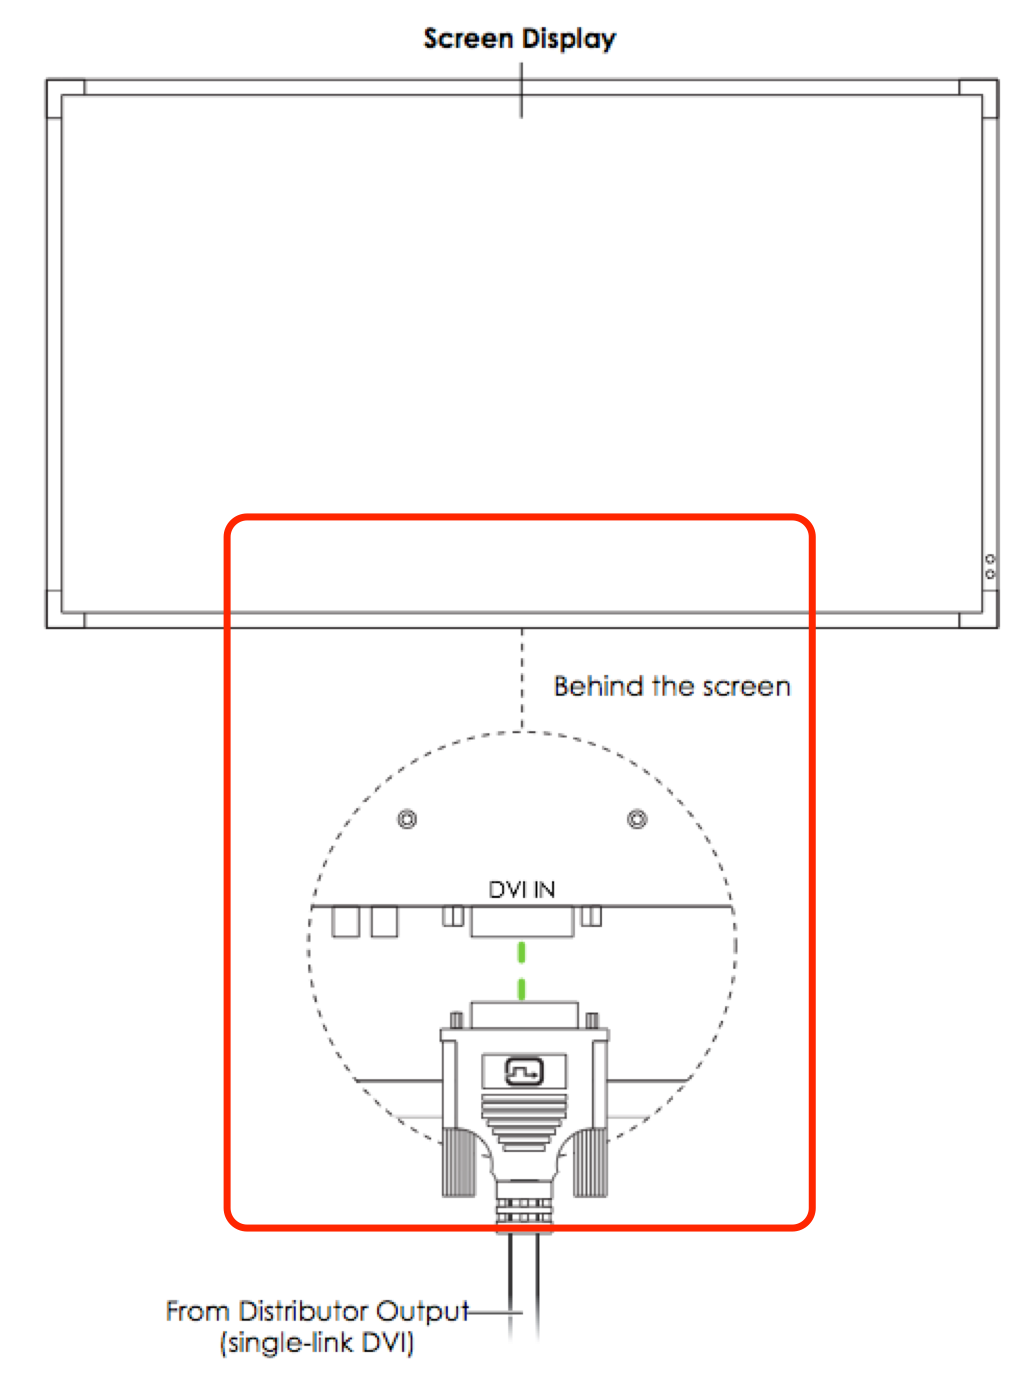
Connect all the DVI output to the the corresponding displays.
Step 3
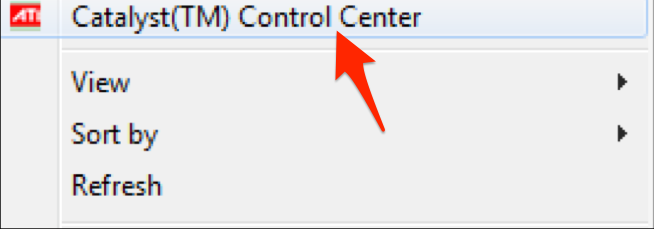
On the Windows desktop, right-click on an empty area and select the Catalyst (TM) Control Center link from the context menu.
Step 4
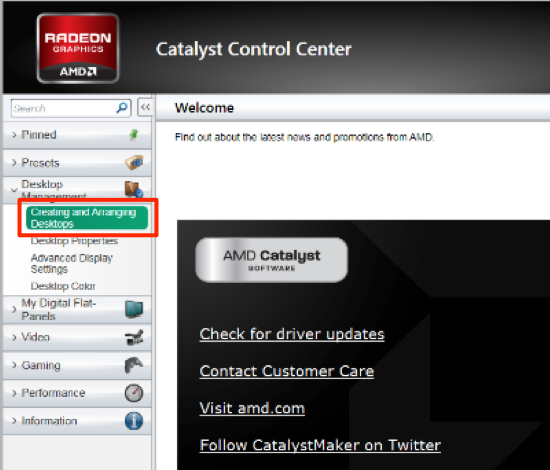
From the main window’s Desktop Management drop-down, select Creating and Arranging Desktops.
Step 5
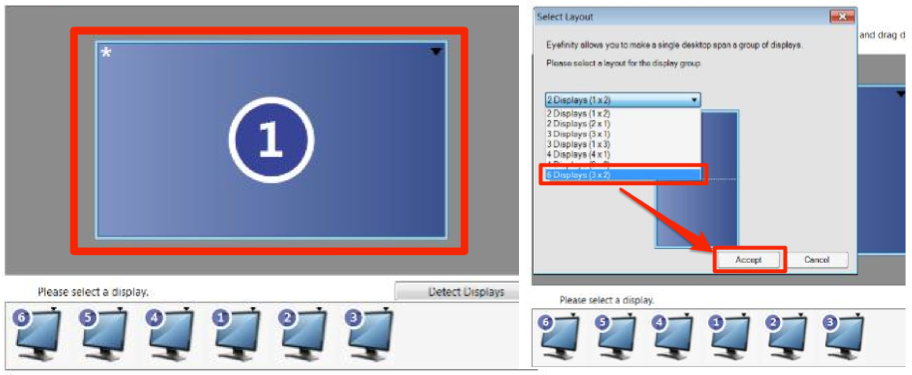
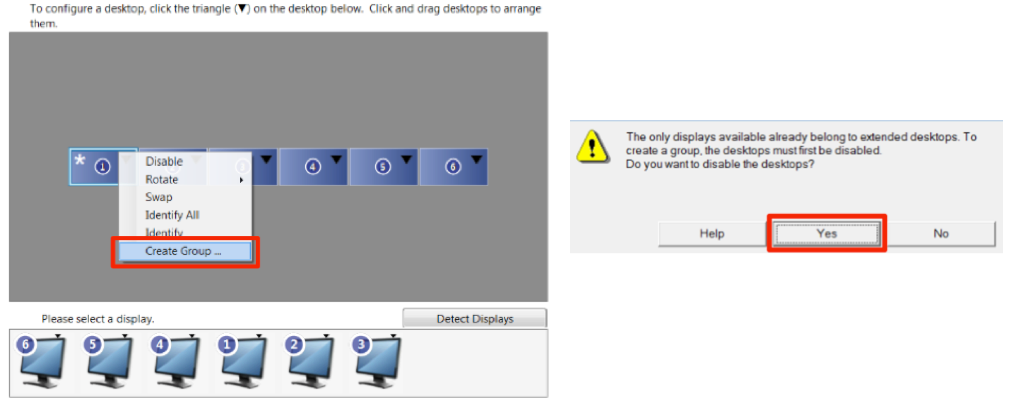
Click on the black triangle in the desktop to access the context menu, and select the Create Group menu option. A pop will appear if you have other desktops enabled, click Yes to disable them.

Step 6
A new group with 6 displays will be created. Choose the 3 x 2 layout from the drop-down list and click Accept and then Yes.
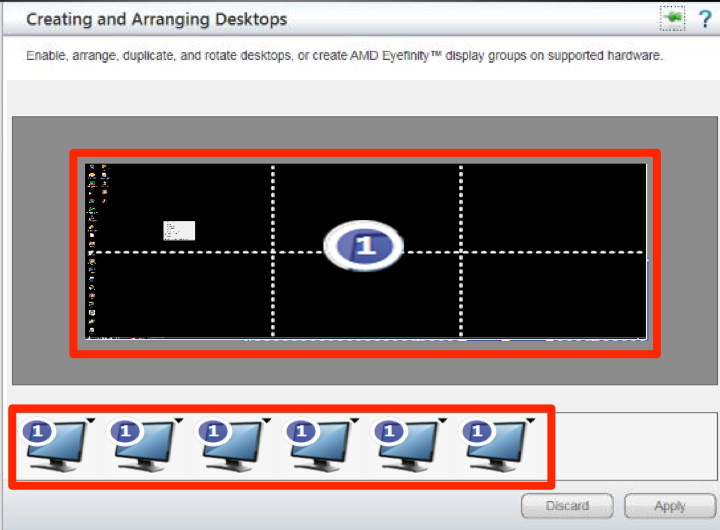
Step 7
The CCC will now tile together all the six screens into one group, forming a video wall desktop with a total display resolution of 5760 x 2160 pixels.
Deployment Scenario 2: Single, Dual-output GPU with DVI Splitters
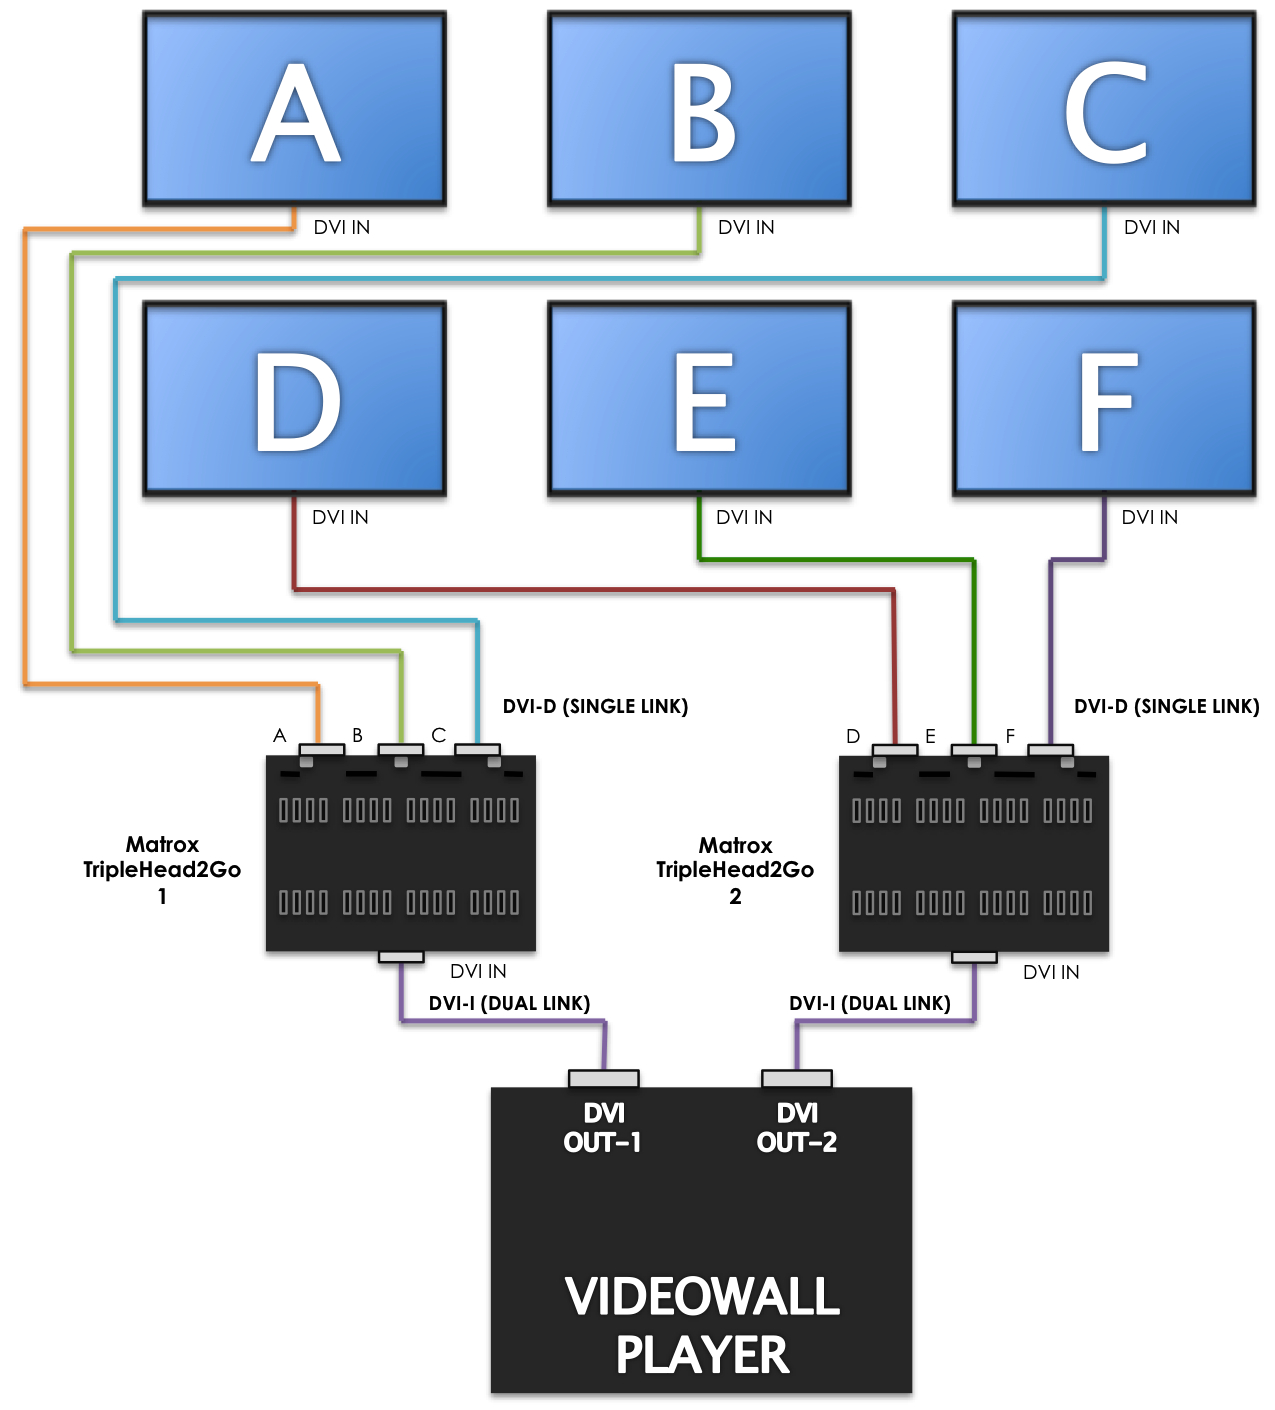
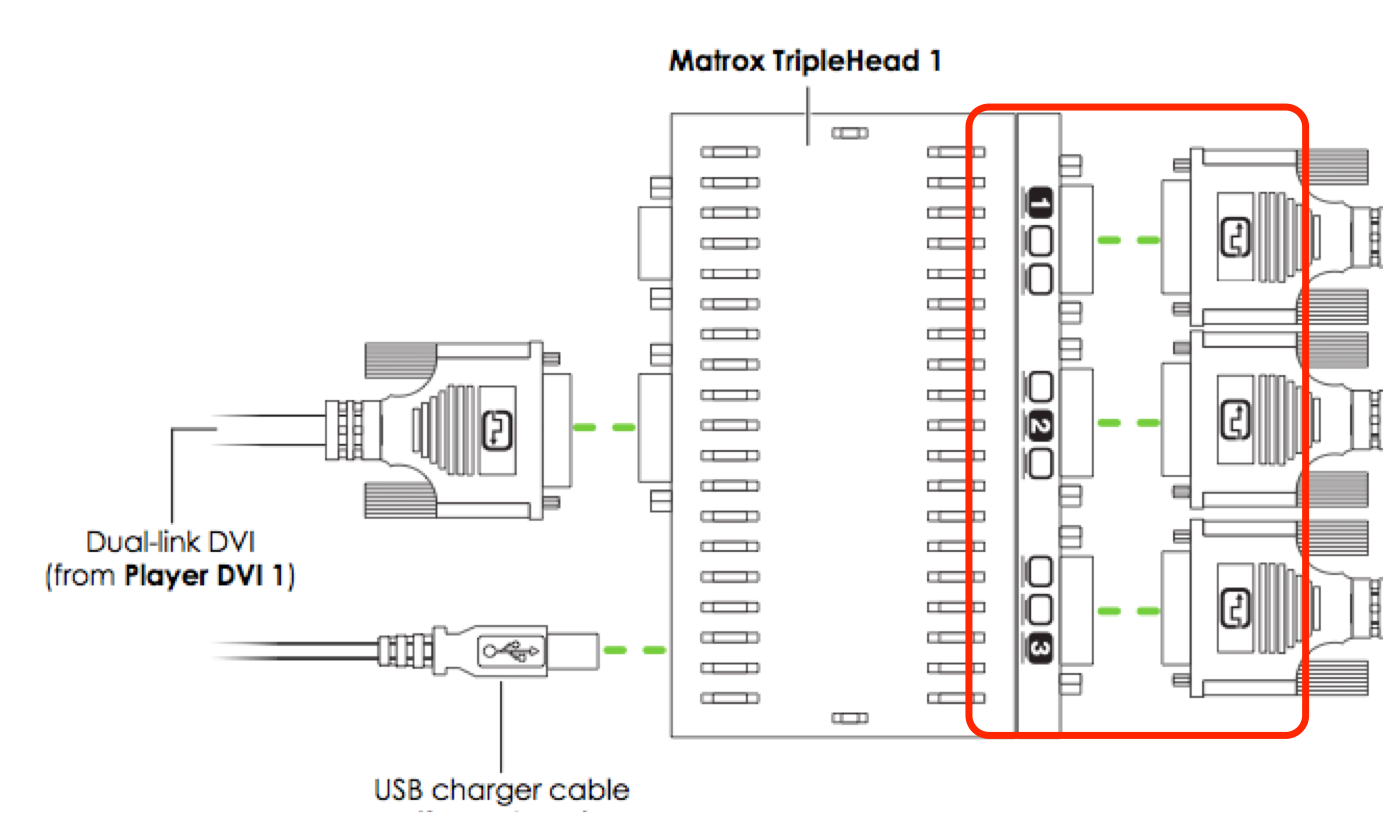
In this deployment scenario, the sample hardware configuration we’re going to use is an Nvidia GeForce GTX 760 paired with two Matrox TripleHead2Go DVI splitters.
Important
Ensure that you have downloaded and preinstalled the necessary Matrox drivers as well as the Matrox PowerDesk software.
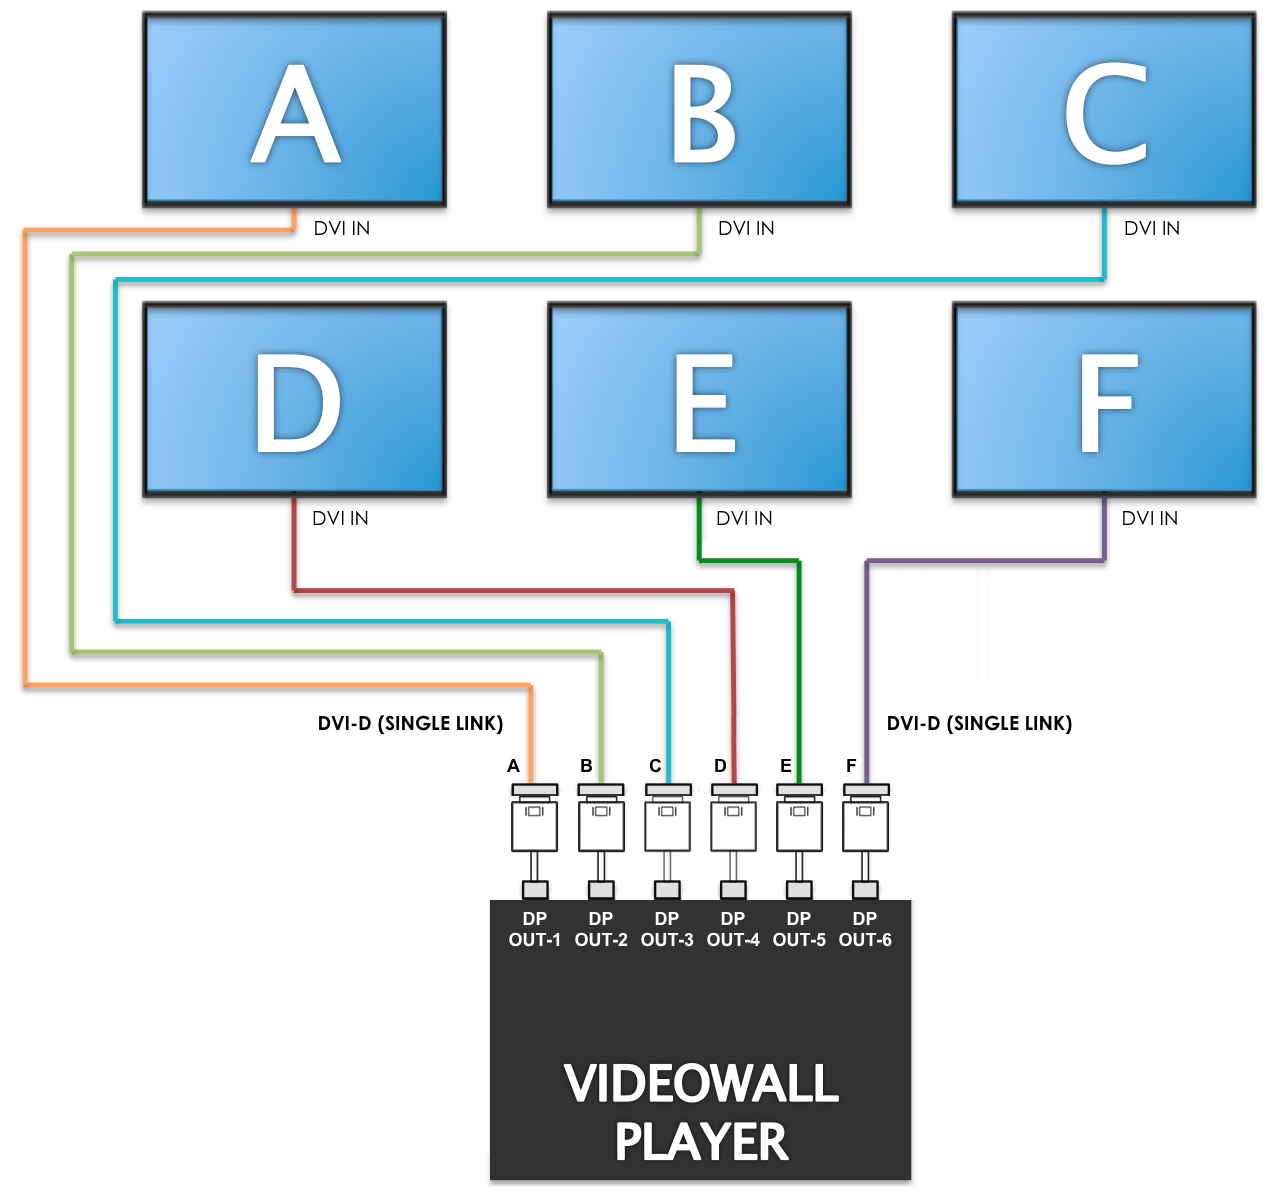
The hardware layout will be based on the following diagram:
Step 1
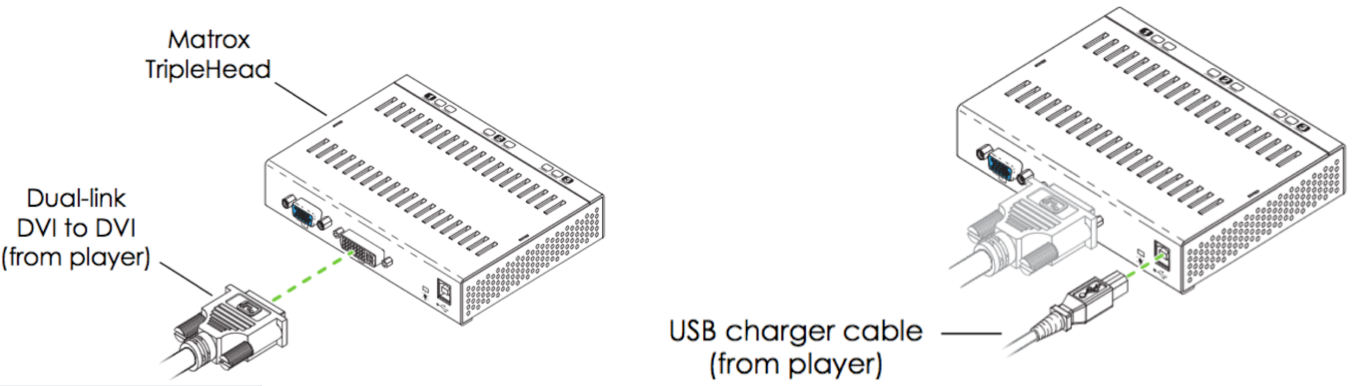
Connect the all DVI outputs from the Appspace Player’s GPU to the Matrox DVI splitter while ensuring you have an attached powered USB hub to provide power to the DVI splitter.
Step 2
You will now need to connect the outputs from each Matrox device into the input ports of the corresponding display unit.
Step 3
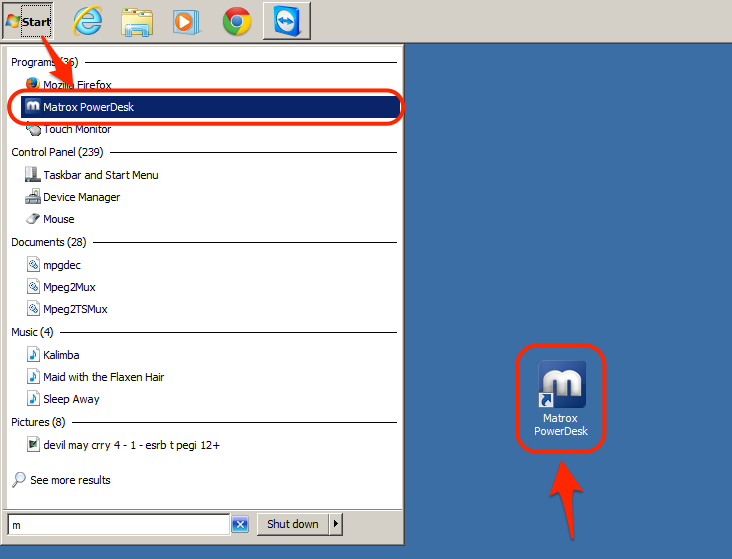
Install and launch the Matrox PowerDesk software.
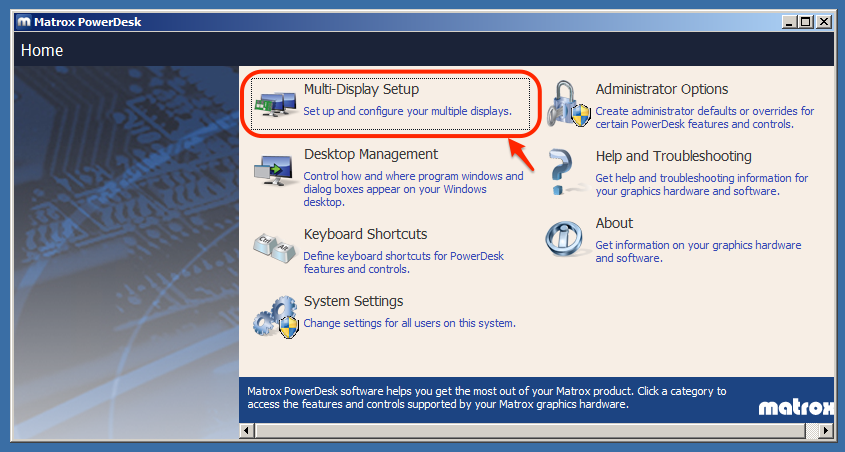
Step 4
From the main menu, select the Multi-Display Setup option.
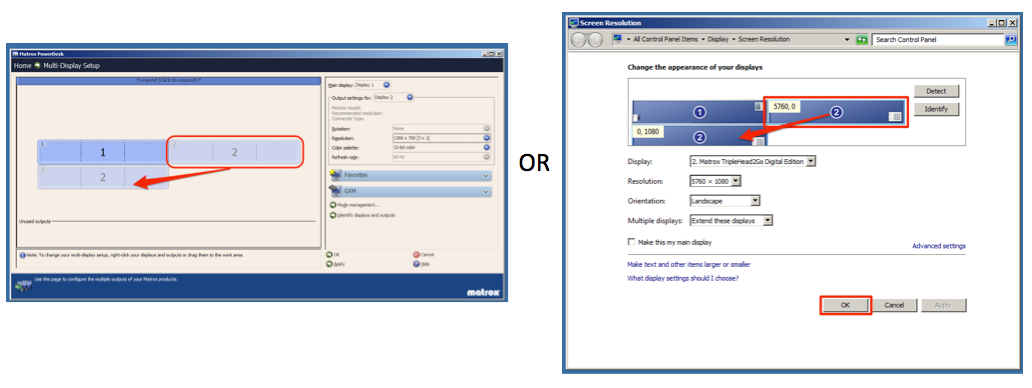
Step 5
Arrange the layout of the displays by dragging and dropping the individual screens. Alternatively, you can also reorder the displays within Windows’ Screen Resolution settings. Click OK to confirm your configuration.
Step 6
Set each display cluster to a 1920 x 1080 (3 x 1) resolution from the drop-down menu.
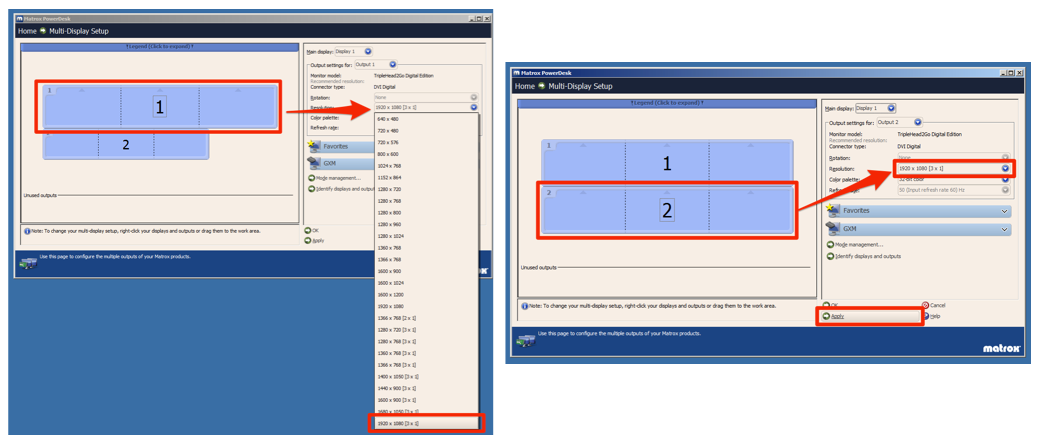
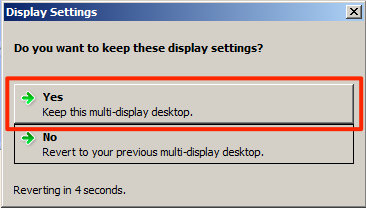
Step 7
Upon clicking apply, you’ll be prompted for confirmation. Click Yes.
Deployment Scenario 3: Single, Six-output GPU
In this deployment scenario, the sample hardware configuration we’re going to use is an AMD Radeon HD 5870 Eyefinity 6 GPU.
Important
Ensure that you have preinstalled the necessary ATI drivers as well as the Catalyst Control Center (CCC) software provided in the included installation CD for Windows to enable the usage of the hardware.
The hardware layout will be based on the following diagram:
Step 1
- Connect all the DVI cables to to a mini DisplayPort to DVI adapter and connect
- the corresponding mini DisplayPort adapter to the Appspace player’s GPU.
Important
Please ensure that all the power cords and connections are initially turned off/disconnected to avoid accidental electrical shocks.
Step 2
Connect all the DVI output to the the corresponding displays.

Step 3
On the Windows desktop, right-click on an empty area and select the Catalyst (TM) Control Center link from the context menu.

Step 4
From the main window’s Desktop Management drop-down, select Creating and Arranging Desktops.

Step 5
Click on the black triangle in the desktop to access the context menu, and select the Create Group menu option. A pop will appear if you have other desktops enabled, click Yes to disable them.
Step 6
A new group with 6 displays will be created. Choose the 3 x 2 layout from the drop-down list and click Accept and then Yes.

Step 7
The CCC will now tile together all the six screens into one group, forming a video wall desktop with a total display resolution of 5760 x 2160 pixels.

Installing and Registering the Appspace Player
Step 1
Log into your Appspace account, and select Downloads from the drop-down menu in the navigation bar and download the Appspace Media Player.

Step 2
Right click and run the installer as administrator.
Step 3
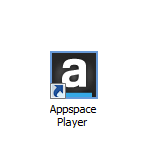
Double-click the shortcut icon on the desktop to start the player once the installation is done.
Step 4
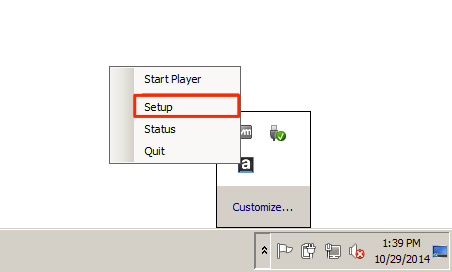
Once the player has started, a new icon will appear in the Windows taskbar, right-click the icon and select Setup.
Step 5
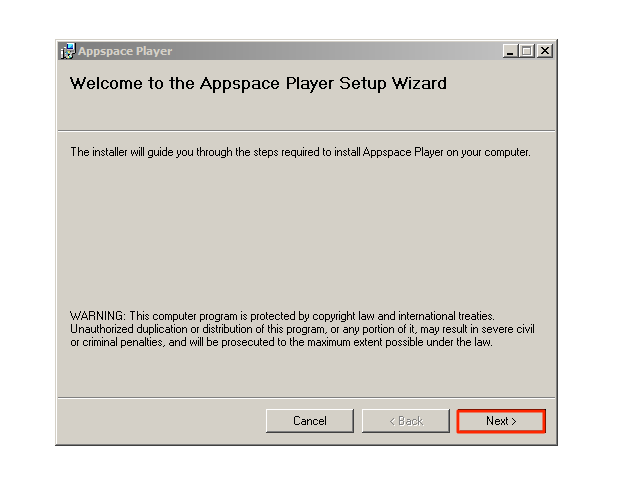
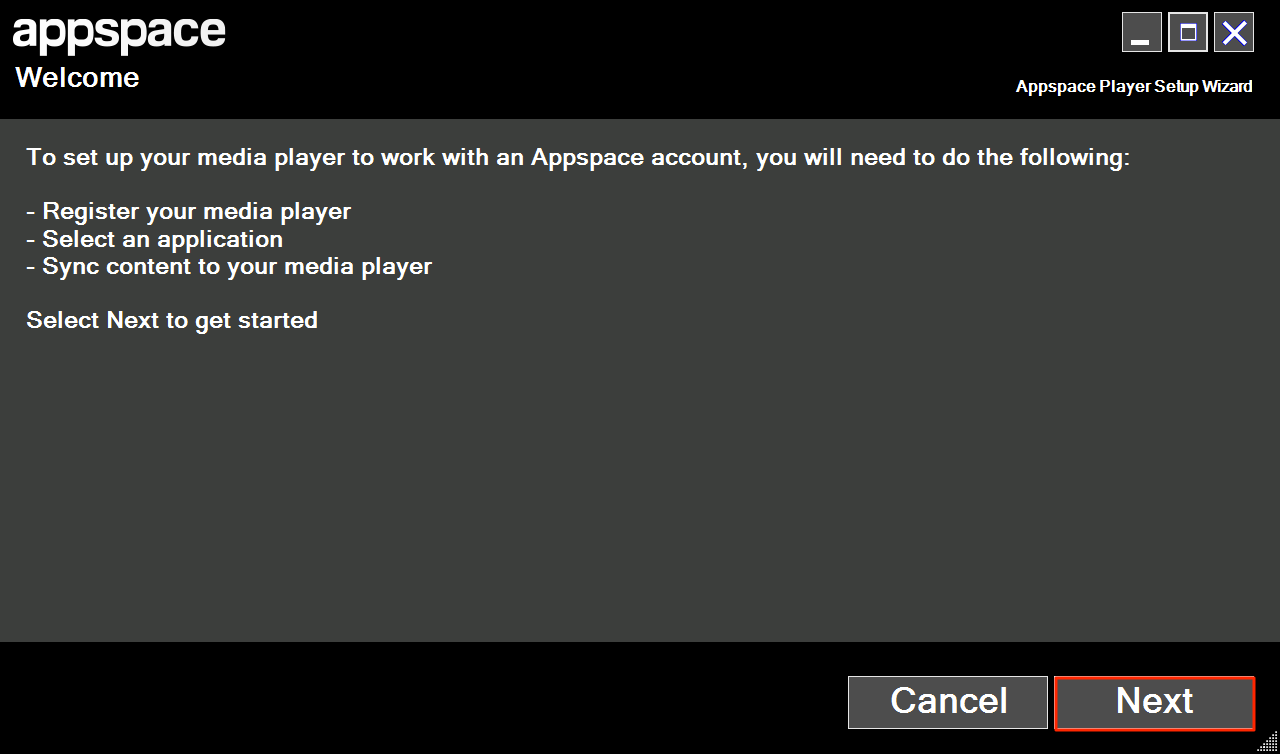
Click Next on the first page.
Step 6
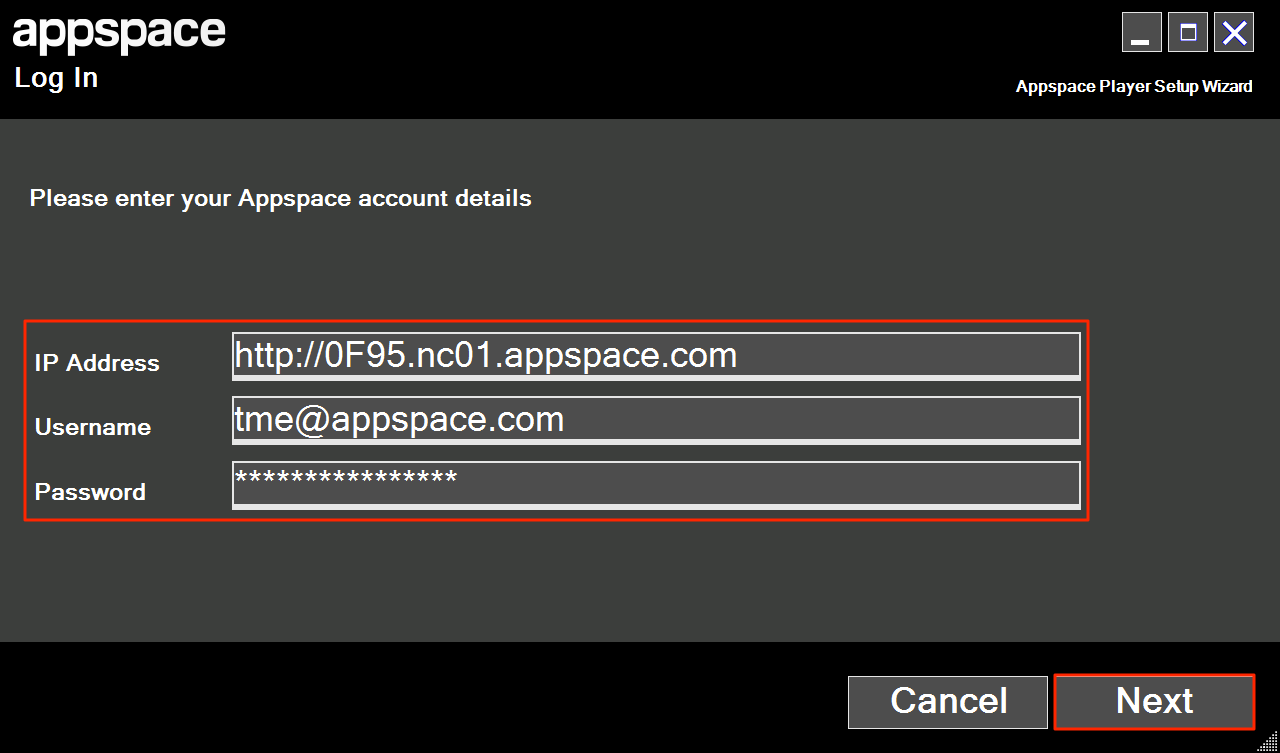
From the Log In screen, enter the URL recorded earlier (Step 1) from the Downloads page. In this example: http://03EF.nc01.appspace.com or if SSL is used https://03EF.nc01.appspace.com. Input your Appspace Cloud account username and password and click Next to proceed.
Step 7
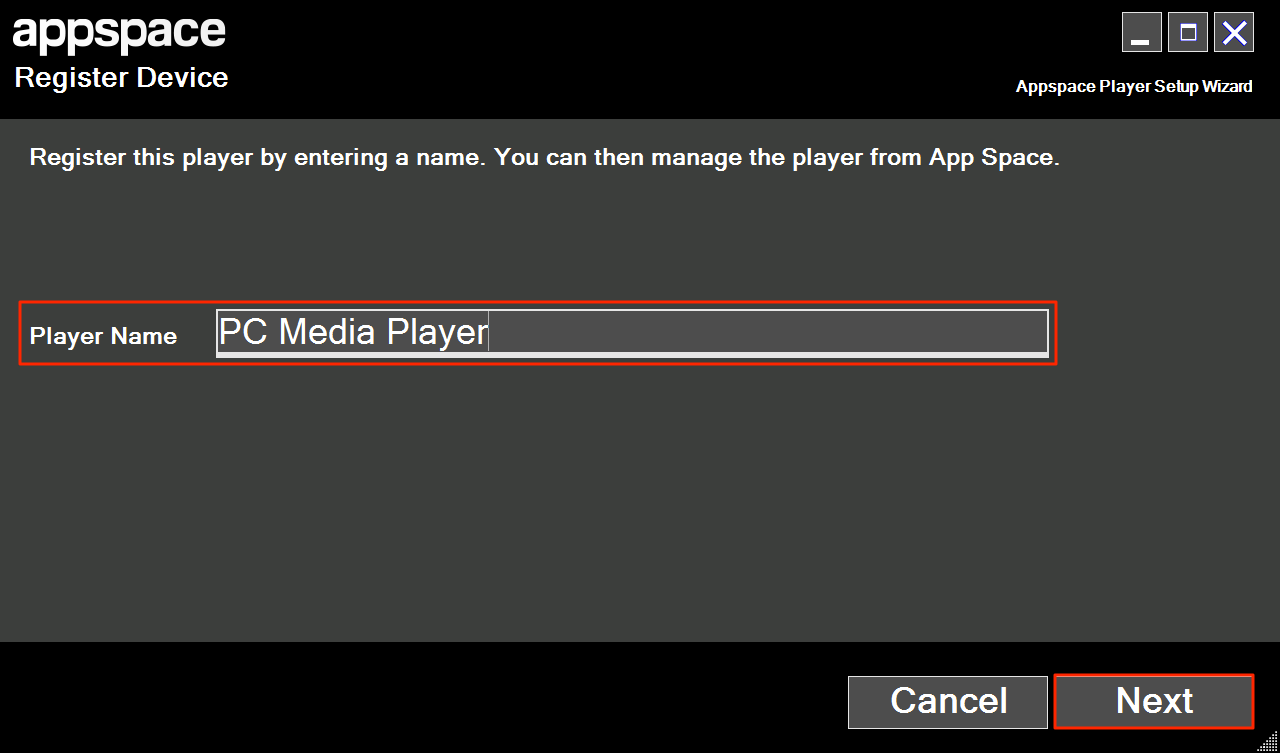
Enter a name in the Player Name field to be used to identify the PC player. Click Next to proceed.
Step 8
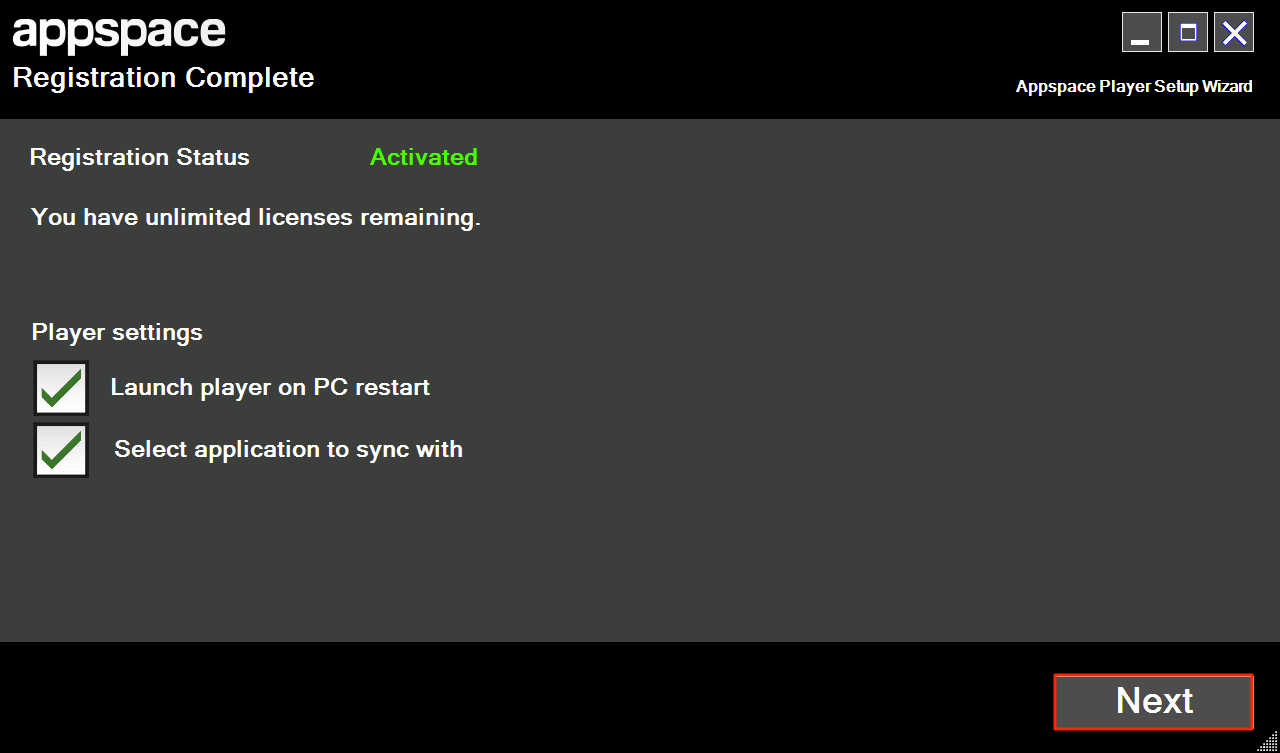
If the PC player is ready to be deployed into a production environment, check the box next to Launch player on PC restart. This ensures the application will always be launched/started even after a system reboot. Check the box next to Select application to sync with and click Next to proceed.
Step 9
Click Next on the Select Application page to start the configuration process.
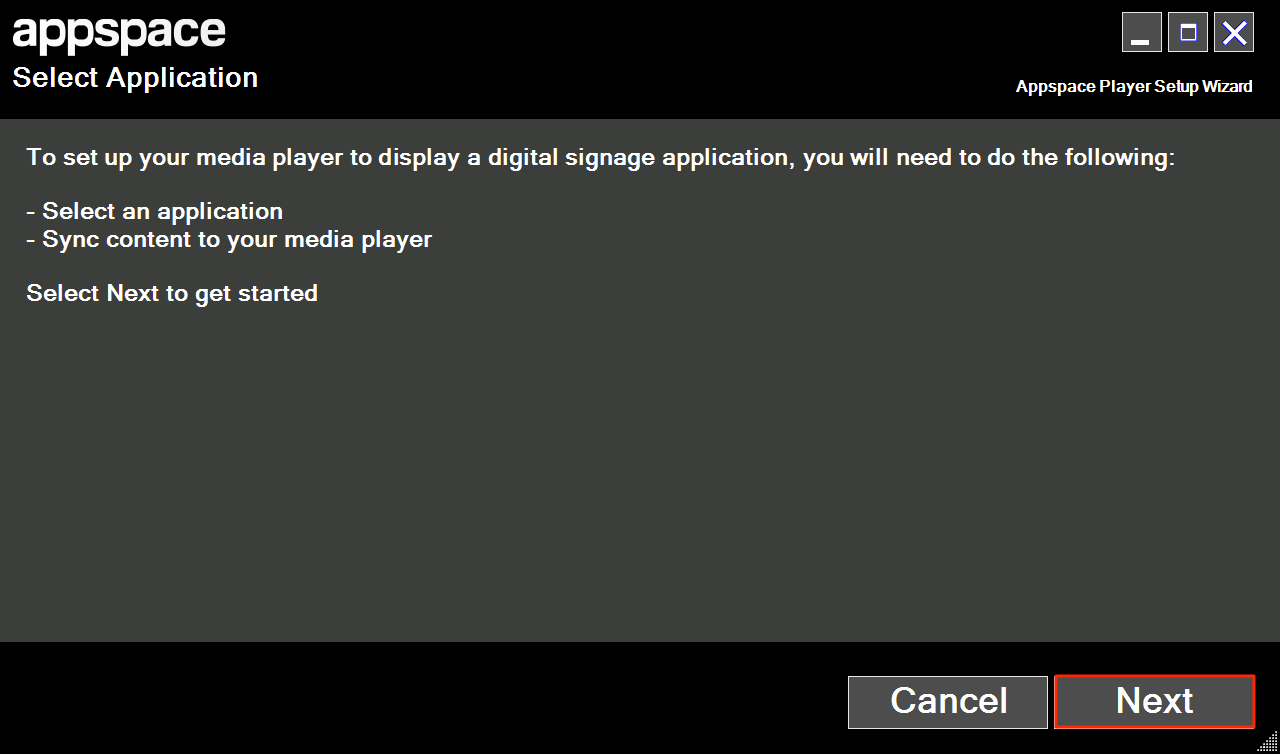
Step 10
Select the application (list is populated with applications already created in Appspace) to assign to the PC player. When finished, click Next to proceed.

Step 11
The selected application will be synced to the player with the progress bar depicting the progression. You may also optionally choose to click Sync in background to hide the window.

Step 12
When the application sync has completed, check the box next to Launch player after wizard completes to start the player after setup finishes. Otherwise, leave the box unchecked to return to the Windows desktop after setup finishes. Click Finish to complete the PC player setup wizard.
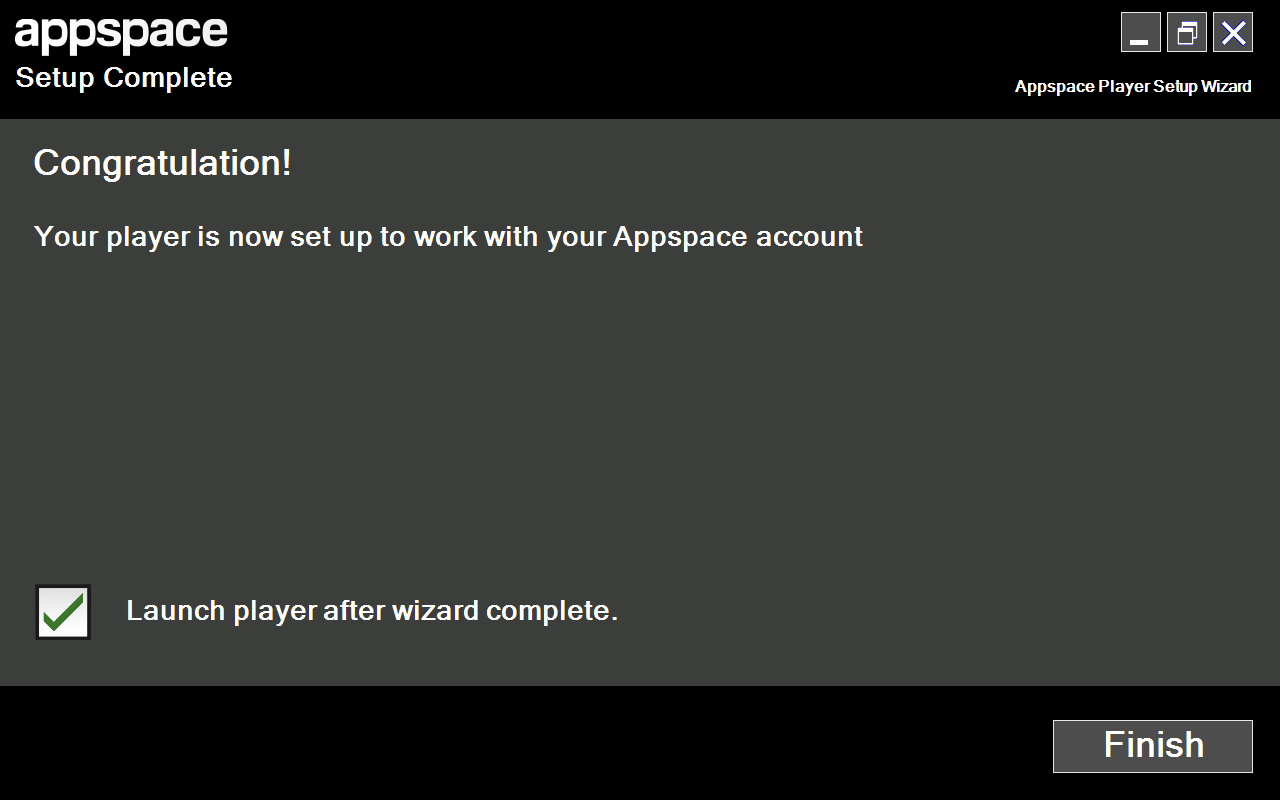
Note
the screen may be blank as it will take some time for the PC to complete its first content sync. The duration will depend on the size of the application and the network bandwidth.
Step 13
In the event that the player DOES NOT automatically start after the setup is finished you can double-click the Appspace Player shortcut icon to launch the program.

Step 14
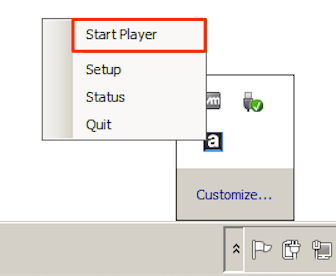
If the player does not start playing the content automatically, right-click on the player icon in the notification area of the Windows taskbar you can also select Start Player from the context menu. The player should now play the video wall app content.
Post-Deployment Appspace Player Configurations
Upon deployment, you’ll need to configure the Appspace Player as shown below:
- Disable screen saver.
- Disable hibernate option.
- Set Windows’ desktop theme to classic.
- Set the desktop’s wallpaper to a black image.
- Remove all desktop items and auto-hide the task bar.
- Turn off Windows’ auto updates.
- Set auto boot on power.
- Add appspace.com to list of trusted websites and enable pop-ups from this URL. Network firewall and proxy server must allow access to the Appspace domain URL/IP.
- For Flash player trusted location – C:FastNetV2 folder must be added.
- The user must have Local Administrator rights on the PC device. It is recommended that the installation be conducted on a stand-alone networked PC instead of a PC connected to a domain.
- Ensure that any anti-virus software or firewalls are configured to allow the Appspace PC player executable and software agent to access the network.
- Set the Appspace Player’s mode to Window (Maximized).