Managing Task Templates
Introduction
This article outlines the steps to:
- Import Task Templates
- Export Task Templates
- Create New Task Templates
- Edit Task Templates
Downloading Task Templates
A collection of pre-configured task templates (packaged together as an .admpkg file) maybe downloaded at the following link. Please follow the instructions in the following sections complete the process of importing the downloaded task templates. This set of ADM templates is compatible for any Appspace server version that is 5.0.2.2 and later.
Collection of Advanced Device Manager task templates: click here to download
Importing Task Templates
It is possible for administrators to import new templates from other ADM sources. This simplifies the process of sharing complex commands, parameters or transform combinations as the data can be easily migrated out of one Appspace instance and into another via this method.
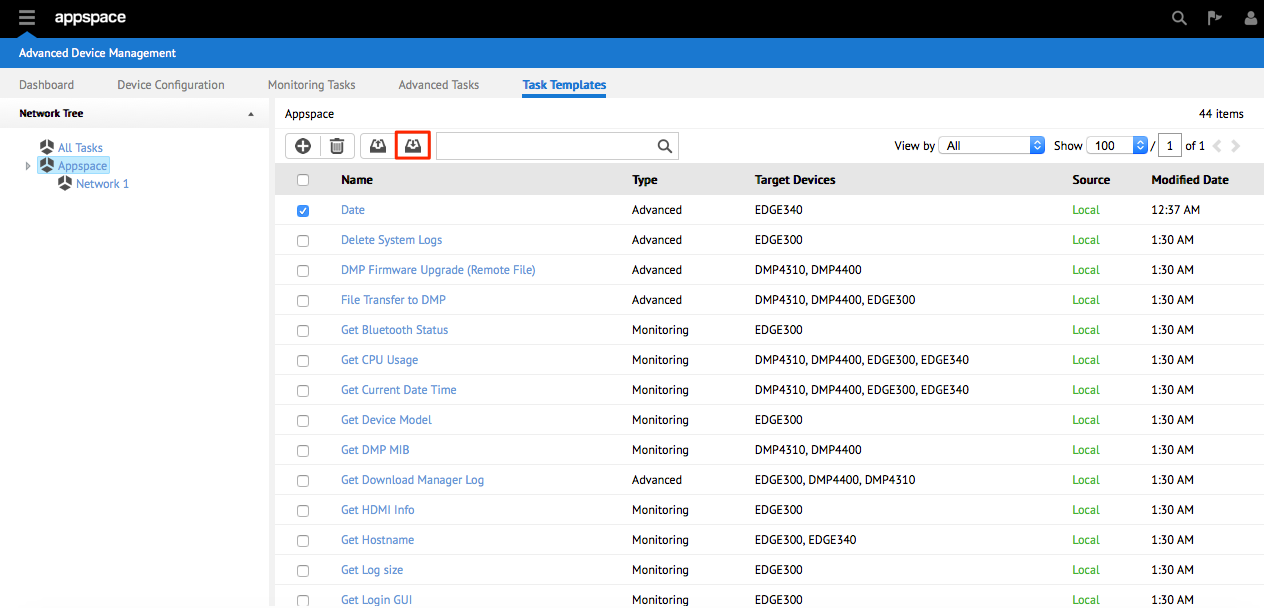
Step 1
From the Task Templates tab, click the Import button.
Step 2
Click the Browse button and locate a task from your local hard drive to upload.
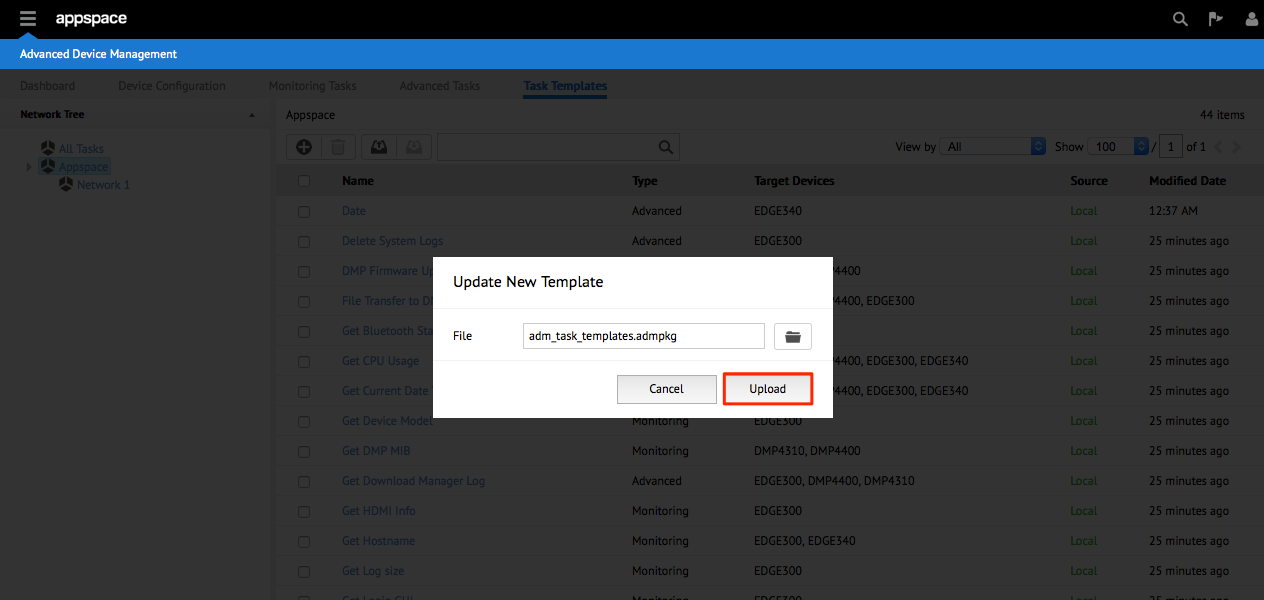
Note
When importing, always ensure that the task package is a valid .admpkg file generated by the extension, and not an externally modified file.
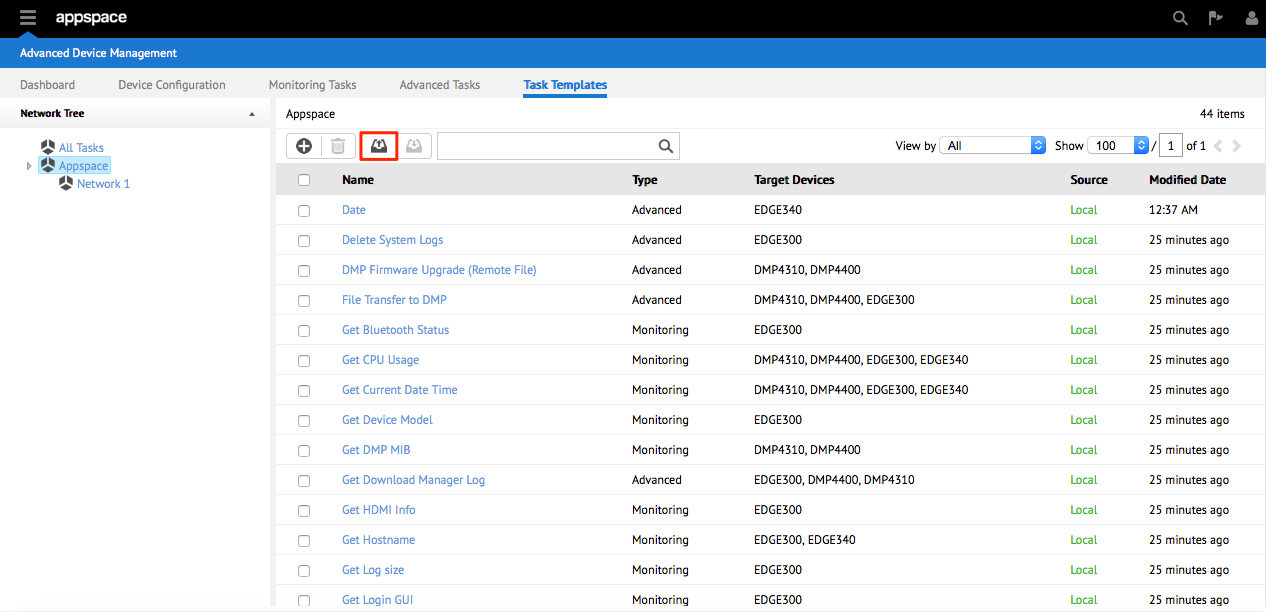
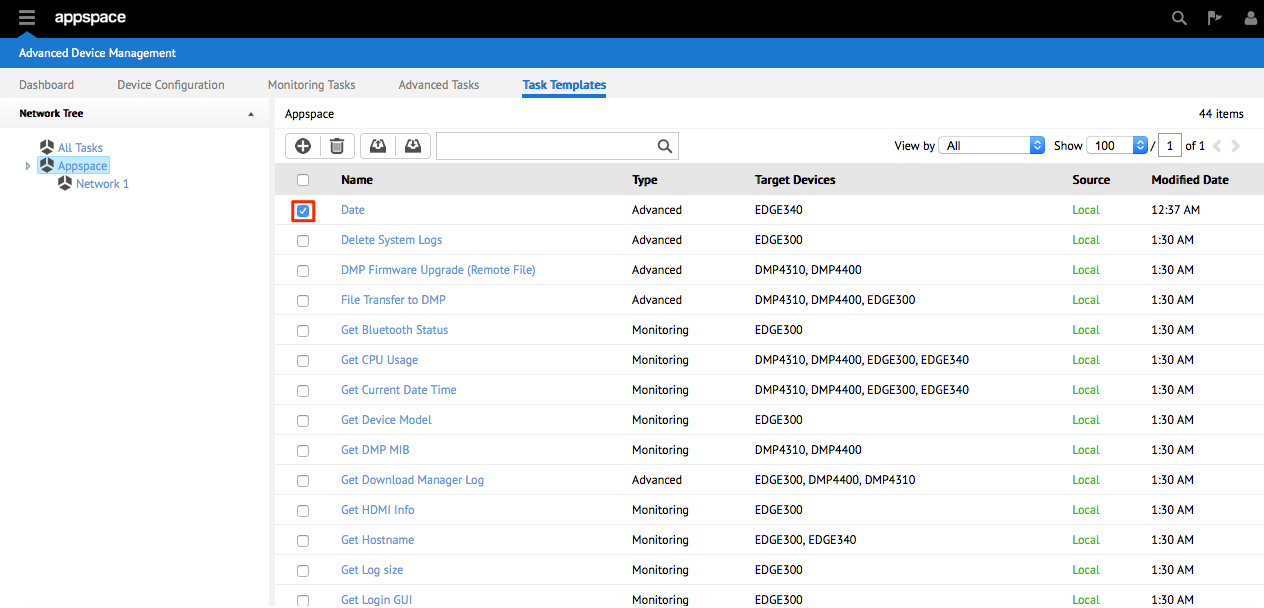
Exporting Existing Templates
The ADM extension makes it possible for administrators to export existing tasks. This makes it easier to share specific device commands, parameters or transform combinations as a task can become very custom or complex.
Step 1
From the Task Templates tab, check the box next to the Name of the template that you would like to export.
Step 2
Click the Export button and select a suitable location to save the exported file to your local hard drive. The file will now be available on your computer, with the extension .admpkg as the file type.
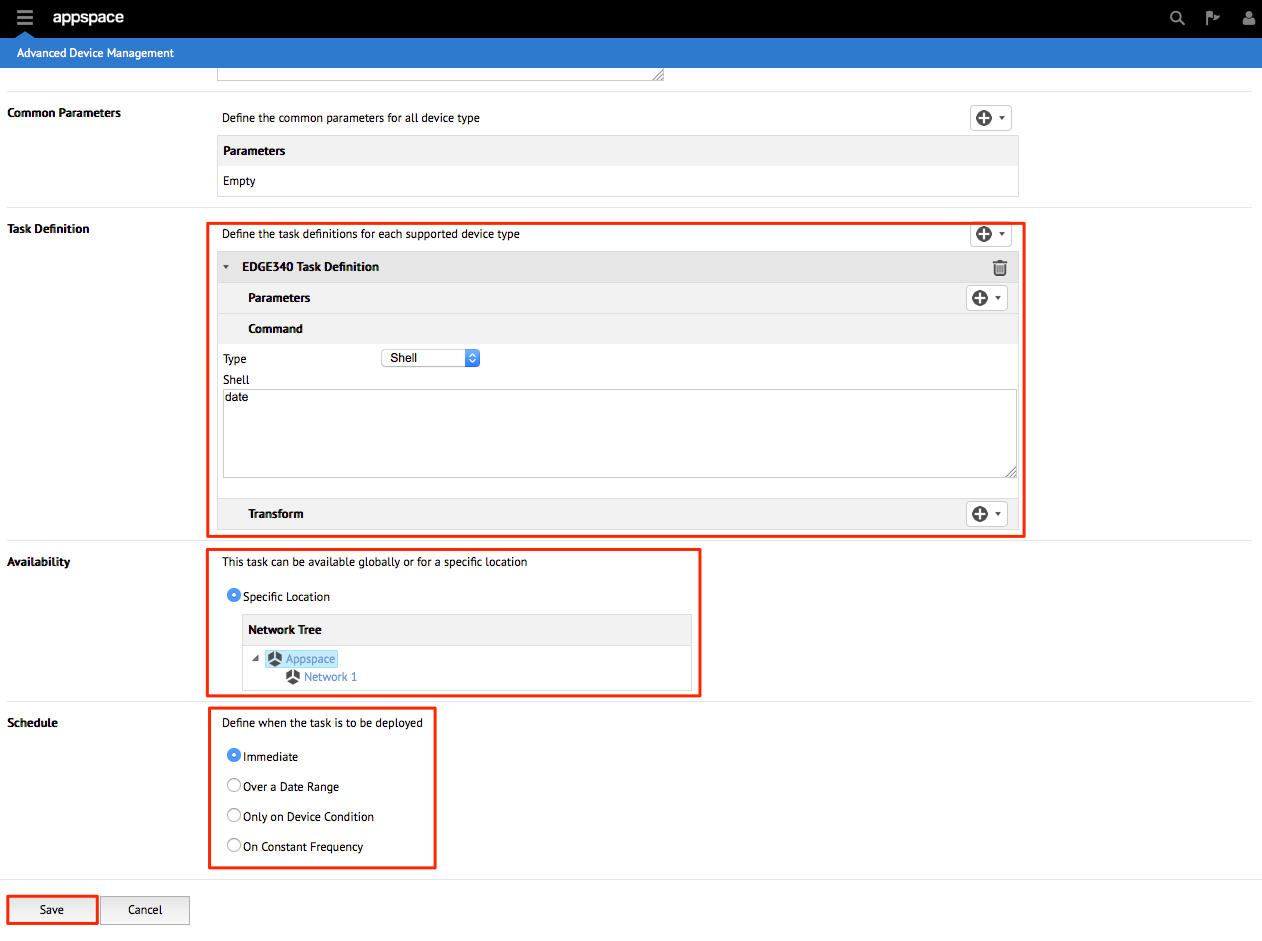
Creating New Templates
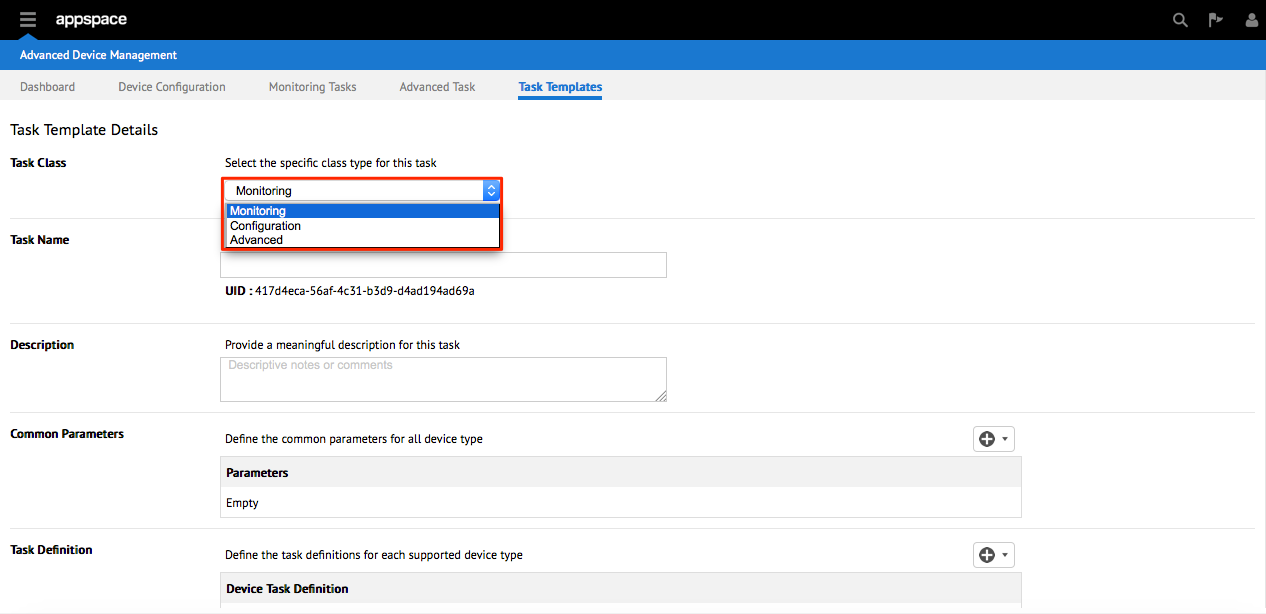
Step 1
From the Advanced Device Management extension, select the Task Templates tab. Click on the Add + icon to begin adding a new Task Template.

Step 2
Choose a class type for the task (Monitoring, Configuration or Advanced).
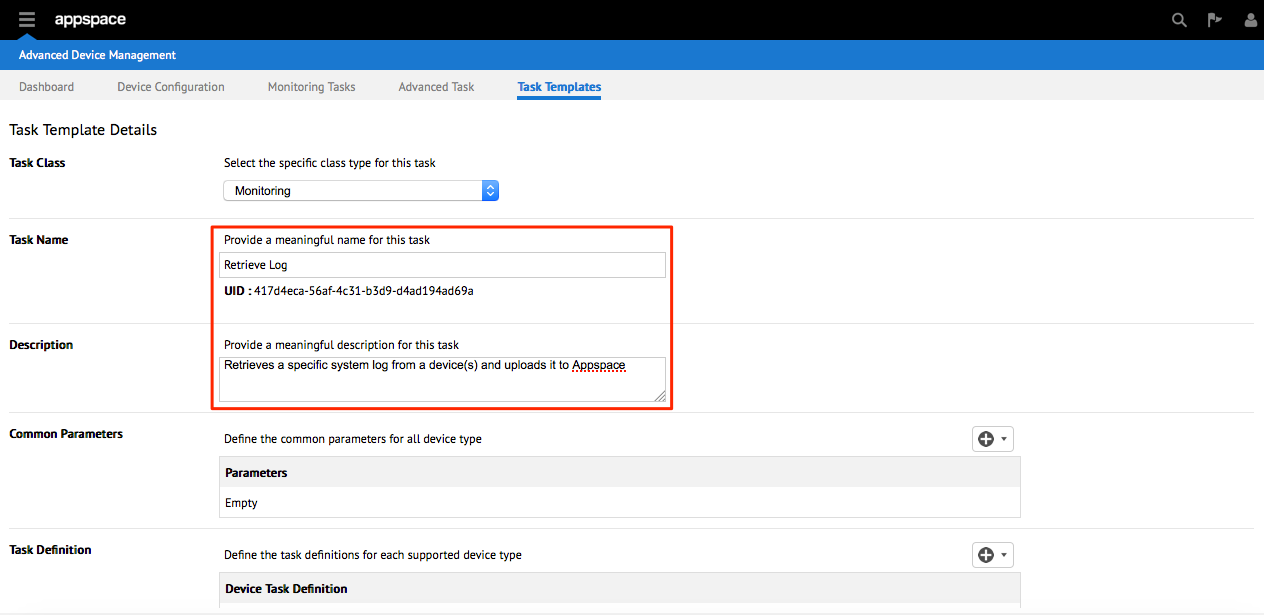
Step 3
Key in the Task Name and Description.
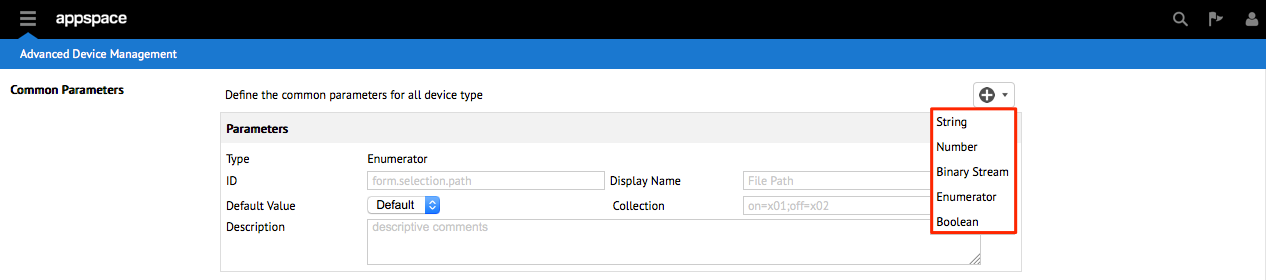
Step 4
Add common parameters by clicking the + button.
Step 5
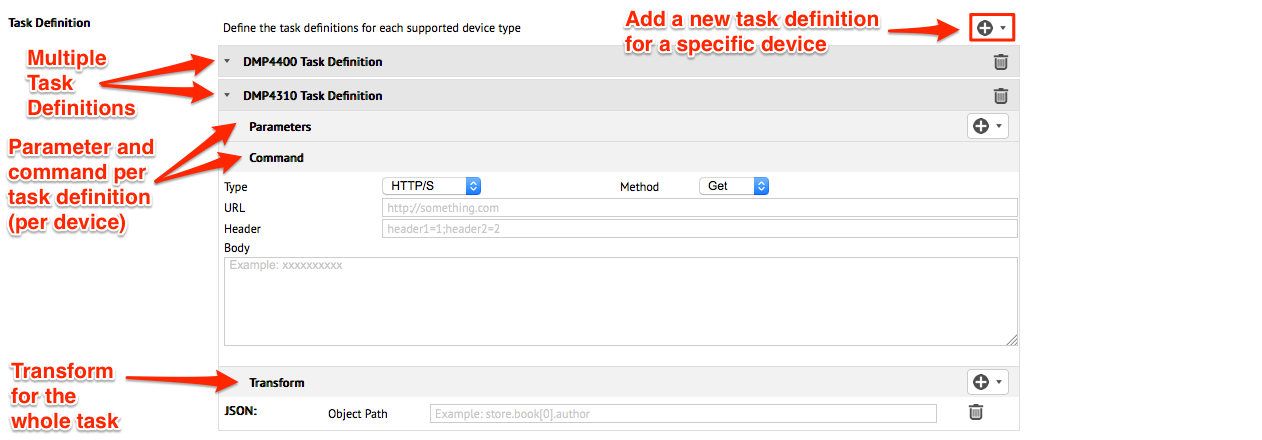
In the Task Definition section, select the target device by clicking the + button. Assign a specific set of Parameters, Command and Transforms for this task template. If your task is designed to target multiple devices, you can individually set the task definition for each device type, again by simply adding a new value by clicking the same + button.
Step 6
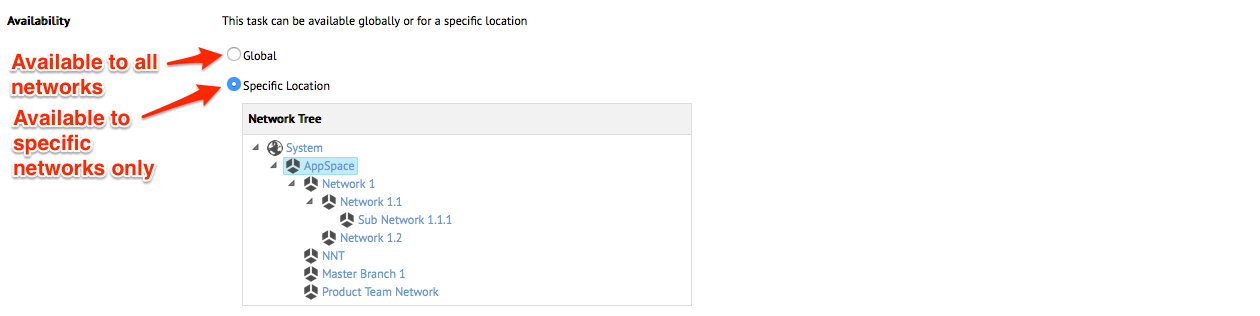
In the Availability section, choose the availability for this task template. If you select Global, the task can be made available globally across the entire network and if you select Specific Location, the task will be available only for specific networks or groups.
Note
Only portal administrators are able to set tasks to global.
Step 7
In the Schedule section, choose the time frame for when the task will be deployed. Click the Save button to confirm the settings.

Note
The schedule can always be changed at the time of deployment, so setting it here in the template makes it more of a guideline.
Editing Task Templates
You can edit any of the existing task templates to make modifications to the device command and parameters.
Note
- Configuring task templates will take effect after an update has been set.
- Monitoring or Advanced tasks will need to be re-deployed after the task template has been modified.
Step 1
From the Task Templates tab, select the Name of the template that you would like to make changes to.

Step 2
Perform the necessary changes to the appropriate sections.

Step 3
Click Save to confirm the changes.