Sharing Folders
Introduction
While the content library is unique to each user group, users can choose to share content between different user groups within the same account.
Sharing Options
The content library allows users to share folders at multiple levels:
- Globally: all users in all accounts will have read and write access to the shared folder.
- All user groups (read only): all user groups in the account have read access to the shared folder.
- All user groups (read and write): all user groups in the account have read and write access to the shared folder.
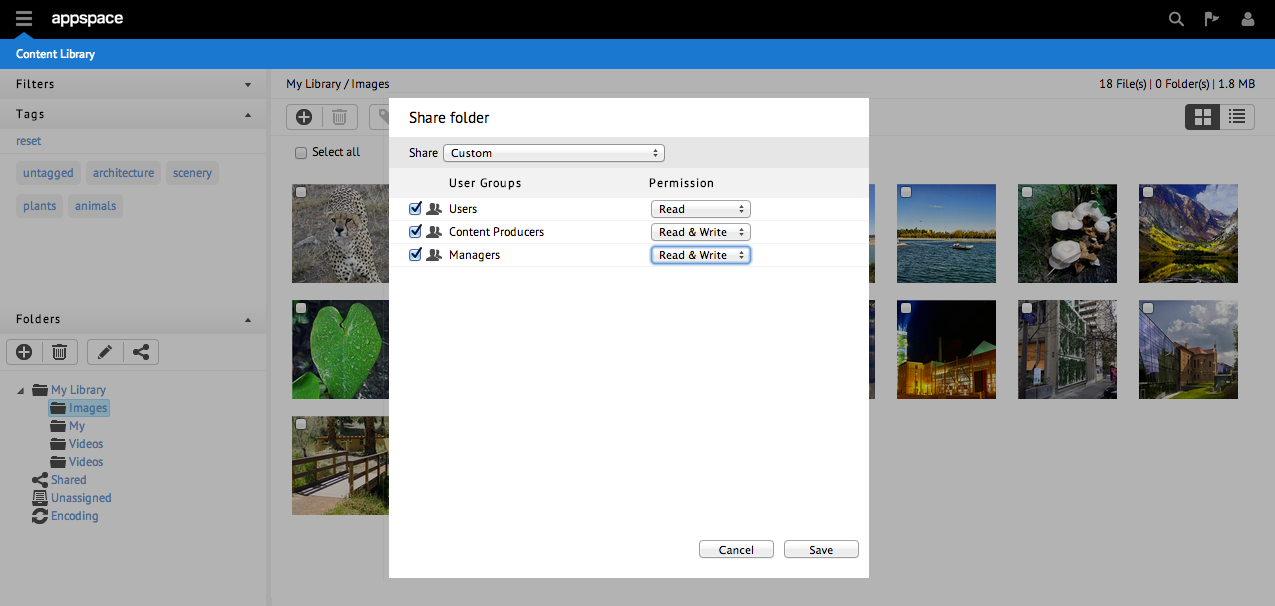
- Custom: users can define which the access level (no permission, read only, read and write) to specific user groups in the account.
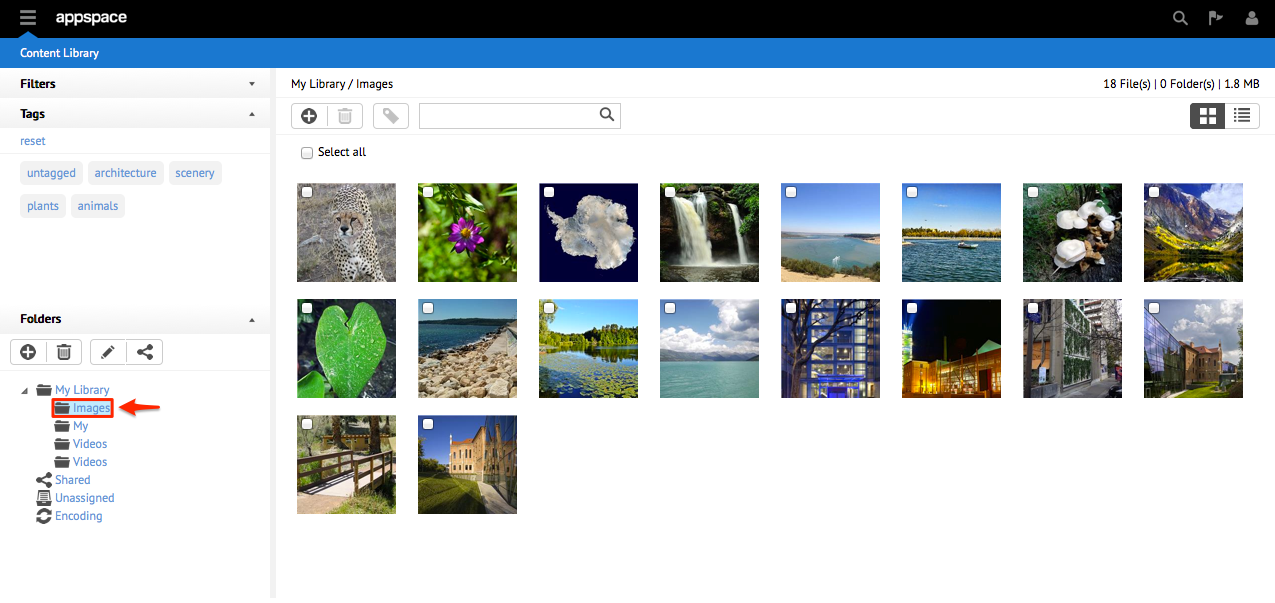
Sharing Folders
Step 1
From the Content Library extension, click the folder you wish to share.
Step 2
Click the share button.

Step 3
In the share window, select your sharing options. If you select custom, the dialog window will display all user groups in the account. You can then proceed to set your sharing options per user. Click Save when done.
Step 4
The shared folder will now be denoted with a slightly different “shared” icon in the tree hierarchy. This visual representation provides users a quick check as to which folders are currently being shared.

Step 5
In order for a user (within the user group selected in the previous step) to view the folders that have been shared with them, look for the shared folder within the folder tree hierarchy.
