PC Player Registration (Cloud)
Introduction
This guide outlines the steps to register PC Players to Appspace Cloud.
Prerequisites
- The PC must meet the minimum hardware and technical specifications for the intended application use.
- The Appspace Cloud account must have sufficient client access licenses (CALs) to register the device.
- The user must have Local Administrator rights on the PC player. It is recommended that the installation be conducted on a stand-alone networked PC instead of a PC connected to a domain.
- Ensure that any anti-virus software or firewalls are configured to allow the Nexus player executable and software agent to access the network.
- Ensure that the following network port requirements are met:
| Source | Destination | Ports | Description |
|---|---|---|---|
| PC Player | Appspace | HTTP(80) or HTTPS (443) | User must add appspace.com to list of trusted websites and enable pop-ups from this URL. Network firewall and proxy server must allow access to the Appspace domain URL/IP. |
Registering a PC Player to Appspace
Step 1
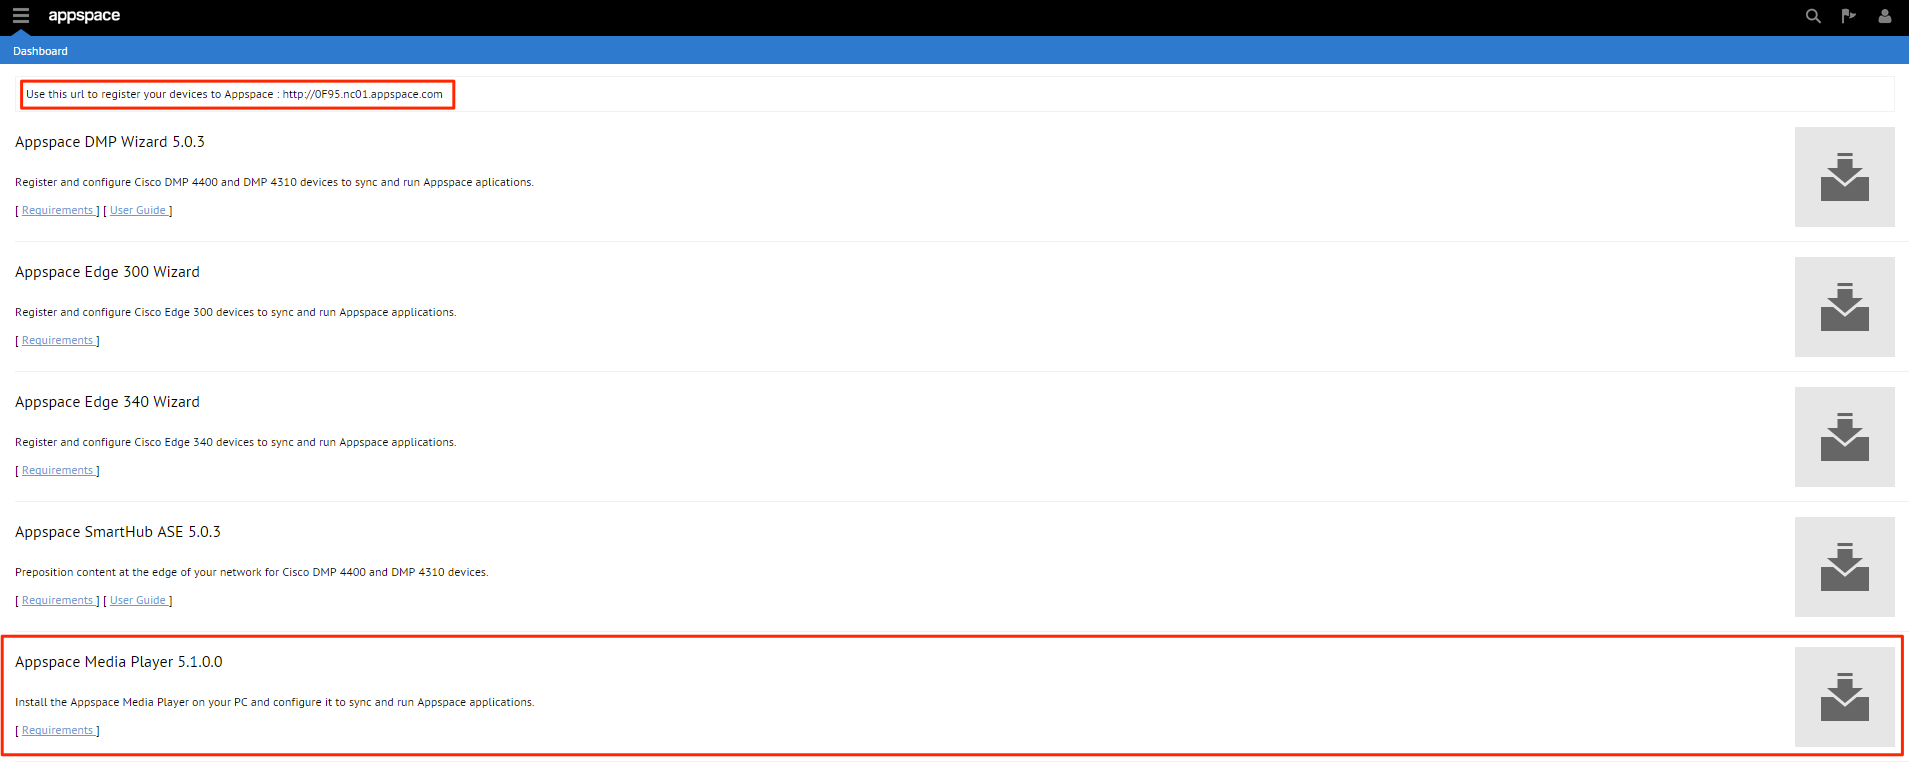
From the Downloads extension locate the Appspace Media Player wizard row and click the Download icon. Run the installer as the local Windows administrator (right-click on the installer file to select the Run as administrator option).
Important
Take note and record the URL displayed at the top of this page for the purpose of registration later on. Note that this URL is unique to your Appspace account.
Step 2
Run the installer as the local Windows administrator (right-click on the installer file to select the Run as administrator option). Select Next and complete the installation.

Step 3
Once the installation has completed, an Appspace Player shortcut icon will appear on the desktop. Double-click the shortcut icon to start the player.

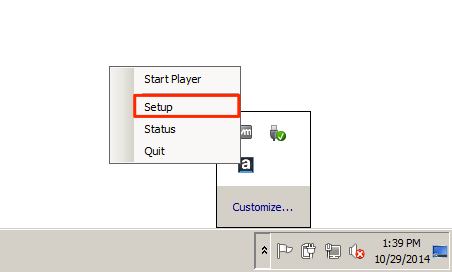
Step 4
Once the player has started, a new icon will appear in the Windows taskbar. Right-click the icon and select Setup.
Step 5
Click Next to proceed.
Step 6
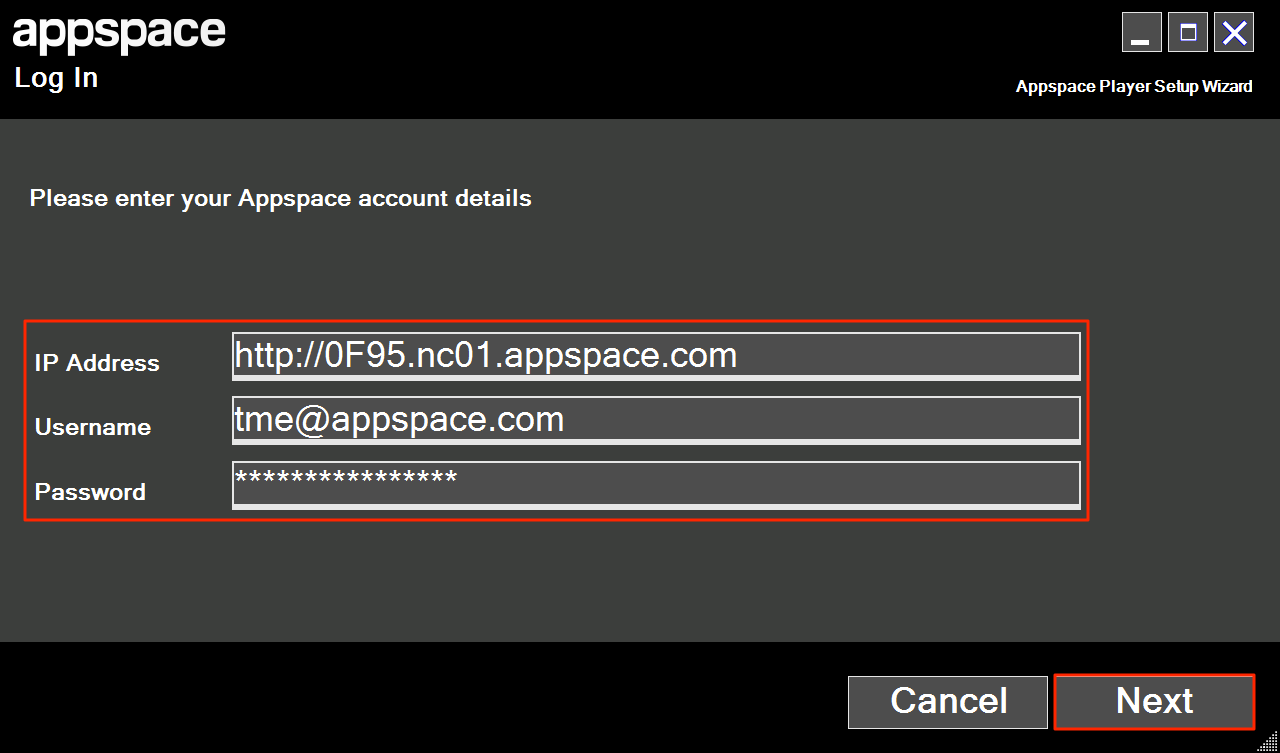
From the Log In screen, enter the URL recorded earlier (Step 1) from the Downloads page. Input your Appspace Cloud account username and password and click Next to proceed.
Step 7
Enter a name in the Player Name field to be used to identify the PC player. Click Next to proceed.

Step 8
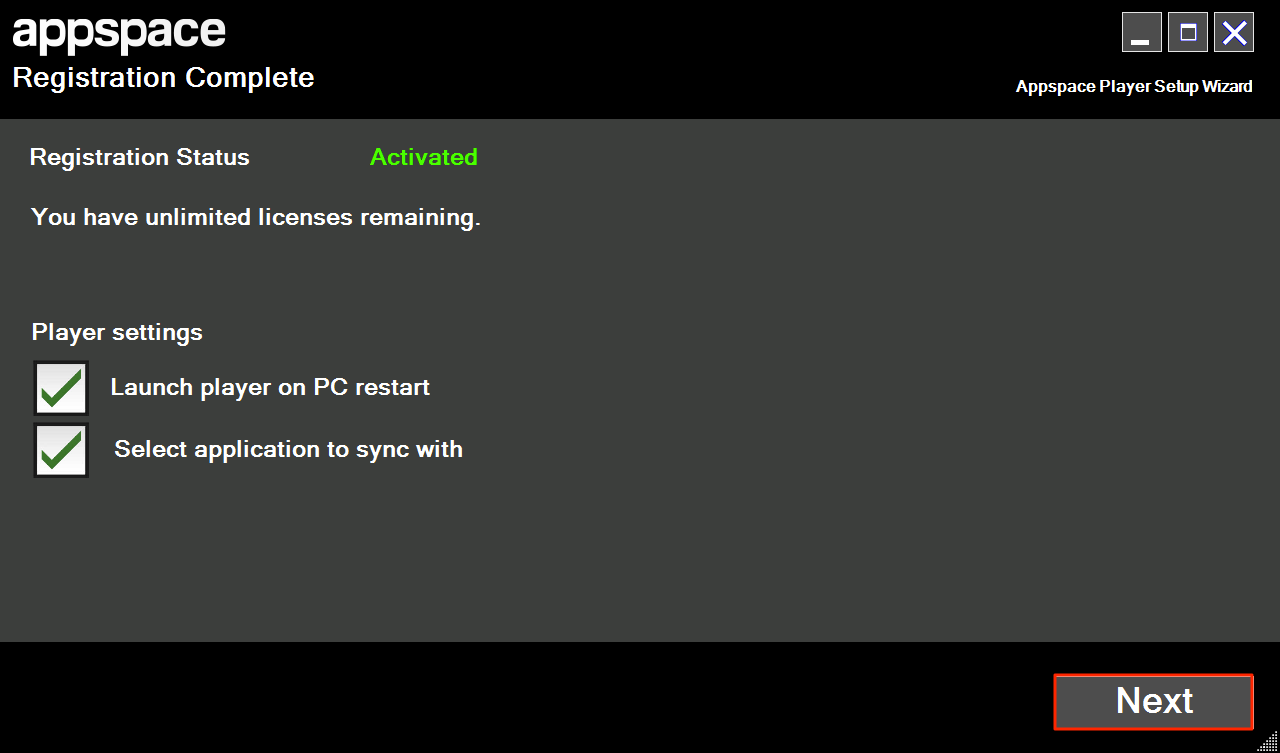
If the PC player is ready to be deployed into a production environment, check the box next to Launch player on PC restart. This ensures the application will always be launched/started even after a system reboot. Check the box next to Select application to sync with and click Next to proceed.
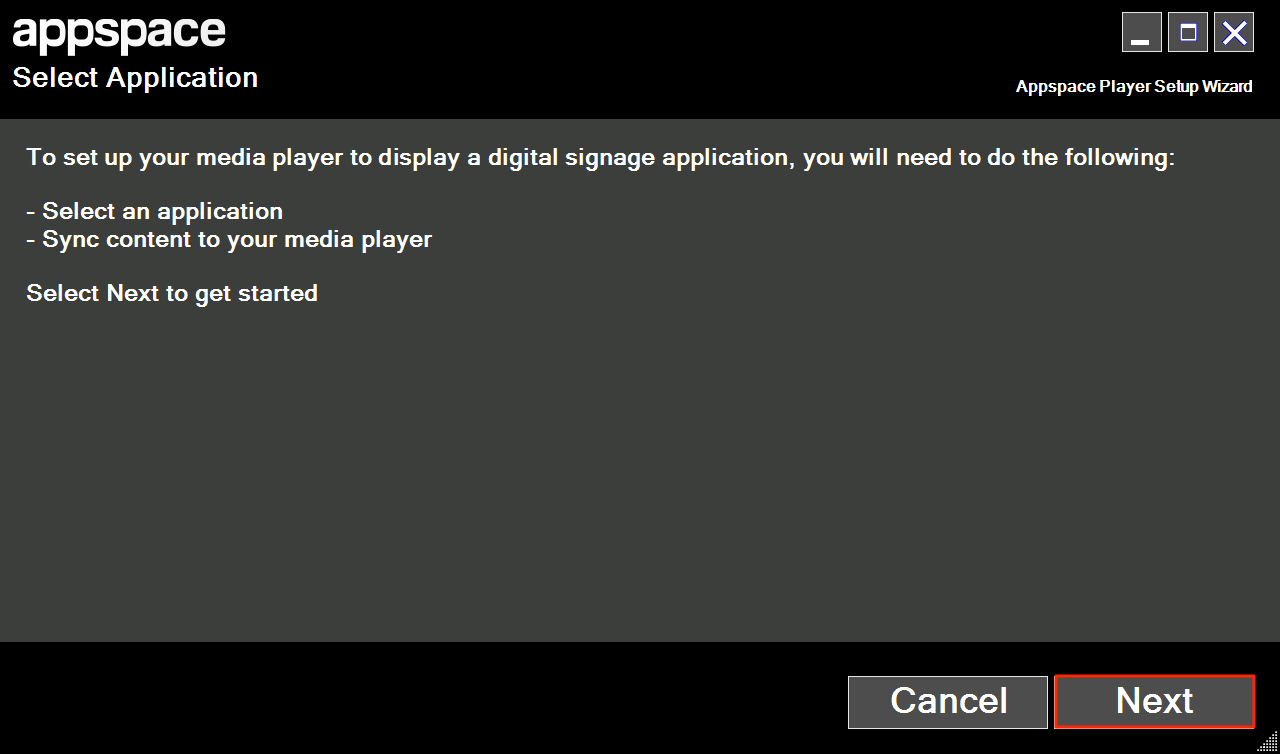
Step 9
Click Next on the Select Application page to start the configuration process.
Step 10
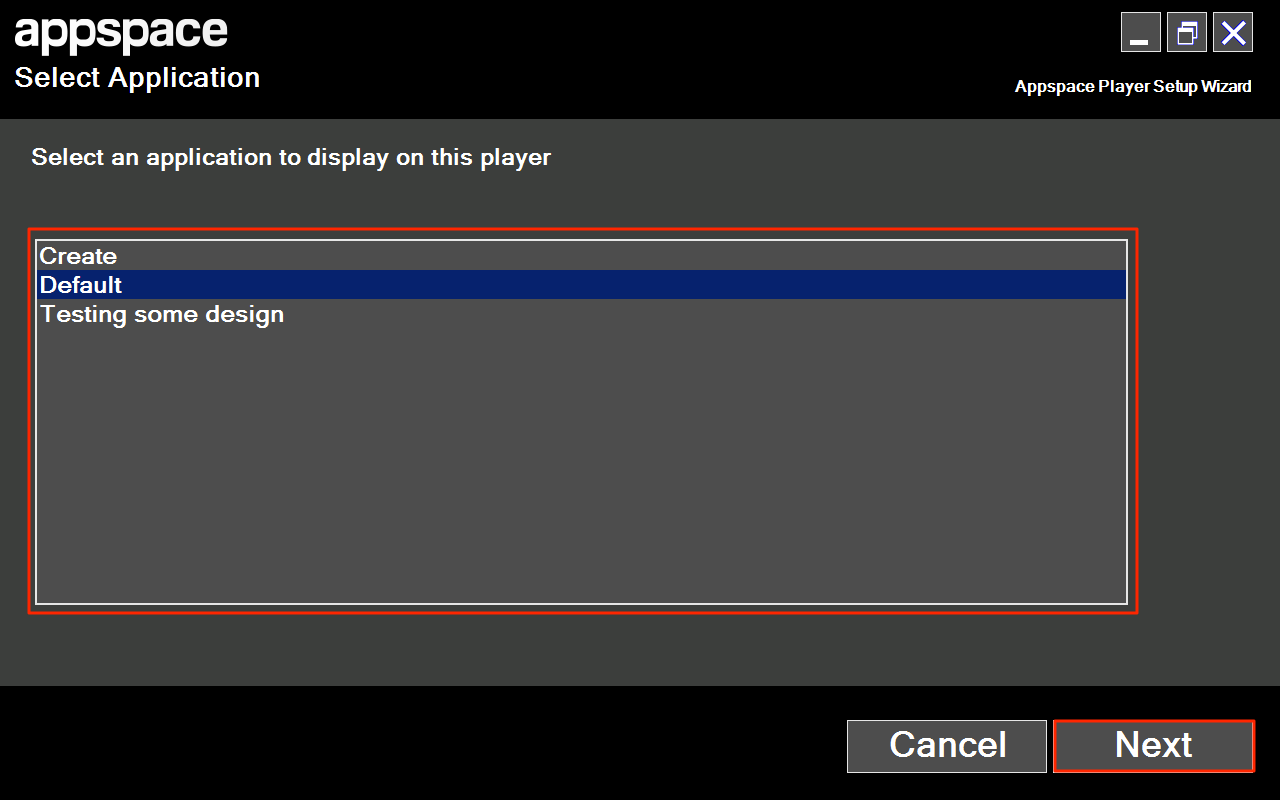
Select the application (list is populated with applications already created in Appspace) to assign to the PC player. When finished, click Next to proceed.
Step 11
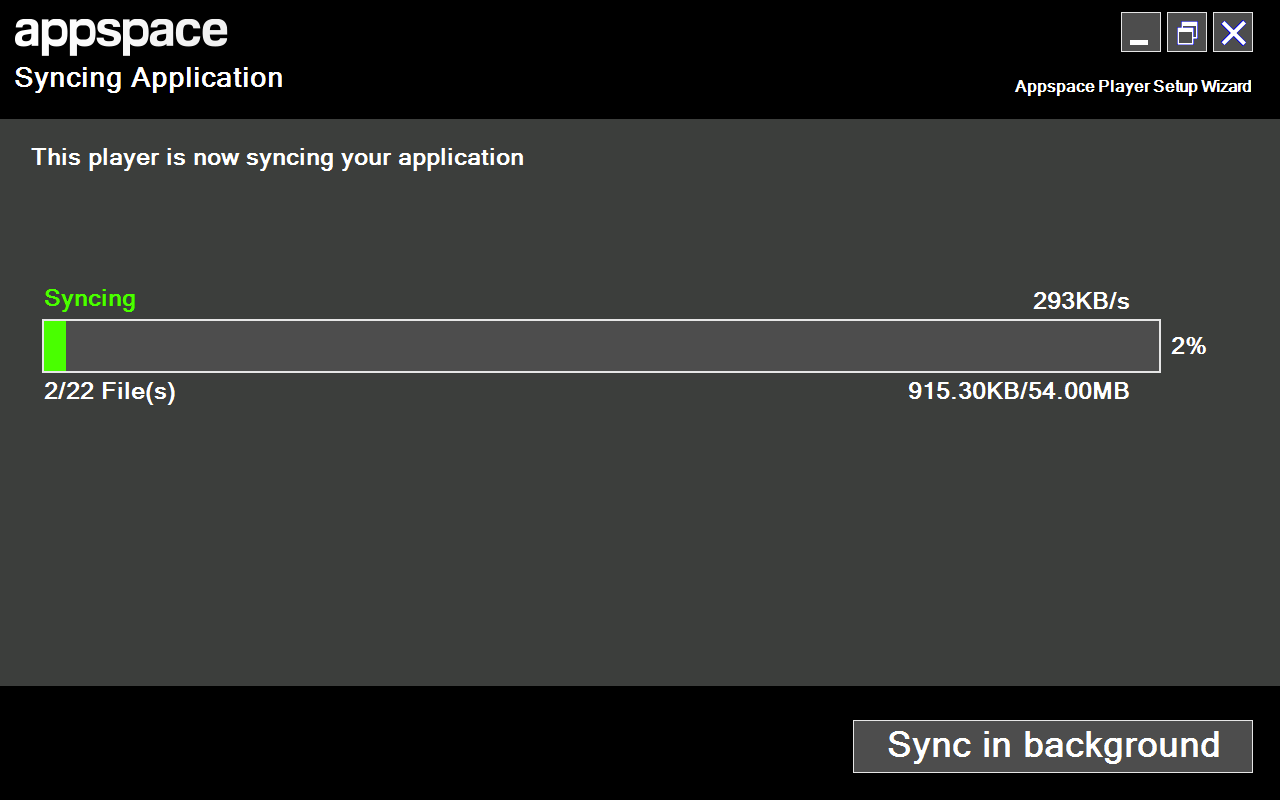
The selected application will be synced to the player with the progress bar depicting the progression. You may also optionally choose to click Sync in background to hide the window.
Step 12
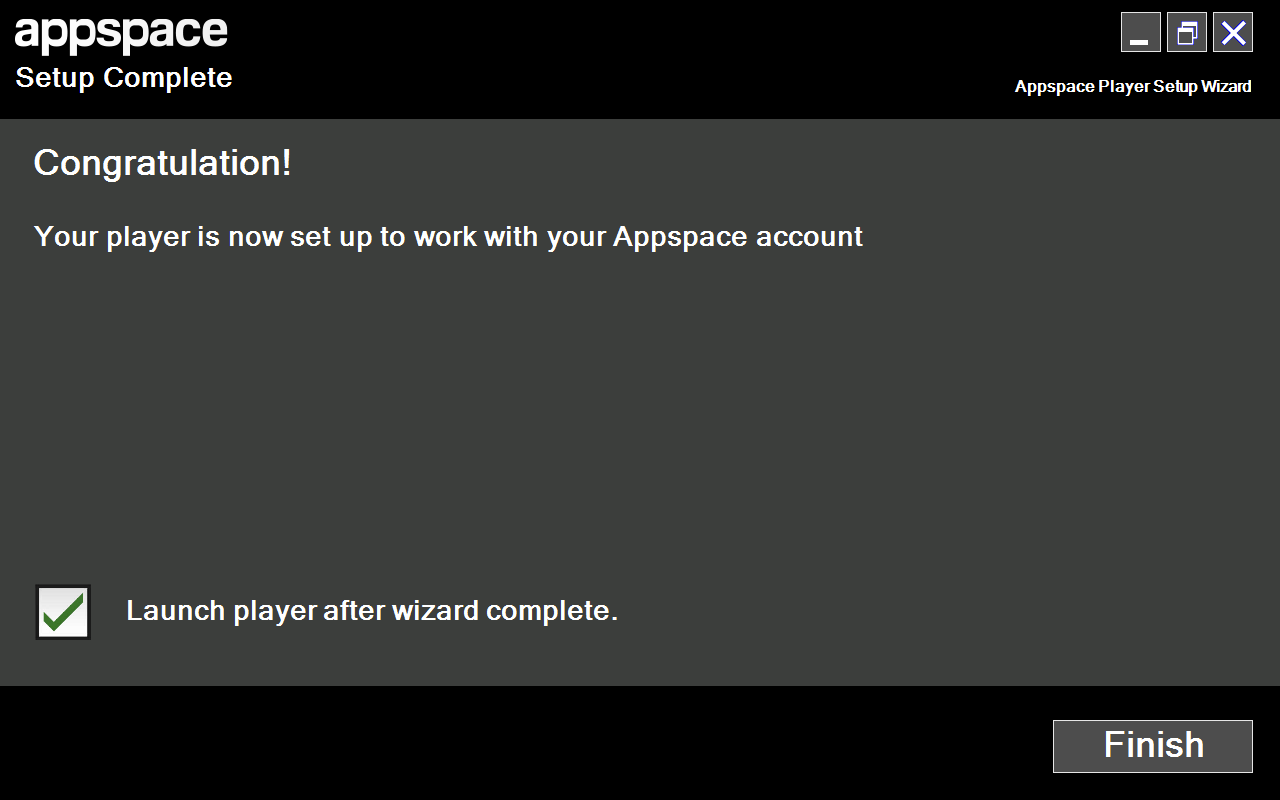
When the application sync is complete, check the box next to Launch player after wizard completes to start the player after setup finishes. Otherwise, leave the box unchecked to return to the Windows desktop after setup finishes. Click Finish to complete the PC player setup wizard.
Note
The screen may be blank as it will take some time for the PC to complete its first content sync. The duration will depend on the size of the application and the network bandwidth.