(On-Prem) User Invitations
Overview
This article will guide you through the workflow and management options available within the user invitation process. You have the option to invite users who are not yet registered members of your Appspace instance and have them create an user account and be automatically assigned to a specified/designated group.
Creating User Invitations
Step 1
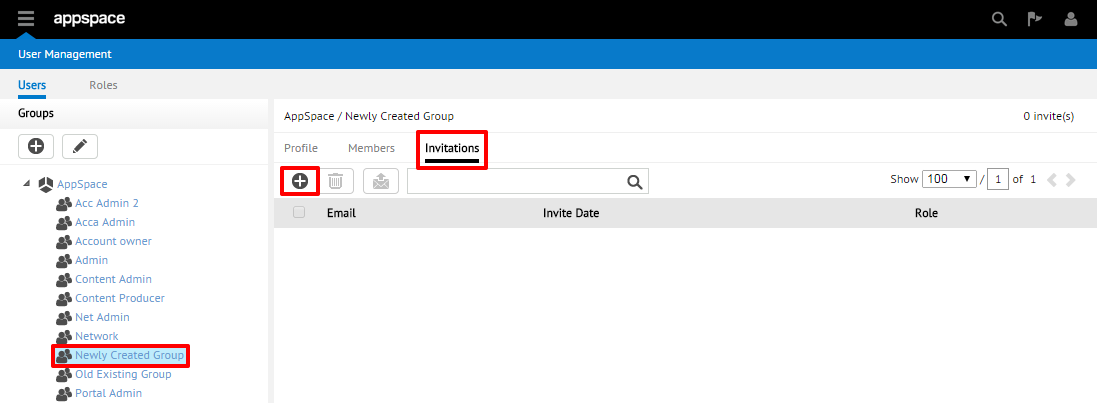
From the User Management homepage, begin by selecting the desired group from the group listing that you would like to invite new users to join. Click on the Invitations sub-tab and click on the + (Send New Invitations) icon.
Step 2
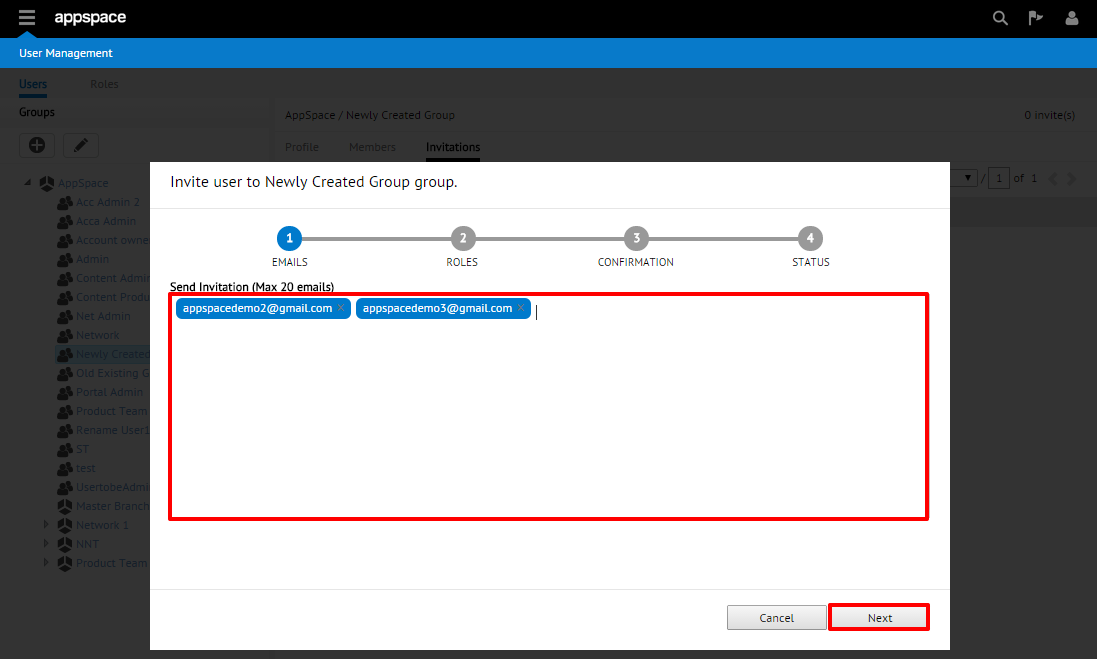
A new window containing a 4-step invitation workflow should appear. Begin by entering in the e-mail address(es) for the user(s) that you would like to invite to join Appspace and your selected group. When you have finished entering the e-mail address(es), click Next to continue.
Note
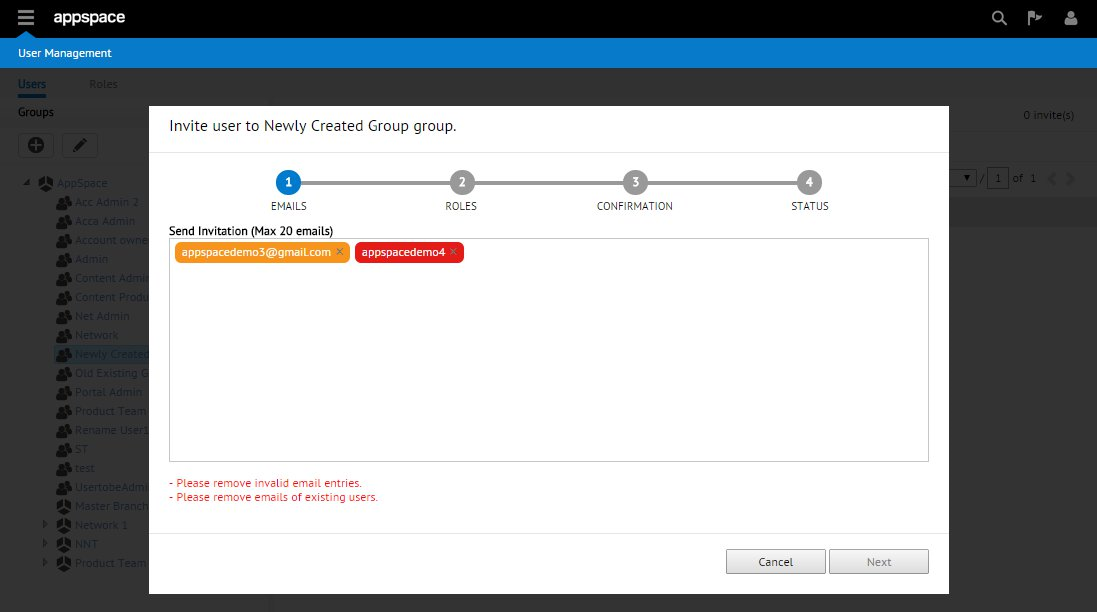
You cannot invite users that already exist on your Appspace instance (that belongs to a different group). These user entries will appear highlighted in orange as seen in the below screenshot. E-mail addresses will also appear orange if there is already a pending invitation in the system for that e-mail address. Invalid e-mail addresses will also appear highlighted in red until you correct it to a valid address.
Step 3
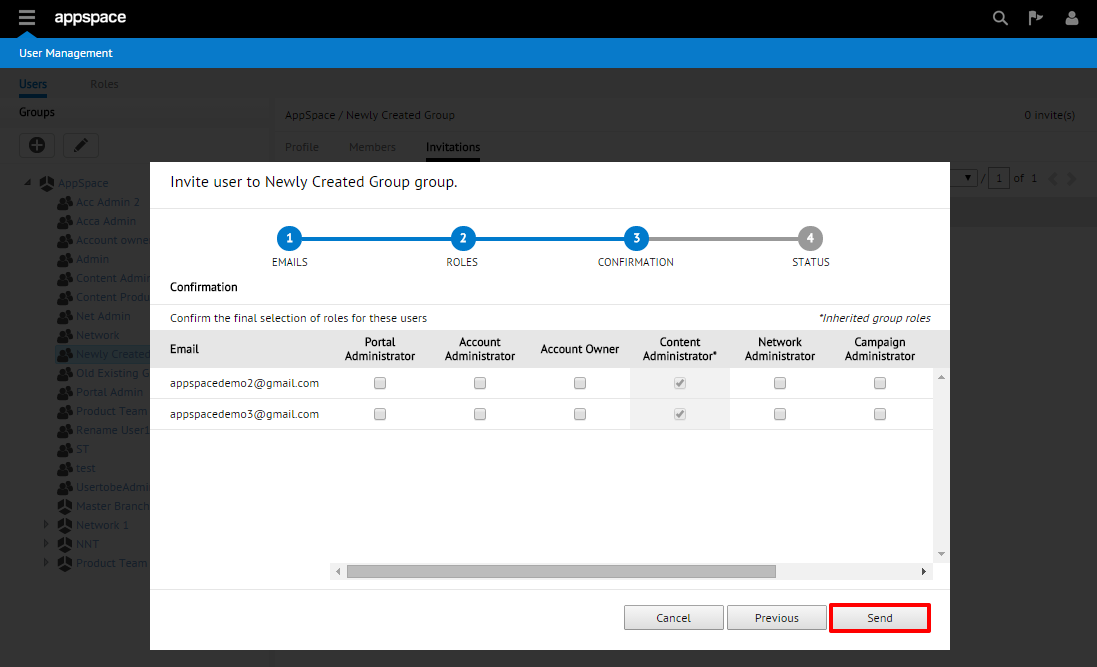
On the next step of the workflow, you will be given the option to assign additional roles to the invited user(s). You will see the existing roles to be inherited from the group already checked by default. It is not mandatory to select additional roles – this is strictly optional. When finished, click Next to continue.

Step 4
At the confirmation stage, verify that you have selected the proper roles for the user(s) to be invited. If you need to make any changes, click the Previous button to return to the earlier stages of the workflow. Click Send when you have finalized the invitation parameters.
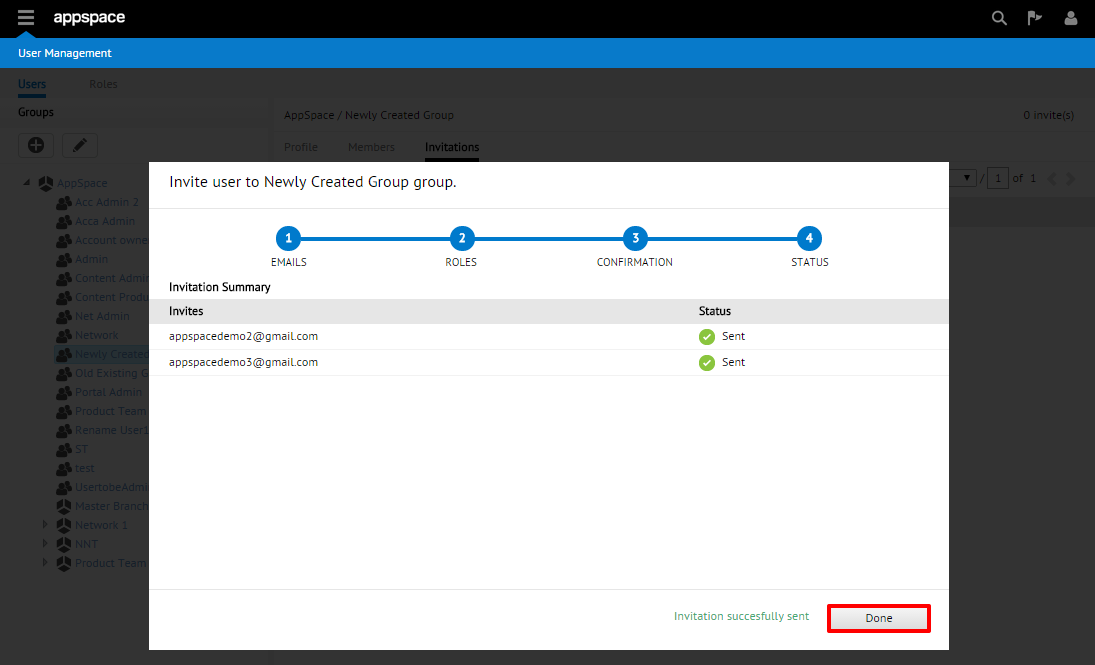
Step 5
The final stage of the invitation workflow will be a summary and confirmation of whether the invitations were successfully sent or not. Click Done to close the invitation window.
Step 6
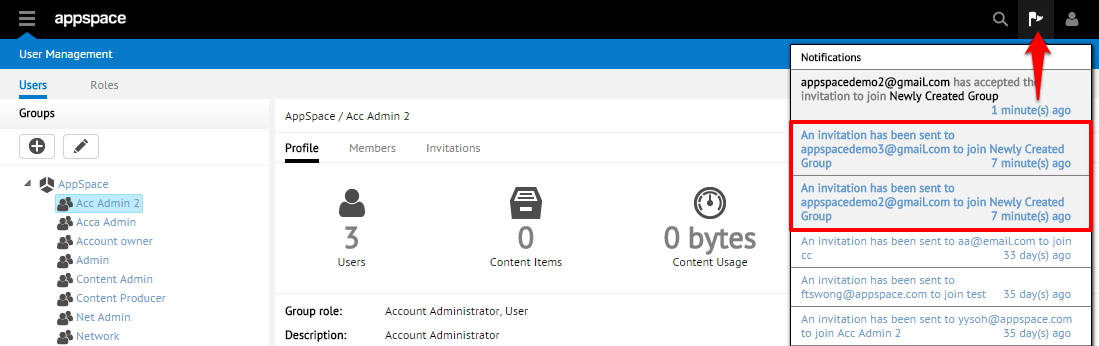
You should be returned to the Invitations sub-tab of the selected group. The newly sent invitations should now appear listed on this page.

You may also confirm that your invitations have been successfully sent by checking the notifications drop-down (upper-right corner).
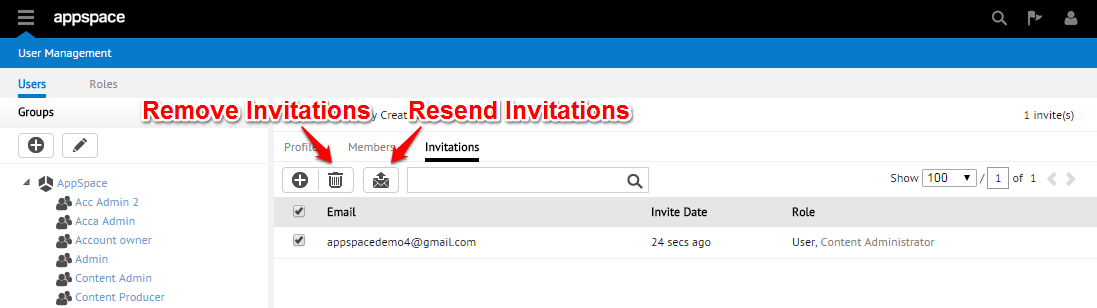
Managing Invitations
Within the Invitations sub-tab, you have the ability to manage your invitations. These options include the ability to Remove Invitations and Resend Invitations by using the icons available in the toolbar after you’ve selected any of the existing invitations listed on the page.
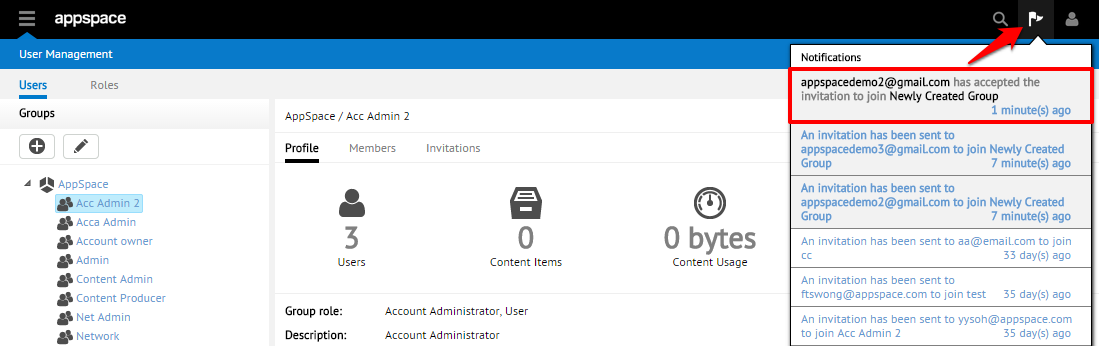
After sending out notifications, administrators will also receive notifications about the join/decline activity of users. This can be seen in the notifications drop-down (upper-right corner).
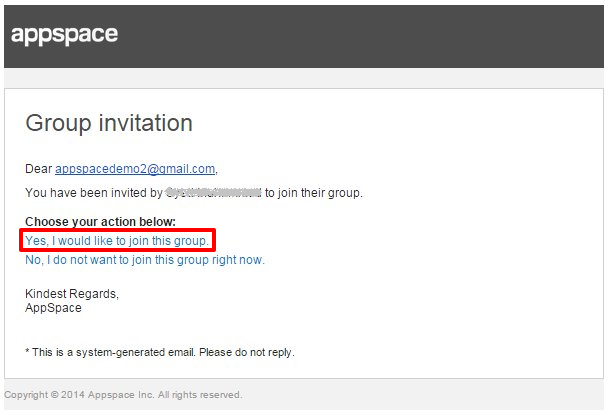
Accepting Invitations
Step 1
Once a new user has been sent an invitation to join the Appspace instance and specified group, they should receive an e-mail containing options to accept or deny. Click on the “Yes, I would like to join this group” link to proceed to the registration process.
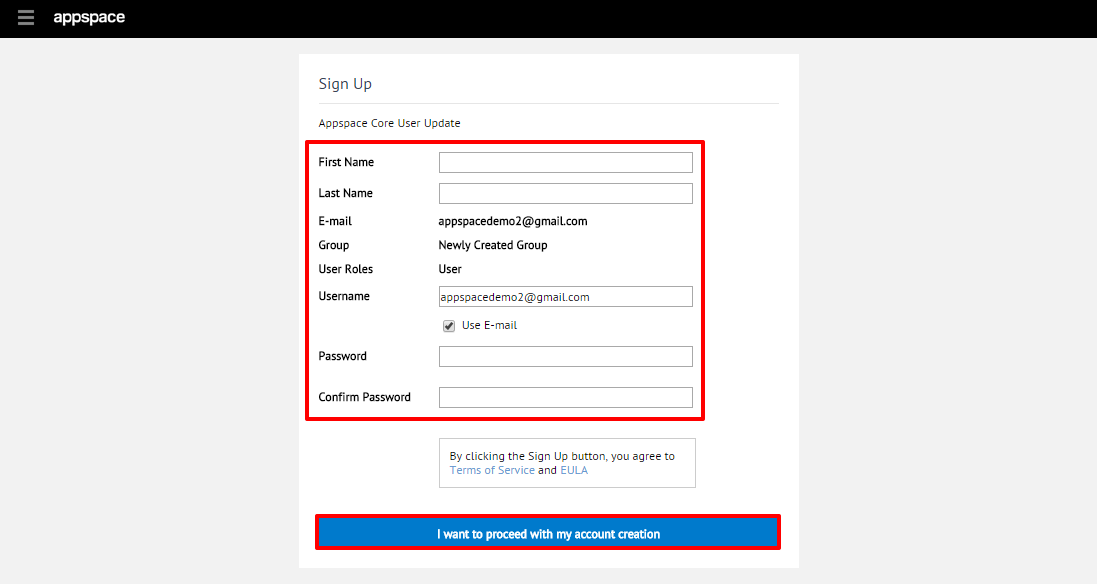
Step 2
The user should be redirected to a Sign Up page. Complete the sign up process by filling in all of the various fields and click the I want to proceed with my account creation button when finished.
Step 3
If successful, the user should be presented with a message confirming the successful group join. Click on the Proceed to Appspace link to login and begin accessing the Appspace server.
