Applying Add-on Licenses (Traditional)
Introduction
Important
This article is only applicable to traditional Cloud subscribers (i.e. Pro, Pro+, or Enterprise) that have deployed an on-premise instance of Appspace server. If you are an Omni plan subscriber (i.e. Omni-D, Omni-E, Omni-F, or Omni-G) – please refer to the Updating Licenses (Omni Subscribers) article.
This particular article focuses on the process of applying additional license keys which serve to increase the features and functionality of your on-premise Appspace server instance. There are two methods available for adding additional Appspace license keys:
- Activating Add-on Licenses Using Automated Activation – an activation method for installations with direct, Internet-connected servers
- Activating Add-on Licenses Using Manual Activation – an activation method that can be performed without an Internet connection, but requires multiple manual steps and a separate workstation that does have Internet-connectivity
Note
You will need to have your unique 16-character Appspace product key on-hand to add additional features. If you have not obtained the add-on license key, please contact your local Appspace sales team or reseller to obtain the code.
Prerequisites
- Your Cloud user account must be upgraded to one of the traditional Cloud subscription plans (Pro, Pro+, or Enterprise)
- Your on-premise Appspace server instance must already be fully licensed and accessible
- You must have Portal Administrator privileges on your Appspace server
Activating Add-on Licenses Using Automated Activation
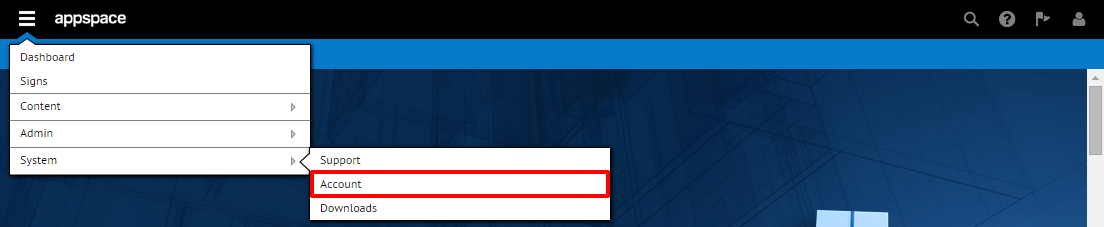
Once you have logged into your on-premise Appspace server instance, click the extensions drop-down menu on the top-left of the Appspace Dashboard. Click System > Accounts.
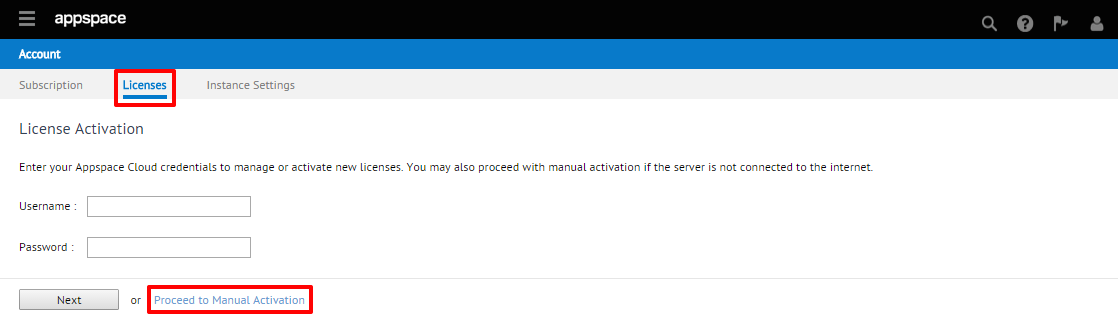
Click on the Licenses tab, and enter your Cloud account credentials in the username (typically an e-mail address) and password fields on the License Activation page. Click Next to continue.
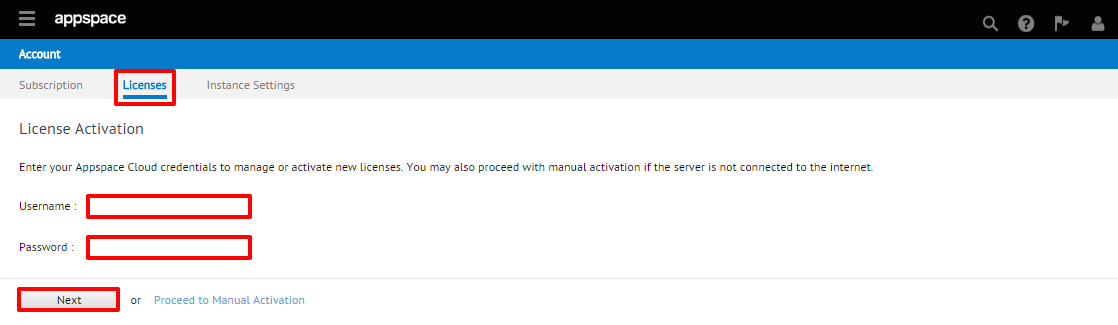
Warning
You must make sure that the Appspace Cloud account that you are using to authenticate in this step contains the Master Key registered/associated with the account. If you don’t authenticate with the correct account, the activation of the add-on license key will fail. You can verify which license keys are associated with your Cloud account by logging in through https://cloud.appspace.com and going to System > Account > Licenses page to see the keys associated with that account.
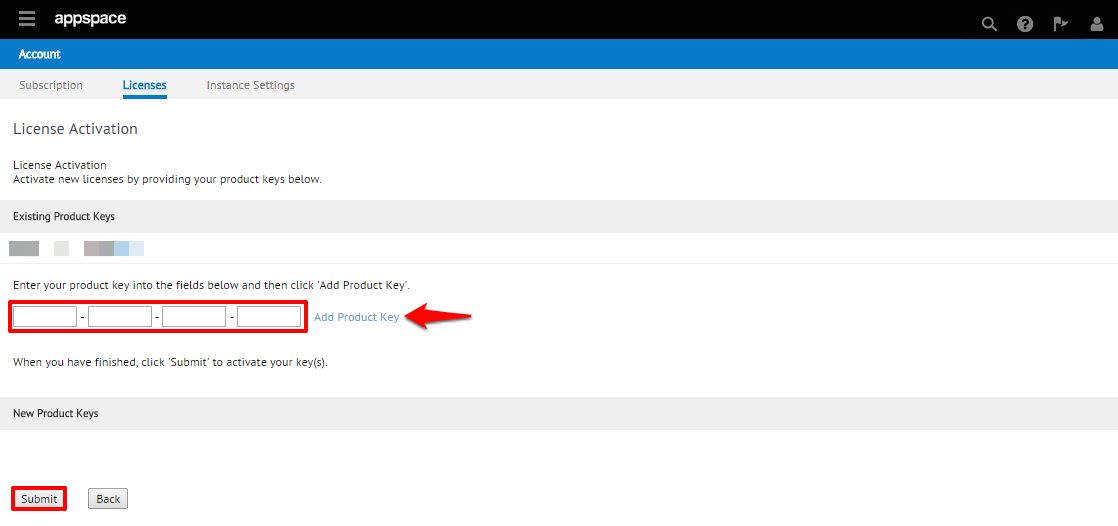
You should now be presented with the License Activation page along with a listing of Existing Product Keys that are currently activated on your Appspace server. Enter the 16-character add-on license key, and click ‘Add Product Key’ when finished. You may see a “Please wait while adding product key…” message during this process. Once you see the new key listed under New Product Keys on the screen, click the Submit button to activate your server instance.
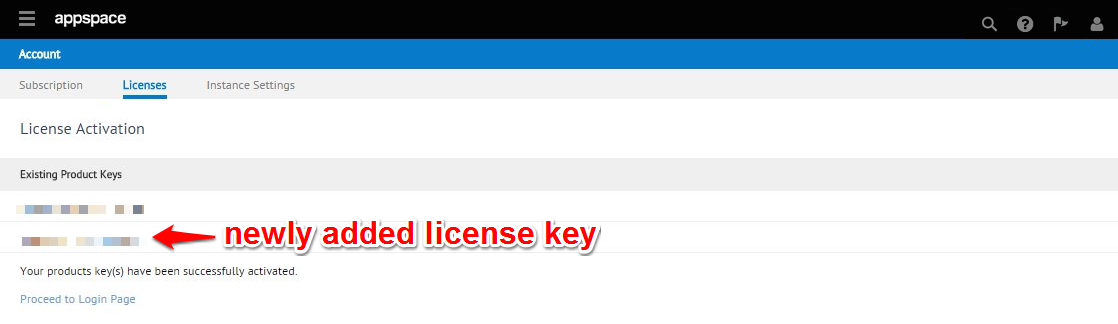
If successful, you should see a confirmation message as well as see your newly added key appear under Existing Product Keys next to the other key(s).
Activating Add-on Licenses Using Manual Activation
Log into your Appspace Cloud account (https://cloud.appspace.com) and access System > Account from the extension drop-down menu on the top-left of the Appspace Dashboard.

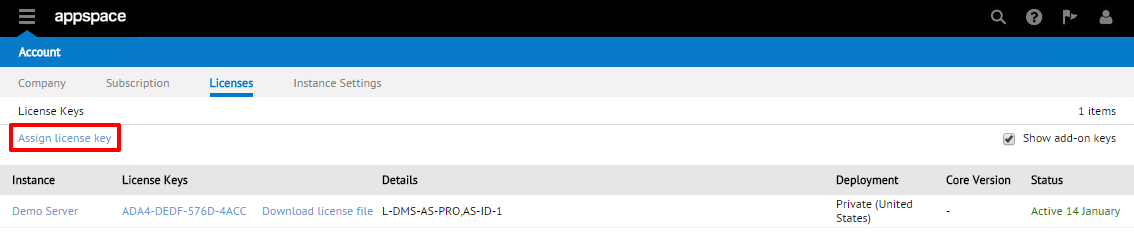
Proceed to the Licenses tab (you should see at least one server instance already listed) and click on the ‘Assign license key’ link.
Note
If you do not see the Licenses tab, it is because your Cloud user account has not yet been upgraded to the needed subscription level to manage license keys. Please contact your local Appspace sales team or support team for assistance.
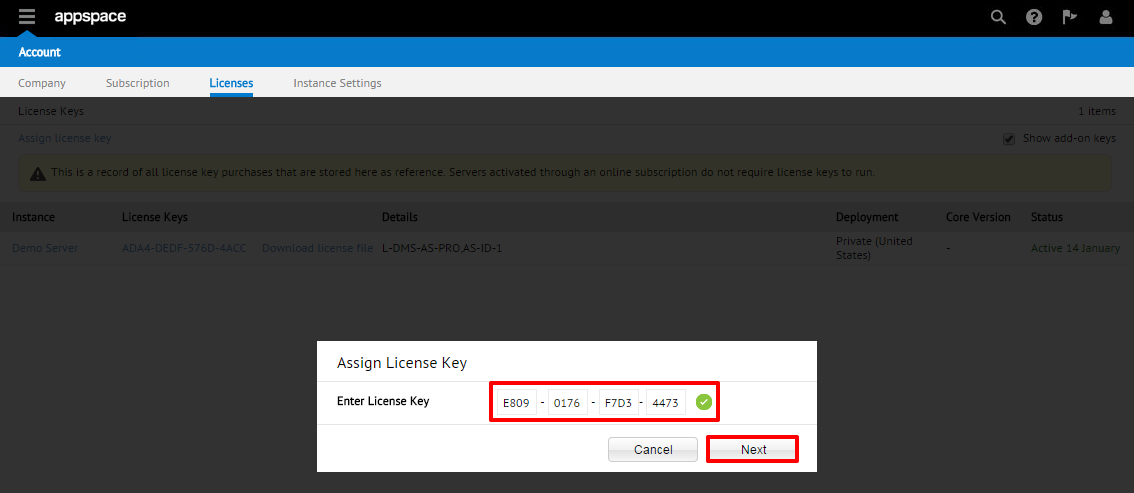
On the Assign License Key window, input the 16-character add-on license key. If done correctly with a valid key, you should be prompted with a green (success) check. Click Next to continue.
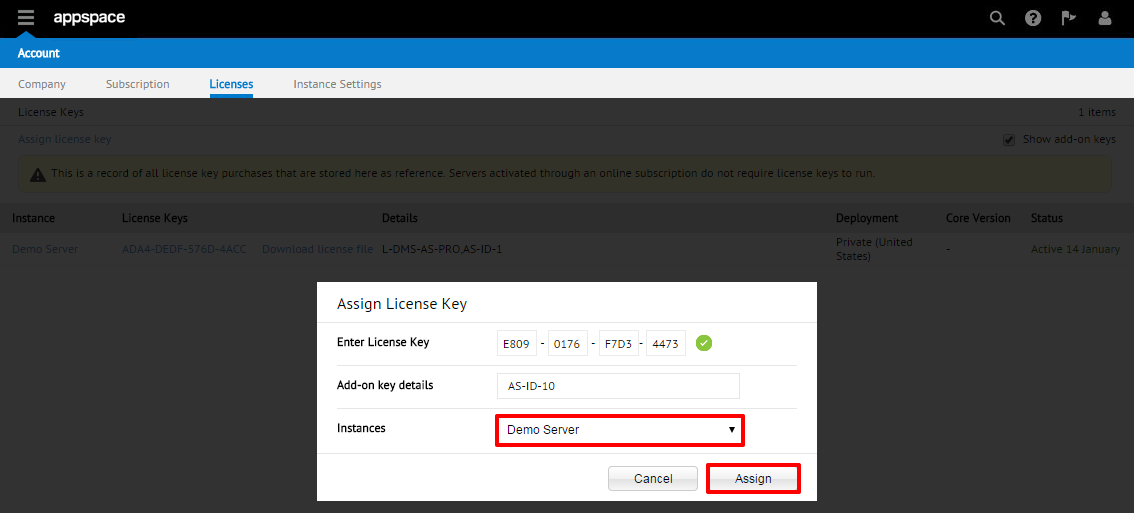
At this point you should see the details of your add-on license key (new features/products that will be added) listed in the Assign License Key window. Select the proper Appspace instance from the drop down menu before clicking on the Assign button to complete this process.
If successful, you should see a green confirmation message. You may now return to the Licenses tab.
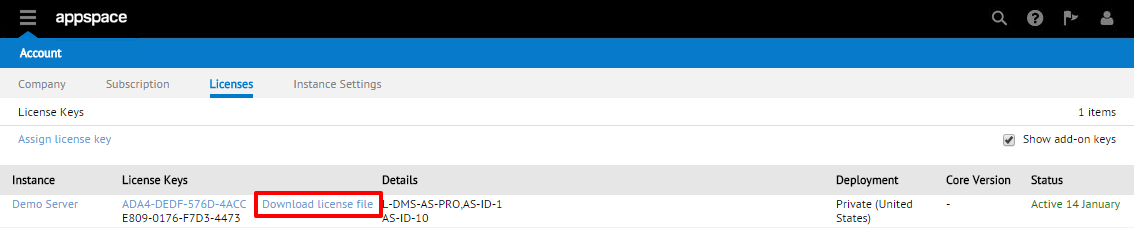
Your new add-on key should now be listed as a new row on the Licenses page direction under the main (master) license key to the server instance in which it was applied. Click on the ‘Download license file’ link that is next to the server instance with this new add-on key. This will download the Product Activation File (usually named <Product Key Number>.bin). Save this file to an easily accessible location on your local machine.
Login to your on-premise Appspace server instance, Click the extensions drop-down menu on the top-left of the Appspace Dashboard. Click System > Account.

Select the Licenses tab and at the License Activation screen, click the ‘Proceed to Manual Activation’ link to continue.
On the Manual License Activation screen, skip down to Step 2. Click the Choose File button to browse/select the previously saved Product Activation File (<Product Key Number>.bin) from your local machine. Once selected, click the Submit button to continue.

If successful, you should be prompted with a confirmation message and your newly added license key should appear under Existing Product Keys next to the other key(s).
