MS SQL Setup (Management Studio)
Once Microsoft SQL has been installed on the Windows server, it needs to be configured for proper database services interaction with Appspace. The setup and configurations are performed using SQL Server Management Studio.
The instructions provided describe how to configure Microsoft SQL to prepare the server and database for Appspace installation.
Start SQL Server Management Studio.
Windows 2008
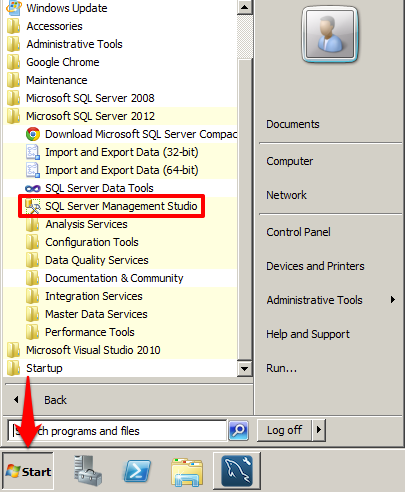
In Windows 2008, click on the Start button and select Microsoft SQL Server 2012 > SQL Server Management Studio.
Windows 2012
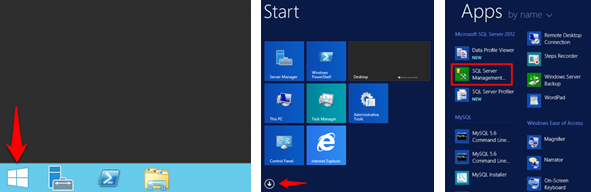
In Windows 2012, click the Windows icon and select SQL Server Management Studio from the Apps menu.
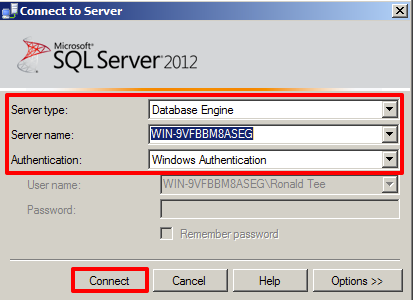
When prompted by the ‘Connect to Server’ window, select Database Engine from the ‘Server type’ drop-down menu and select Windows Authentication from the Authentication drop-down menu. Click Connect to continue.
Note
Take note of the Server Name field, as it will be used again at a later point.
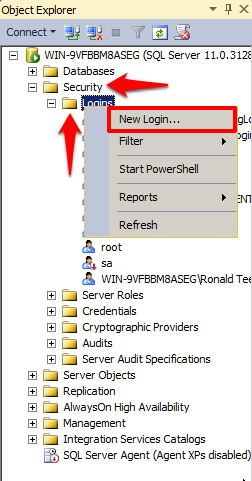
Once connected to the server, expand the Security folder tree directory within the Object Explorer. Right-click the Logins folder and select New Login.
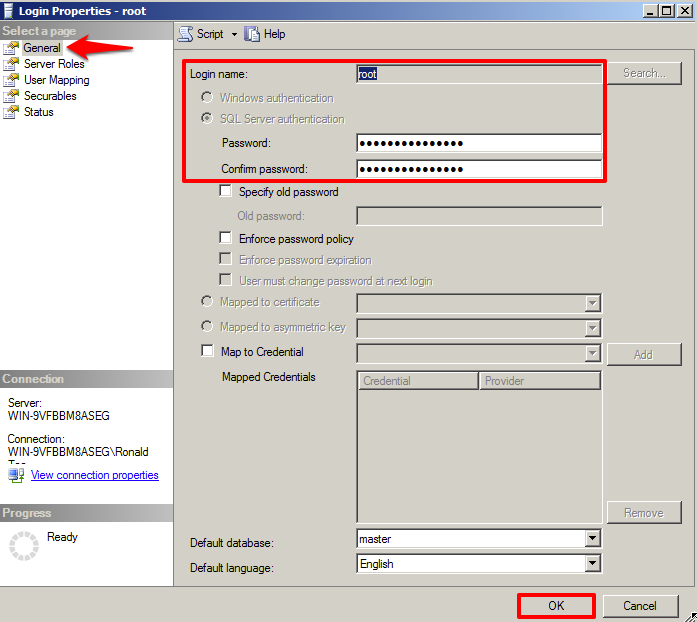
In the ‘Login Properties’ window, select General in the ‘Select a page’ pane. Configure the Login name as “root” and select the ‘SQL Server authentication’. Enter the password as: g56*k9lp (note: it is a lower case L between 9 and p). Confirm the password a second time and click OK.
Warning
Please ensure the ‘Enforce password policy’ and ‘Enforce password expiration’ options is unchecked before clicking OK.
Warning
You may choose your own custom MySQL password for the root account. The stated “g56*k9lp” is a suggested/recommended password and will be referenced at a later point in this guide. If you select your own custom password, please take special care to note and write it down to be used later.
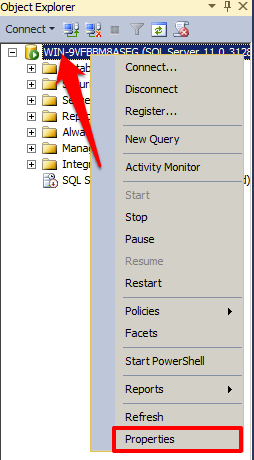
Back in the Object Explorer, right-click on the server instance and select Properties from the available options.
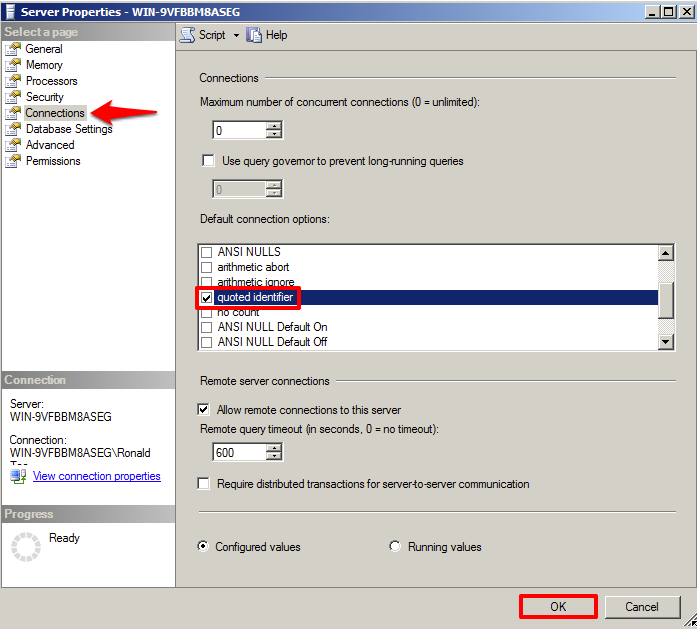
In the ‘Server Properties’ window, select Connections in the ‘Select a page’ pane. In the ‘Default connection options’ list, check the box to select quoted identifier and click OK when finished.
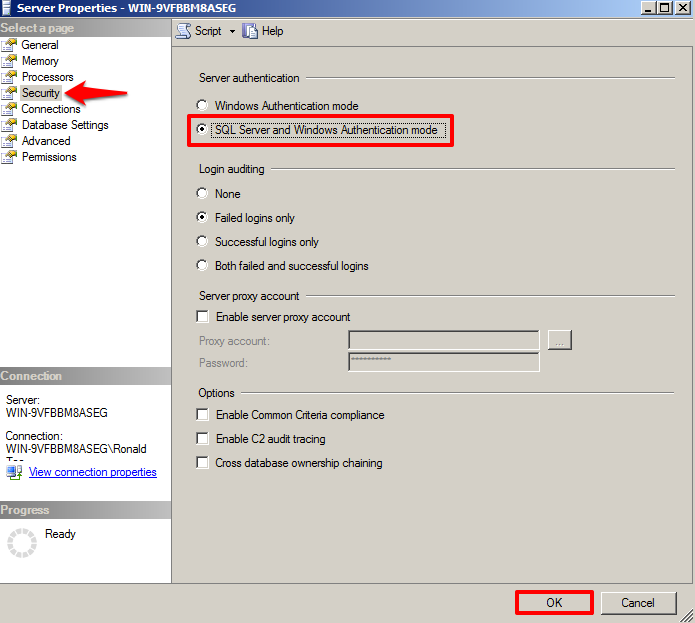
In the ‘Server Properties’ window, select Security in the ‘Select a page’ pane. Under Server authentication, select the ‘SQL Server and Windows Authentication mode’ option and click OK when finished.
You have completed the MS SQL Setup (Management Studio). You may now proceed to the Appspace Installation article.