Managing media player groups
Media player groupings allow users to easily manage and locate a collection of media players. Media players can belong to only one group. Groups can be nested in a hierarchy tree. This article provides the instructions to add, edit, and manage your media player groups within Networks.
- Creating New Media Player Groups
- Adding Media Players to Groups
- Renaming Media Player Groups
- Deleting Media Player Groups
- Viewing Ungrouped Media Players
Creating New Media Player Groups
In Networks, click the Players tab and select an existing media player group to be designated as the parent of the new media player group to be created.

Note
The root Appspace folder (group) will be selected by default to be the parent and cannot be deleted.
Click the Add button to create the new group and give it a name.

Adding Media Players to Groups
Click the Players tab.
Begin by selecting the the root folder “Appspace” in order to browse the entire listing of media players. Select the media player(s) you want to add into a group by checking the box next to the media player name. You may also search for a specific media player by performing a name or keyword search using the search tool.

Click the Move to Group button.

Important
Please ensure that the media players you’ve selected have already been assigned with a channel. The media players cannot be moved if they are not assigned to any channels.
Under Group Players, select the desired media player folder (group) from the tree hierarchy. Click Proceed.
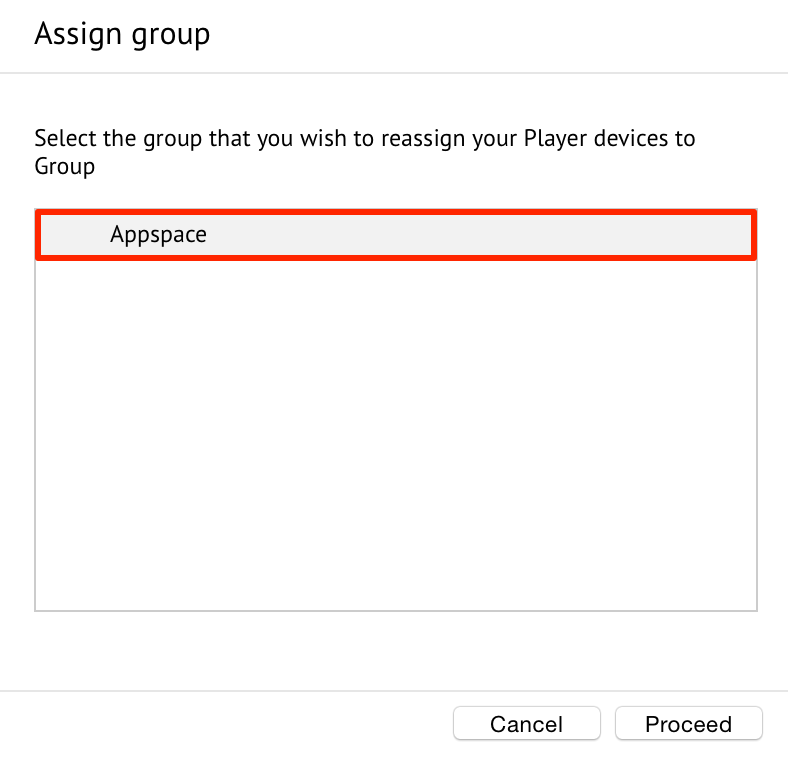
Verify the selected players have been associated and grouped under the desired media player group in the main media player listings.

Note
You may also drag and drop groups into the desired location to rearrange and reorganize the hierarchy tree.
Renaming Media Player Groups
Click the Players tab.
Under the Groups pane, select the group you would like to rename, and select the Edit button.
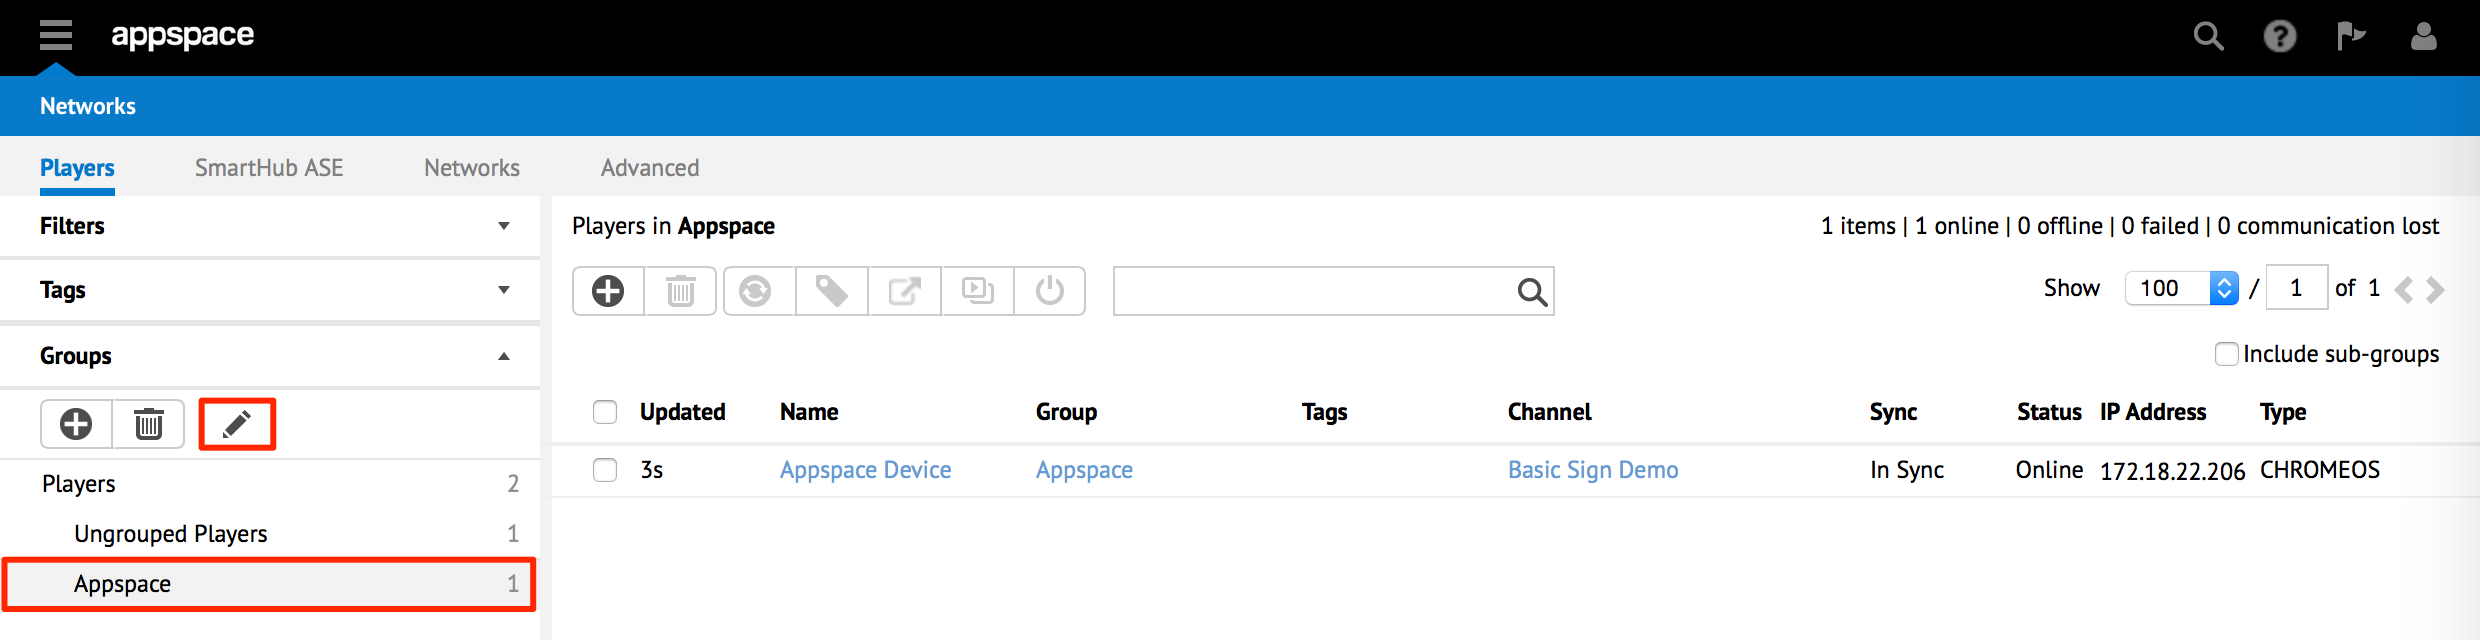
Type in the new name for the group, press enter to confirm the changes.
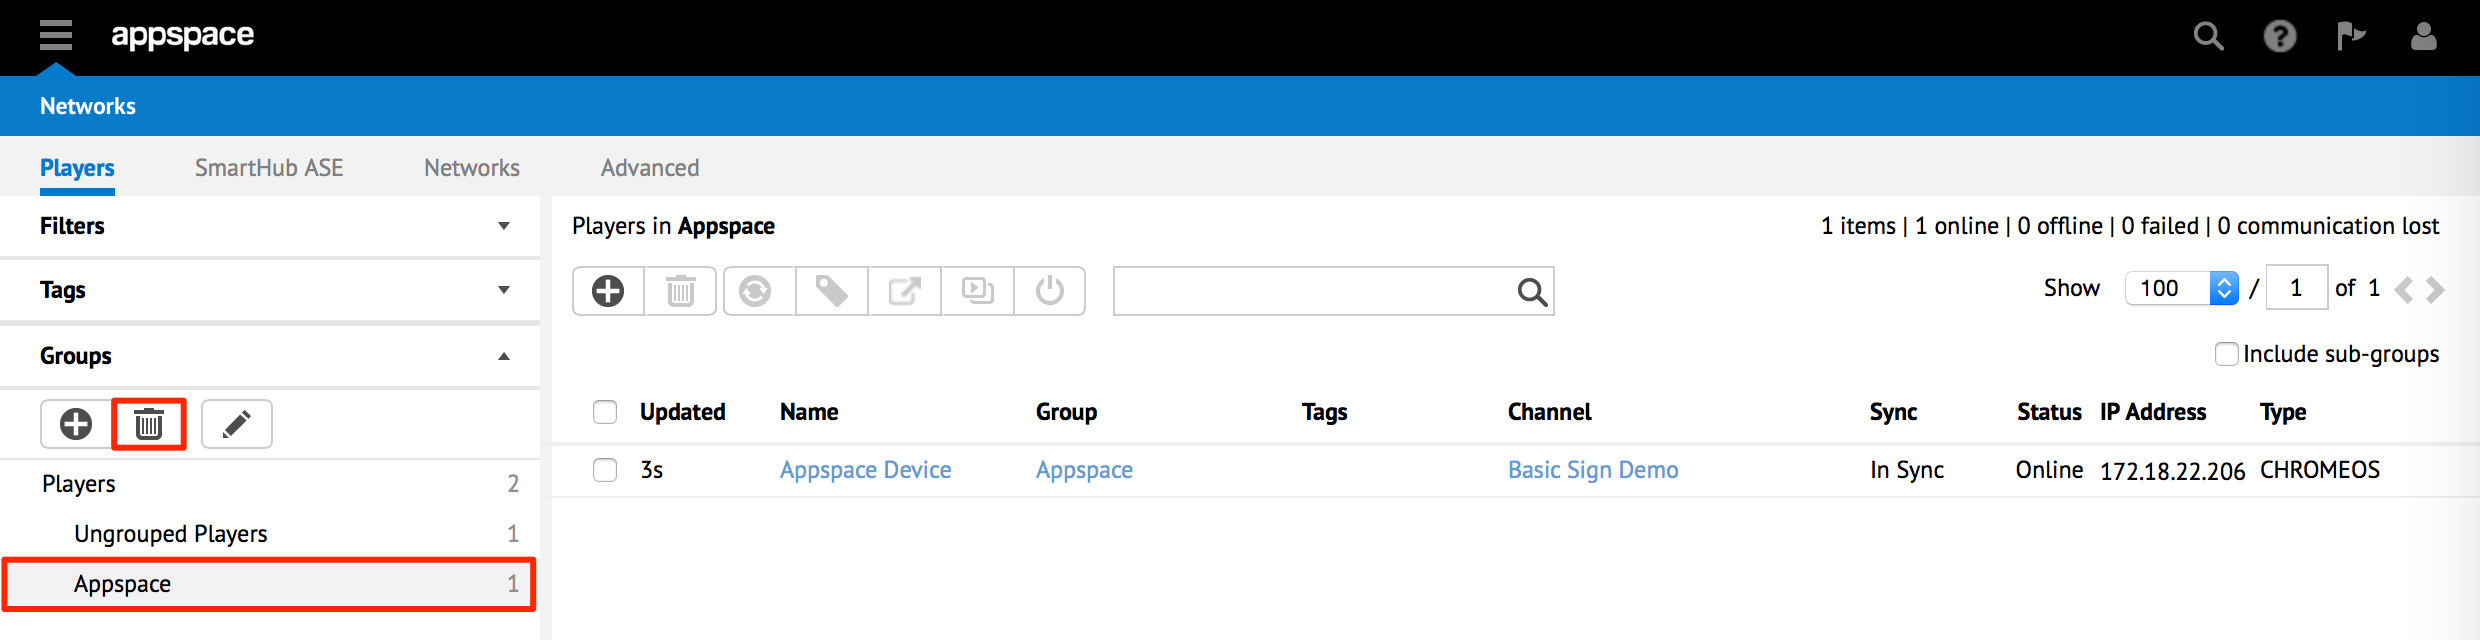
Deleting Media Player Groups
Click the Players tab.
Under the Groups section, select the group you would like to delete and select the Delete button. The media players in the deleted group will be returned to the Ungrouped Players folder.
Viewing Ungrouped Media Players
Click the Players tab.
Under the Groups section, select the Ungrouped Players folder. All available media players that have not yet been associated to a group will be presented in the media player listings.
