Activating a legacy license
Important
As of September 9th 2017, the instructions below are no longer valid with the release of our new licensing workflow and Account Management Portal at https://account.appspace.com. Please refer to our introductory article here: Account Management Portal.
For new instructions to activate your license, please refer to the Activating Appspace on-premises article available in version 6.2 of this Knowledge Center.
This article provides instructions to activate your on-premise Appspace server for a legacy subscription (i.e. Pro, Pro+, or Enterprise), using the following two methods:
- Automated Activation: when you have an active Internet connection.
- Manual Activation: when you do not have an active Internet connection.
Note
To upgrade to an OMNI subscription, please contact your local Appspace sales or support team.
Prerequisites
- A Cloud user account on a legacy Cloud subscription plan (Pro, Pro+, or Enterprise).
- Your Cloud user account must be upgraded to one of the legacy Cloud subscription plans (Pro, Pro+, or Enterprise).
- Portal Administrator privileges on your Appspace server.
- A unique 16-character Appspace product license key. If you have not obtained the product license key, please contact your local Appspace sales team or reseller to obtain the key.
Note
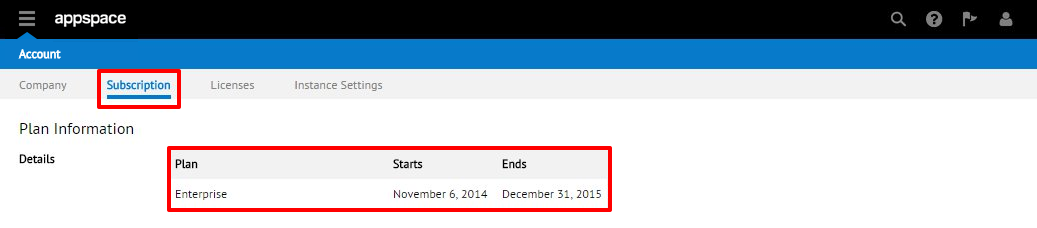
You can check your subscription information from your Cloud account via System > Account > Subscription.
Automated Activation
Follow the instructions below to activate an on-premise Appspace server with an active Internet connection.
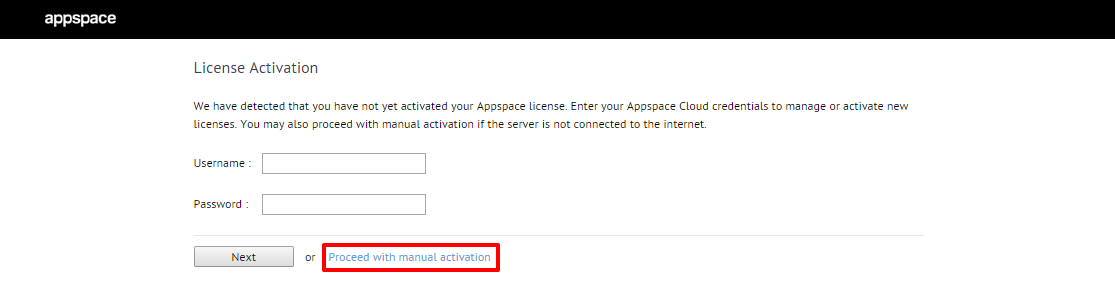
In the License Activation page, enter your Appspace Cloud account credentials and click Next to continue.

Note
Please ensure that you are using a Cloud account that has already been upgraded to one of the legacy subscription plans (Pro, Pro+, or Enterprise).
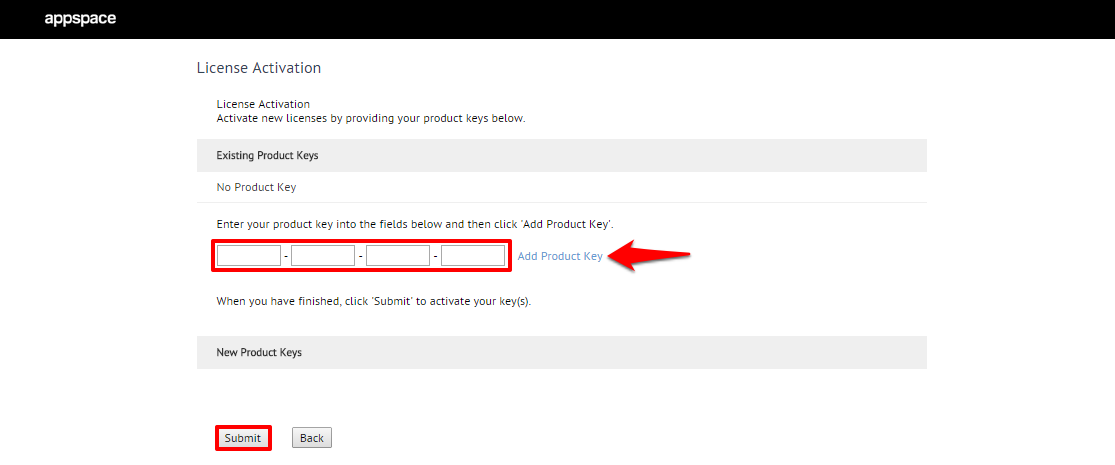
Input your 16-character product license key, and click ‘Add Product Key’. Once the new key is listed under the New Product Keys section, click the Submit button to activate.
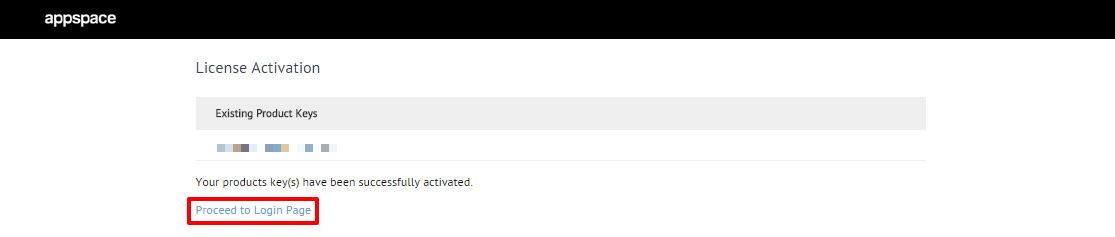
If successful, a confirmation message is displayed. Click the ‘Proceed to Login Page’ link to sign-in to your Appspace server.
Proceed to the First Time Login section below.
Manual Activation
Follow the instructions below to activate an on-premise Appspace server without an active Internet connection, or with security policies in place that limit Internet access.
In the License Activation page, click the ‘Proceed to Manual Activation’ link to continue.
Click the Download File button to download your Server Profile. Save the ServerProfile.xml file to a location on your local machine.

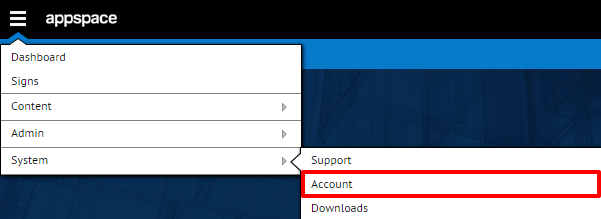
Login to your Appspace Cloud account on https://cloud.appspace.com, and click System > Account in the Appspace menu.
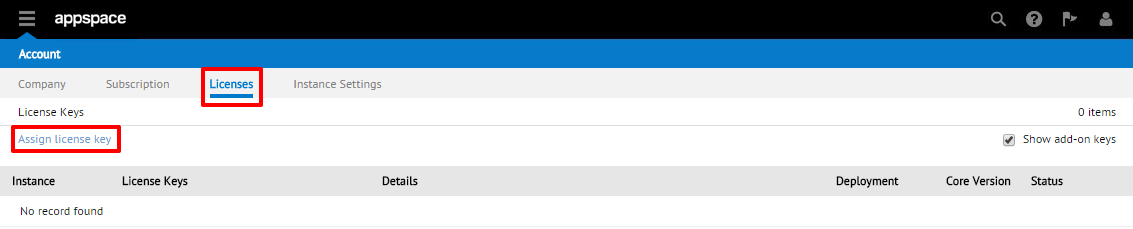
Proceed to the Licenses tab and click the ‘Assign license key’ link.
Note
If you do not see the Licenses tab, your Cloud user account has not yet been upgraded to the needed subscription level to manage license keys. Please contact your local Appspace sales team or support team for assistance.
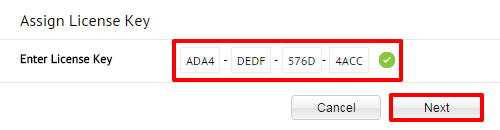
In the Assign License Key window, input the 16-character product license key. If the key is valid, a green check is displayed. Click Next to continue.
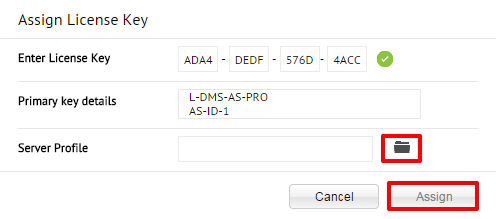
The add-on key details is displayed in the Assign License Key window. Browse and select the downloaded Server Profile (ServerProfile.xml) file. Click Assign to continue.
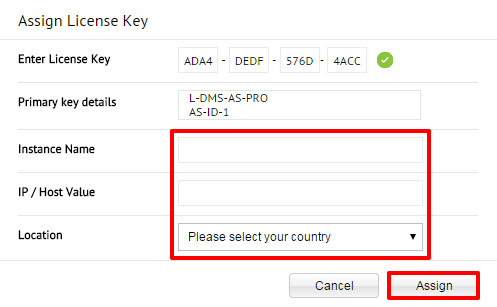
Input the Instance Name, IP/Host Value, and Location. This information will be used strictly to identify the Appspace server instance as seen in the Cloud dashboard and will not affect any on-premise server behavior. Click Assign to complete the process.
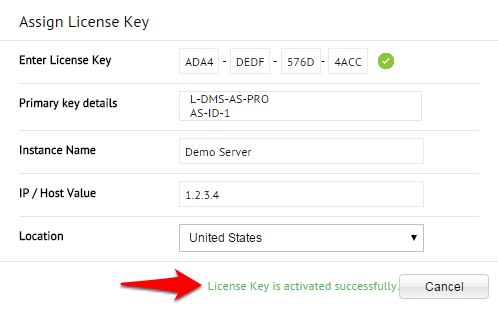
If successful, a green confirmation message is displayed. You may now return to the Licenses tab.
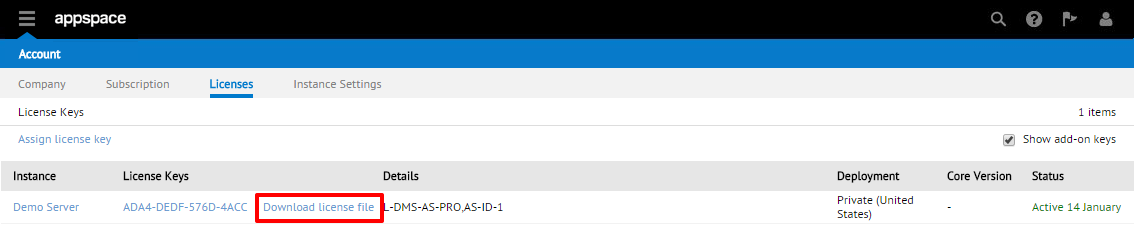
Your newly added server instance should now be listed on the Licenses page. Click the ‘Download license file’ link. This will download the Product Activation file, <Product Key Number>.bin. Save this file to your local machine.
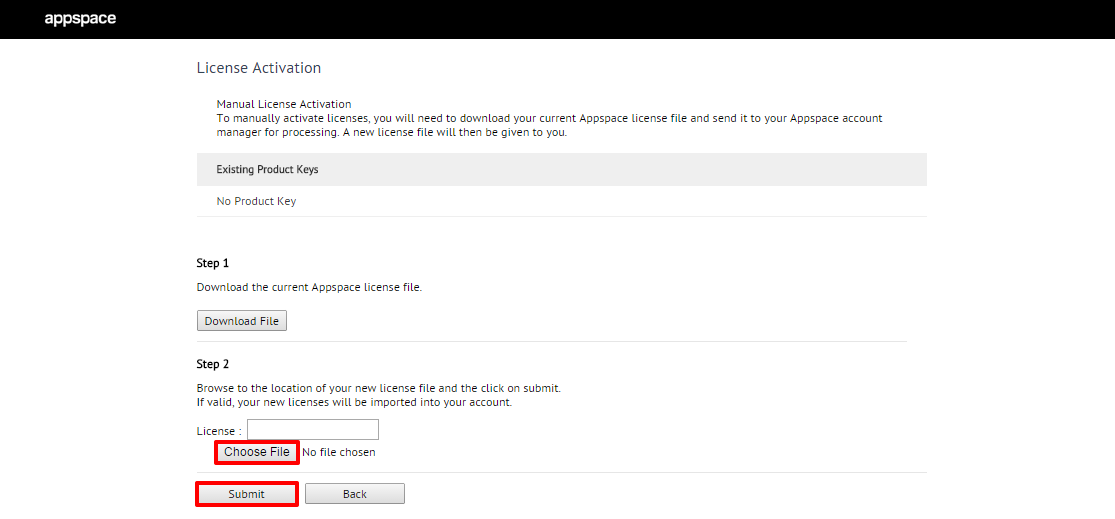
Back on the Manual License Activation page, browse and select the downloaded Product Activation file (<Product Key Number>.bin). Click the Submit button.
If successful, a confirmation message is displayed. Click the ‘Proceed to Login Page’ link.

Proceed to the First Time Login section below.
First Time Login
Once your Appspace server has been successfully licensed, connect to the Appspace server from a web browser via one of the following two URL paths:
- http://<server_name_ip_address>/app (replace <server_name_ip_address> with the DNS name or IP address of your Appspace server)
- http://localhost/app
Note
When accessing the Appspace server for the first time, it may take several seconds (between 30 to 90 seconds) for the web browser to load the server’s user interface. This initial delay is due to the server creating and building the databases that will be used by Appspace. All future attempts to load Appspace will not encounter this delay.
In the Sign In page of your on-premise Appspace server, use the following credentials:
- Username: admin
- Password: password123

Note
The password for the “admin” username may be changed at a later time. This account has Portal Administrator privileges by default.
In the Software License Agreement page, review the End User Agreement, and click Accept to continue. You will be automatically redirected to the Appspace dashboard.