Upgrading an Appspace on-premises server
This article provides the instructions to perform a full upgrade of the Appspace server:
Prerequisites
You must meet all the requirements listed in the Appspace on-premises requirements article.
Turn off anti-virus software prior to installation. If unable to turn off anti-virus software due to company policies, configure the anti-virus software to exclude all Appspace folders and databases.
Important
When not turned off, anti-virus software blocks installer processes from running, which prevents the installation of some Appspace files. Overall installation time is also slower.
Modify the MySQL Database
Note
If you are upgrading a version of Appspace that is 5.1.0 or later, please proceed to the Update Appspace Installation Center section below.
If you are upgrading a version of Appspace that is 5.1.0 or older (e.g. any of the 5.0.3.x releases), follow the instructions below to modify the MySQL database to support ANSI quotes.
Start MySQL Workbench.
- In Windows 2008, click the Start button and select MySQL > MySQL Workbench 6.2 CE.
- In Windows 2012, click the Windows button and select MySQL Workbench 6.2 CE from the Apps menu.
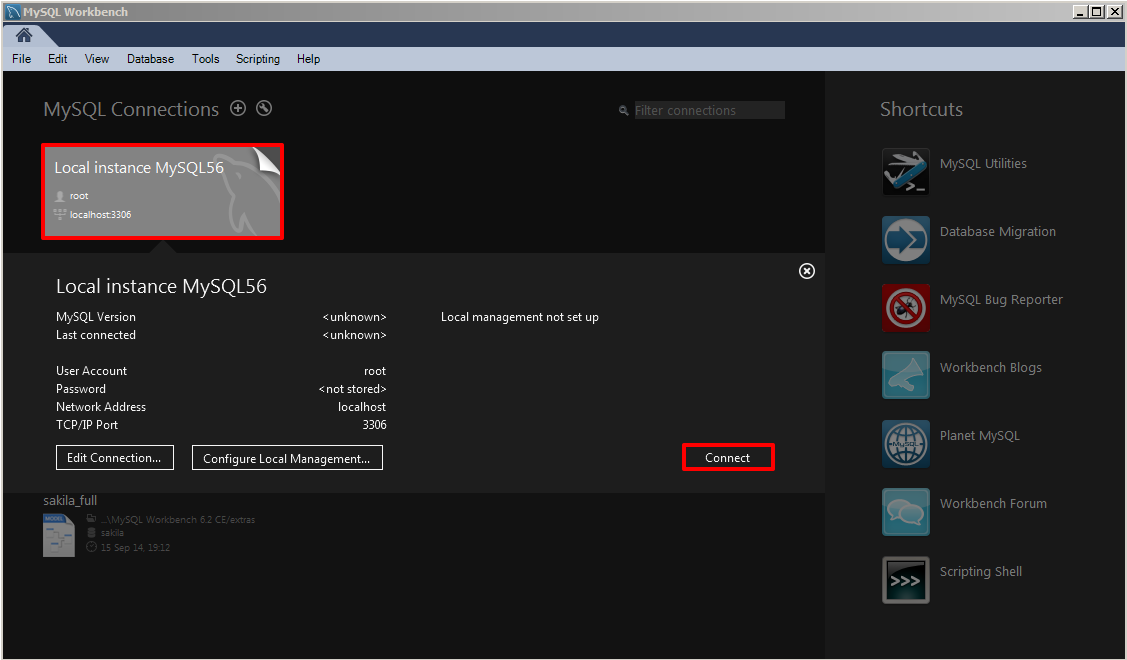
Once MySQL Workbench has started, select ‘Local instance MySQL56’ and click Connect.
Note
It is highly recommended that you double-check to ensure the MySQL Workbench connection is pointing to the correct my.ini file. If you recently upgraded MySQL Workbench (e.g. from version 5.x to 6.0) the Workbench may be pointing to an incorrect path. To edit the my.ini path, right-click the instance and select Edit Connection. On the System Profile tab, the Configuration File field must point to the existing my.ini file of the MySQL database server (i.e. C:/Program Files/MySQL Server 5.x/my.ini).
When prompted, type the MySQL server root password created during the original MySQL installation process. Check the ‘Save password in vault’ option for easier access in the future. Click OK to continue.
In the MySQL Workbench window, select Options File under INSTANCE This should open up a tab named ‘Administration – Options File’.
Click the General tab and scroll down to the ‘SQL’ section.

In the ‘sql-mode’ text field, add the following to the existing string (before the closing quotation marks): ,ANSI_QUOTES .

Warning
Be sure to add the comma and do not leave any blank spaces.
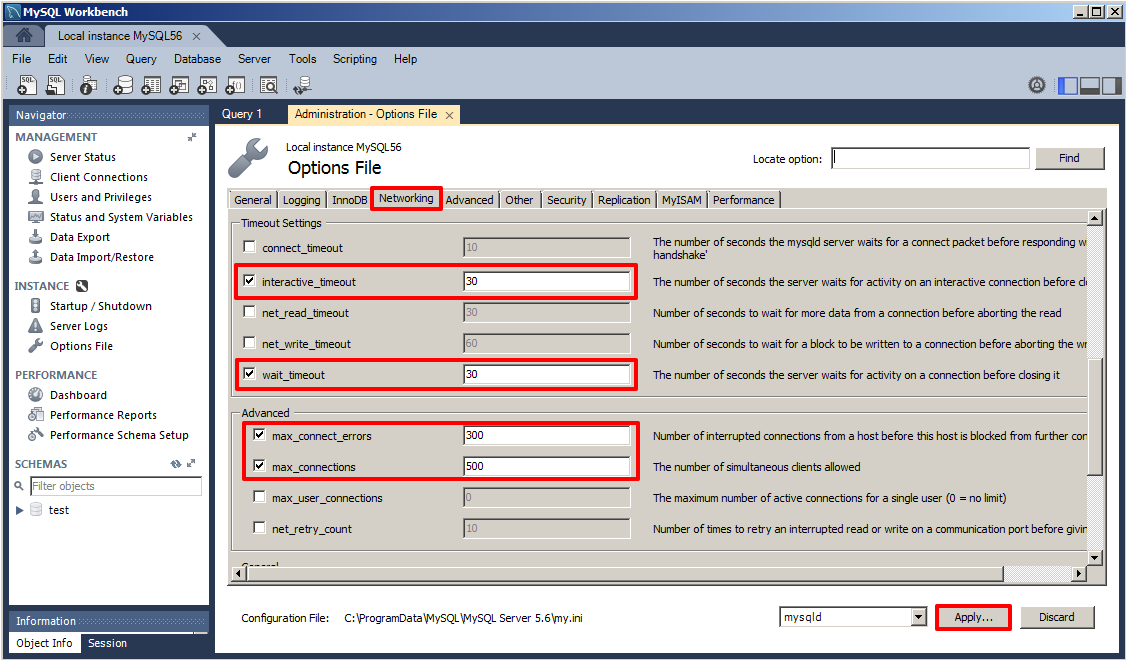
Click the Networking tab and scroll down to the ‘Timeout Settings’ and ‘Advanced’ sections. Make the following changes:
- Check the box for interactive_timeout and give it a value of 30
- Check the box for wait_timeout and give it a value of 30
- Check the box for max_connect_errors and give it a value of 300
- Check the box for max_connections and give it a value of 500
When finished, click the Apply… button to continue.
In the ‘Apply Changes to my SQL Configuration File’ window that lists all the configurations that were just made, click the Apply button to confirm the changes.
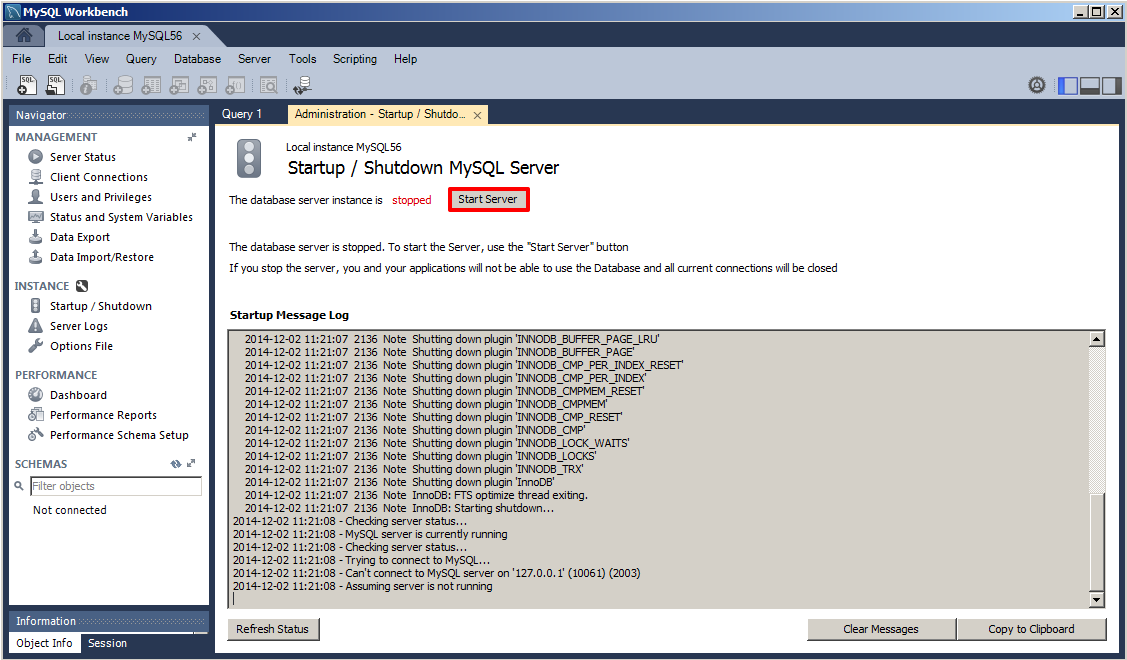
In the Navigator pane on the left, select ‘Startup / Shutdown’ under INSTANCE. ‘The database server instance is’ should read ‘running’. Click the Stop Server button.

Wait until you see the ‘The database server instance is’ reads ‘stopped’; this confirms that the MySQL server has shut down. Restart the server at this point by clicking on the Start Server button.
Update Appspace Installation Center
You must first remove the previous builds of Appspace Installation Center. Go to the Windows Control Panel, and double-click ‘Programs and Features’. In the list of installed programs, select Appspace Installation Center and click Uninstall.
Install the latest version of the Appspace Installation Center. For detailed instructions, please refer to the Install Appspace Installation Center section in the Installing Appspace on-premises article.
Upgrade Appspace
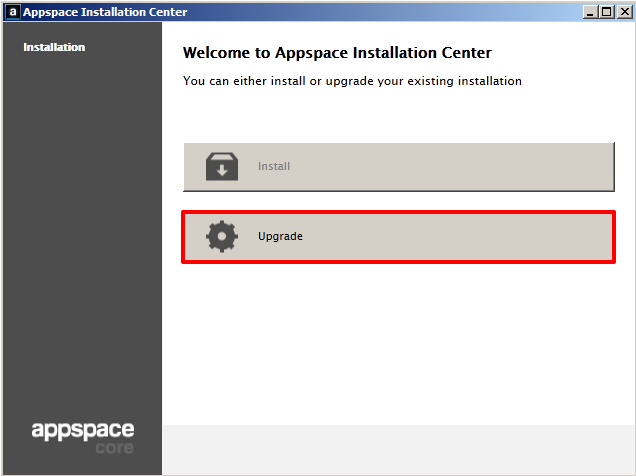
Launch the Appspace Installation Center (AIC) using the ‘Run as Administrator’ option (hold down SHIFT + double-click on the icon).
If prompted by a warning, click Yes to allow the program to make changes to the computer.
Click Upgrade in the ‘Welcome to Appspace Installation Center’ window.
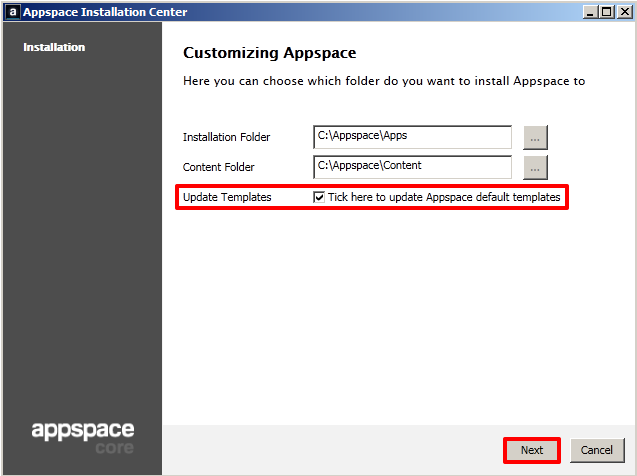
You may choose to update Appspace default templates if you desire and click Next to continue. You do not need to replace templates for Appspace servers version 5.0 and later.
Warning
Opting to update the templates will also overwrite all existing templates/icons. Do not select this option if you have previously created custom elements/assets relating to widgets (i.e. custom weather widget icons).
Select your database and enter the values in the Host, Username, and Password fields. Click Validate.

Please wait while Appspace is being upgraded. Upgrade durations will vary depending on the system’s resources and hardware specifications. Typical upgrades will require at least 20 minutes. During the upgrade, you may see various messages and status updates.
Click OK when you see the “Appspace Installation Complete” message.
Perform a manual restart of your Windows server.
In Windows 2008, click the Start button and select the Restart option (you may also alternatively use CTRL + ALT + DEL).
In Windows 2012, press CTRL + ALT + DEL and select the Restart option.