Registering a Cisco DMP 4400/4310
This article provides instructions to register Cisco DMP4310G or DMP4400G devices to cloud and on-premise Appspace deployments, using the following two options:
- Registering with Online Registration Tool
- Registering with DMP Wizard
- Registering with Registration URL
Prerequisites
- The Appspace on-premise server should have sufficient client access licenses (CALs) to register the desired quantity of devices.
- Ensure that you have the latest Java Runtime Environment (JRE) versions installed on your web browser.
- Ensure that you have enabled Java to run on your web browser.
- Ensure that you have added your Appspace instance as a trusted site to your web browser.
- If the Appspace deployment utilizes multiple-domain Active Directory authentication, ensure you have the short domain name and credentials.
- Ensure that the following network port rules are enabled to complete registration process:
| Source | Destination | Ports | Description |
|---|---|---|---|
| Workstation | Appspace | HTTP(80) or HTTPS (443) | Access using a modern web browser (FireFox, Chrome, Safari) with Adobe Flash 10.0 Plugin. User must add appspace.com to list of trusted websites and enable pop-ups from this URL. Network firewall and proxy server must allow access to Appspace domain URL/IP. |
| Workstation | DMP 4310G or 4400G | SSH (22) | The DMP wizard tool runs on a Windows OS (Windows XP, Windows 7), and requires the Microsoft .Net 4.0 runtime and accesses the device via SSH during registration. |
| DMP 4310G or 4400G | Appspace | HTTP(80) or HTTPS (443) | Background agents on media player devices connect to Appspace for content sync and player status reporting. Network firewall and proxy server must allow access to the Appspace domain URL/IP. |
| DMP 4310G or 4400G | Valid NTP Server (e.g. pool.ntp.org) | UDP(123) ICMP | The media players requires access to a valid NTP server to sync its system clock. This can be an internal network NTP server or a public NTP server on the pool.ntp.org domain name. Network firewall and/or proxy server must allow access to a selected NTP server. |
Registering with Online Registration Tool
Warning
The Online Registration Tool does not work on Chrome and Firefox web browsers, as the NPAPI plugins that are required by the tool to communicate with the devices on the local network are disabled by default on these browsers. Please use Internet Explorer 11 instead.
Navigate to Devices from the Appspace menu, and select the Advanced tab. Click the Looking to register legacy devices? Click here link to register a new device.
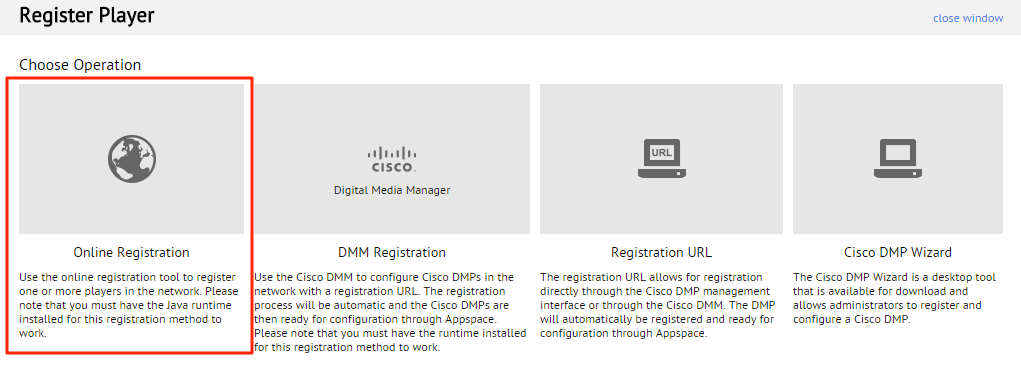
Select Cisco DMP from the device drop-down menu, and click OK.
Select Online Registration.
Enter in the Device IP, Content delivery method, and Device Credentials. Once complete, click Scan Devices to begin the device search.

Note
An IP range may be used for the Device IP field to find multiple devices.
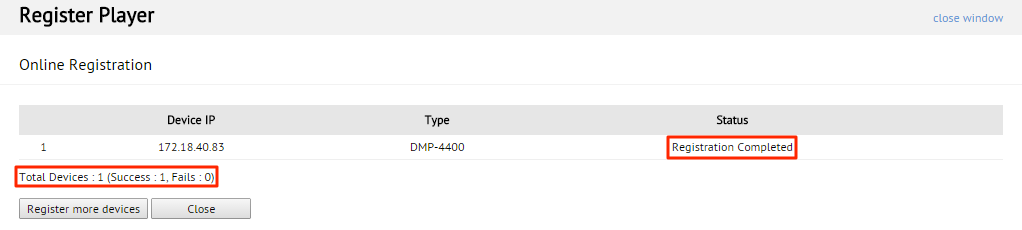
The tool displays the DMP(s) found within the defined IP or IP range. Select the checkbox of the DMP(s) you want to register and click Register Device.
This process will take up to a few minutes depending on the number of DMPs being registered. The status column will continuously update the current registration progress of each DMP (if there are multiple).

Once the registration process is complete, a summary at the bottom of the page displays the number of devices successfully registered and the number of devices that failed to register.
Registering with DMP Wizard
Navigate to System > Downloads from the Appspace menu, and download the Appspace Installer for Cisco DMPs
Right-click the installer file (.msi) and Run as Administrator.
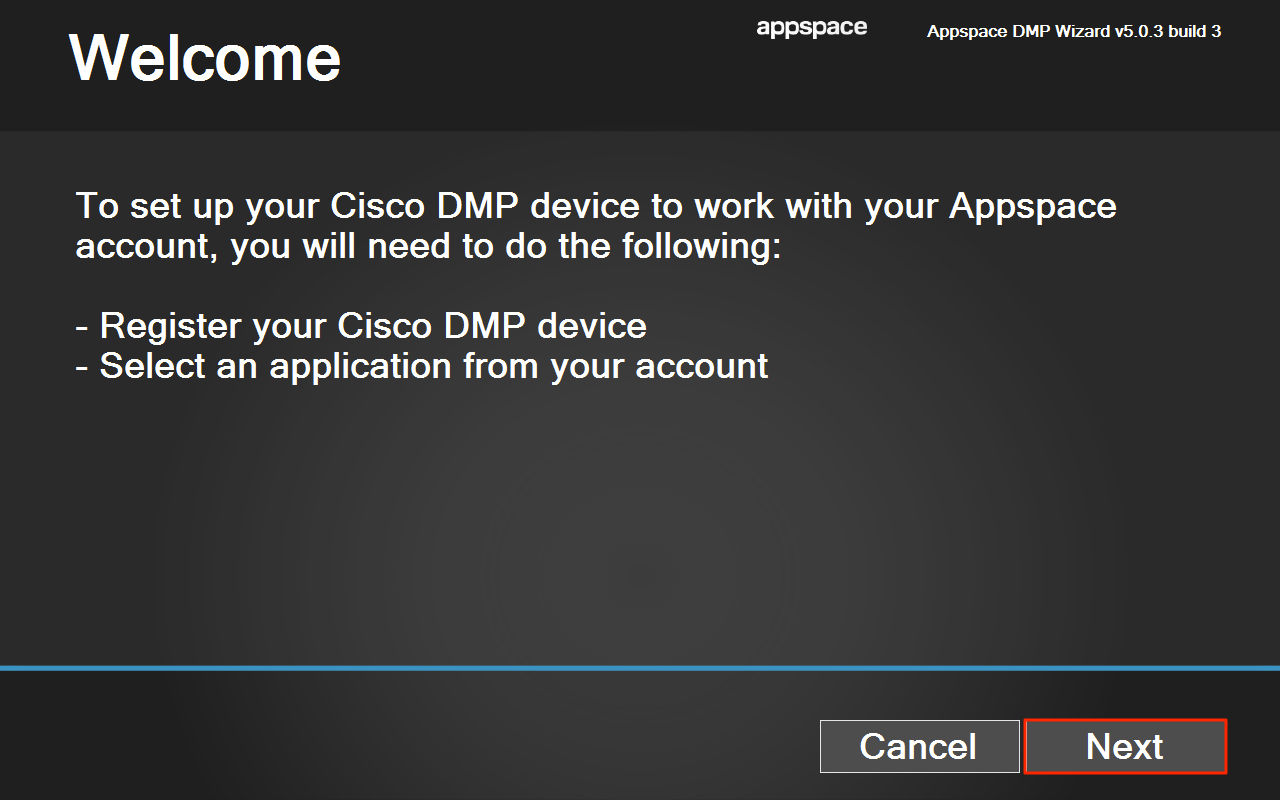
When the installation is complete, an Appspace DMP Wizard shortcut will be placed on the desktop. Double-click the icon to run the wizard.

Click Next at the Welcome screen.
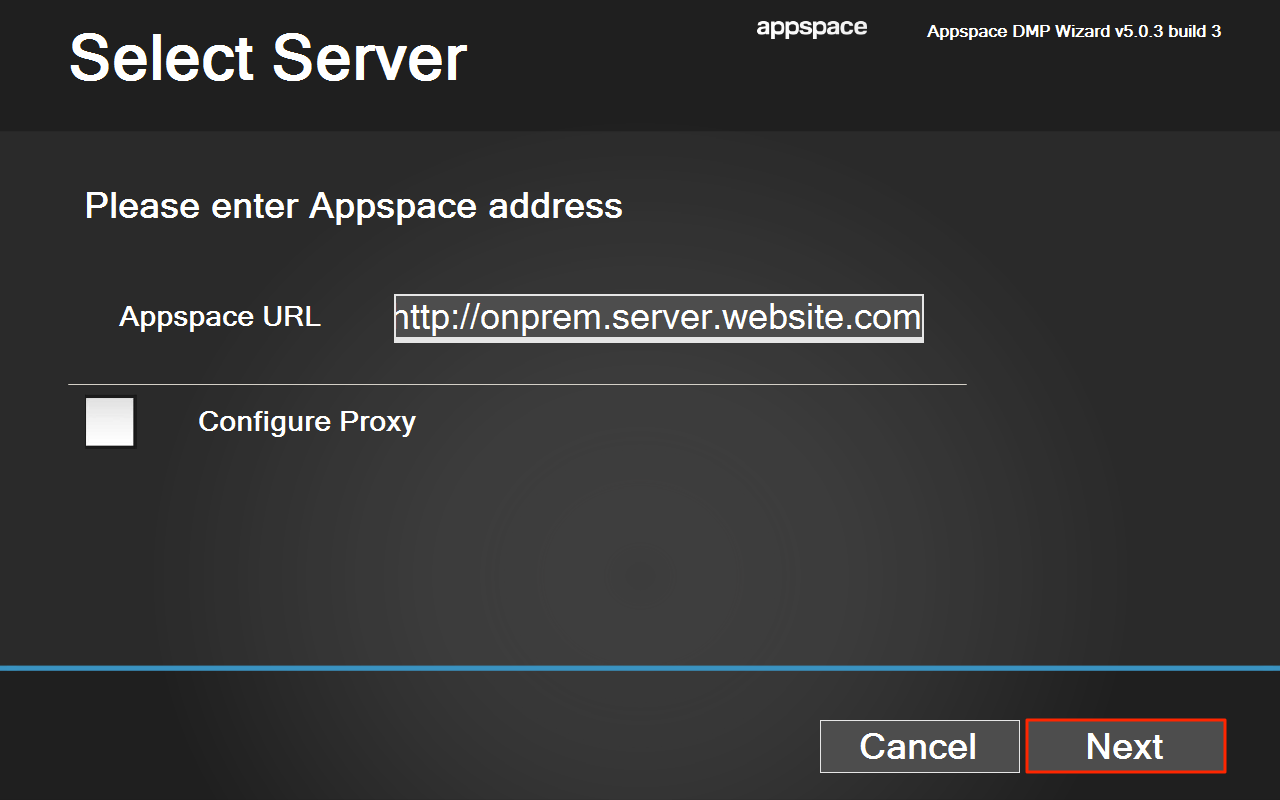
In the Appspace Settings page, enter in the details for the Appspace URL, Username and Password sections as per your Appspace deployment
For On-Premise deployments, the Appspace URL should coincide with the URL of your on-premise Appspace server. In this example: http://onprem.server.website.comor if SSL is used, https://onprem.server.website.com. Click Next to proceed.
Note
When authenticating via Active Directory (single/multiple domain) the Username must be in the format of: short domain nameUsername
For Cloud deployments, The Appspace URL is the device registration link from the Downloads page. Click Next to proceed.
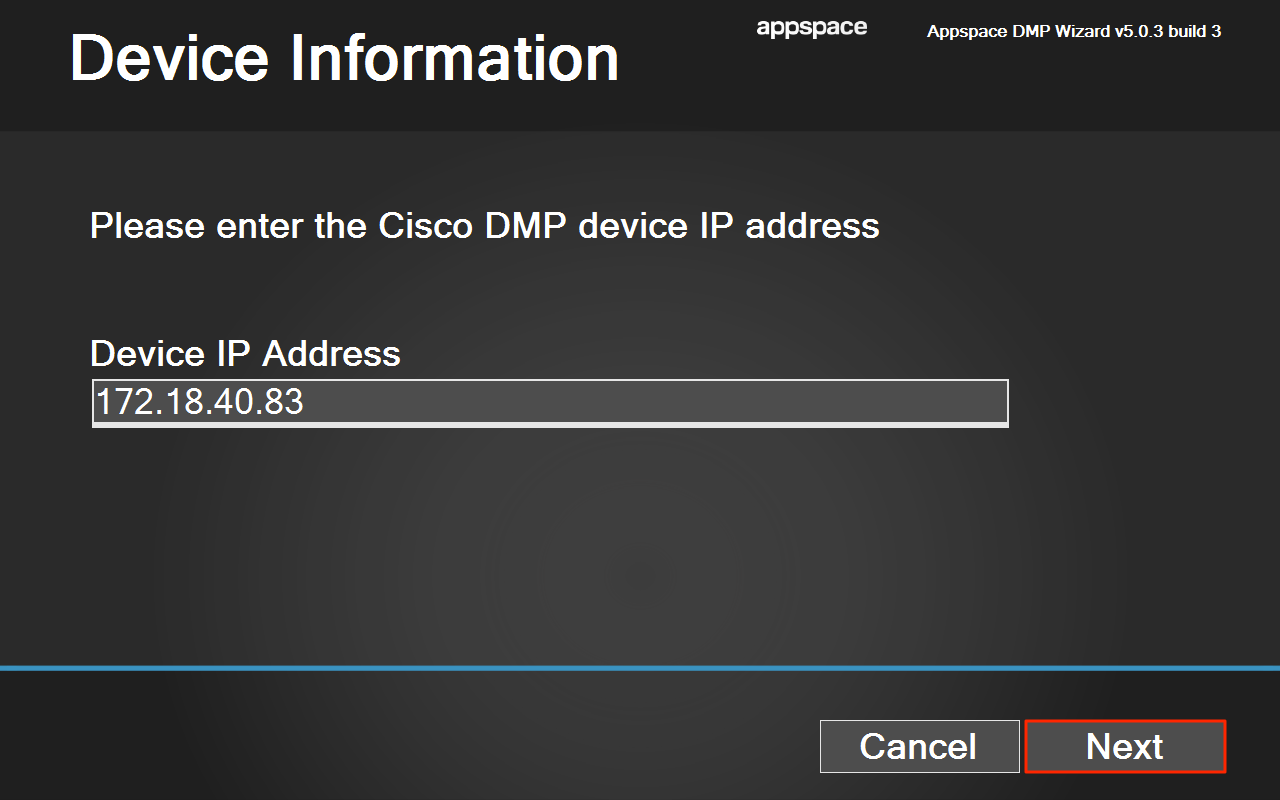
Enter in the Device IP Address of your Cisco DMP, and click Next.
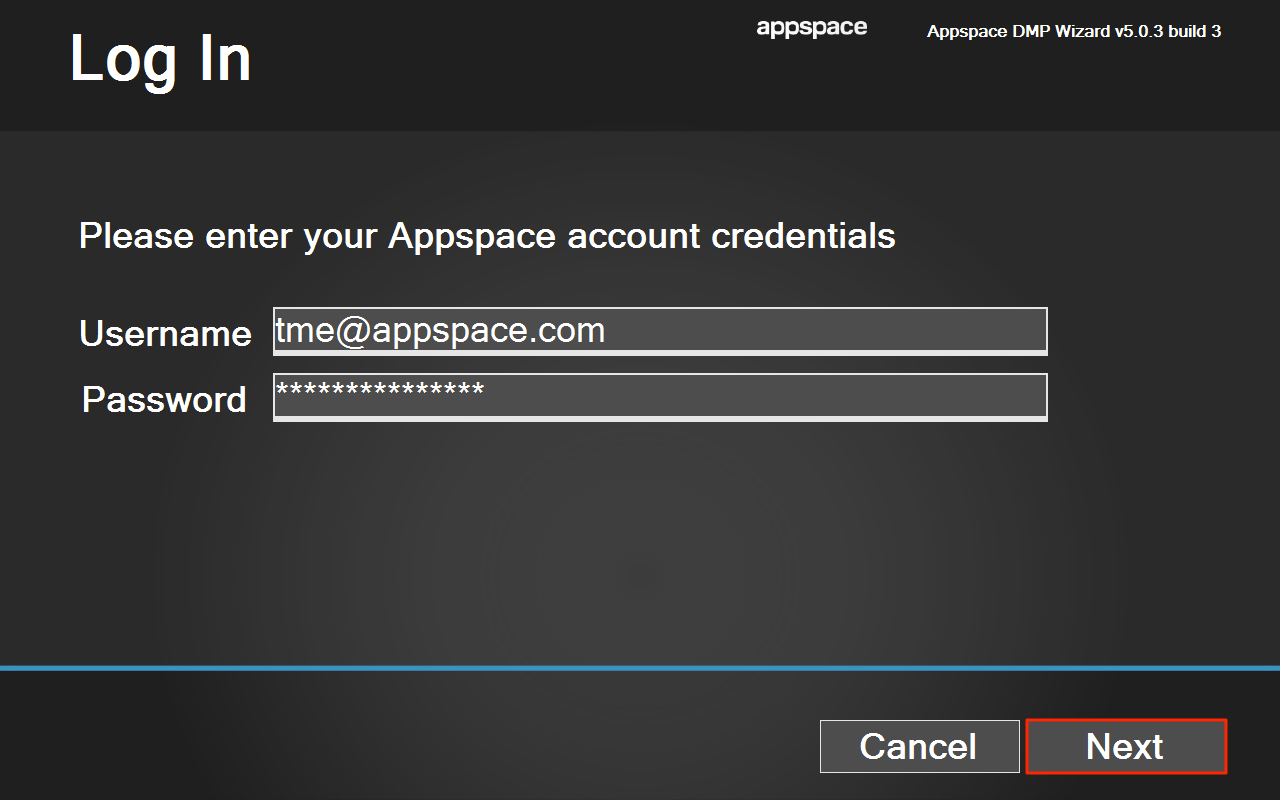
Enter in your Appspace user credentials and click Next to continue.
Note
When authenticating via Active Directory (single/multiple domain) the username must be in the formate of short-domain-name\username.
Once your credentials have been verified, click Next to continue.
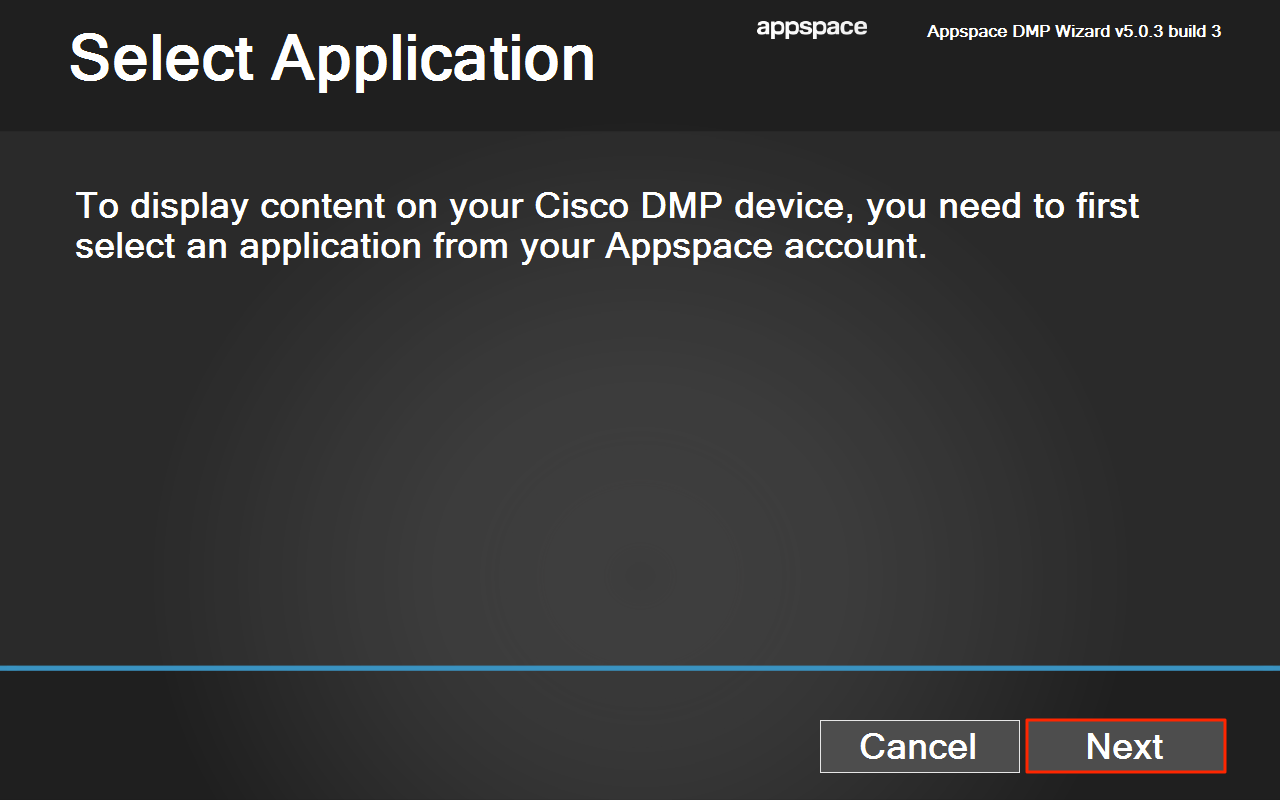
Select a Sign channel to be displayed on the DMP from the list. Once complete, click Next.

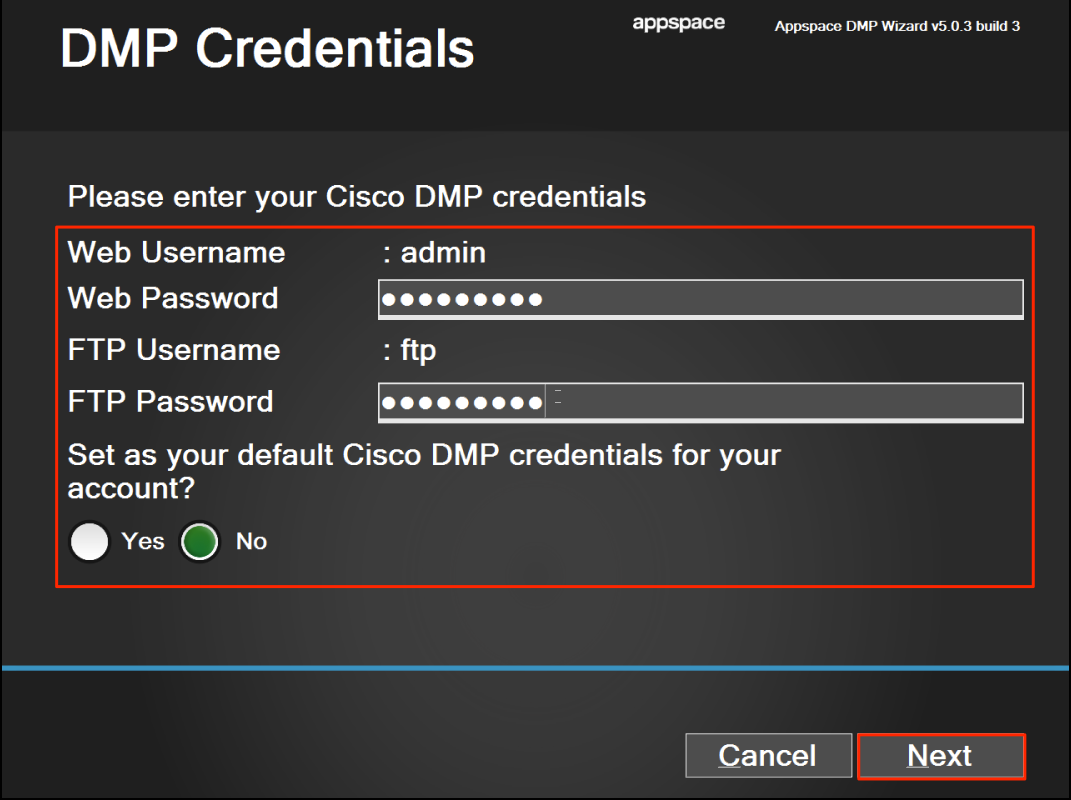
Enter the required password(s), and click Next.
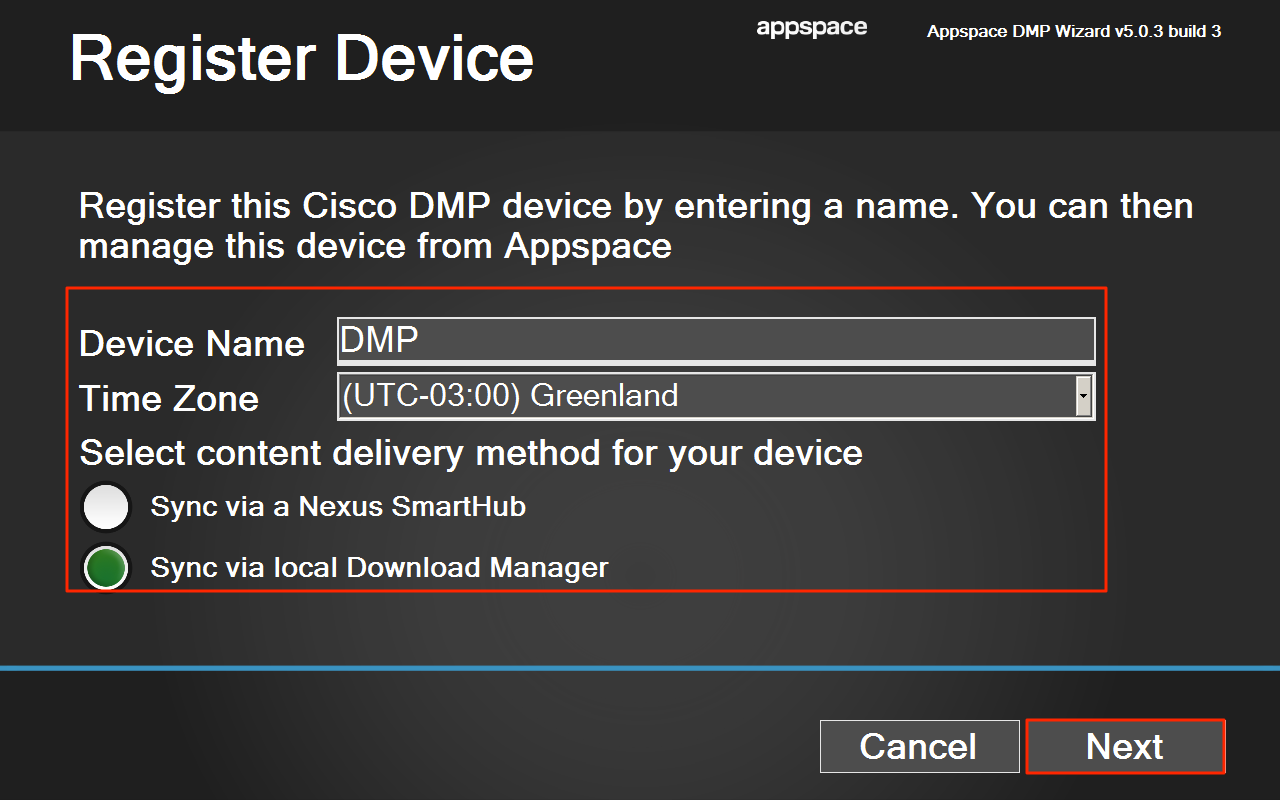
Assign a Device Name and configure the other options if needed, and click Next.
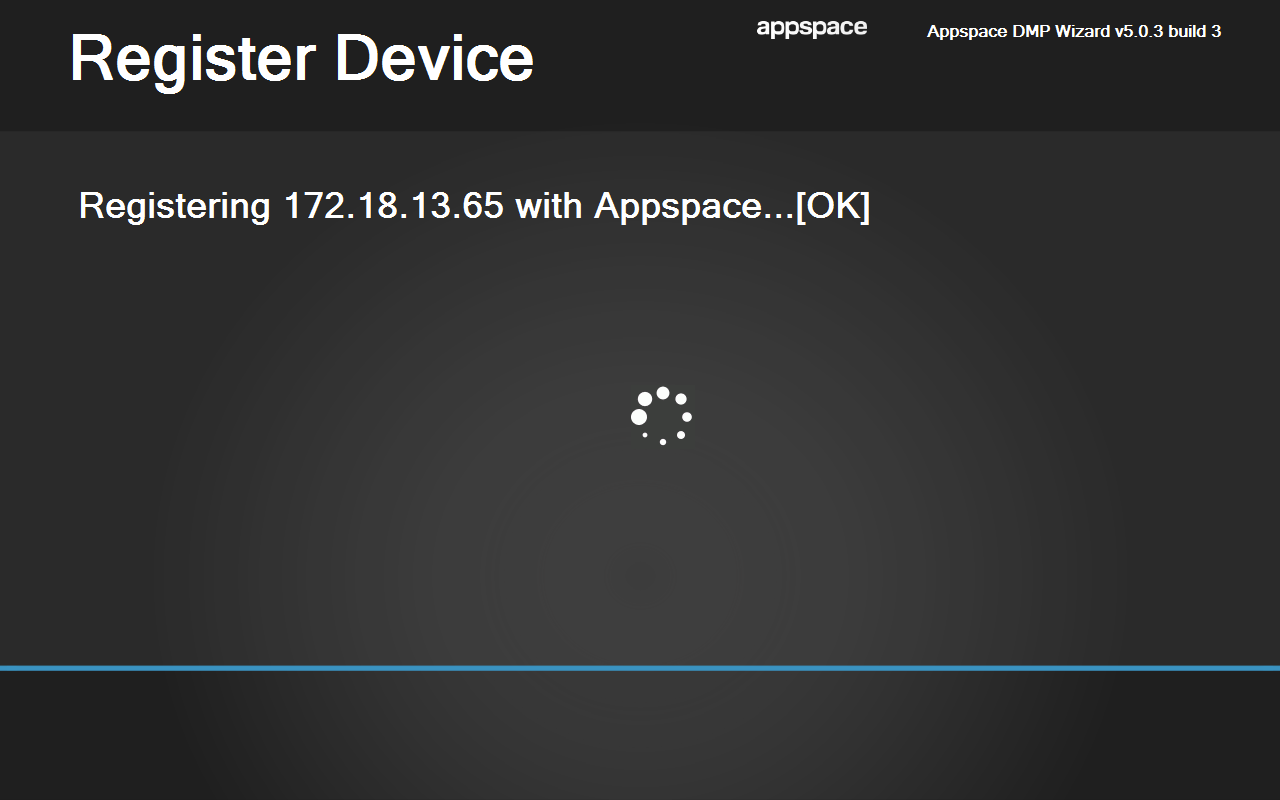
It will take a few minutes to configure and complete the DMP registration process.
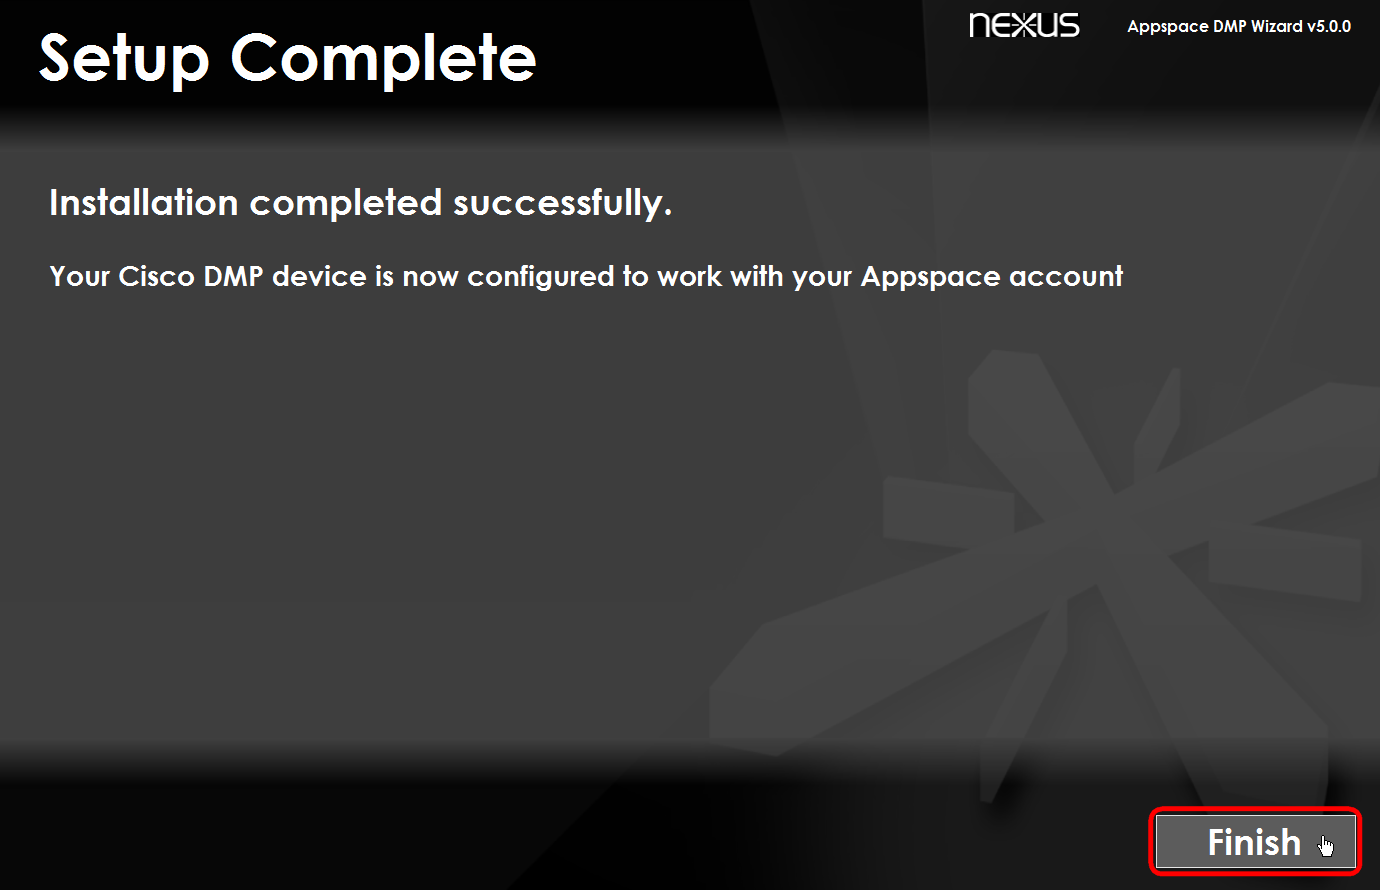
Once the registration has completed, click Next.

You should be prompted with a successful installation message. Click Finish to complete the process.
Registering with Registration URL
Navigate to Devices from the Appspace menu, and select the Advanced tab. Click the Click here for advanced device registration options link to register a new device.
Select Cisco DMP from the device drop-down menu, and click OK
Select Registration URL.
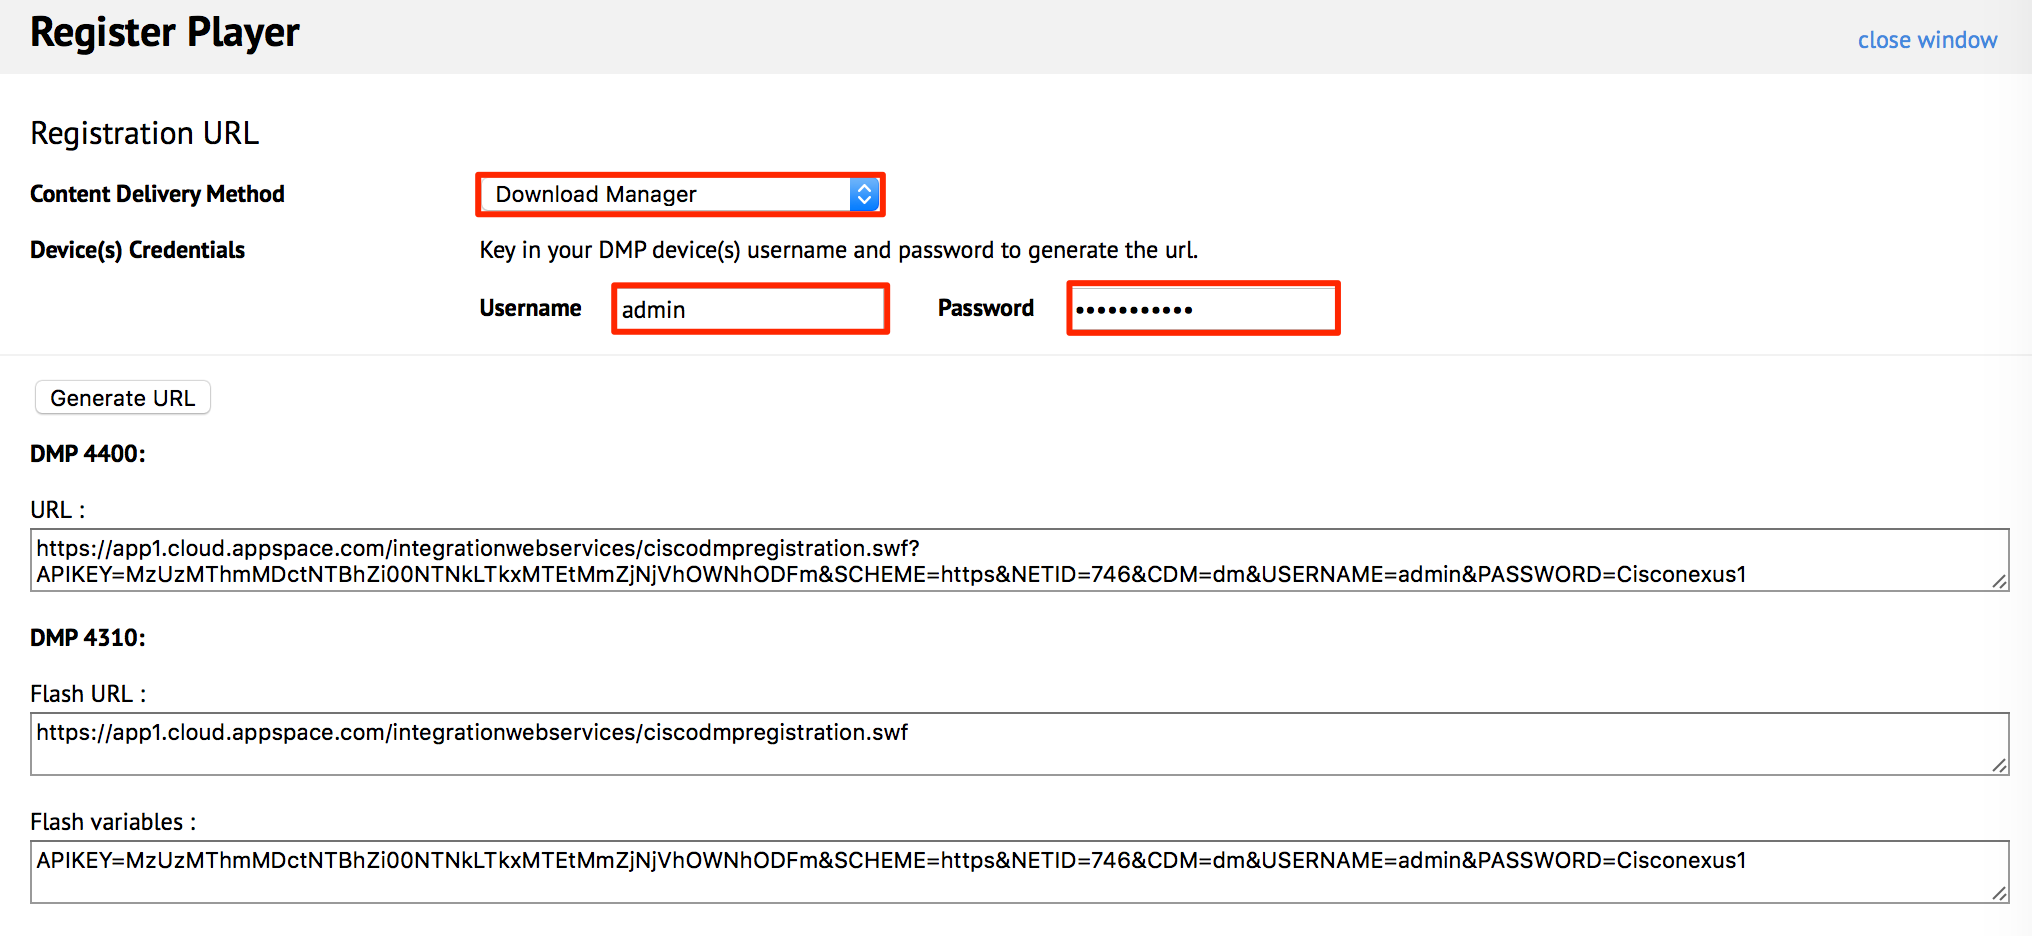
In the Registration URL page, select the Content Delivery Method, and enter in the DMP device admin credentials. Click the Generate URL button to generate the DMP registration URLs.
Launch your web browser, and enter in the IP address of the DMP device, and access the DMP device configuration page.
Follow the instructions depending on your DMP device:
DMP 4400
Click the URL To Be Displayed link under Display Actions.
Copy the DMP 4400 URL link in Step 4, and paste it in the URL field.

Click Go to register the device.
DMP 4310
Click the Browser and Flash Playback link under Display Actions.
Copy the DMP 4310 Flash URL link in Step 4, and paste it in the Playback URL field.
Copy the DMP 4310 Flash variables URL link in Step 4, and paste it in the Flash variable field.
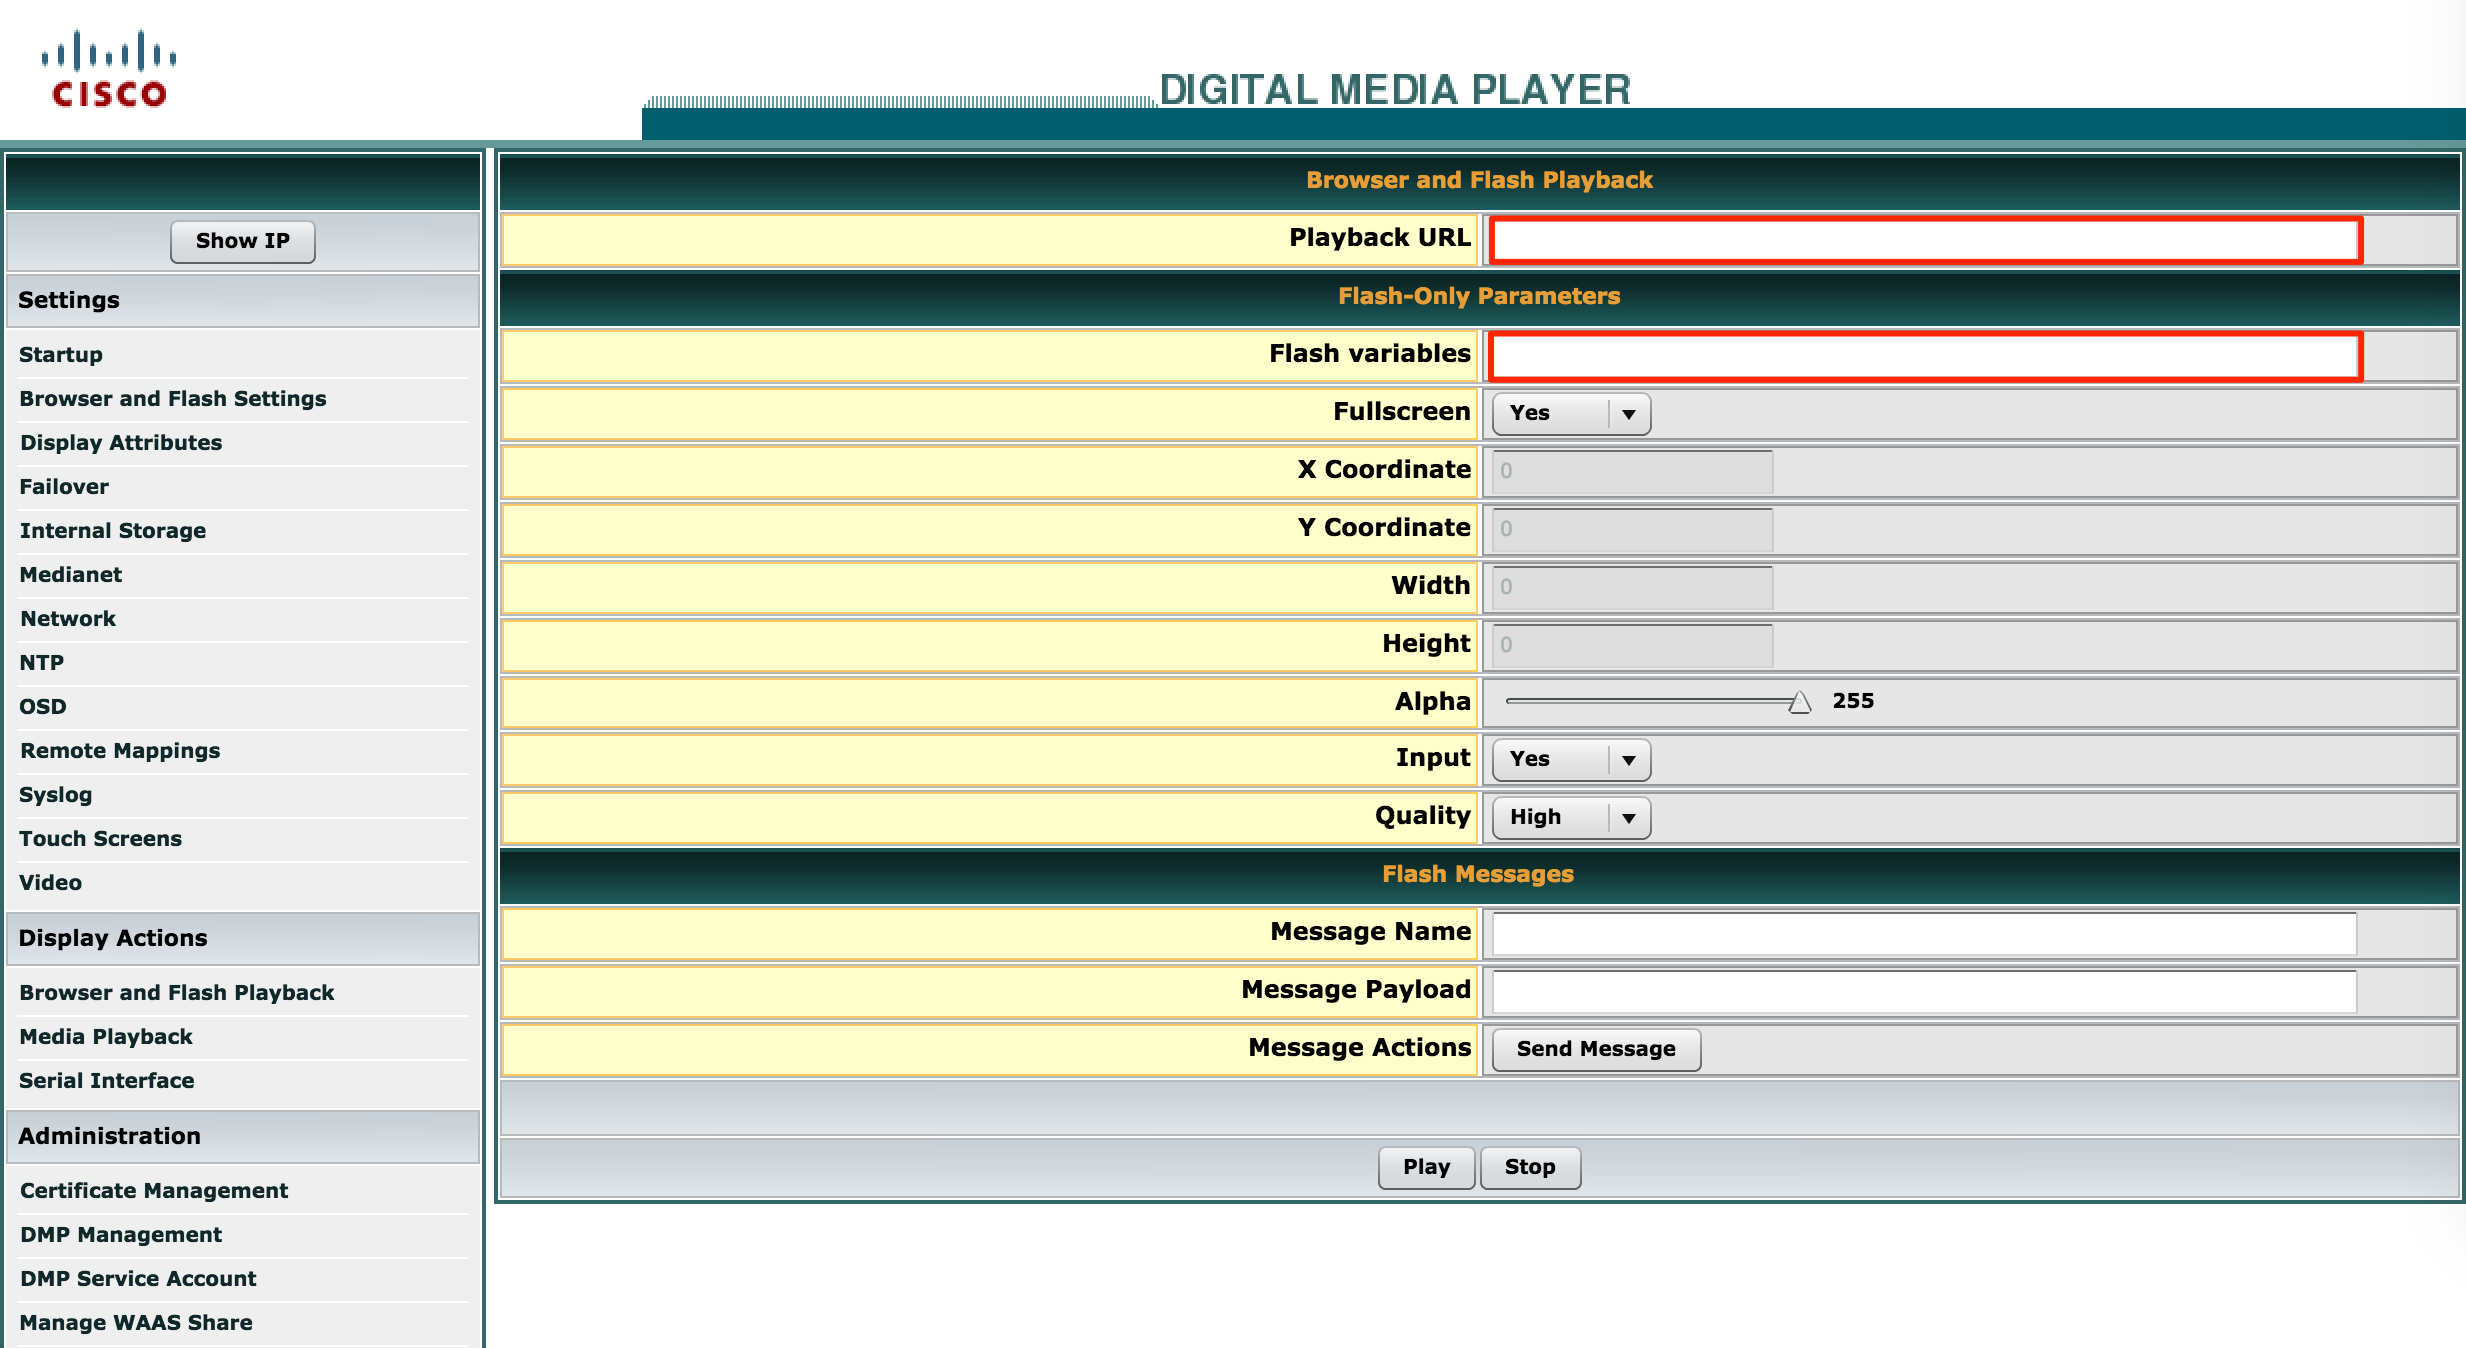
Click Play to register the device.