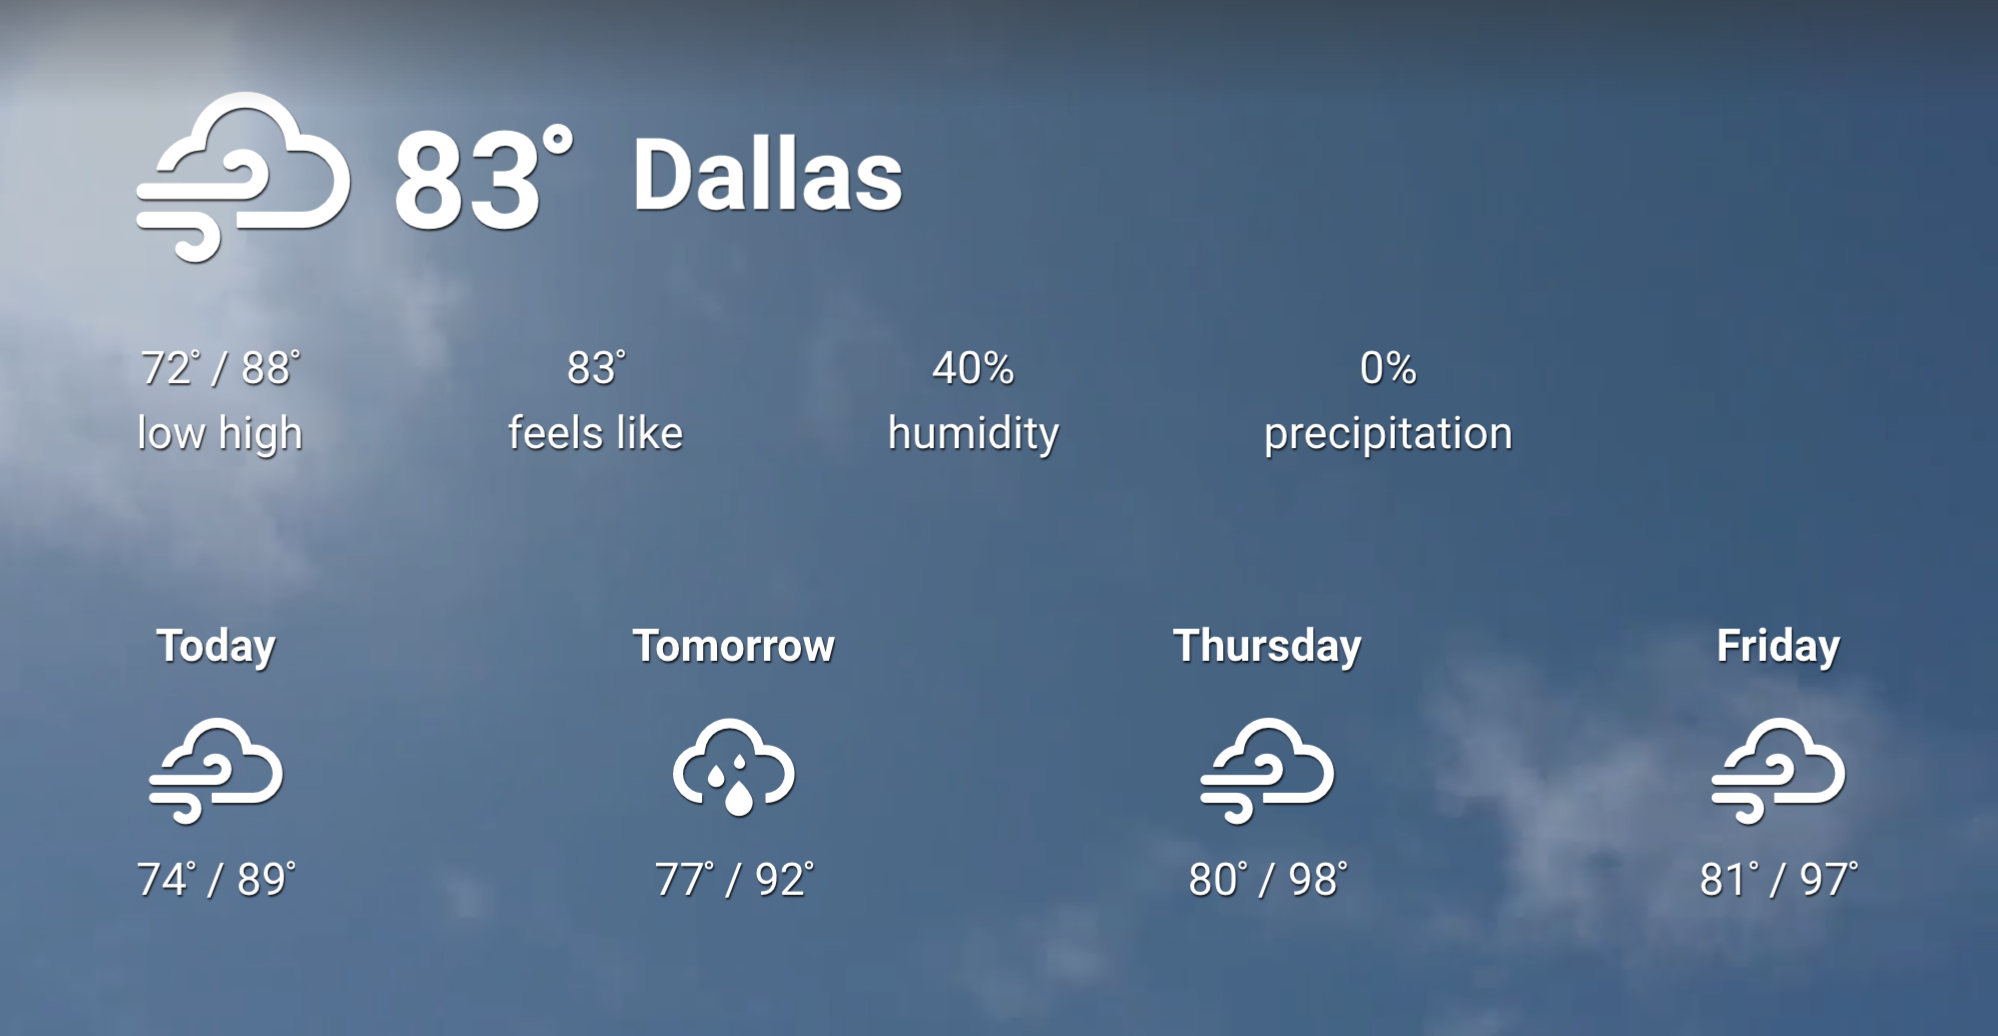
The Weather card is perfect for businesses that rely on the weather, allowing employees to prepare for the weather in advance, or if certain outdoor tasks can be scheduled on that particular day. With a 5-day weather forecast of your selected location, you’ll always be able to set that house viewing on a sunny day.
The Weather card is an Appspace supported card, which is officially created and periodically updated by Appspace with new templates and features.
Visit our Appspace Card Gallery to find the perfect card to deliver your message.
Apart from the basic card customizations, the following customizations are available on the Weather card:
- Configure the temperature unit in Fahrenheit or Celsius.
- Display temperature unit.
- Display motion background.
- Display advanced weather information.
- Display the country or state of the location.
- Configure text color.
- Configure background color.
This article provides the instructions to create and configure a Weather card, which allows you to quickly and easily display a 5-day weather forecast within your organization.
What’s in this article:
Prerequisites
- Cards are only supported on devices with the Appspace App. Legacy devices are not supported.
- Ensure your device is compatible. Refer to Compatible Appspace Cards.
- Account Owner, Publisher, or Editor (author) role in Appspace.

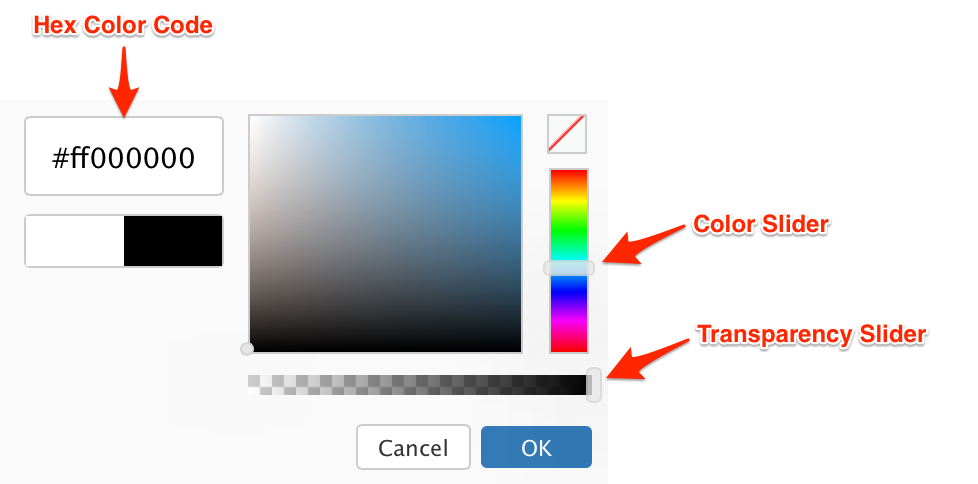 The first two characters in the Hex color code is the transparency value, while the next six characters are the color values. Please be mindful when including a custom Hex color code.
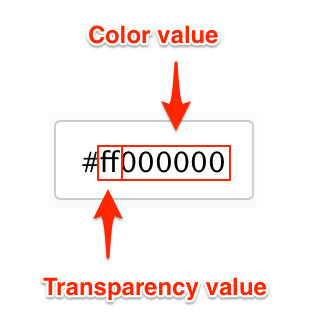
Create and Configure Weather Card
Follow the instructions below to create and configure the card:
- Log in to the Appspace console.
- Click the QUICK ACTION menu on the top-right and select Create Card, and proceed to step 4 below. Or click Library from the Appspace menu navigation bar on the left, and proceed to step 3 below.
- Select the desired folder in the library, and click the ADD button, and select Create Card.
- Select Weather Card from the Filter by template menu, and select a desired card template.
- Enter in the location of the weather to be displayed in the location field on the card.
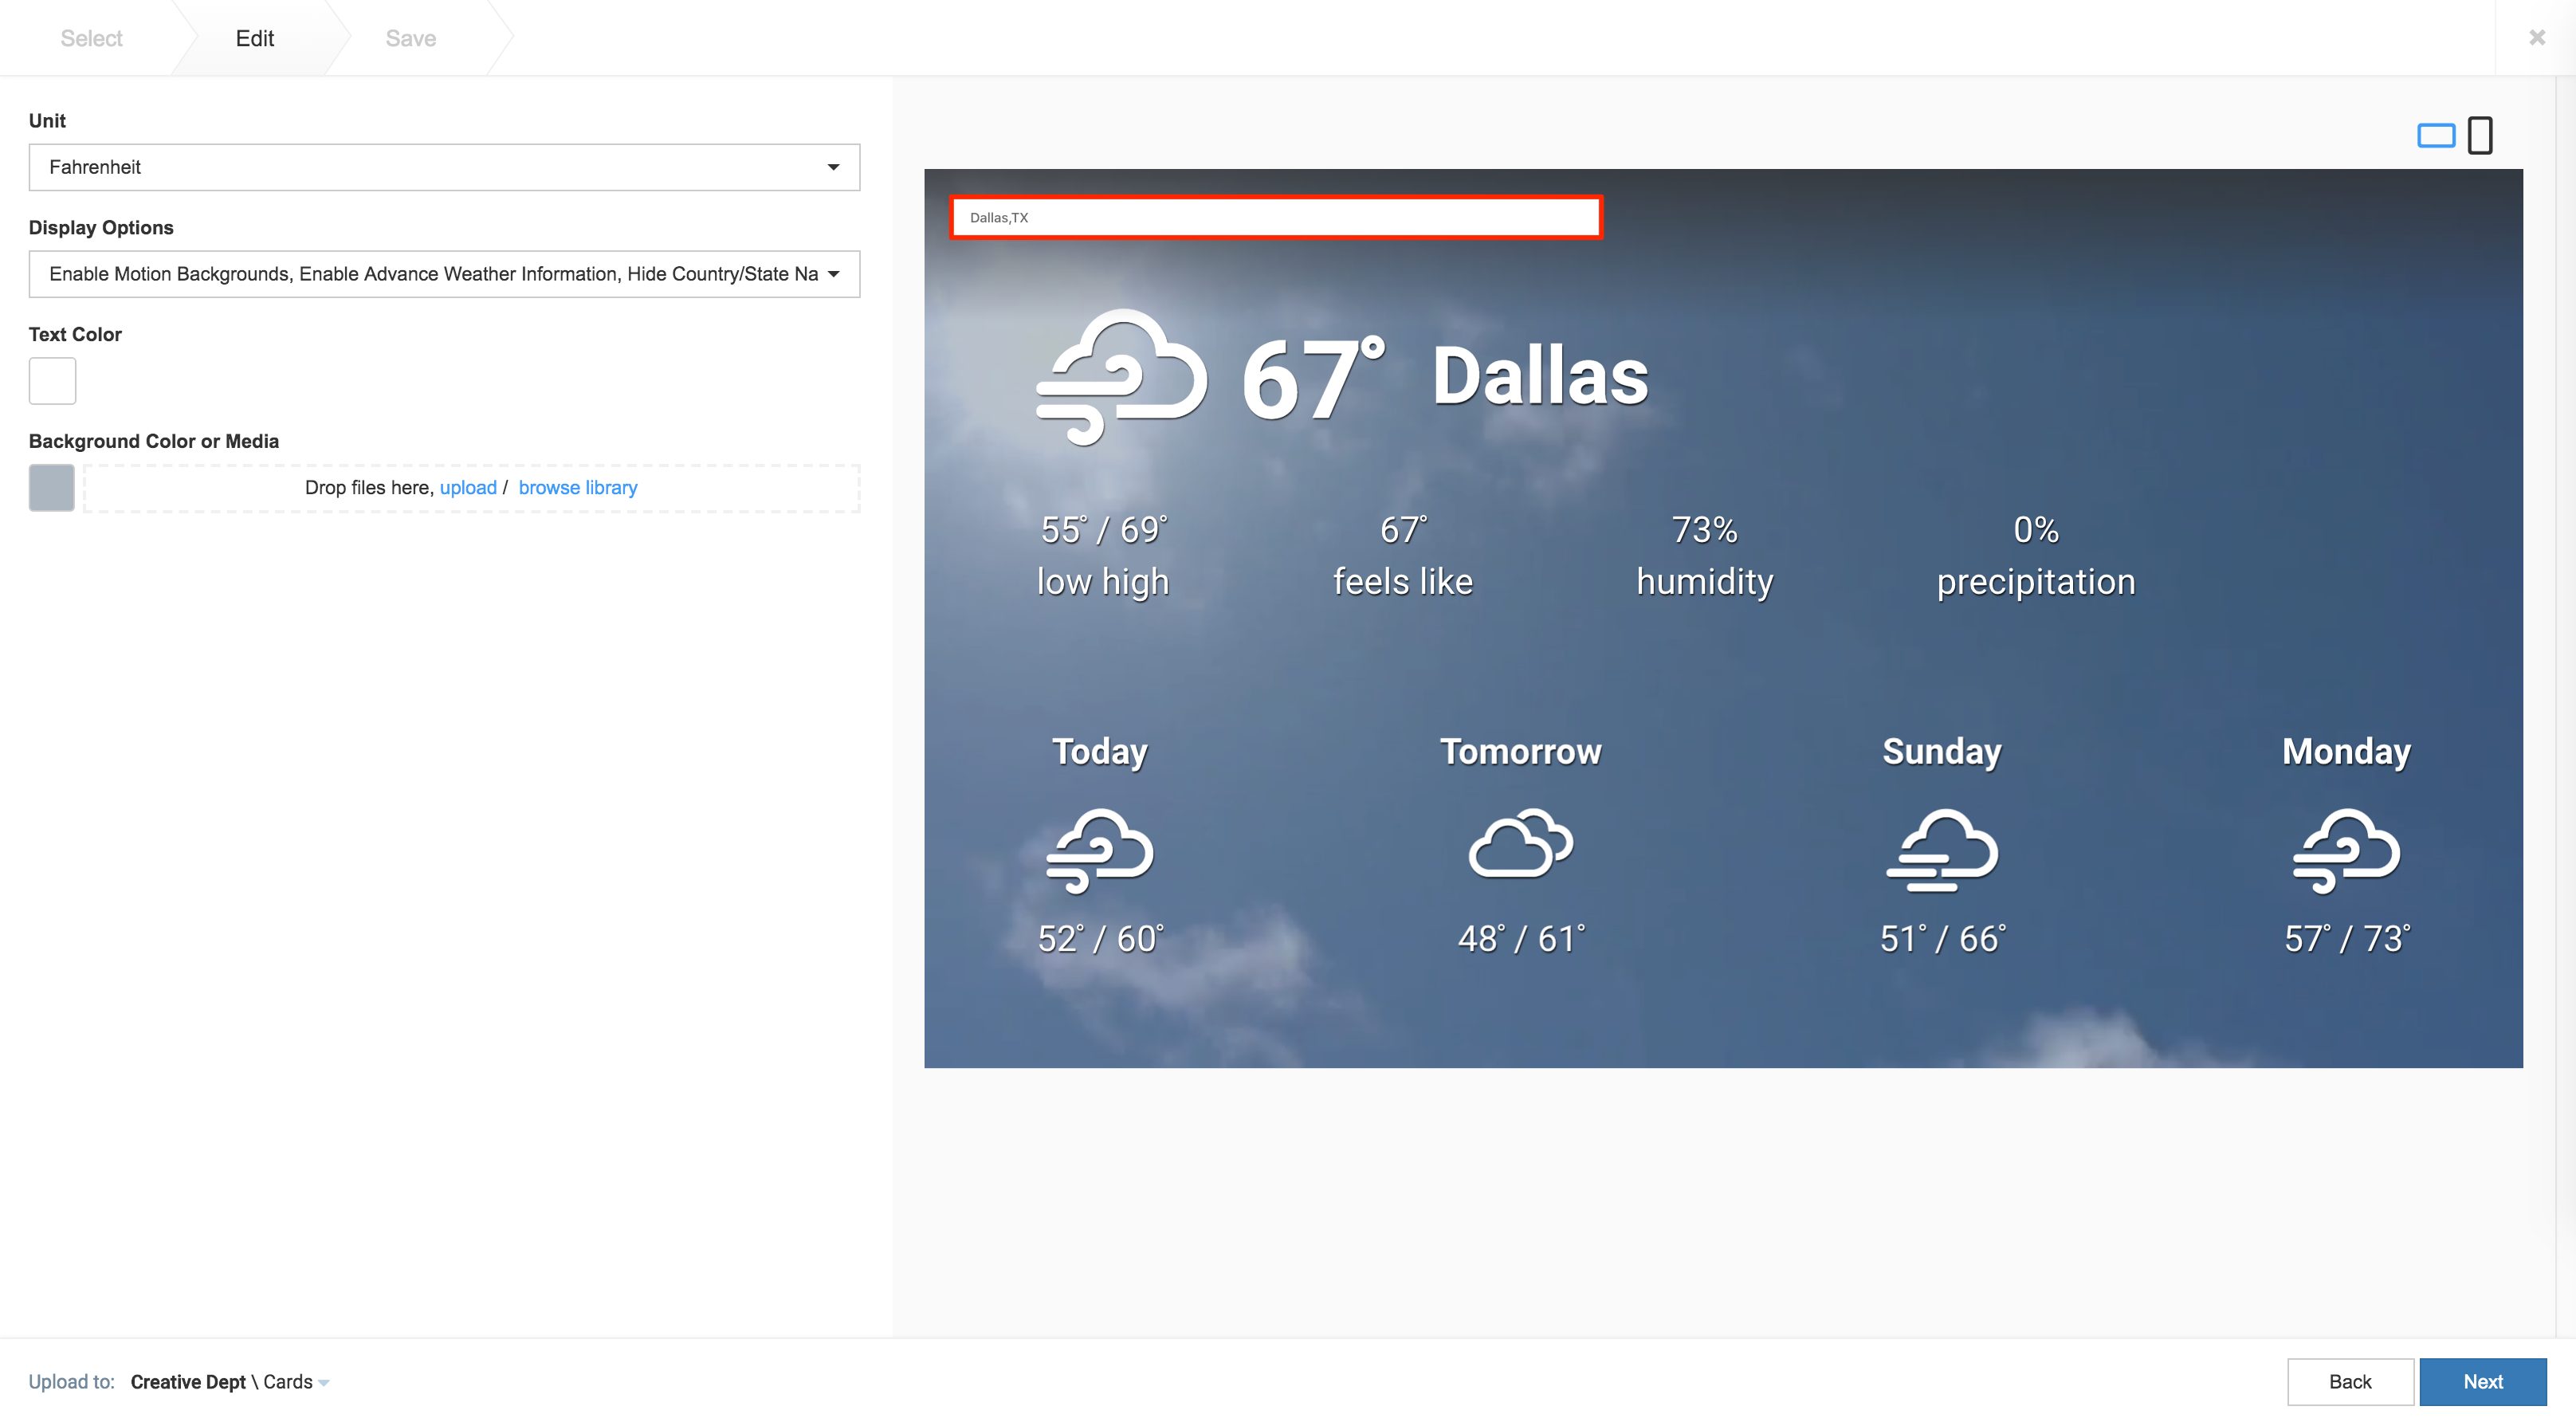 ImportantLeaving the location blank allows the card to display the weather of the display device’s current location. This enables users to configure a single Weather card and deploy it to multiple devices on different locations quickly eliminating the need to configure each location manually.
In the event that the search function is unable to locate the entered location, or has a location selected, users may override it by using the “card.weather.location” device property, and manually entering the location by setting the value to “City name, State / Country”. The system will then try to map the closest location at it’s best effort. - Select the Unit for the temperature to be displayed:
- Fahrenheit
- Celsius ImportantUsers may also use the device property “card.weather.units”, with the values to “c” or “f” to override the selected temperature unit on the card.
- Select the display options for the Weather card:
- Enable Motion Backgrounds – Display a video background that represents the weather.
- Enable Advanced Weather Information – Display extra weather information, such as the high/low temperature, humidity, precipitation, and how the temperature feels like.
- Show Temperature Units – Displays the temperature units.
- Hide Country/State Name – Hides the country or state of the weather location.
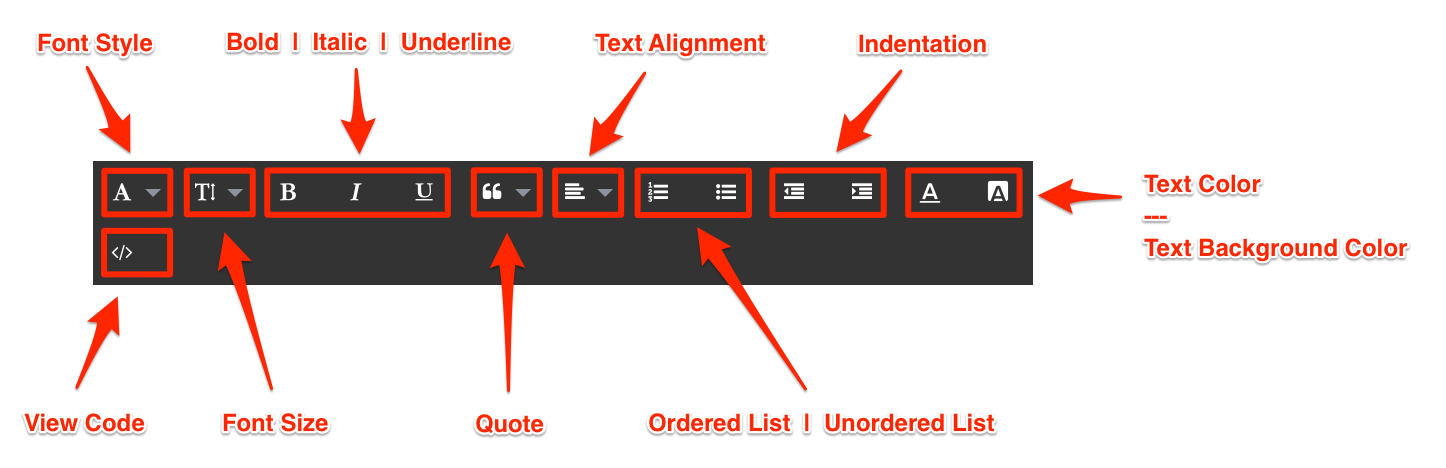
- The following customization options are available:
- Customize the card Text Color
- Customize the card Background Color Note
- When a user selects a background color with video enabled, the background color is rendered with 30% opacity by default. However, users can manually change the opacity levels.
- When a user uploads an image with video enabled, the image is displayed at 100% opacity by default, which blocks the motion background from being viewed. This can be fixed by uploading a PNG image with transparency levels managed by the user from the source file.
- Once customizations have been made, click Next.
- In the Save tab, enter in the Title, as this is a mandatory field. Optionally, you may enter in the Article, Caption, Content Expiry, Content Tags and even upload a custom thumbnail for the content.
- Click Save to complete, and you may now proceed to add the card into a playlist channel.