The Appspace Visitor Management system allows event hosts and facilitators to handle invitations for employees and external users (visitors) to a meeting or event hosted at their organization by giving them comprehensive visibility into who is entering, why they are there, and how long they are there. Through checkpoints and touchless sign-in, it helps to maintain a high level of health and safety while also accommodating the needs of various visitor types.
Hosts can invite visitors to a configured resource in a company such as a room, space, or building and manage visitor registrations that are either done manually, through email, or an enterprise messaging app. Employees who initiate any visitor management activity by inviting an external user to an event or meeting via the Appspace Employee App. Once an employee sends an invitation, they automatically become the meeting/event host.
Facilitators are the initial point of contact for visitors who are tasked with managing all visitors scheduled to enter the facility. Facilitators will have an enhanced set of permissions over a selected set of resources (location, building, workspace), enabling them to perform the following functions:
-
- check-in or check-out visitors who cannot perform this by themselves.
- edit visitor pre-registration information.
- edit existing invitations, such as adding additional visitors, changing of time, and more.
- track the status of the visits and all visitors registration activities.
- ability to export the list of selected or filtered visitors for reporting purposes.
The facilitator will have visibility over all visitors within their defined scope, unlike hosts who will have limited visibility only over their own visitors.
Workflows
The following describes the key workflows in a Visitor Management system:
- Invitation – Hosts initiate the invitation as part of a meeting/event reservation activity. Visitor Management will introduce a new permission-controlled, interactive visitor dashboard within the Employee App (Visitor tab), permitting access to some of the Visitor Management oversight functions.
- Registration – Visitors will be notified of any registration tasks that need to be completed via a portal. Both the host and the visitor will have visibility of the completed registration tasks.
- Registration/Check-In –
- the Visitor Kiosk card will be deployed to kiosk devices and used for self-guided visitor registration and check-in.
- visitors need to check-in for the event on-site at the facility, and complete any last-minute tasks (such as ID confirmation, badge printing, etc.) on the kiosk.
- if the visitor has not completed the Registration activities, the visitor may complete them on-site and then complete the check-in.
- the host is notified upon completion of the check-in process allowing them to come greet the visitors.
- the facilitator will be the initial contact to the visitor on-site with a complete view of all upcoming event and visitor details. Facilitators will help verify any/all Registration activities or help complete the registration and check-in processes on-site if needed.
Features & Functions
The following lists the main features and functions in the Appspace Visitor Management system:
- Host & Visitor Invitation Features
- Invite visitors to a room, space, or building.
- Enter visitor data to invite using a spreadsheet (bulk import). (This feature is currently behind a feature flag and not available to the public).
- Configurable registration workflows for admins, hosts, and visitors.
- Calendar and email reminders for all visitor registration checkpoints.
- Visitor check-in notifications to email and enterprise messaging apps.
- Visitor registration activity completion notifications.
- Manual registration of visitors for last-minute events.
- Administrator & Facilitator Dashboard Features
- Access to all admin functions in a separate admin console.
- Calendar and list view of expected visitors and historic record of past visitors.
- Review visitor details including, but not limited to: Name and contact details, company, host, date, time, duration, photo, and much more.
- Option to enable/disable touchless check-ins and manually check-in visitors.
- Select multiple visitors to perform check-in/check-out, print badges, or cancel/delete invitations in bulk.
- Option to enable/disable pre-registration, notifications, and checkpoints (this feature is currently behind a feature flag and not available to the public).
- Notifications
- Once a visitor has completed registration details, the visitor’s event status becomes confirmed. Visitors will be notified via email.
- Hosts will be notified via email and their configured enterprise messaging app, when a visitor:
- Accepts, Declines, or responds Maybe to an invitation.
- completes registration details and is confirmed for their visit.
- checks out onsite.
This article provides Hosts and Facilitators with the instructions to send event invitations to visitors, and check them in or out of the event, all from the Appspace Employee App:
- Administrators looking for information on navigating the Visitor Management module in the console, refer to Browse and Navigate Visitor Management in Appspace 8.x.
- Administrators who would like to manage visitors in the Visitor Management module, refer to Configure and Manage Visitors – Administrator.
- Administrators who would like to setup the Visitor Kiosk card on a kiosk for self-check-ins, refer to Cards: Visitor Kiosk Check-Ins.
- Visitors looking for check-in and registration guidance, refer to Visitor Self Check-In and Registration.
Prerequisites
- An active Appspace account.
- Visitor Management system enabled and configured.
- Hosts and Facilitators will use the Appspace Employee App to invite visitors and to review and check-in visitors. Employee App requires Premium user licenses.
Send Visitor Invitations
Follow the instructions below to send visitor invitations via the Appspace Employee App:
- Log in to the Employee App Portal.
- Click the More tab, and select Visitors.
- Click + Invite to send an invitation to a prospective visitor.
- In the Invite Visitors window, proceed to enter the following visitor information for the visit:
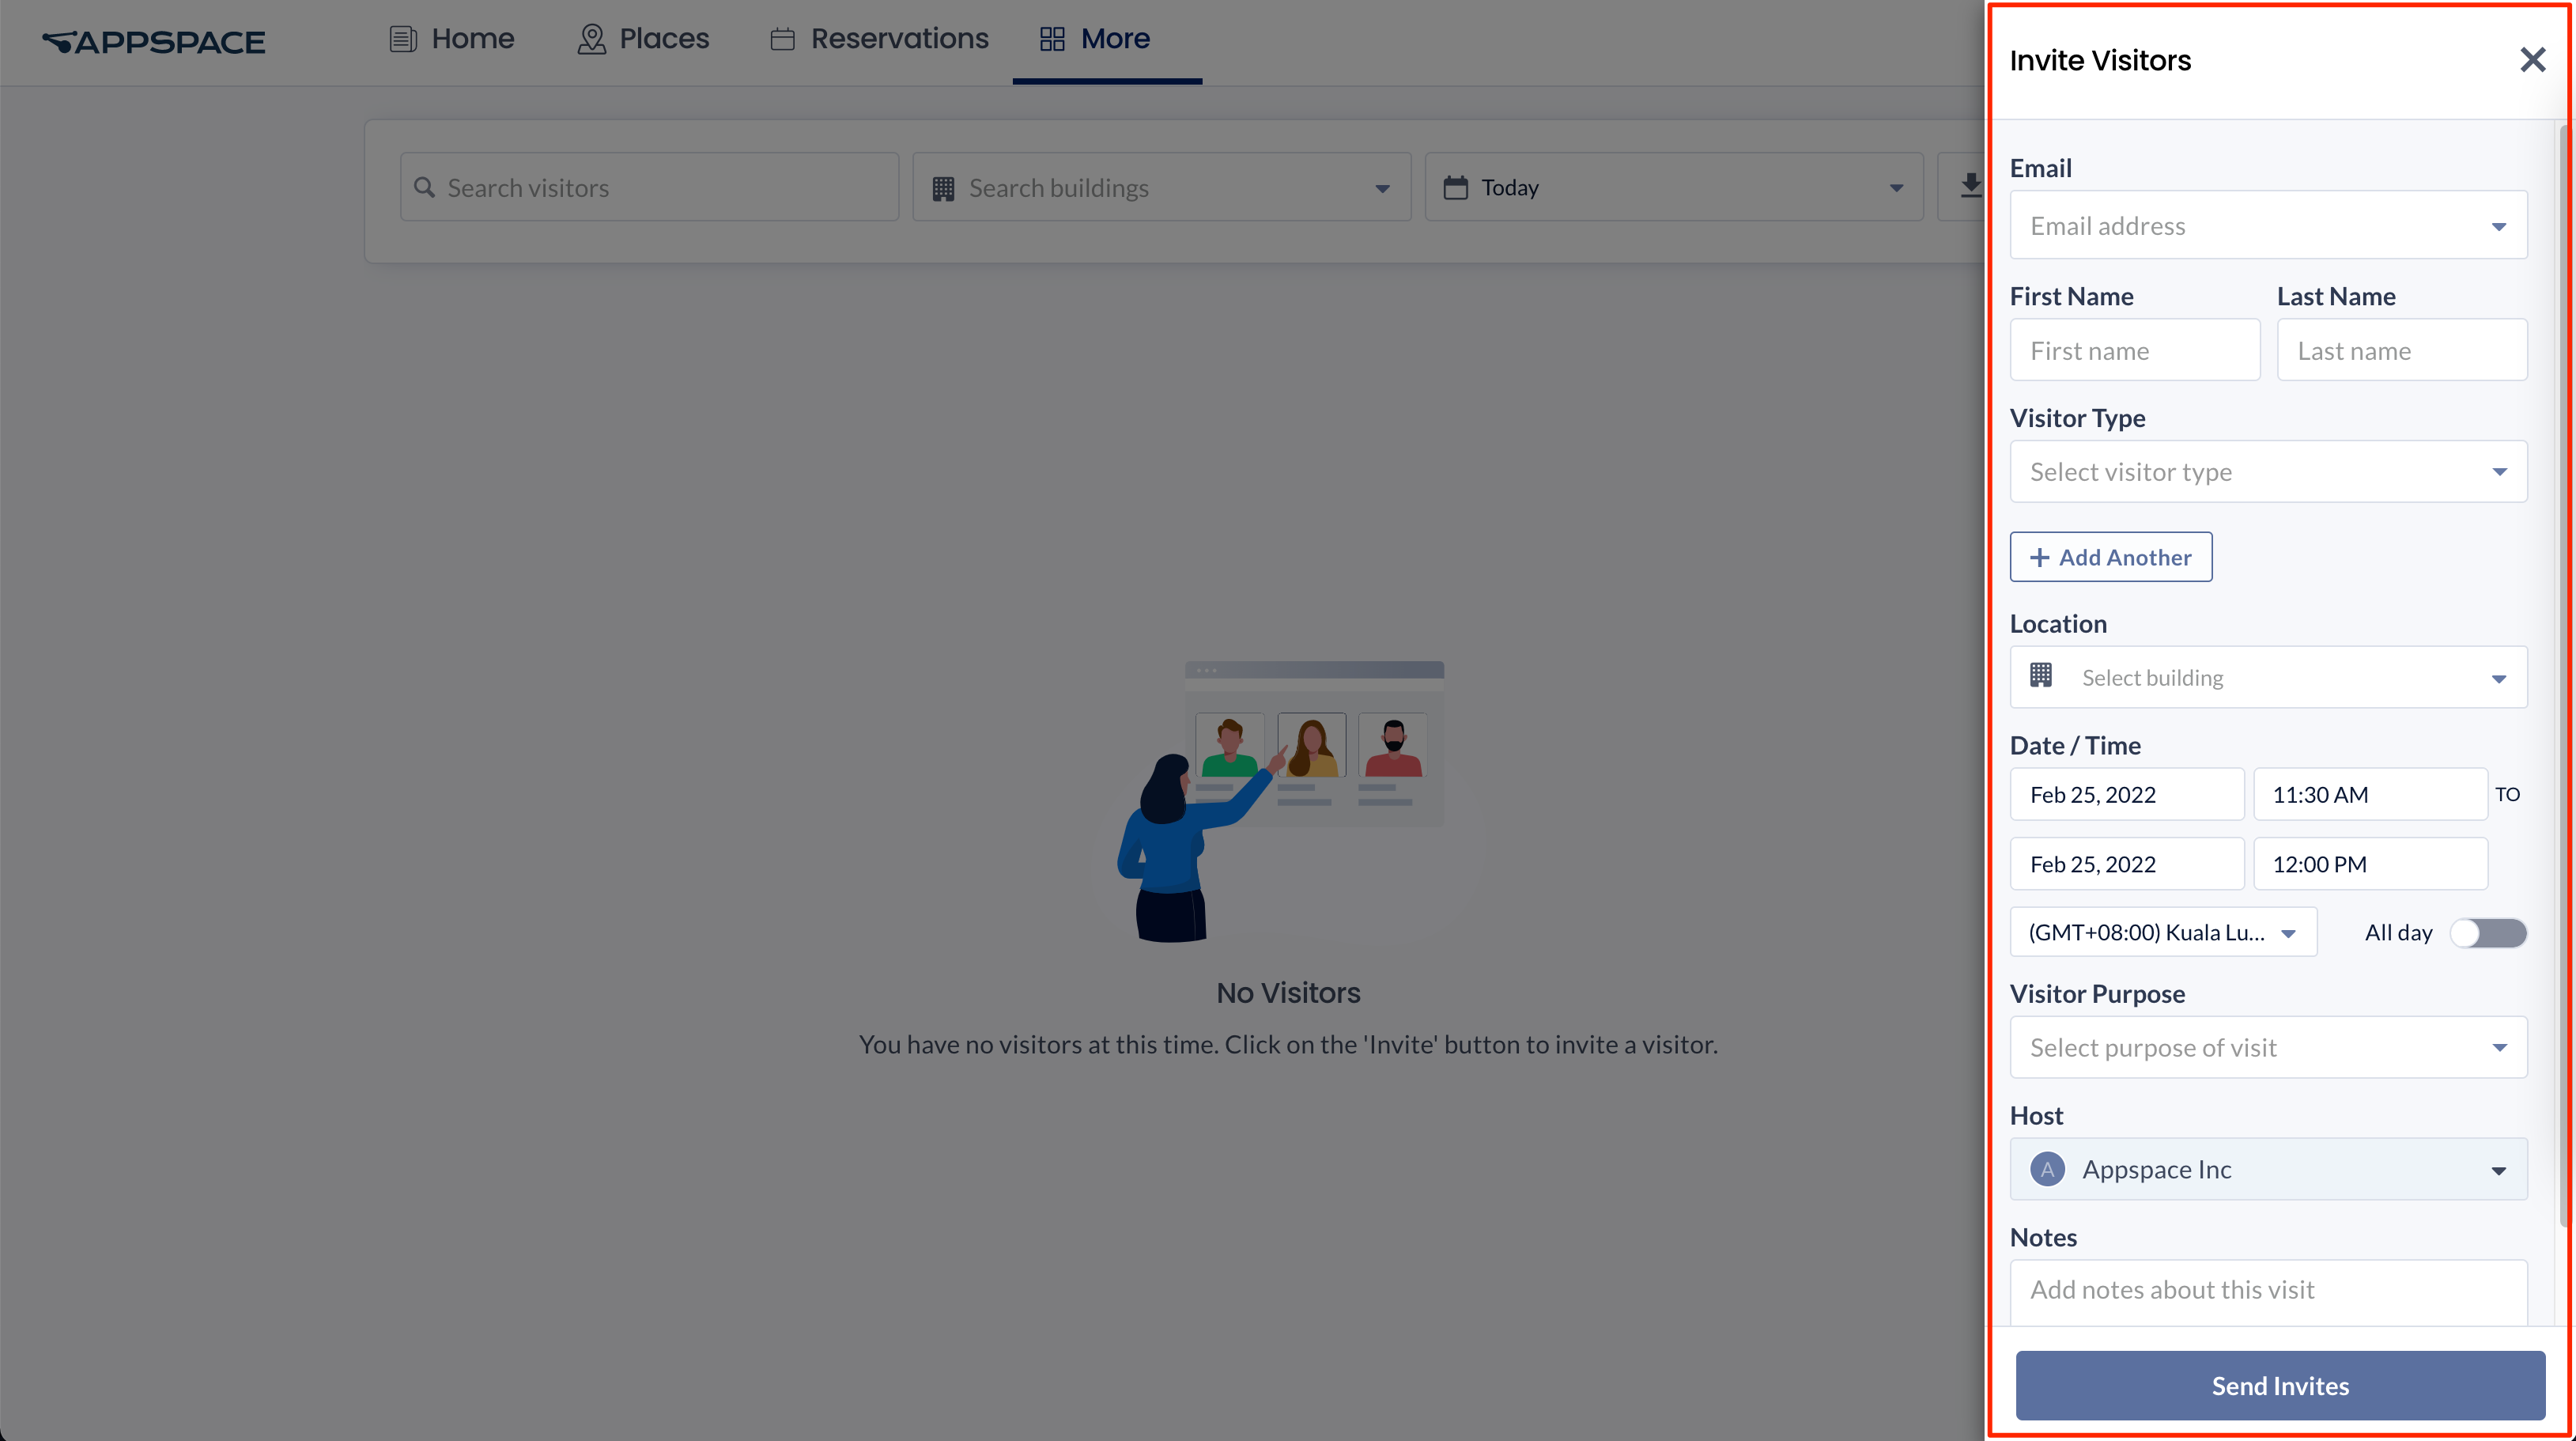
- EmailNoteIf the host privacy setting is enabled, you (as a host) can only search and view visitors you have previously invited, and not visitors invited by other hosts. Selecting or entering the email of an existing visitor will auto-populate the First Name, Last Name, and Visitor Type fields.
- First Name, Last Name
- Visitor Type – Select if the visitor is a Contractor, Delivery Personnel, Family Member, Business Guest, New Hire, or Other from the dropdown menu.
- + Add Another – Optionally, you may add an additional visitor using the same visitor invitation. You may enter it manually or import visitor data using a spreadsheet (bulk import). To import visitor data, see Step 4 in the Import Visitors to an Event section below.
- Location – Select the building location of the visit.
- Date/Time – Select the duration of the visit.
- Start Date / Time
- End Date / Time
- Timezone
- All day – If the invitation is for an all day visit, slide the toggle to enable.
- Visitor Purpose – Select the purpose of the visit by the visitor, such as for a Business Meeting, or a Job Interview.
- Host – Select the Host if other than you.
- Notes
- ImportantThe following three options are currently behind a feature flag and not available to the public.
- Require pre-registration – Enable this to require visitors to perform event pre-registration and set them as Pending for the event. Disabling this will set them as Expected for the event and not send out the invitation email.
- Enable notifications – Enables or disables the email notifications for the invite, update, removal, or cancellation of the event sent to the visitor. This does not affect emails sent to the host.
- Require checkpoints – Enable this to require the visitor to use checkpoints using the Employee App. Disabling this will set the visitor as Expected at checkpoints.
- Email
- Once done, click Send Invites.
Import Visitors to an Event
Instead of creating visitor invites, you can import visitor data to an event using a spreadsheet (bulk import). You also have the option to send invites to the visitors, or to set them as Confirmed for the event. Follow the instructions below to import visitors to an event.
- Log in to the Employee App Portal as a Facilitator.
- Click the More tab, and select Visitors.
- Click the + Invite button drop-down.
- Select + Download Import Template. Download the file.
- Open the downloaded spreadsheet template file. Enter the visitor information following the columns in the template:
- First Name
- Last Name
- Visitor Type – Specify if the visitor is a Contractor, Delivery Personnel, Family Member, Business Guest, New Hire, or Other.
- Save the file.
- In the Invite Visitors window, click the + Invite split button, and select + Import from xlsx. Select the saved file.
- After the file is uploaded, the information of the imported visitors is displayed in the Invite Visitors window.
- An error message appears if there are errors in the imported visitor information.
- Click the error message to go straight to the next field with an error.
- Correct the fields that have an error, or click – to remove that visitor entirely.
- Click Next.
- Enter the following information for the visit:
- Location – Select the building location of the visit.
- Date/Time – Select the duration of the visit.
- Start Date / Time
- End Date / Time
- Timezone
- All day – If the invitation is for an all day visit, slide the toggle to enable.
- Visitor Purpose – Select the purpose of the visit by the visitor, such as for a Business Meeting, or a Job Interview.
- Host – Select the Host if other than you.
- Notes
- Require pre-registration – Enable this to require visitors to perform event pre-registration and set them as Pending for the event. Disabling this will set them as Expected for the event and not send out the invitation email.
- Enable notifications – Enables or disables the email notifications for the invite, update, removal, or cancellation of the event sent to the visitor. This does not affect emails sent to the host.
- Require checkpoints – Enable this to require the visitor to use checkpoints using the Employee App. Disabling this will set the visitor as Expected at checkpoints.
- Once done, click Send Invites.
Check-In Visitors
Follow the instructions below to check-in a visitor via the Appspace Employee App:
- Log in to the Employee App Portal.
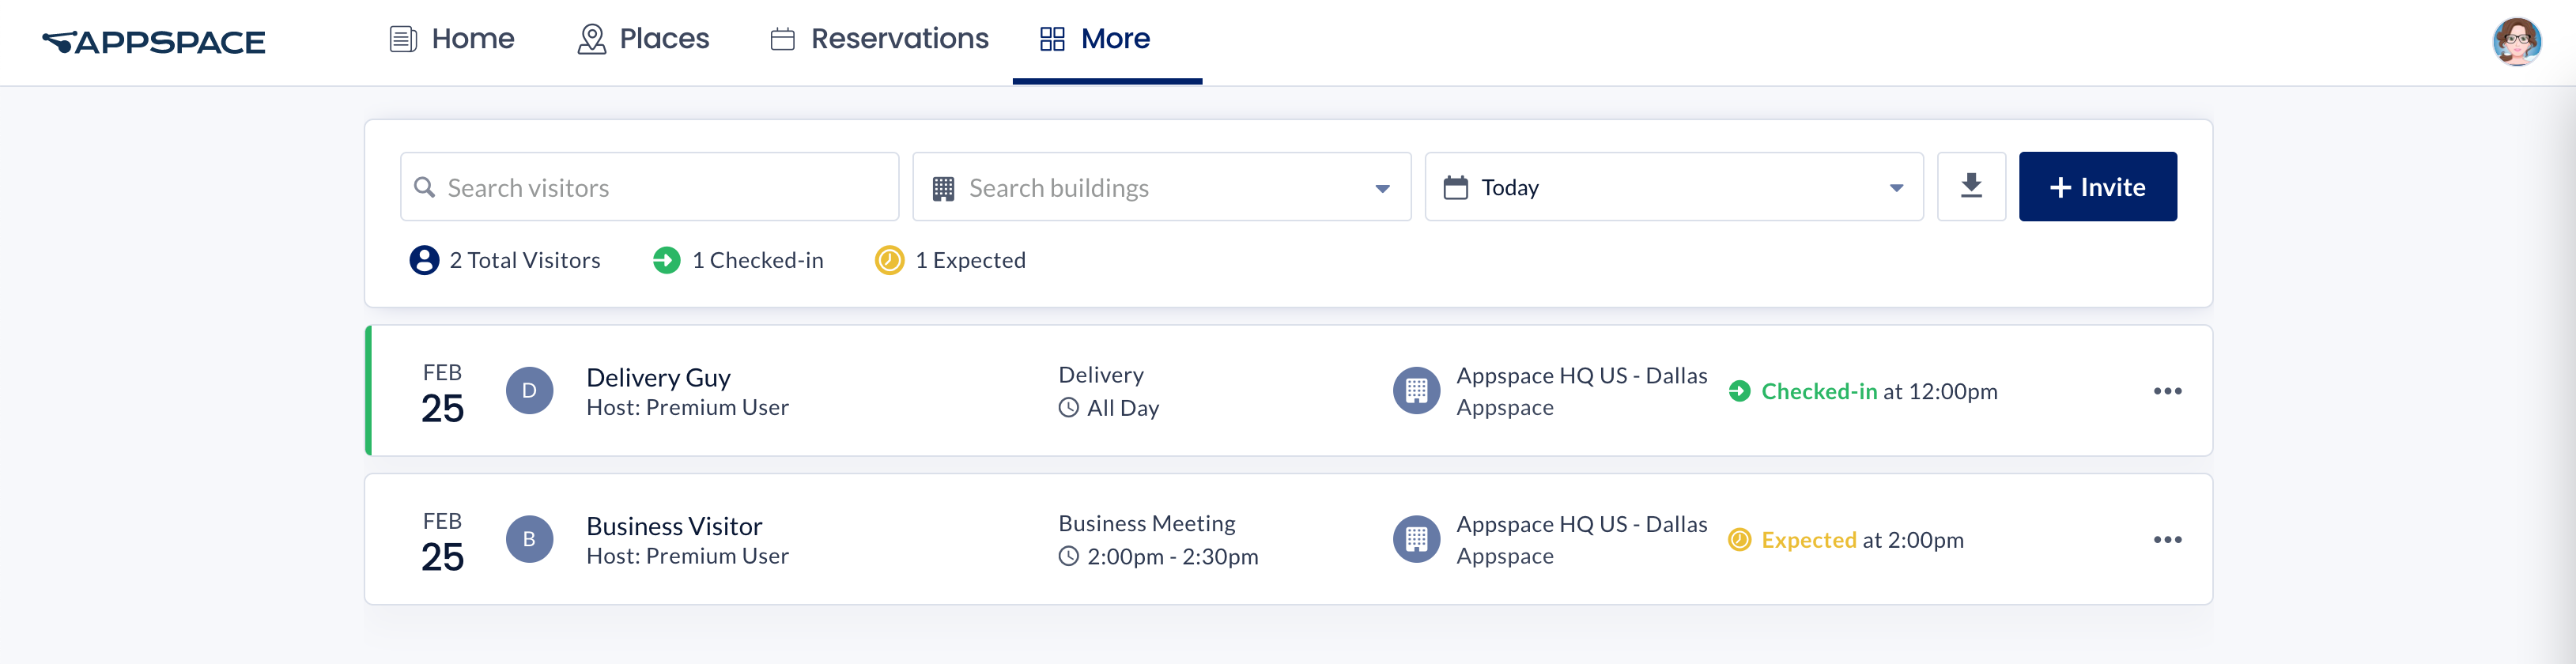
- Click the More tab, and select Visitors.
- Click the desired visitor invitation of the visitor, and click the Check-in button.
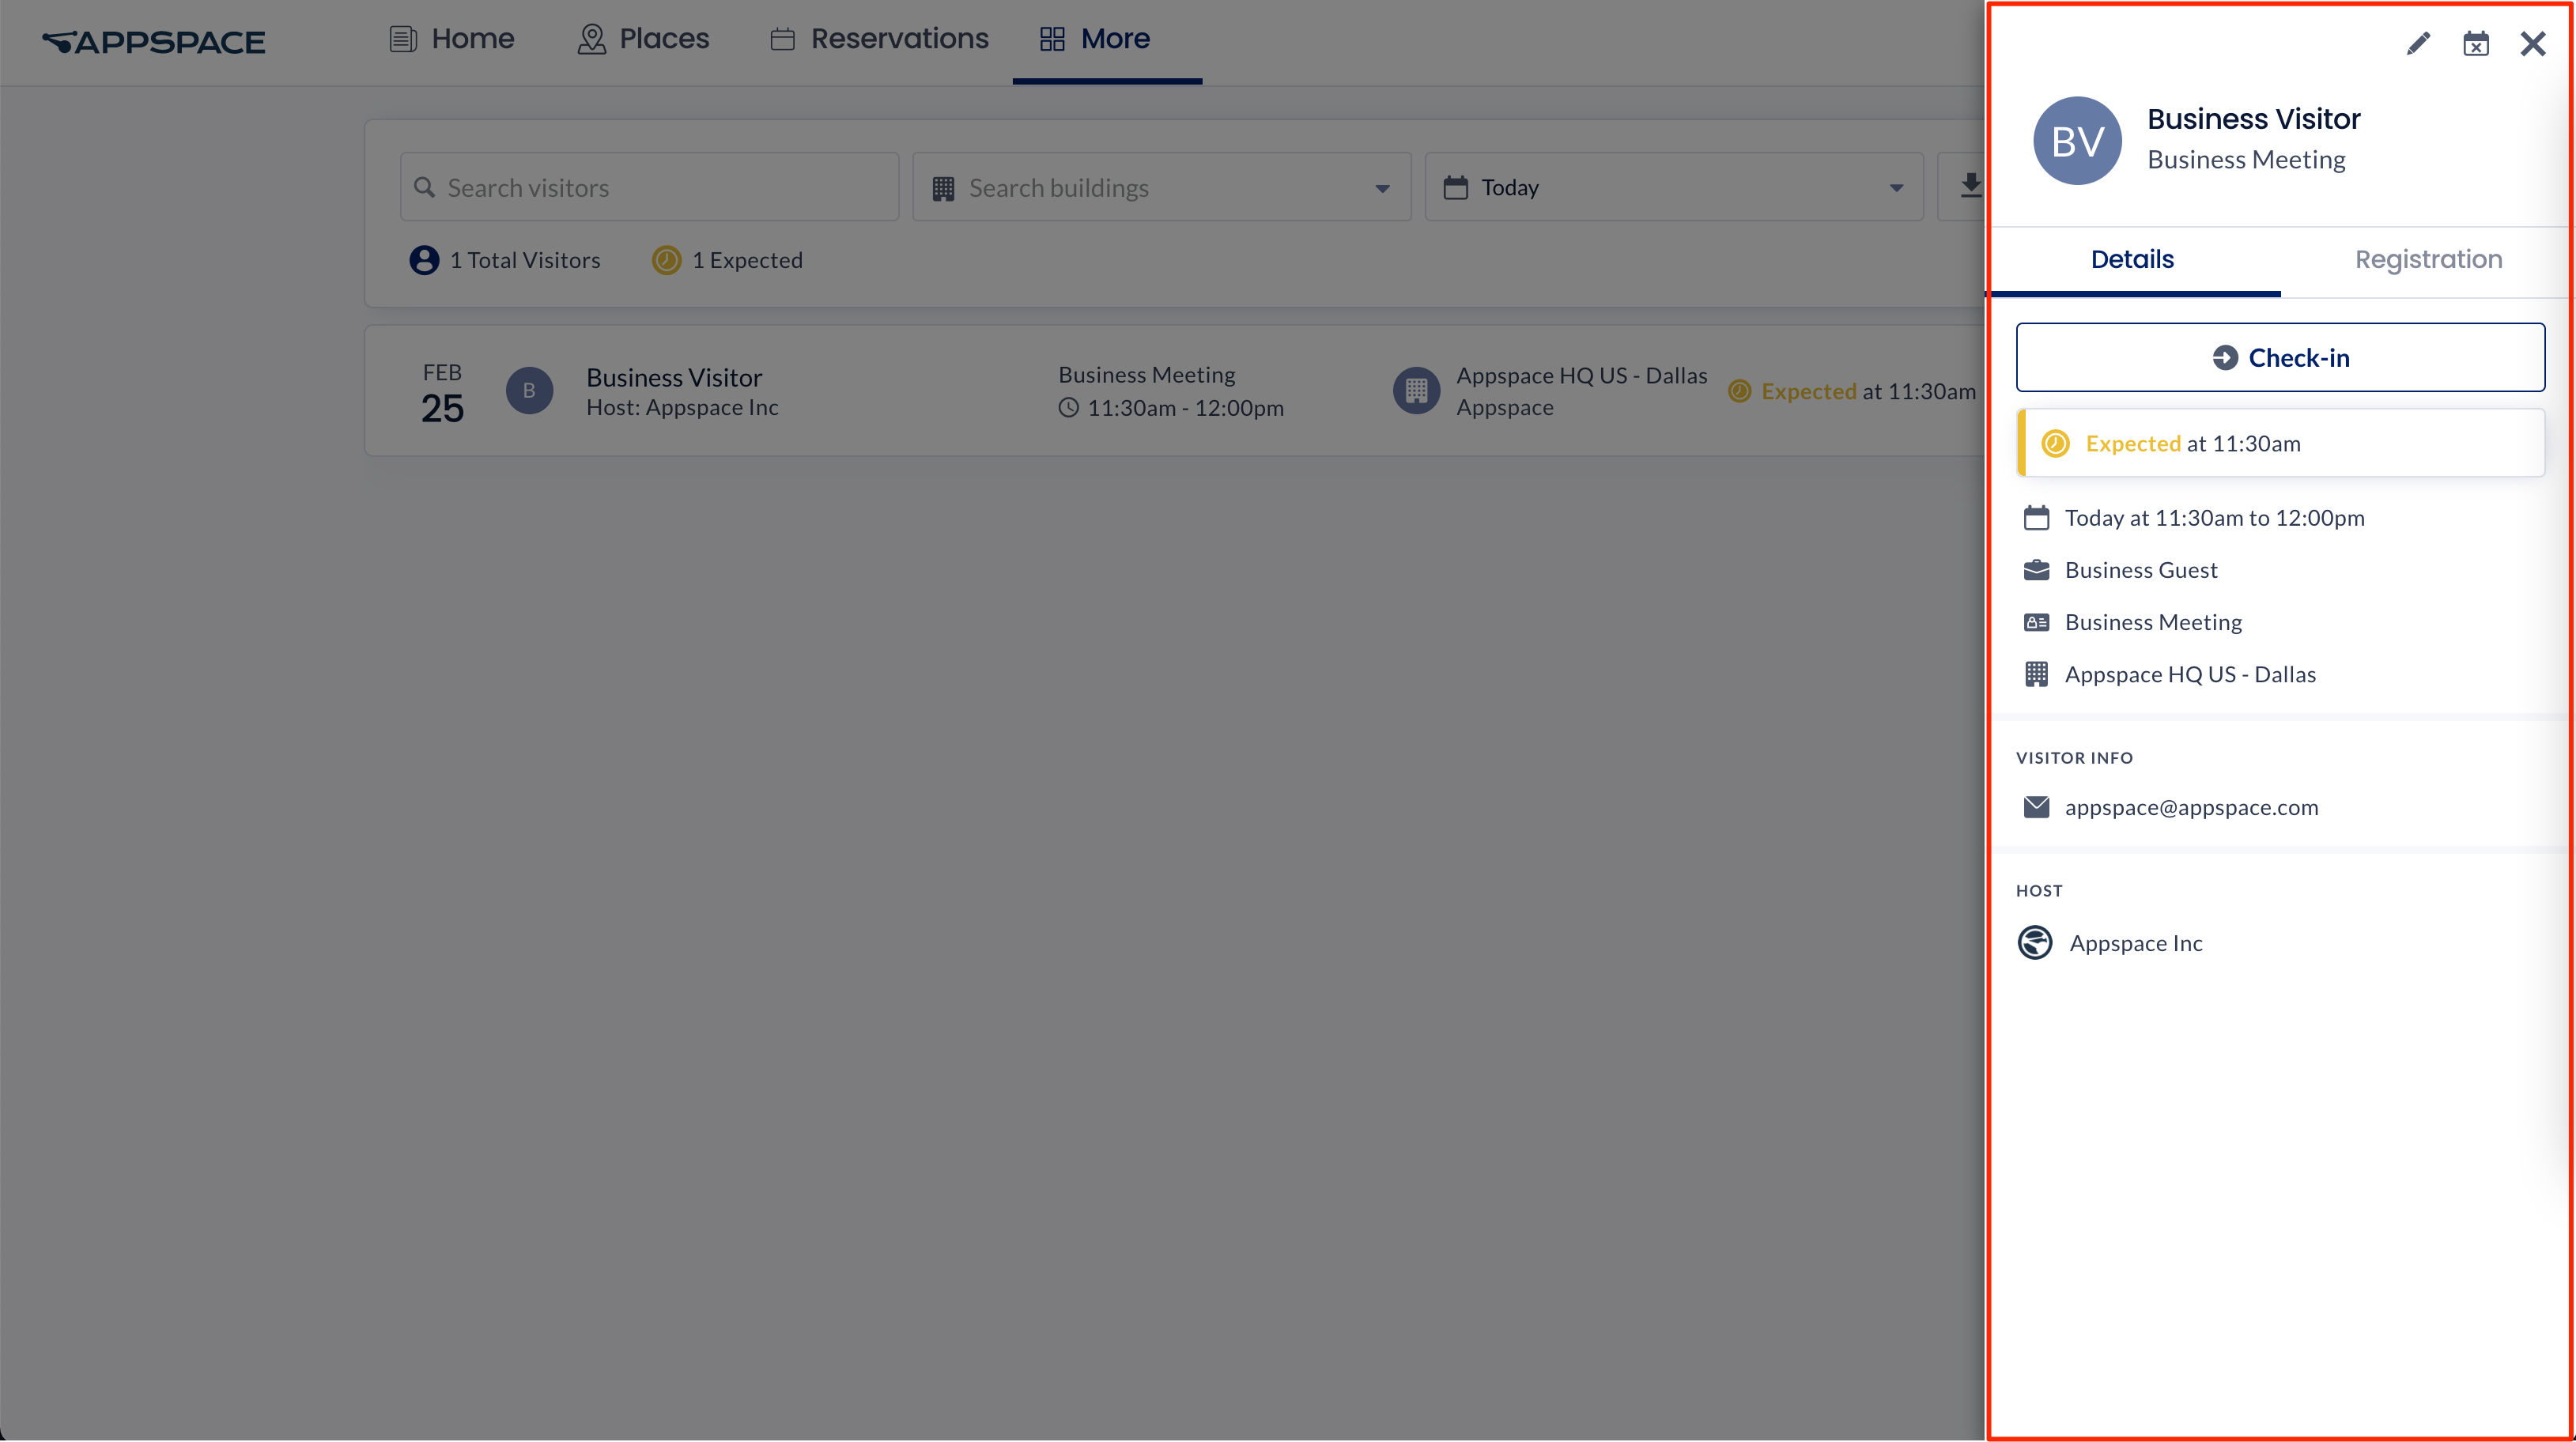
- Alternatively, you may click the ellipsis of the desired visitor invitation of the visitor, and select Check-in Visitor.
Print Visitor Badge
Follow the instructions below to print badges for visitors via the Appspace Employee App:
- Log in to the Employee App Portal.
- Click the More tab, and select Visitors.
- Click the desired visitor invitation of the visitor that has been checked in, and click the Print Badge button.
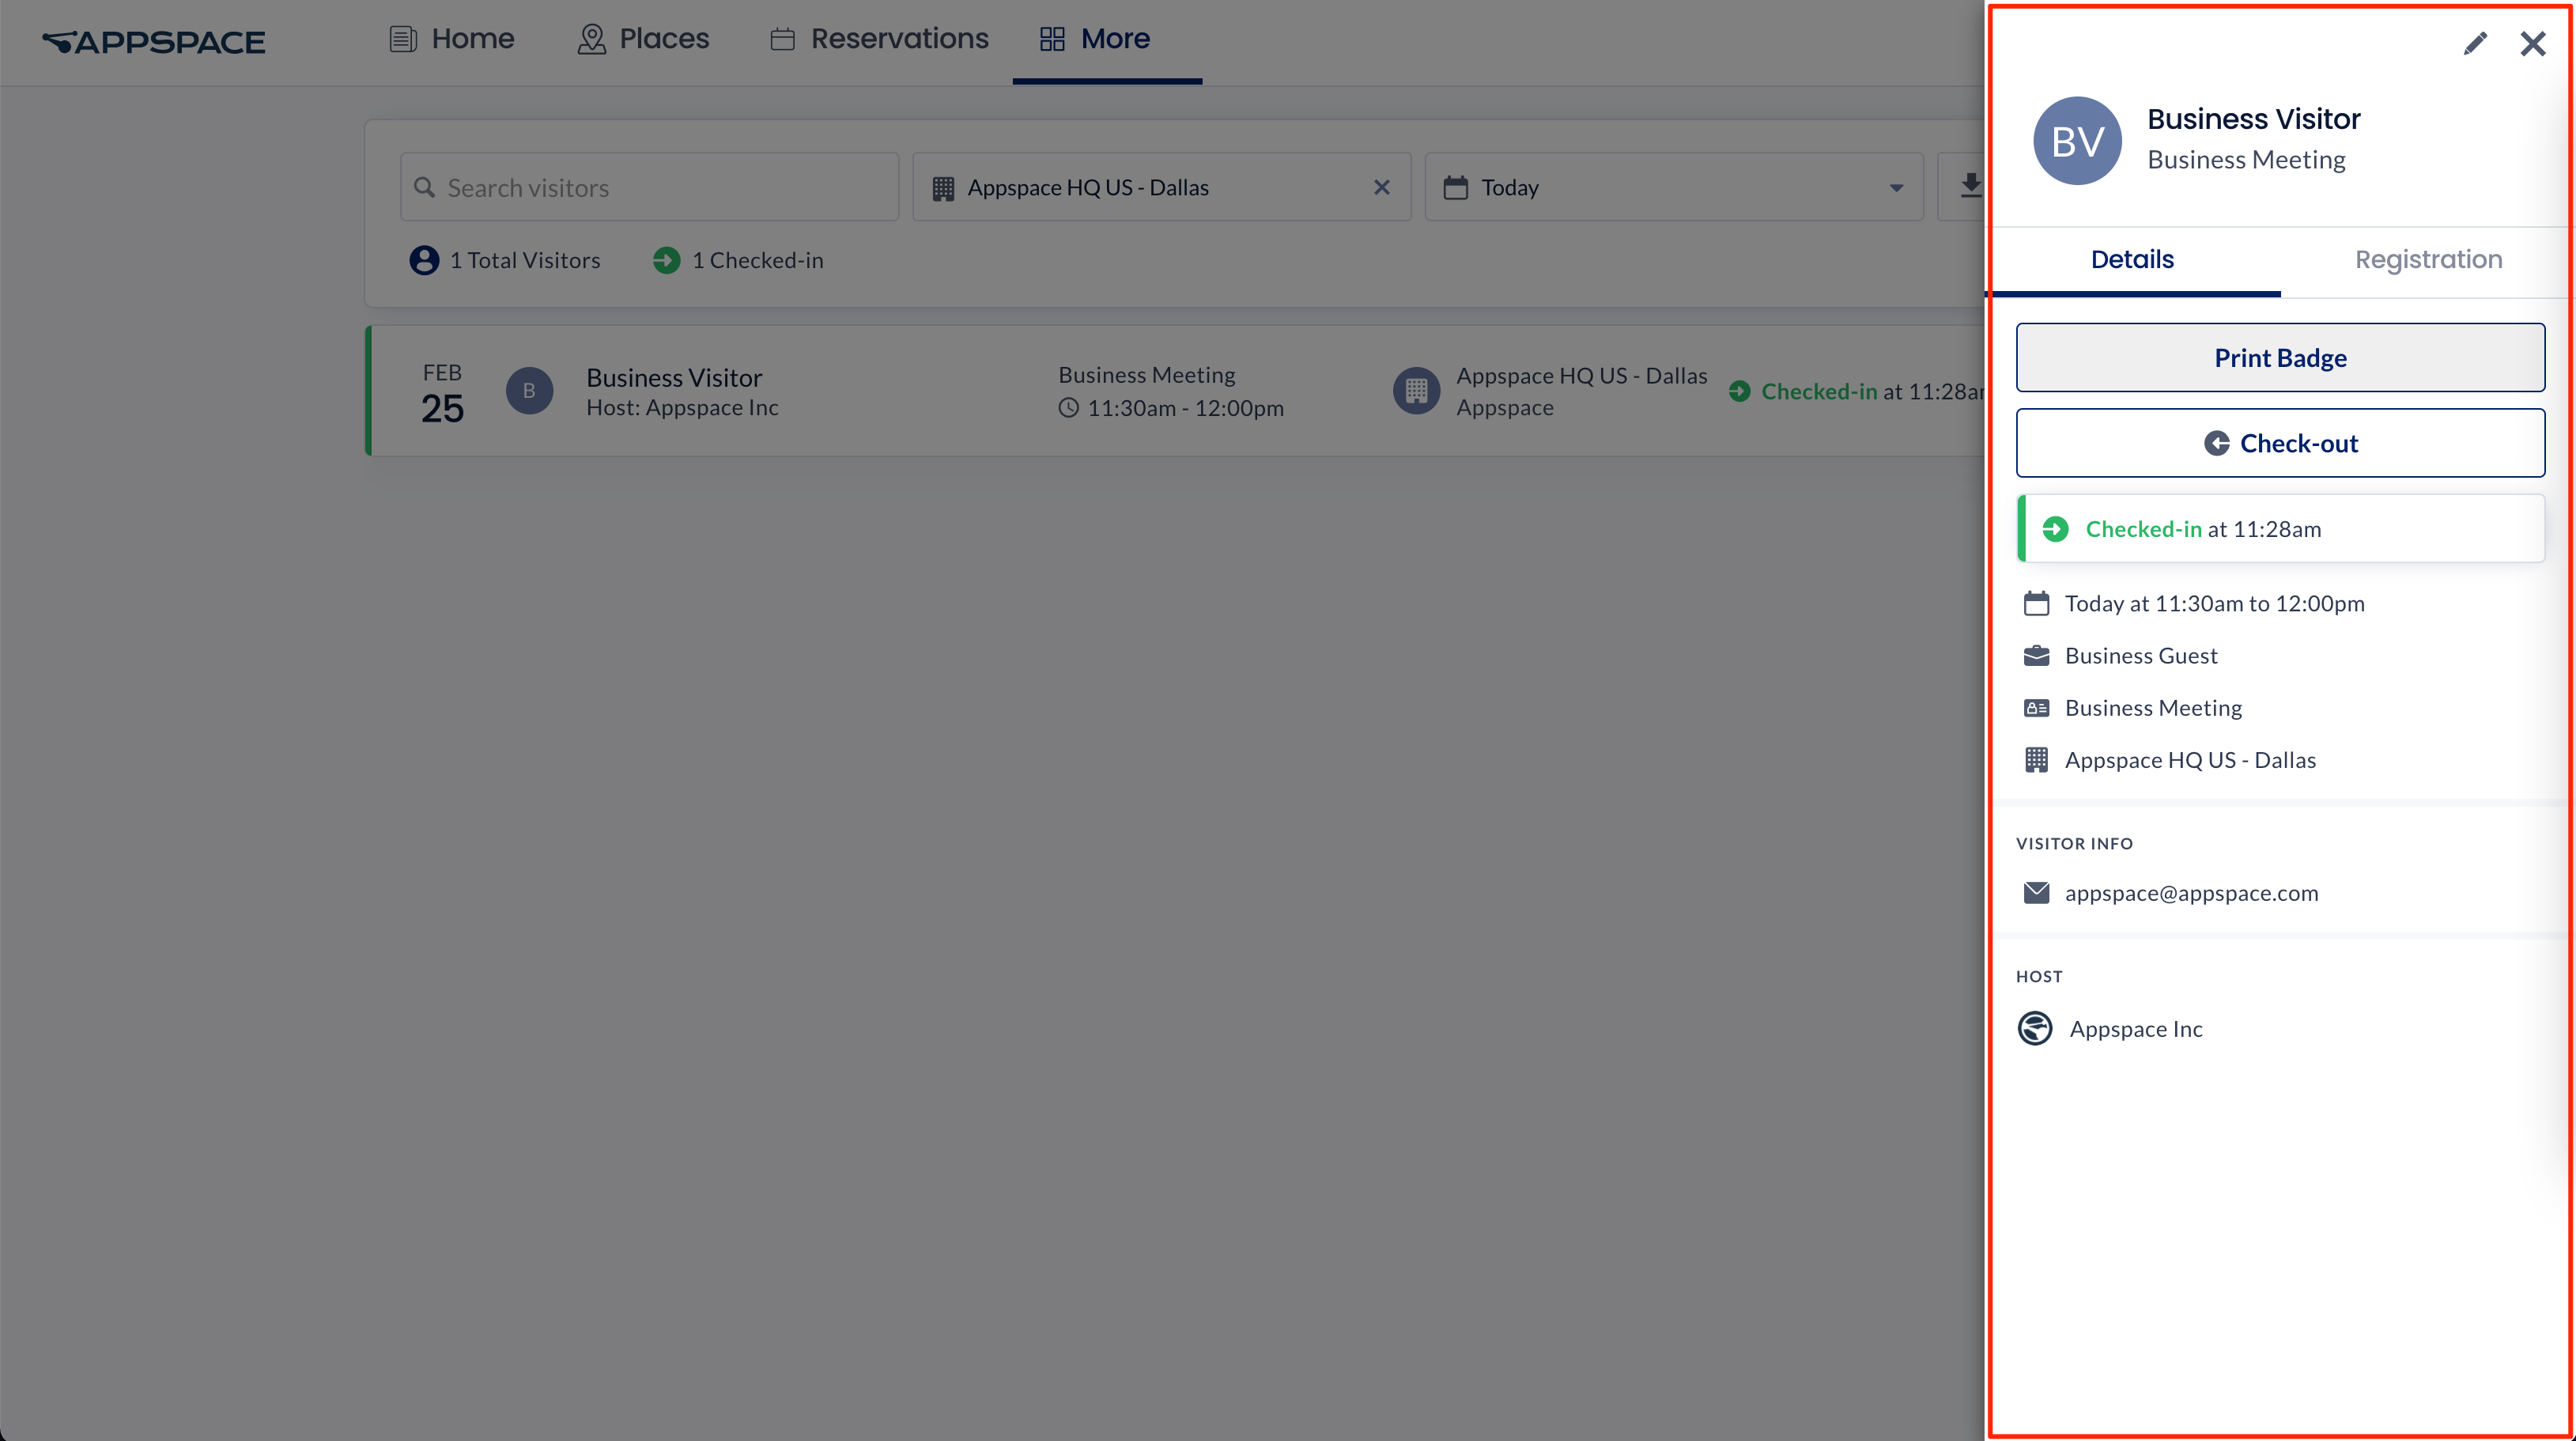
- Alternatively, you may click the ellipsis of the desired visitor invitation of the visitor, and select Print Badge.
Check-out Visitors
Follow the instructions below to check-out a visitor via the Appspace Employee App:
- Log in to the Employee App Portal.
- Click the More tab, and select Visitors.
- Click the desired visitor invitation of the visitor, and click the Check-out button.
- Alternatively, you may click the ellipsis of the desired visitor invitation of the visitor, and select Check-out Visitor.
Delete Visitor Invitations
Follow the instructions below to check out a visitor via the Appspace Employee App:
- Log in to the Employee App Portal.
- Click the More tab, and select Visitors.
- Click the ellipsis of the desired visitor invitation of the visitor, and select Delete Invitation.
Perform Bulk Actions for Multiple Visitors
In Visitors, you can select multiple visitor invitations to perform the following bulk actions in the Appspace Employee App:
- Check-in
- Check-out
- Print Visitor Badges
- Delete Invitations
- Cancel Invitations
- Log in to the Employee App Portal.
- Click the More tab, and select Visitors.
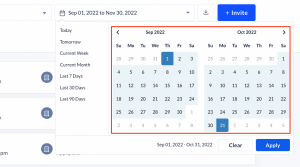
- Select the date range (start date and end date) for the invitations. Click Apply.
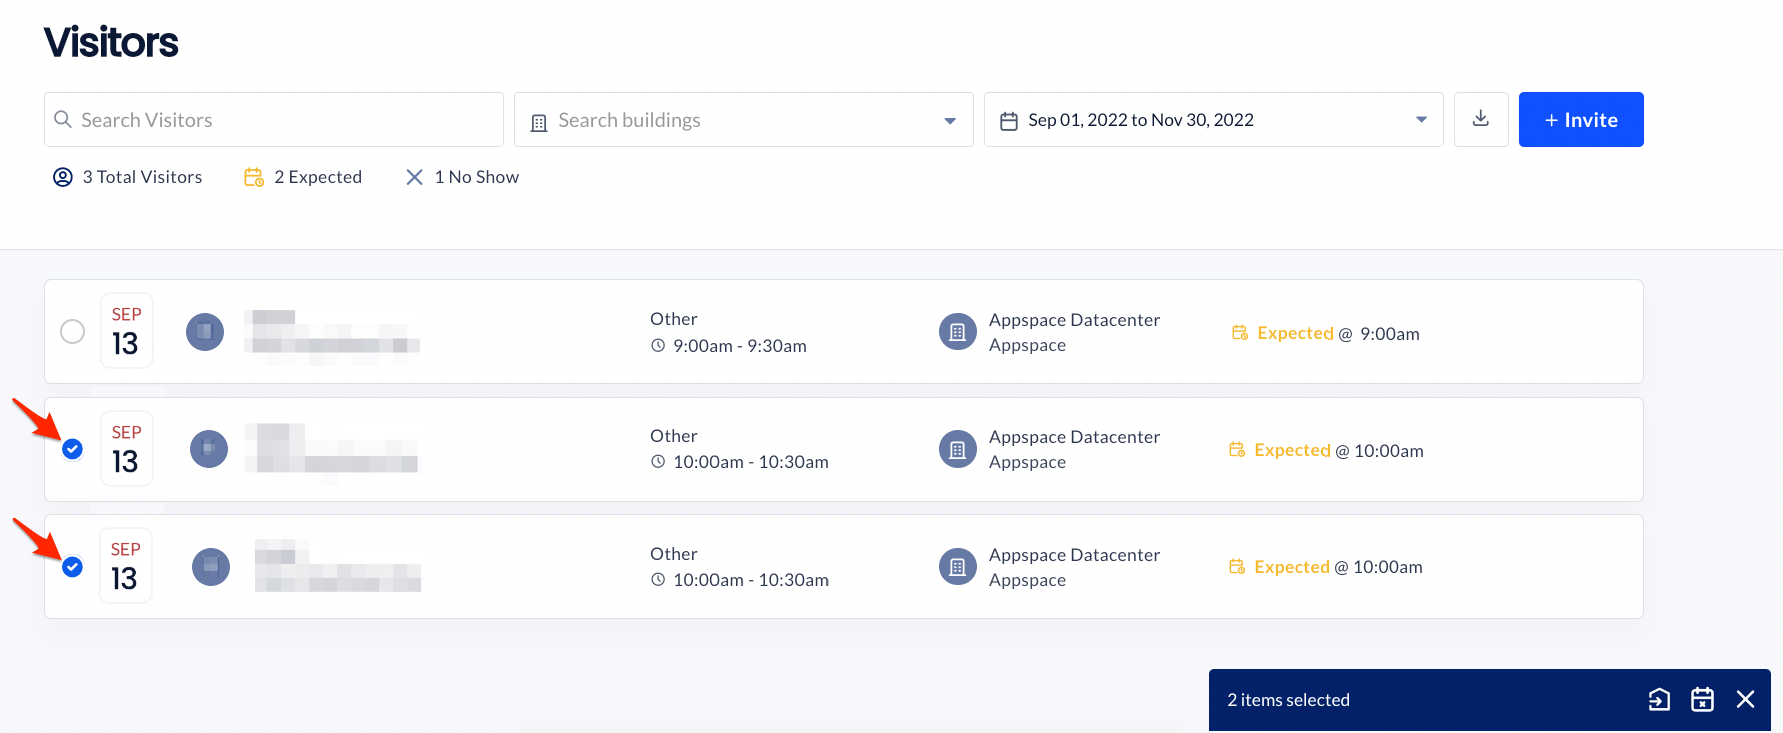
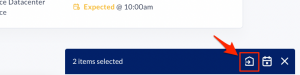
- Select the checkboxes of multiple visitor invitations.
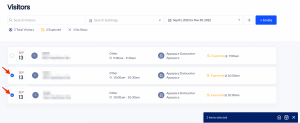
- Select the bulk actions to perform for the selected visitors (check-in, check-out, print visitor badges, cancel invitations, delete invitations). The bulk actions available depend on the Status of the selected visitors (in this example, only check-in and cancel invitations are available).
- A message says that you have performed your selected bulk action successfully.