Managing Spaces
This article provides the instructions to create, edit, and delete Spaces within the Play extension.
Prerequisites
Creating Spaces
To add a Space, follow the instructions below:
Click the Spaces tab and click the New Space button.

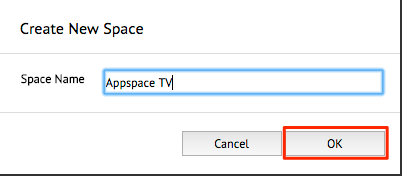
Type in the name of the Space in the Create New Space window and click OK.
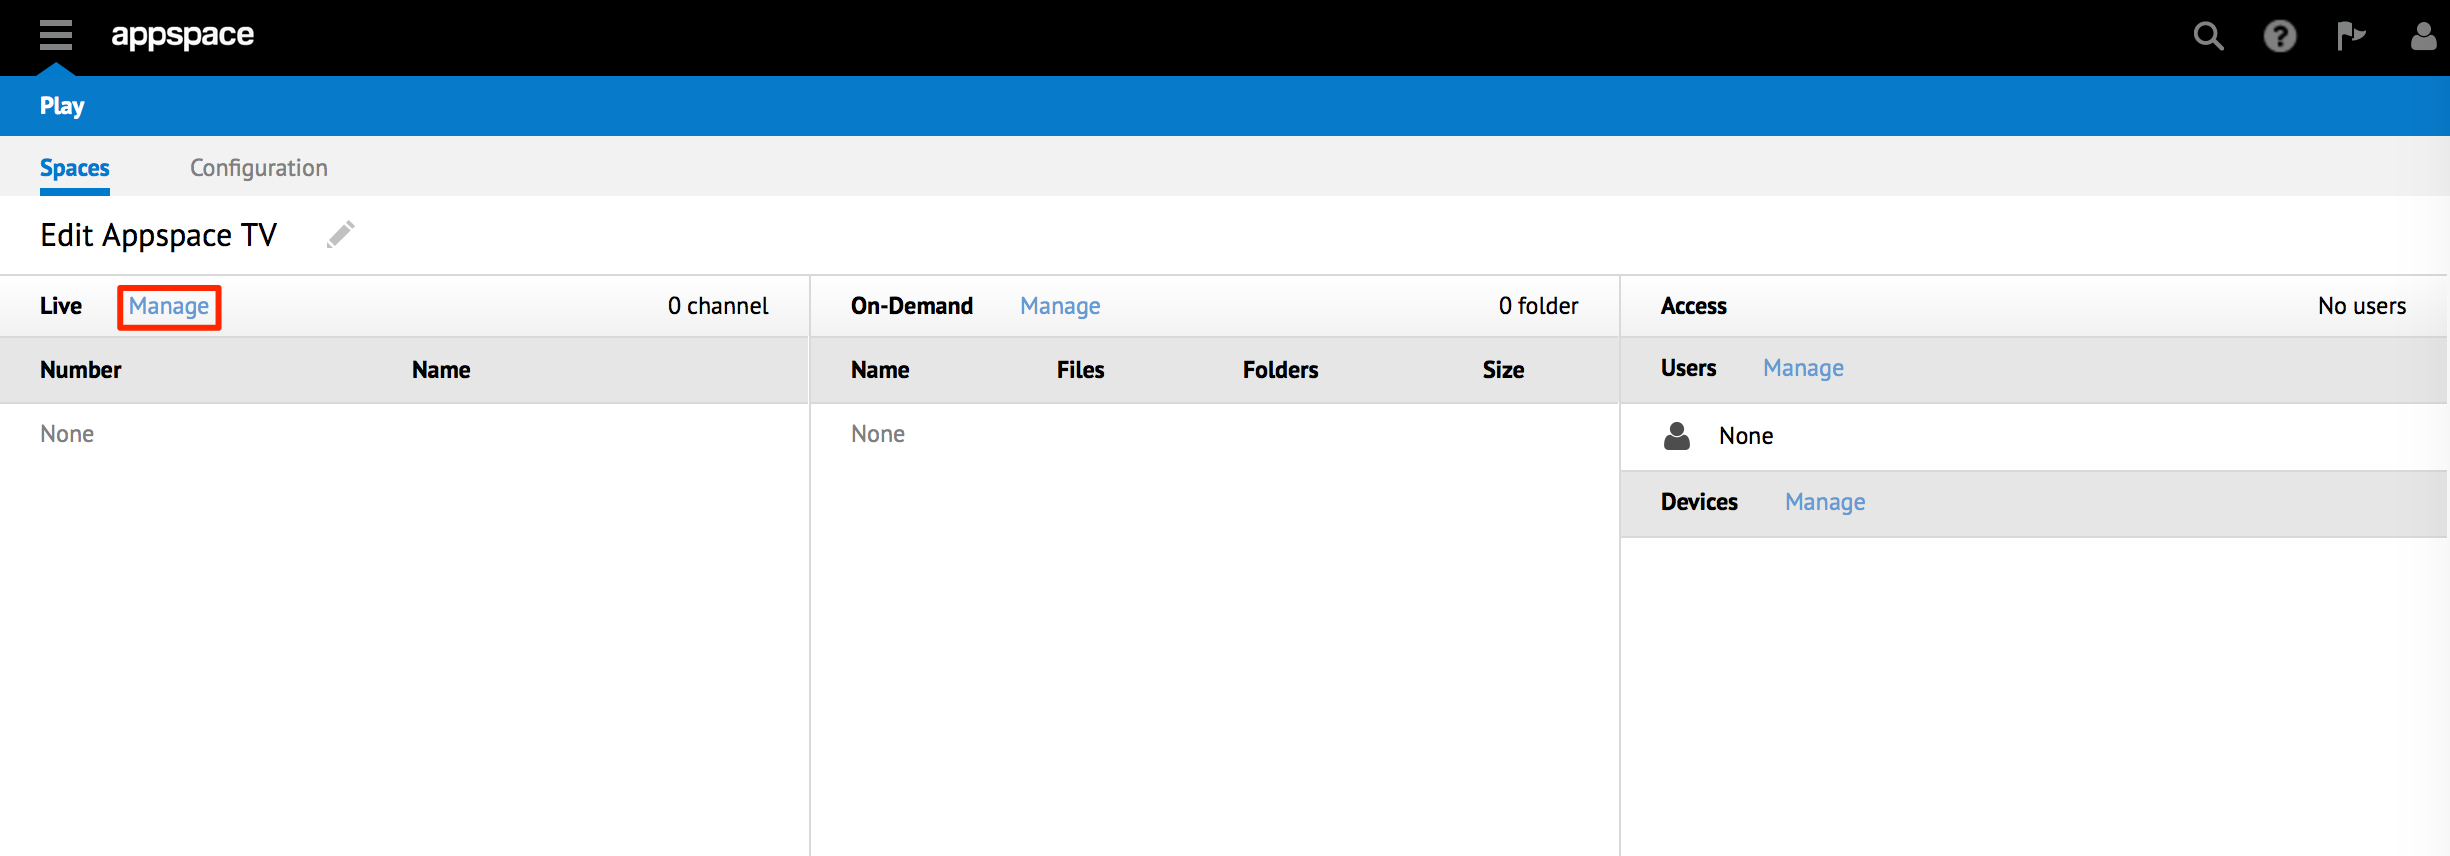
In the Edit <Space> page, configure content to display in your Space.
Configuring live stream content
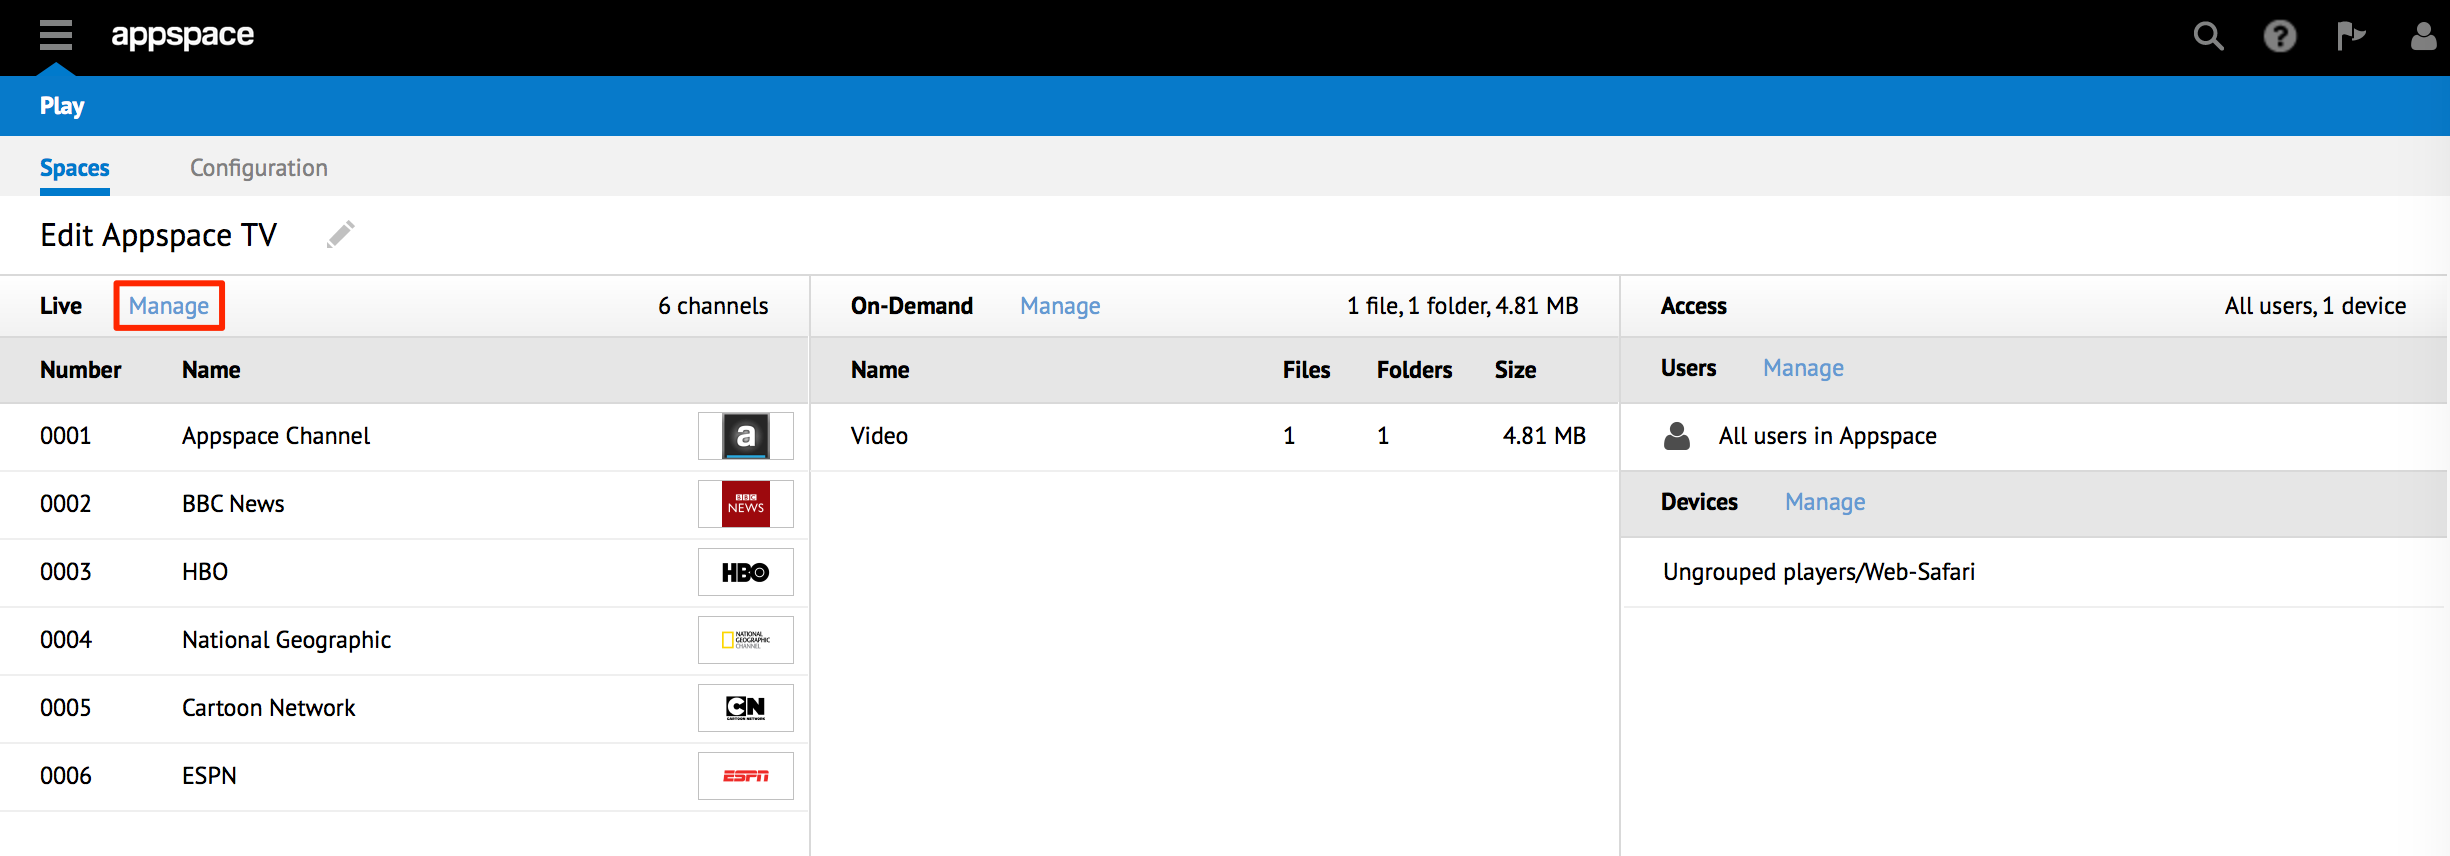
Click Manage in the Live section to add Channels configured earlier.
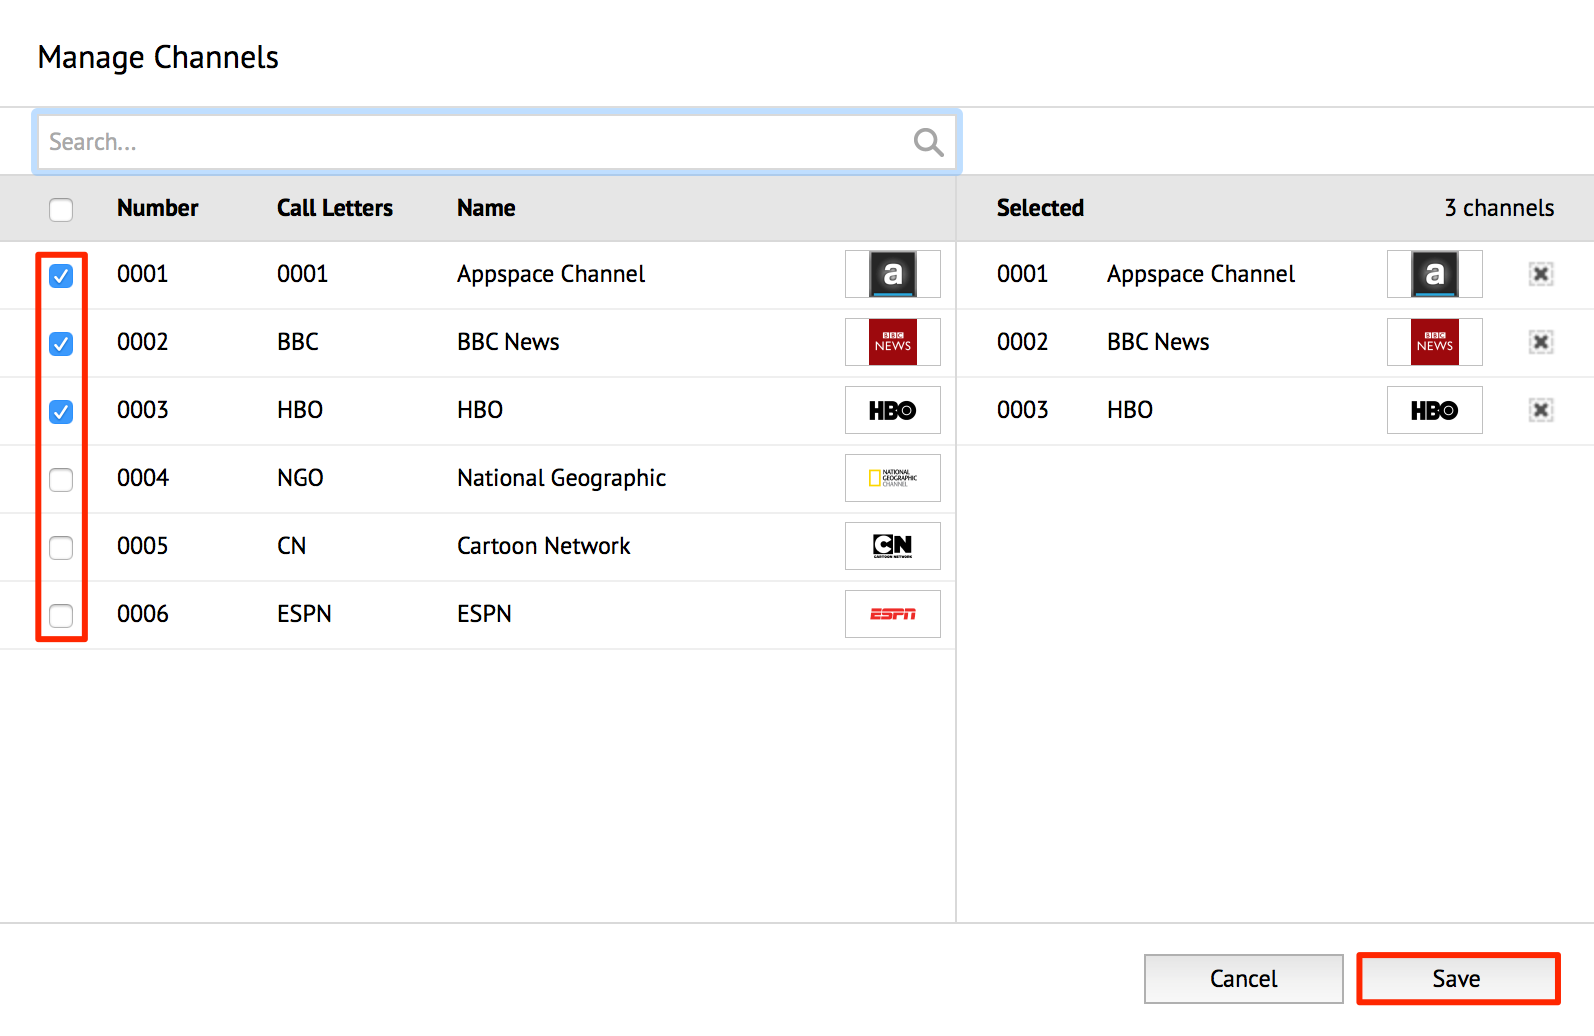
Select the desired Channels from the list in the left pane. The selected channels are displayed on the right pane. Confirm your selection and click Save.
Note
You can also use the Search bar above to quickly search for channels and select them.
Configuring on-demand content
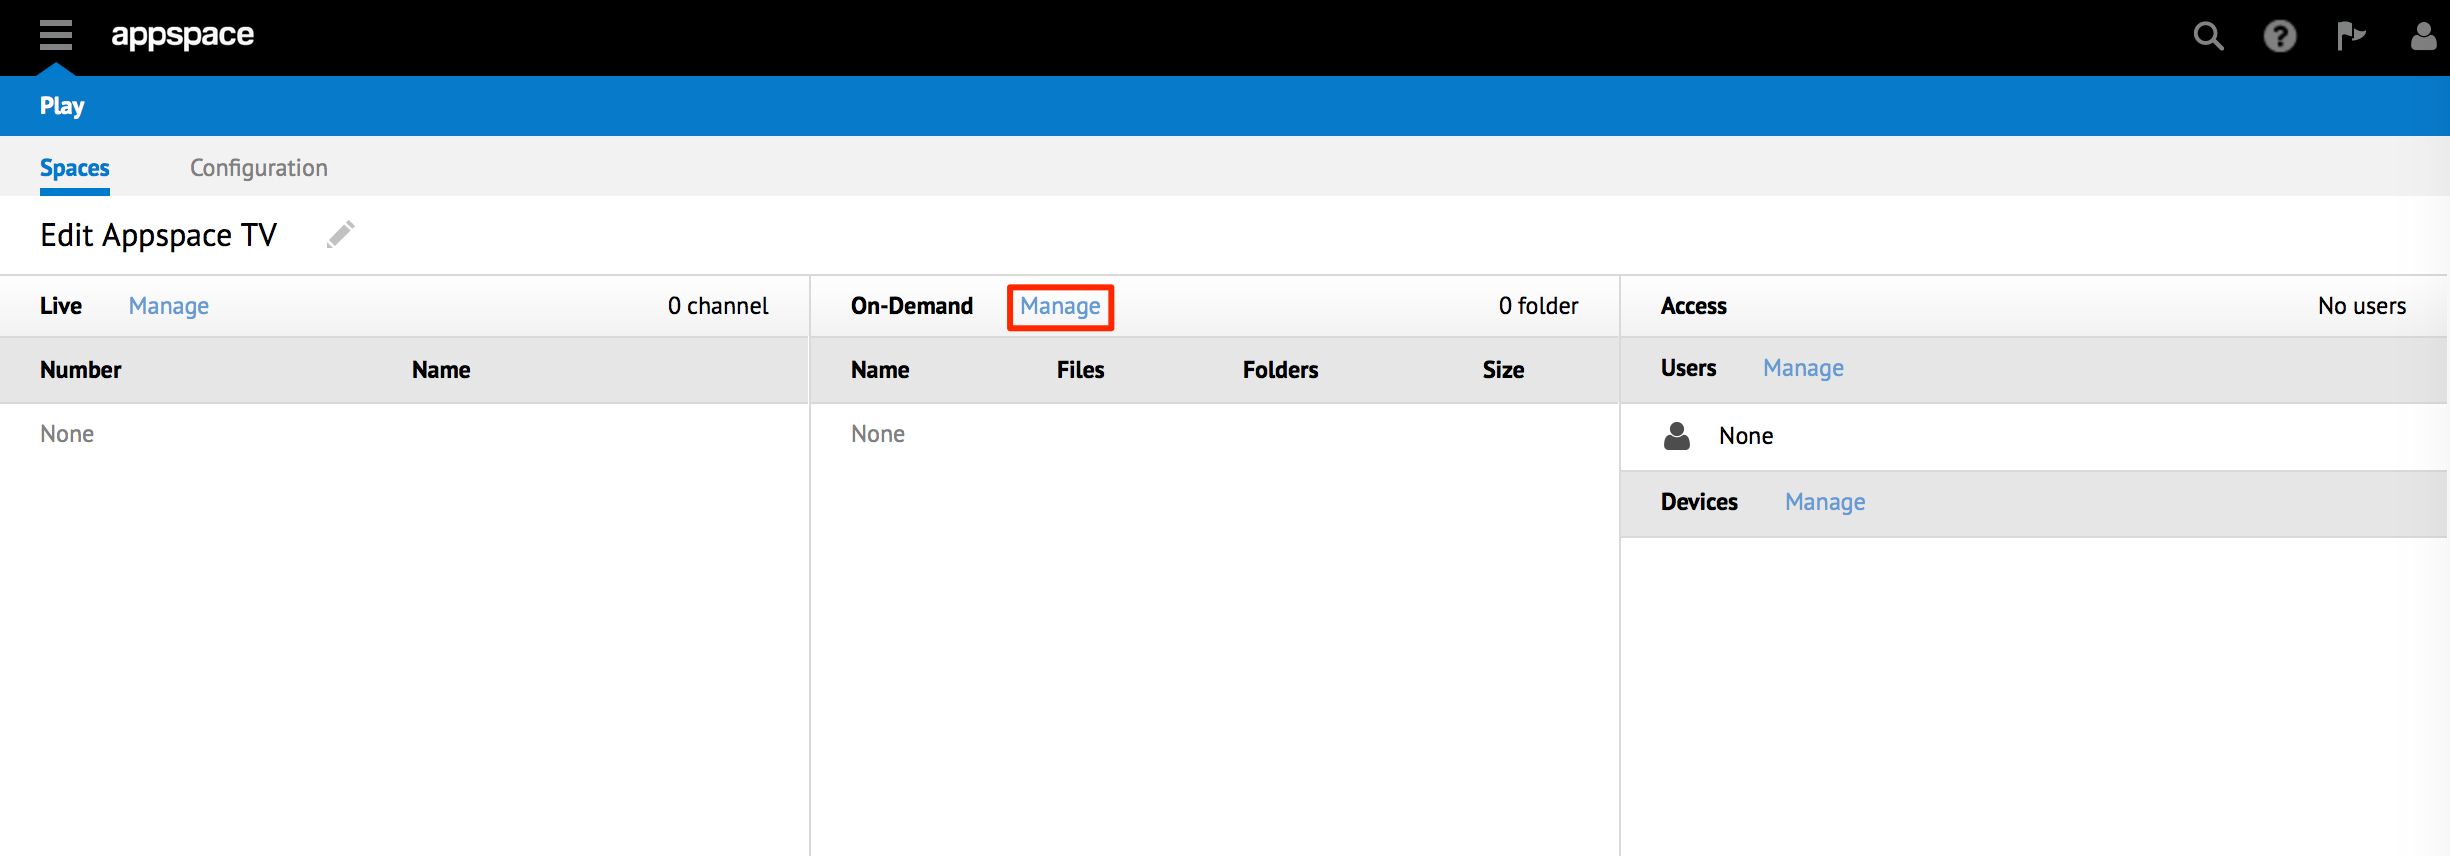
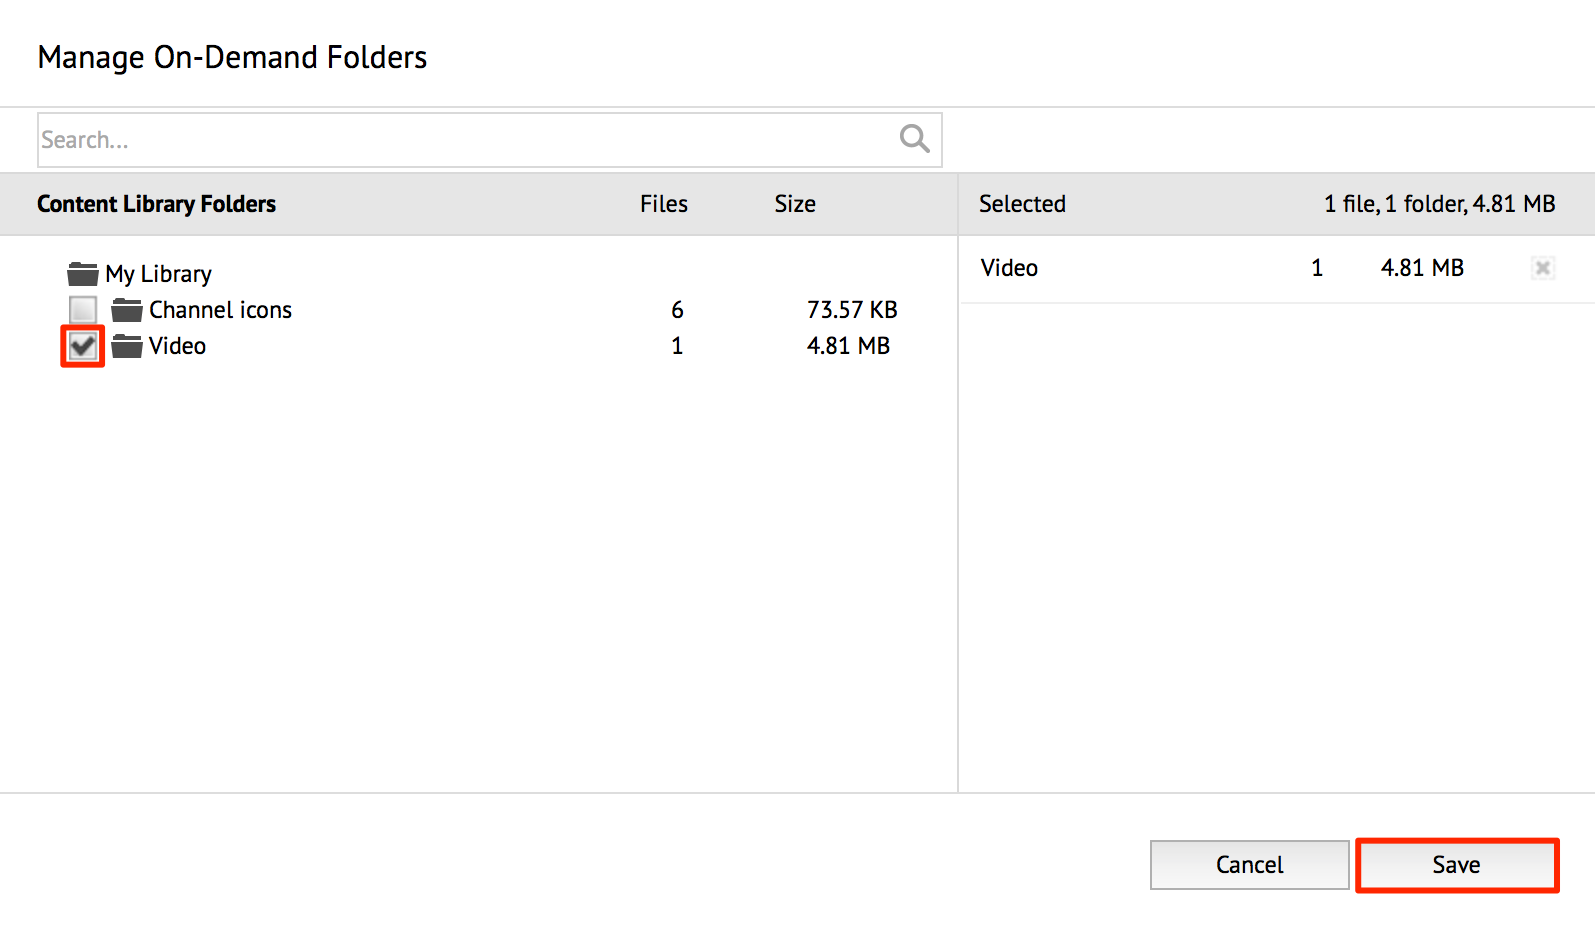
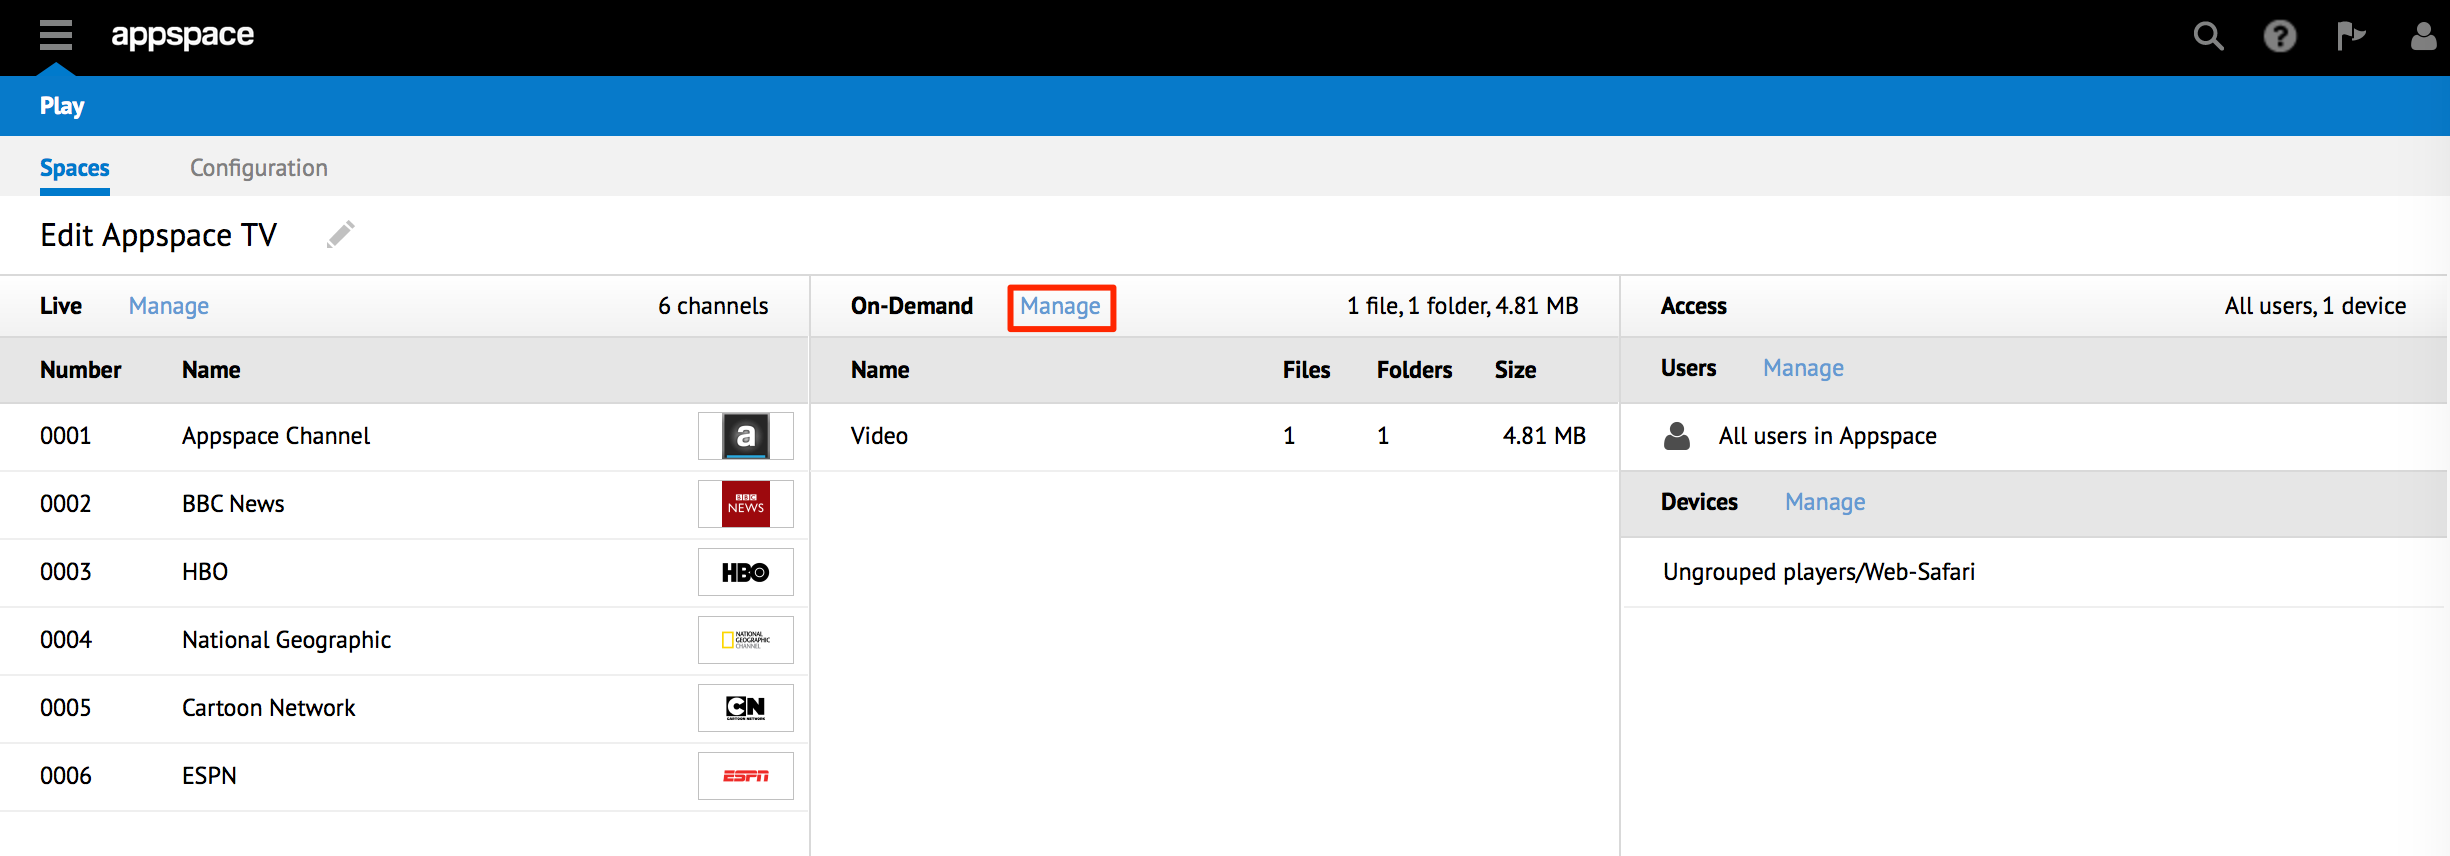
Click Manage in the On-Demand section to add content from the Appspace Library.
Select the desired content from the folders listed under My Library. The selected content is displayed on the right pane. Confirm your selection and click Save.
Note
You can also use the Search bar above to quickly search for content and select them.
Configure the access types for this Space. Please refer to the Managing User Access article to help you decide which access types you should pick.
User level access
Device level access
Editing Spaces
To edit a Space, follow the instructions below:
Click the Spaces tab and click the name-link of the Space.
In the Edit <Space> page, edit the content displayed in the Space.
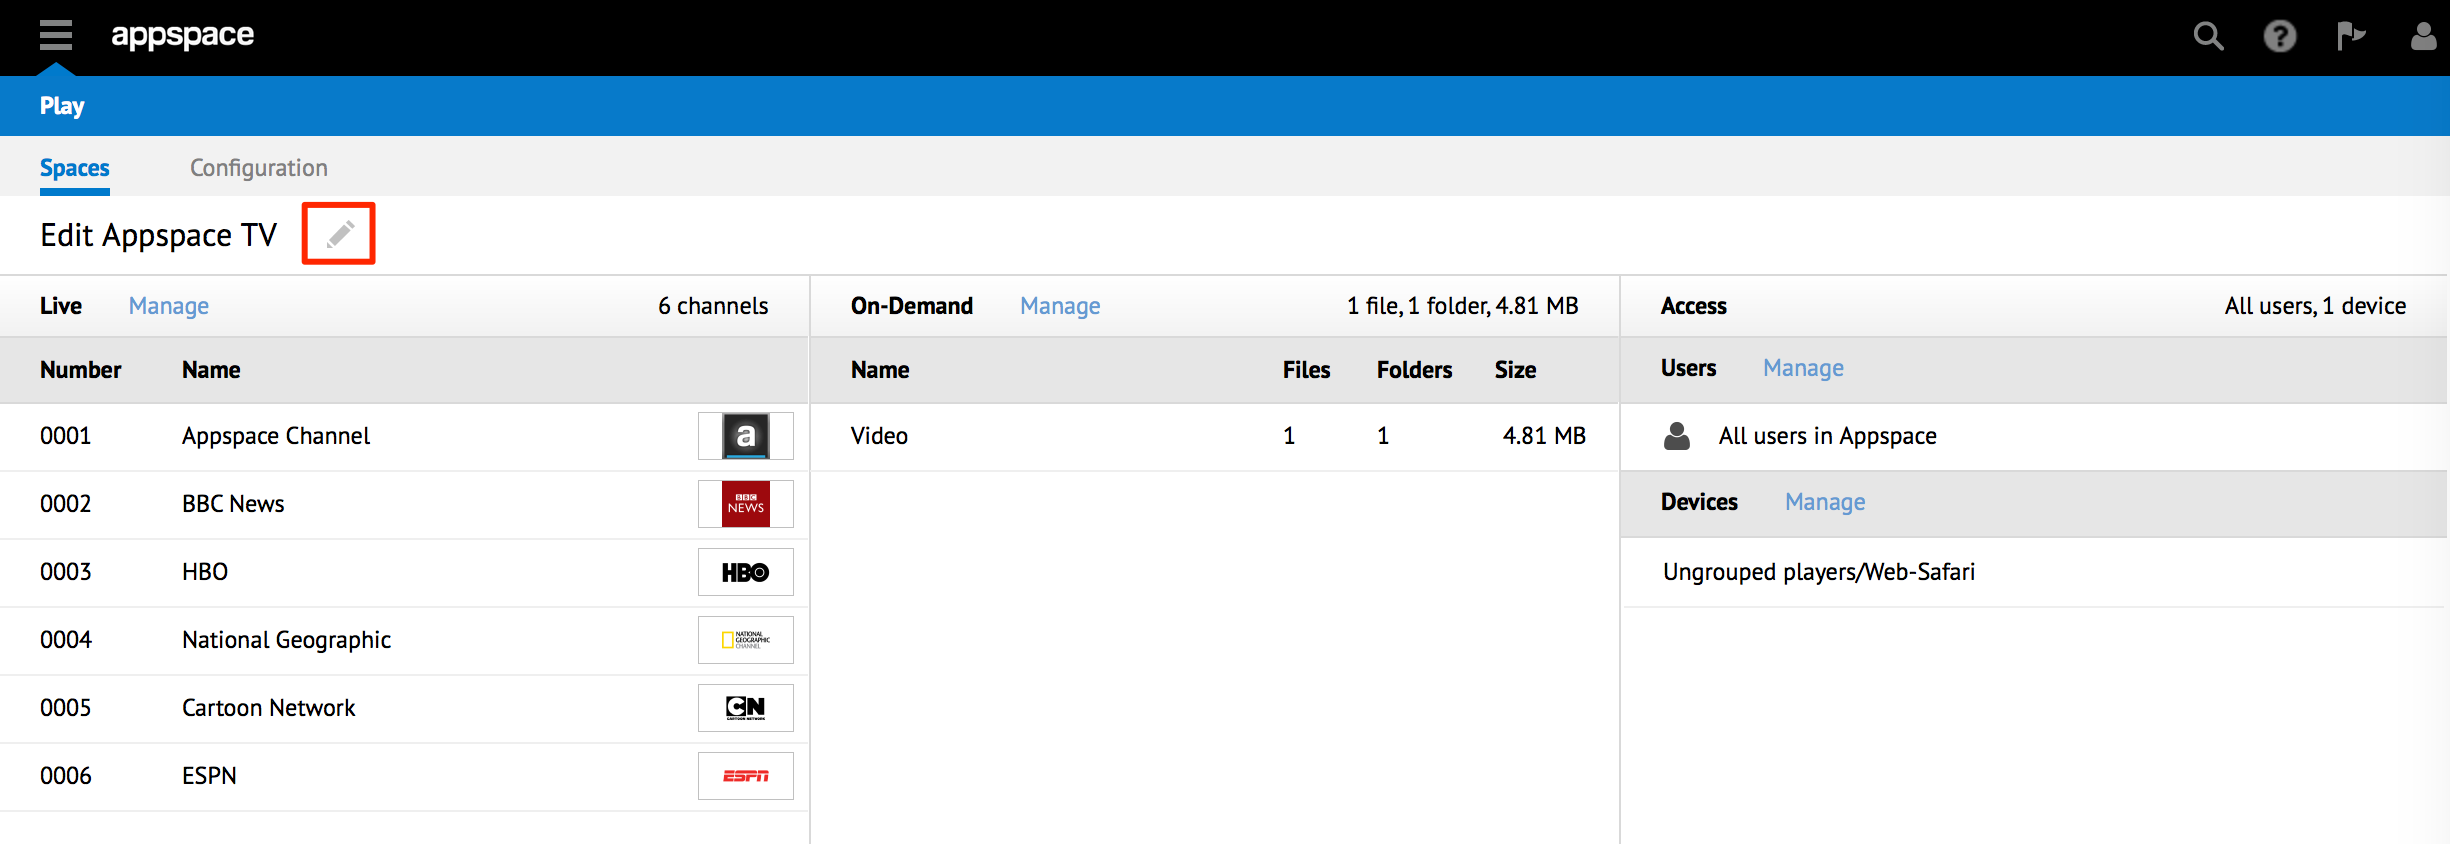
Edit Space name
Click the Edit Name button.
Change the desired Space name and click the green tick button.

Edit live stream content
Click Manage in the Live section to manage channels added to the Space.
To add more channels, select the desired Channels from the list in the left pane. To remove channels, click the delete icons of the channels in the right pane.
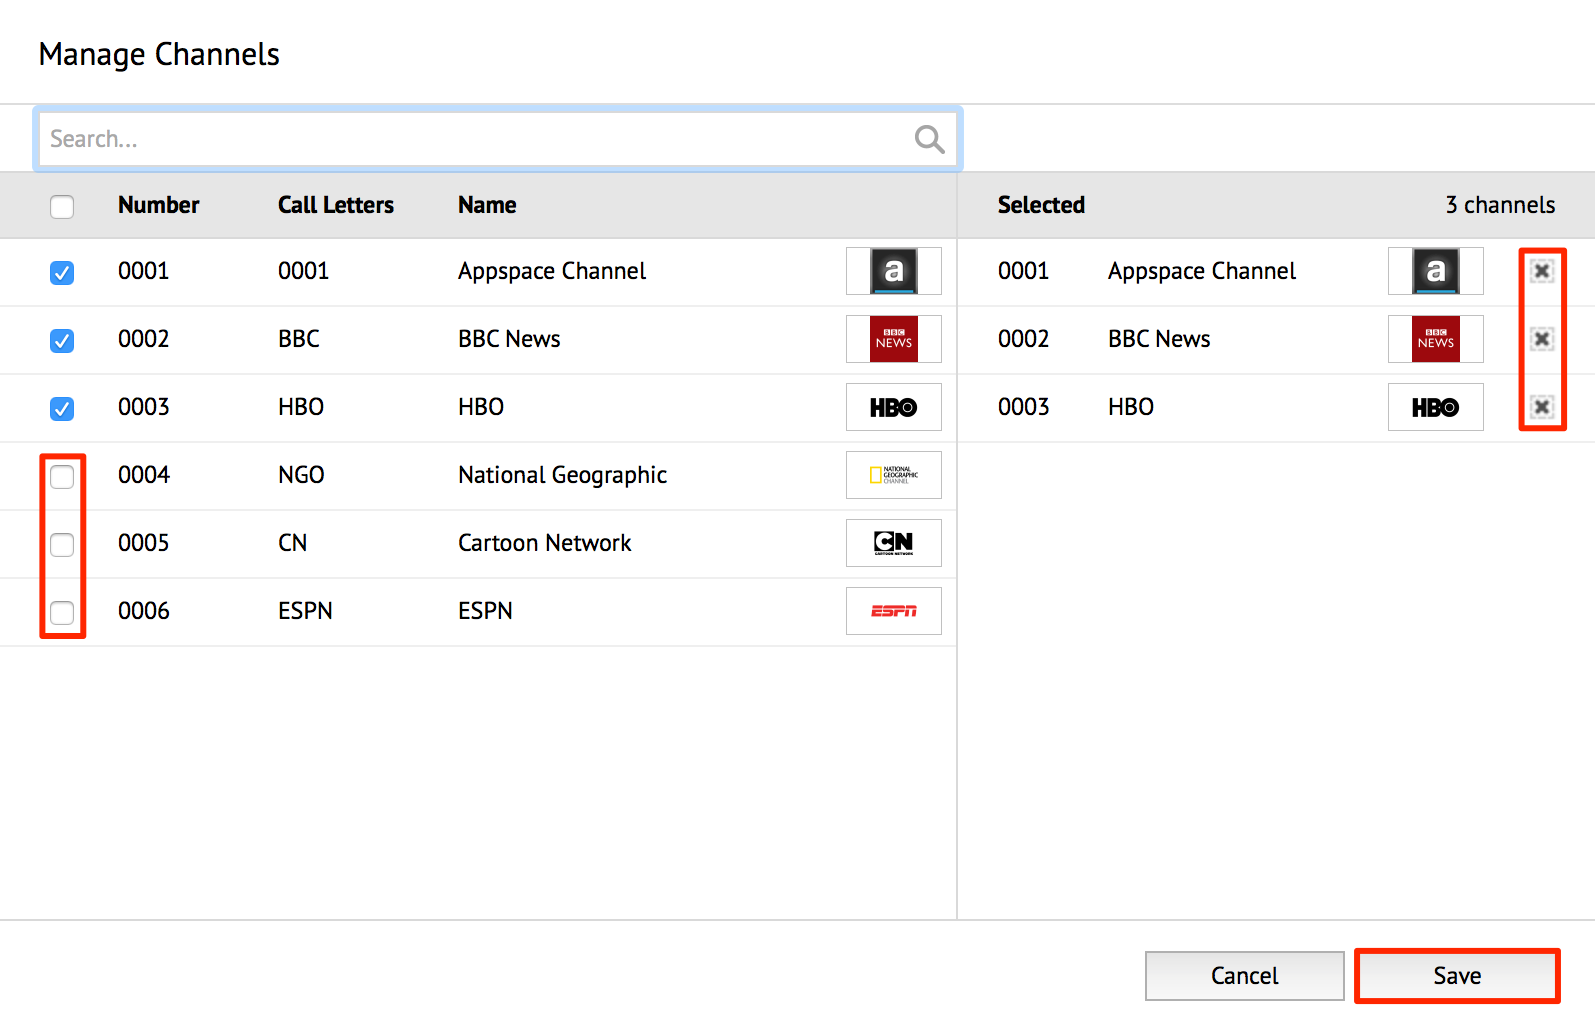
Confirm your channel selection in the right pane and click Save.
Edit on-demand content
Click Manage in the On-Demand section to manage content added to Space.
To add content, select the desired content in the folders in My Library. To remove content, click the delete icons of the content in the right pane.
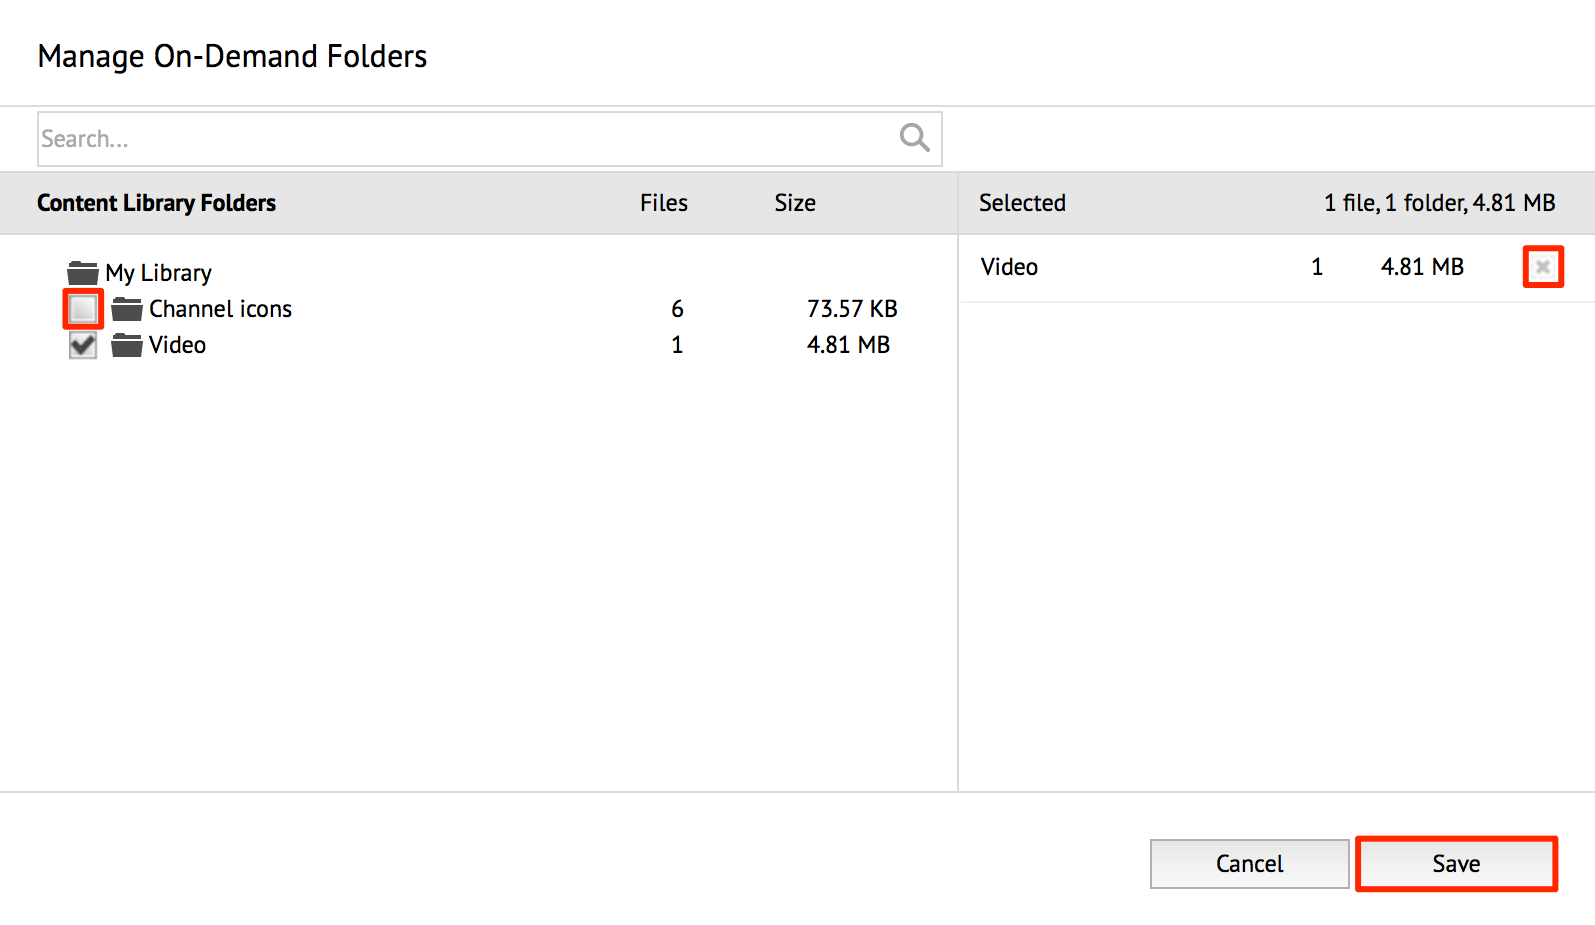
Confirm your content selection in the right pane and click Save.
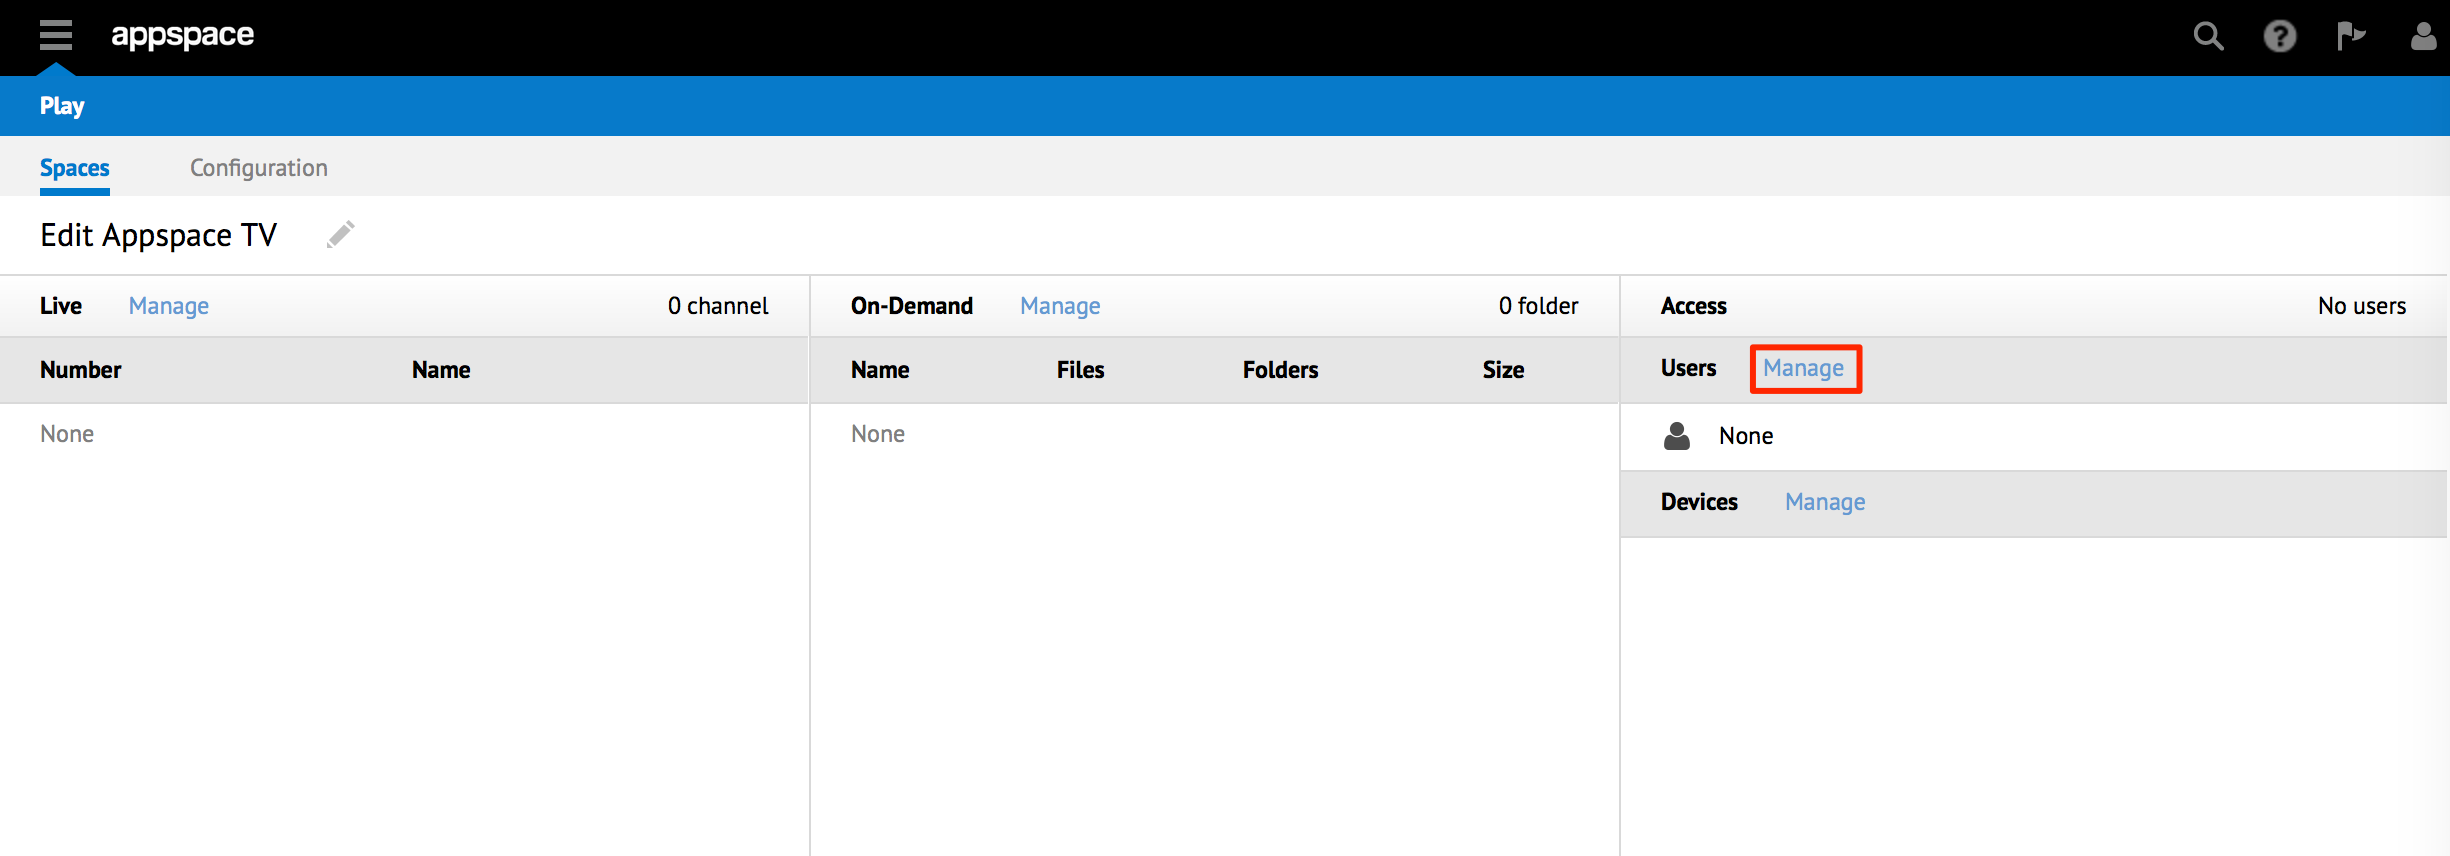
Configure the User or Device level access of the Space.
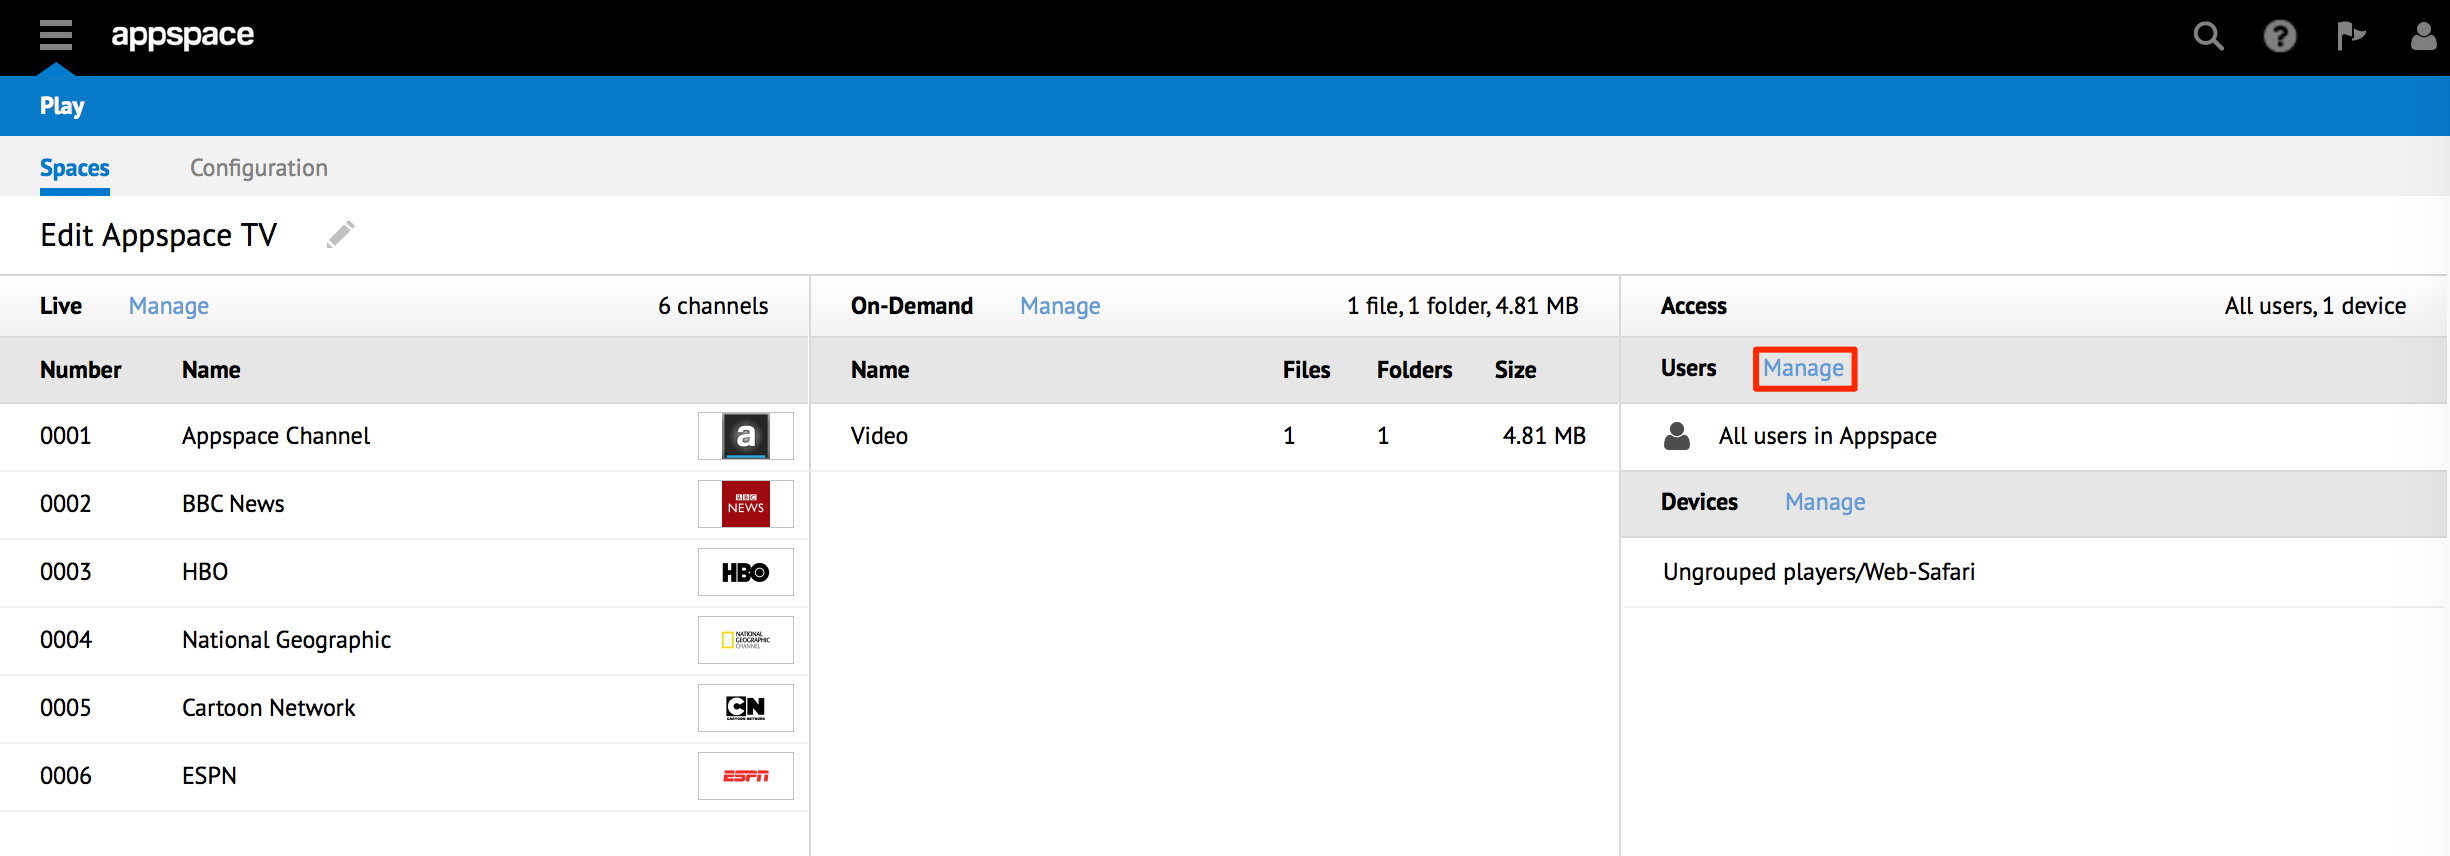
Edit user level access
Click Manage in the Users section..
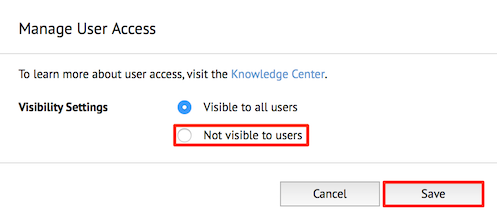
Select the ‘Visible to all users’ option to allow users to view the Space, or select ‘Not visible to users’ to disallow visibility. Click Save to make changes.
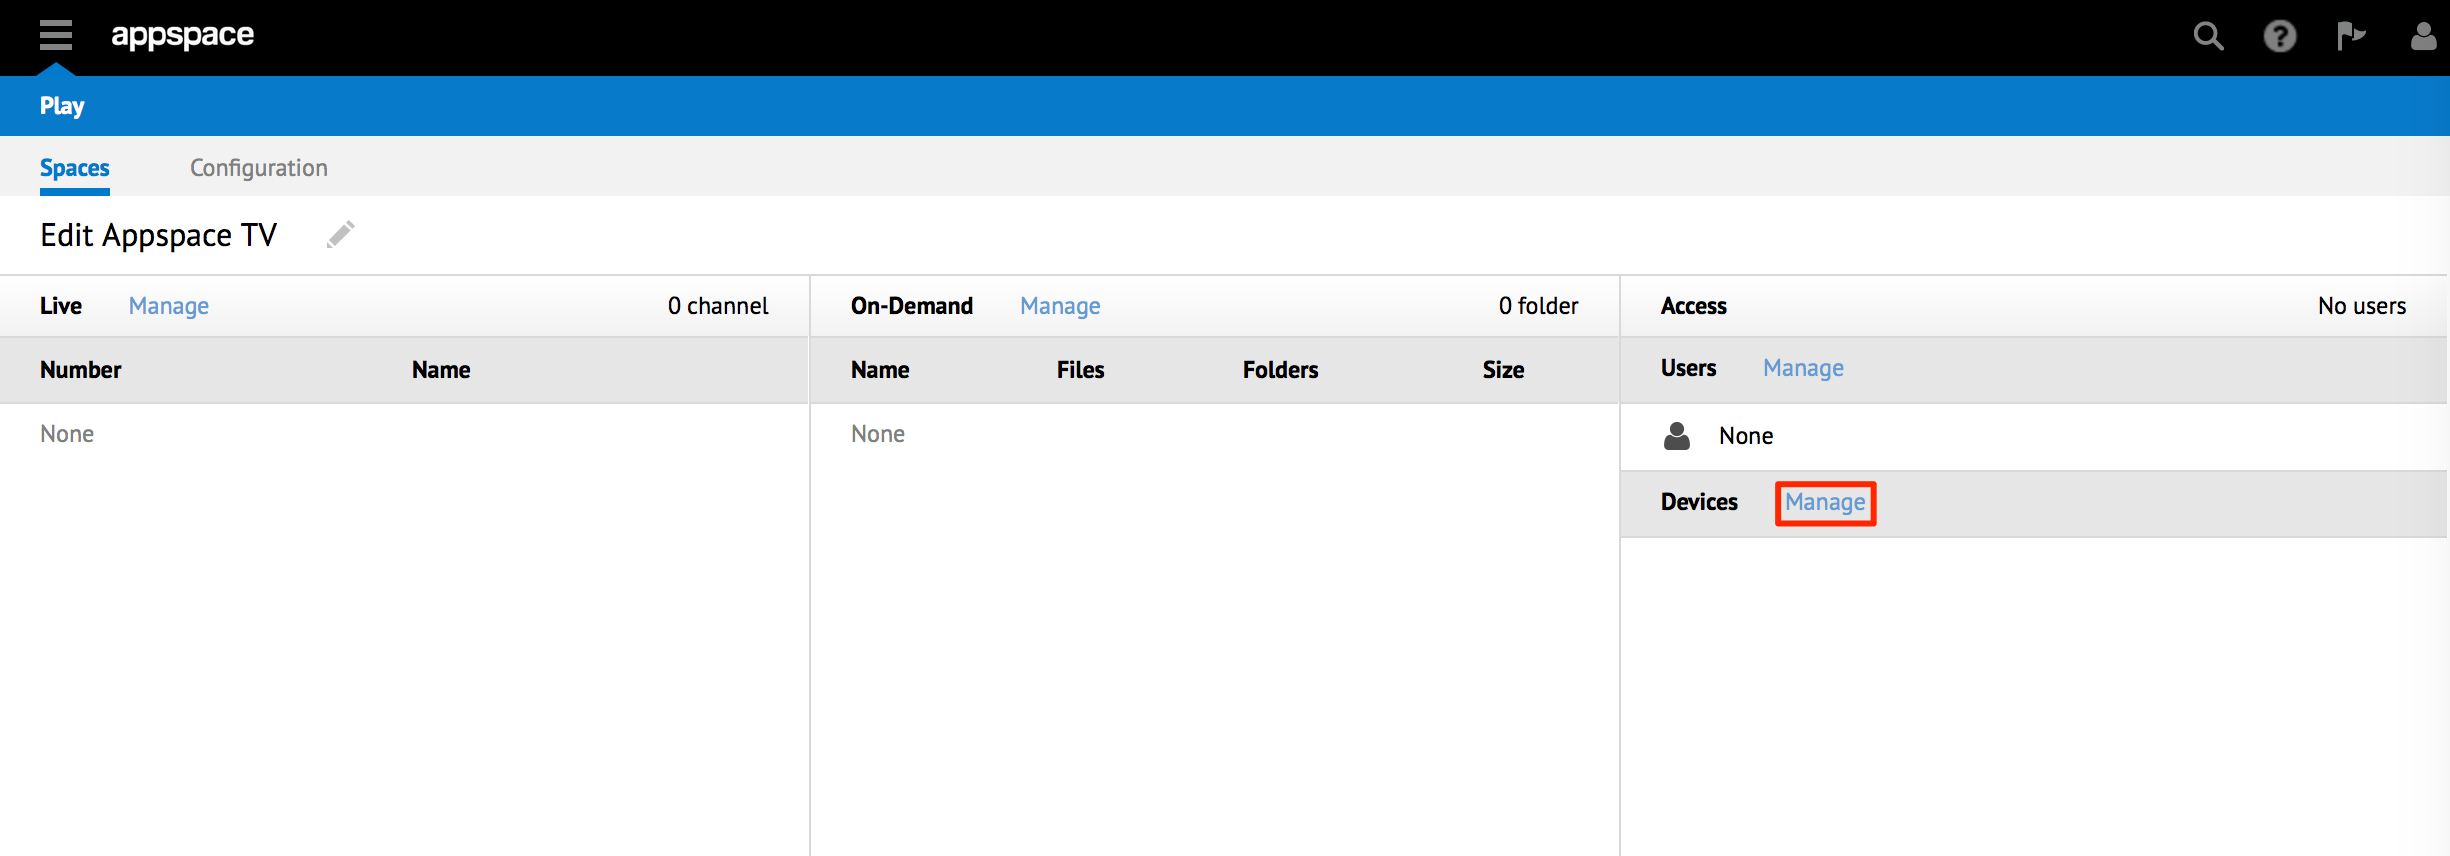
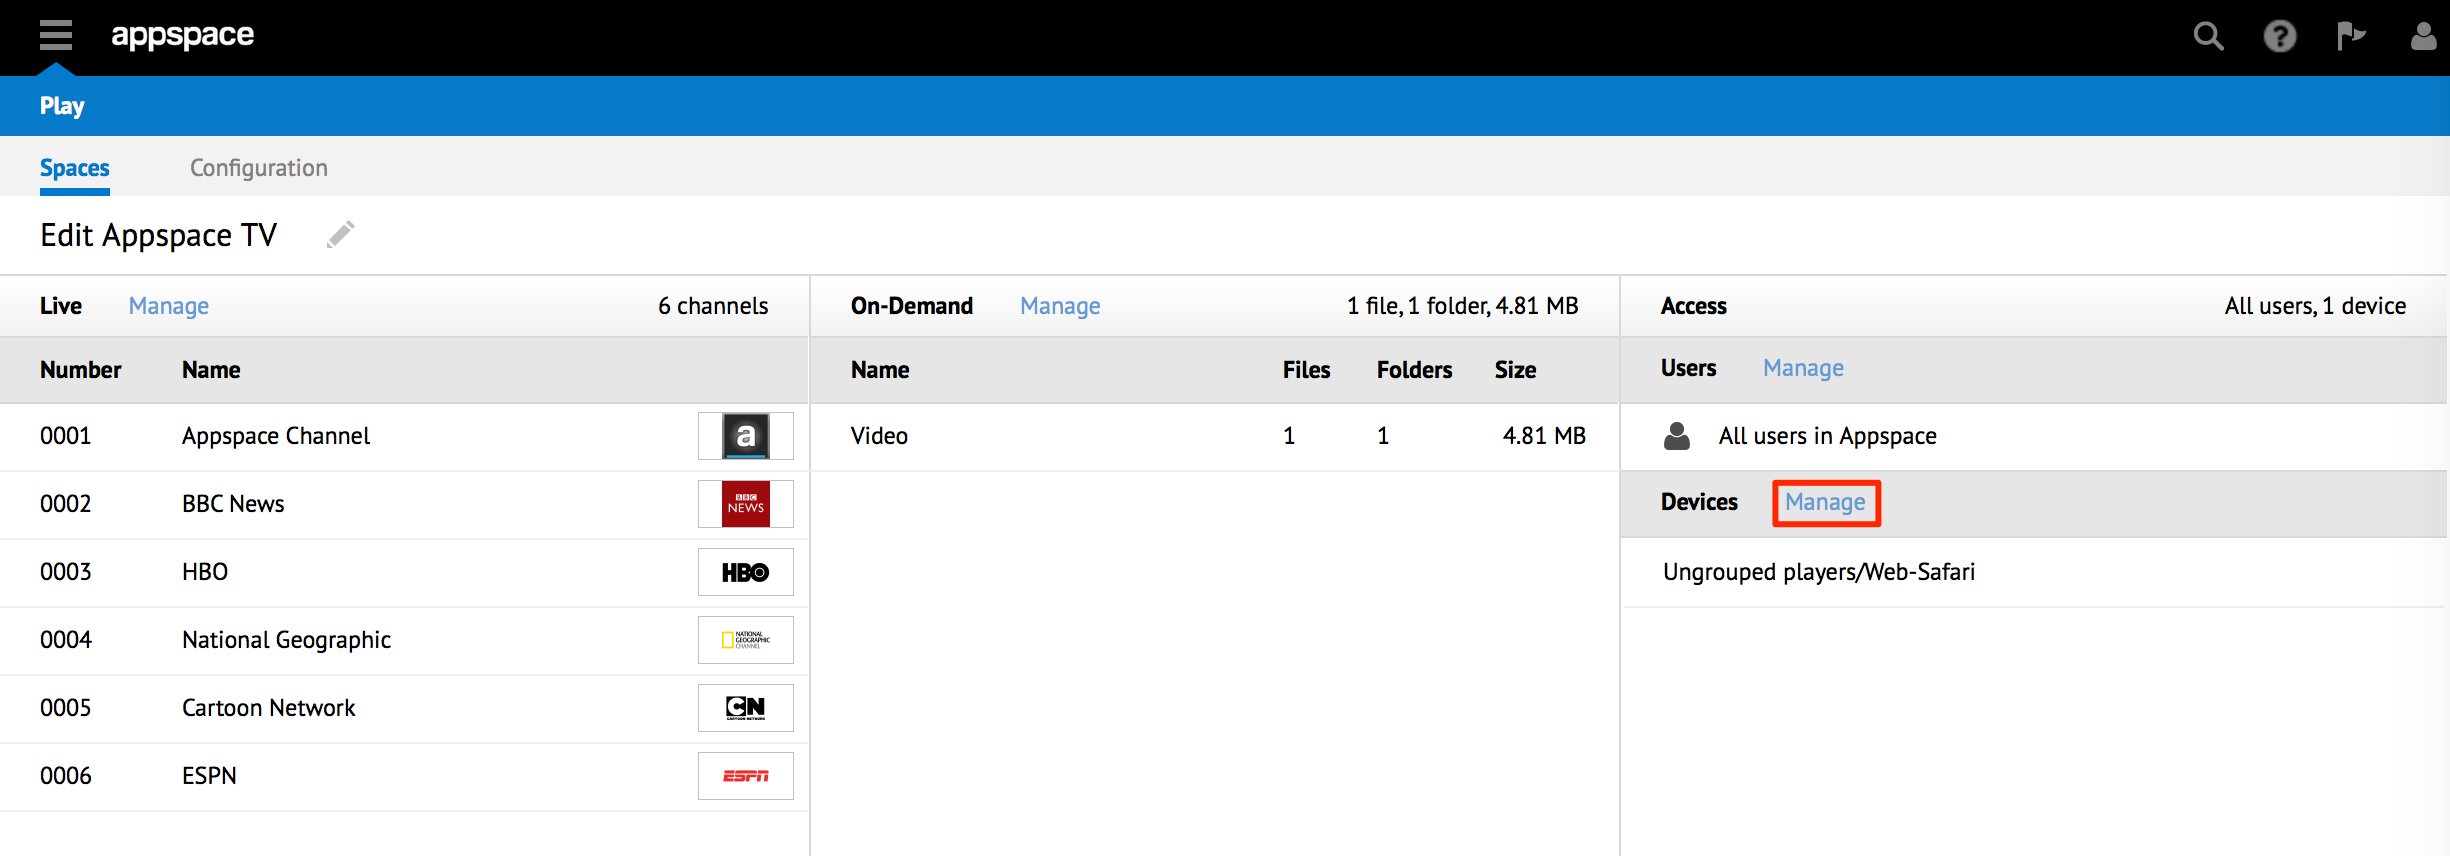
Edit device level access
Click Manage in the Devices section.
To add network groups or devices to your Space, check the desired check boxes. To remove groups or devices from the Space, click the delete icon next to each Group or Device in the right pane.
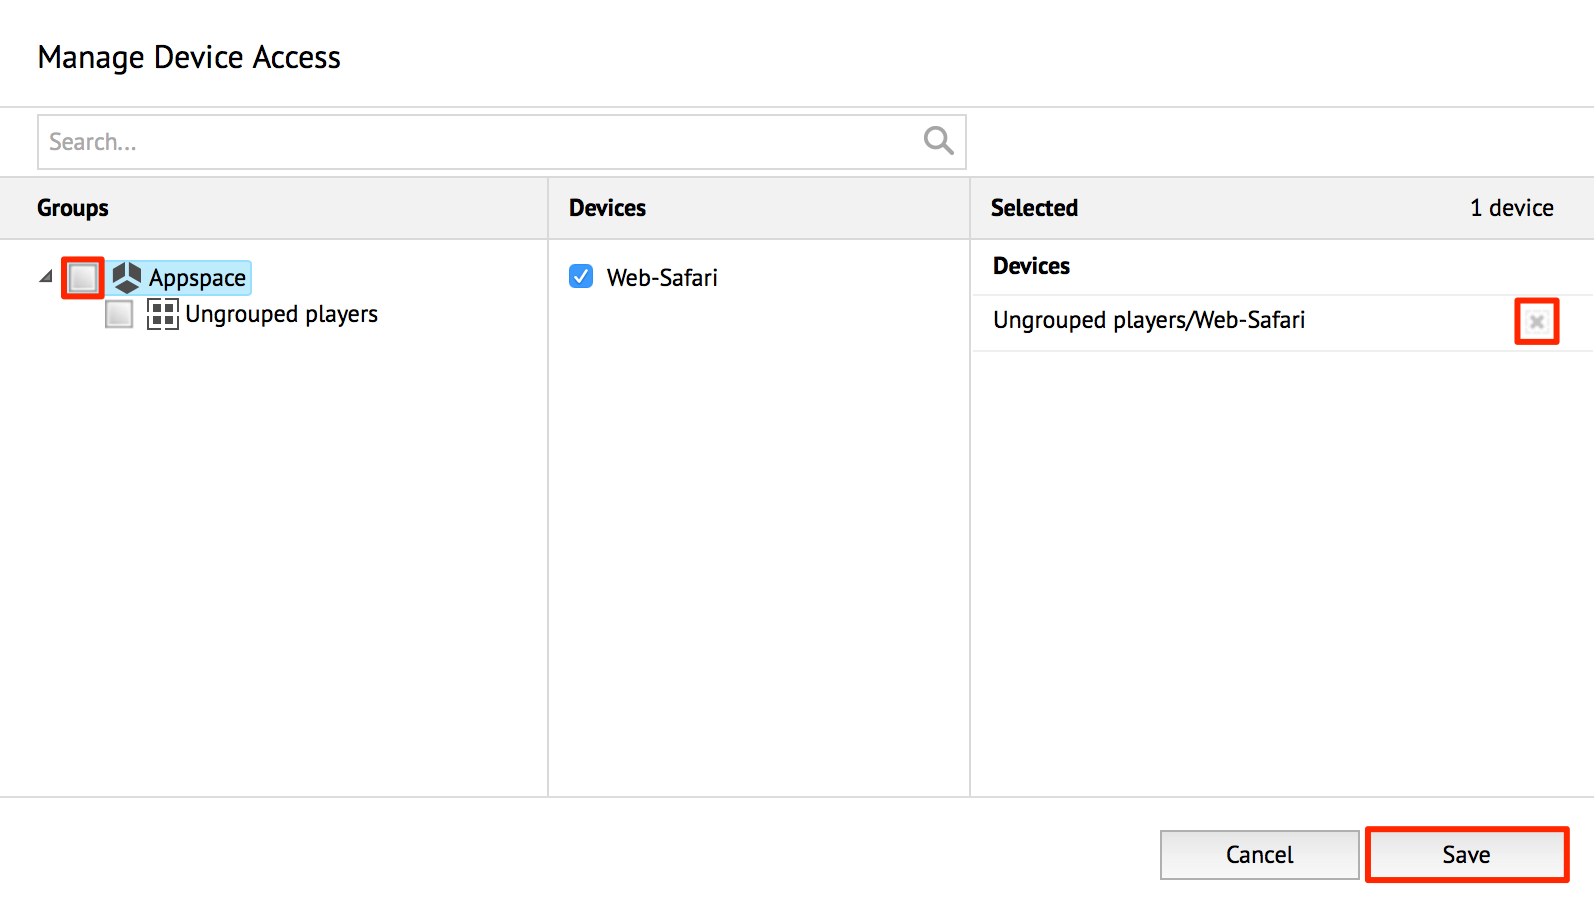
Confirm your selection in the right pane and click Save.
Deleting Spaces
To delete a Space, follow the instructions below:
Click the Spaces tab and select a Space.

When the Space row is highlighted, click the Delete icon in the right to delete the Space.

Click OK to confirm.