Configuring Permissions in Microsoft Exchange
Introduction
This article provides the instructions to set permissions in Microsoft Exchange granting the Calendar Provider user mailbox full access to each meeting room.
Prerequisites
- One preconfigured Calendar Provider user mailbox in Microsoft Exchange – referred to as MRX User in this article.
- Preconfigured mailboxes for each meeting room in Microsoft Exchange.
- All meeting rooms must be a part of a room list distribution group. For more information please refer to this guide.
Assigning Permissions in Microsoft Exchange 2010
To assign permission to the Calendar Provider mailbox in Microsoft Exchange 2010, follow the instructions below:
Important
Repeat these instructions for every meeting room registered.
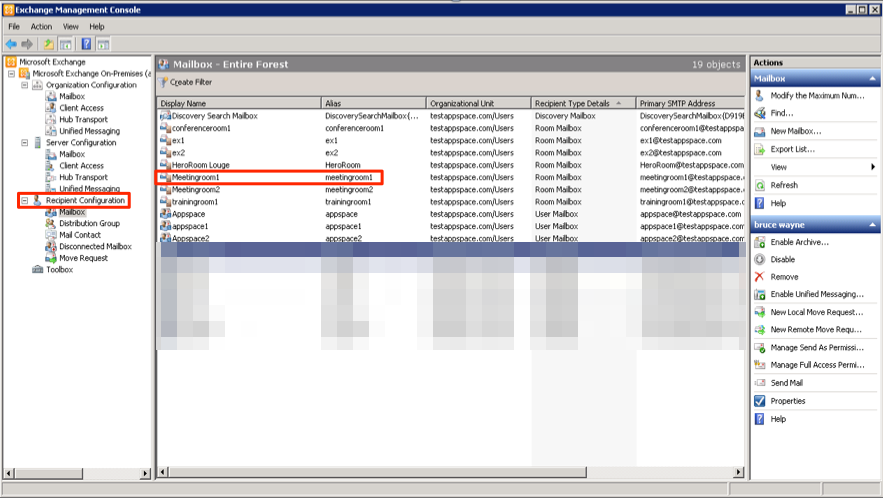
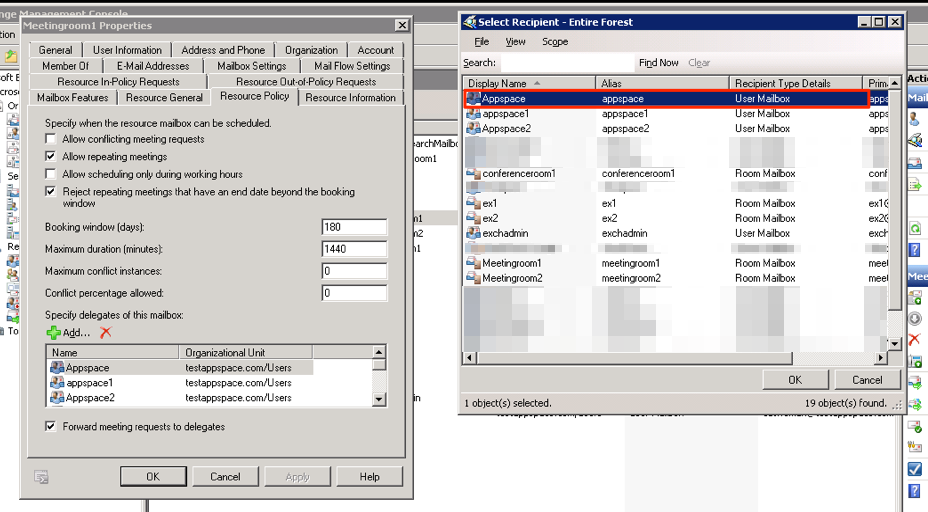
Launch the Exchange Management Console on the Microsoft Exchange Server.
Expand the Recipient Configuration directory tree, and click Mailbox.
Double-click the desired meeting room.
In the Properties window, select the Resource Policy tab.
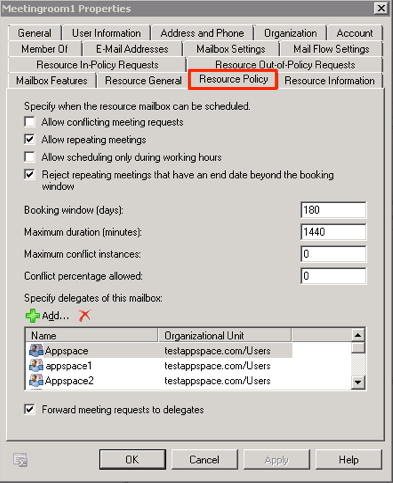
Click the Add button.
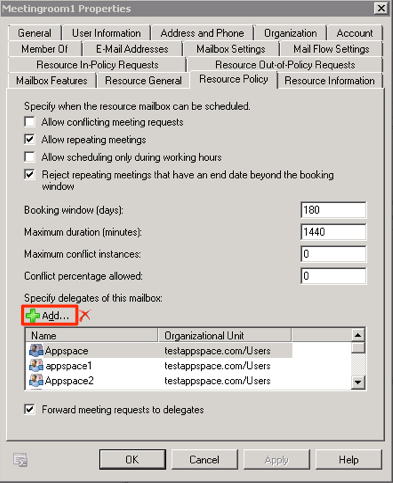
In the Select Recipient window, select the MRX User, and click OK. Click the Apply button on the Resource Policy tab to grant full access to the meeting room.
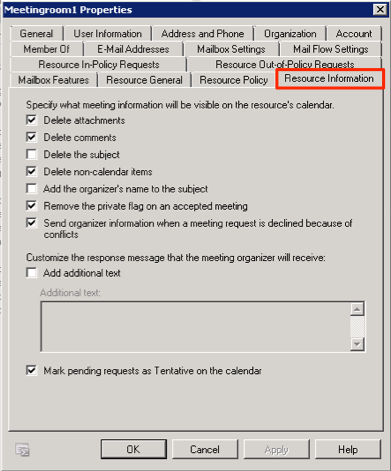
Click the Resource Information tab, match the settings in the image below, and click OK.
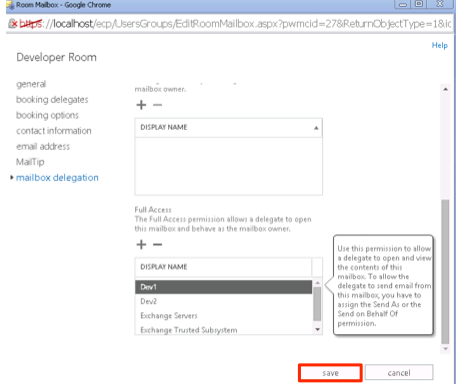
Assigning Permissions in Microsoft Exchange 2013
To assign permission to the Calendar Provider mailbox in Microsoft Exchange 2013, follow the instructions below:
Important
Repeat these instructions for every meeting room registered.
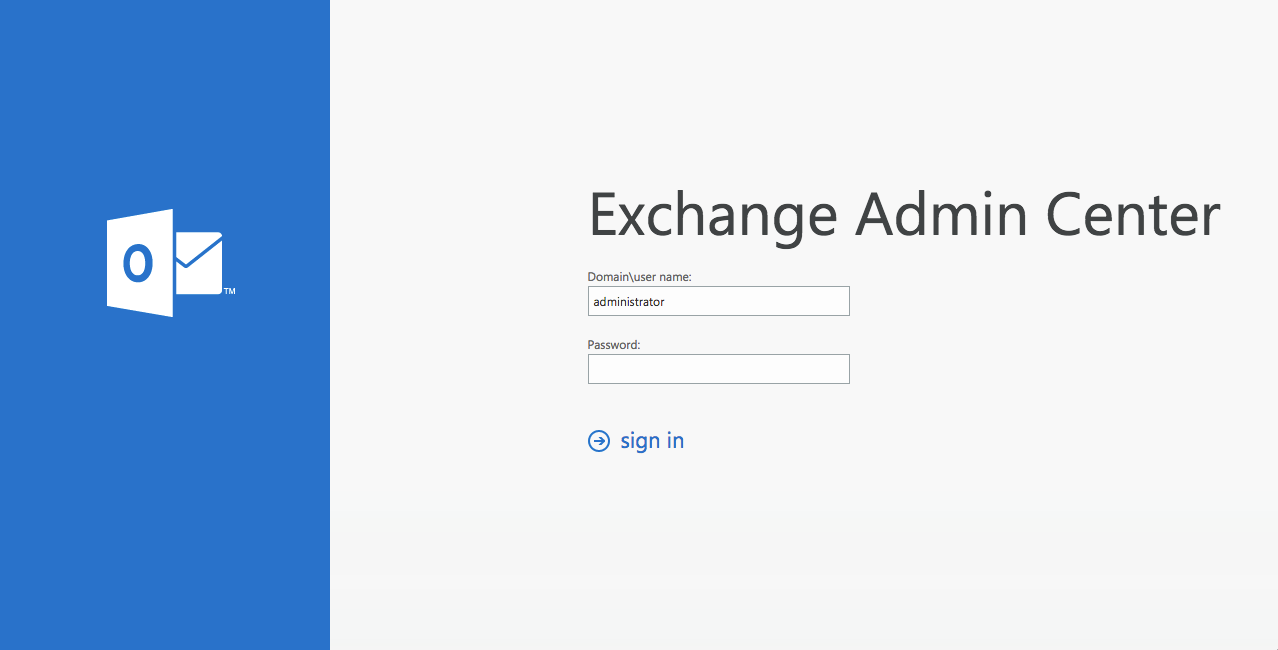
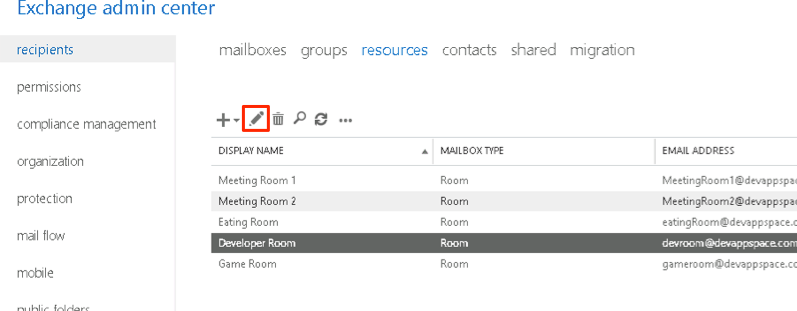
Login to Exchange Admin Center.
Click ‘recipients’, and click the ‘resources’ tab.
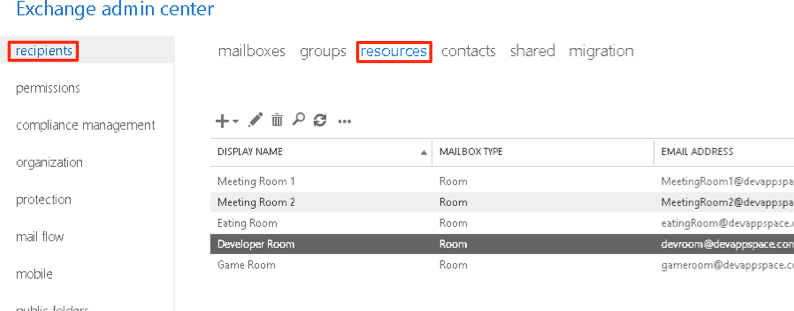
Click the desired room, and click the Edit button.
Click ‘More options’.
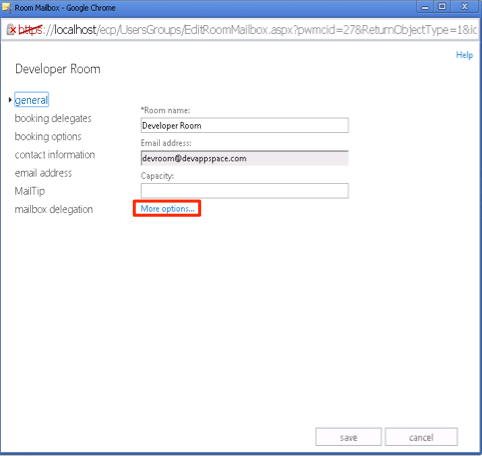
Click the Full Access Add button, and search for the MRX User. Select the user, and click ‘add’. Click ‘ok’ when done.

Click ‘save’ to grant the MRX User full access to the meeting room.