Managing On-Demand Content
Overview
The On-Demand section of the extension provides users with the ability to create content menus for non-real time content (video) files. OTT content (video or image files) is assigned to the Content Menu interface and sub-folders – this is in turn accessed when a user navigates through the menu. It is through the Content Menu interface in which administrators have the ability to create content menus, add OTT content/video files, and manage OTT content.
Note
Over-the-top content (OTT) refers to the delivery of video, audio and other media over the internet without multiple system operator being involved in the control or distribution of the content.
This guide will elaborate on the steps to add, remove, and edit On-Demand content within the VOD Extension of Appspace.
Creating On-Demand Content, Folders, and Content Items
Note
The folder structure and how it’s reflected in the VOD UI is very dependent on the theme itself.
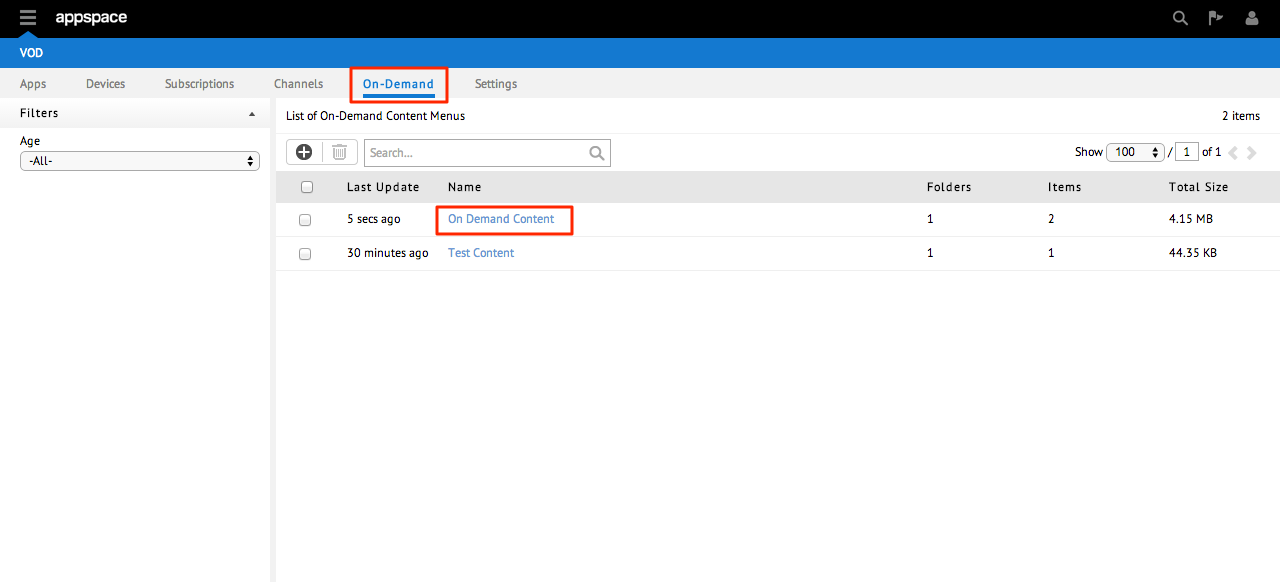
Step 1
From the VOD Extension, select the On-Demand tab. Click the + (New Content) icon to add new on-demand content.

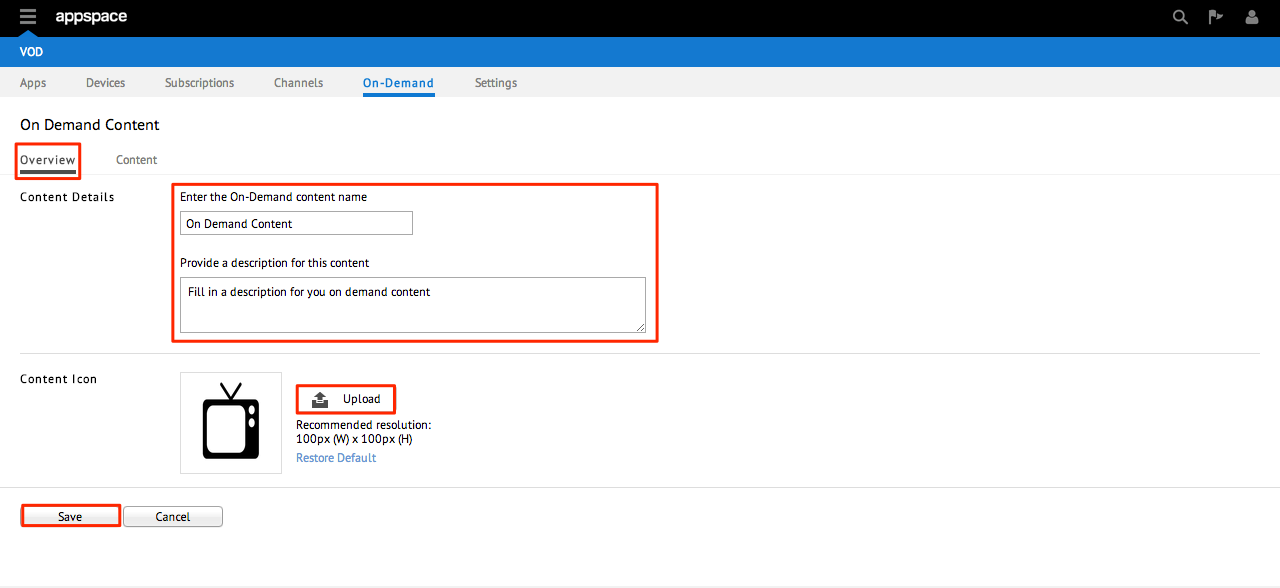
Step 2
Fill in the relevant details in the New On-Demand Content Information page under the Overview sub-tab. Click Save when finished.
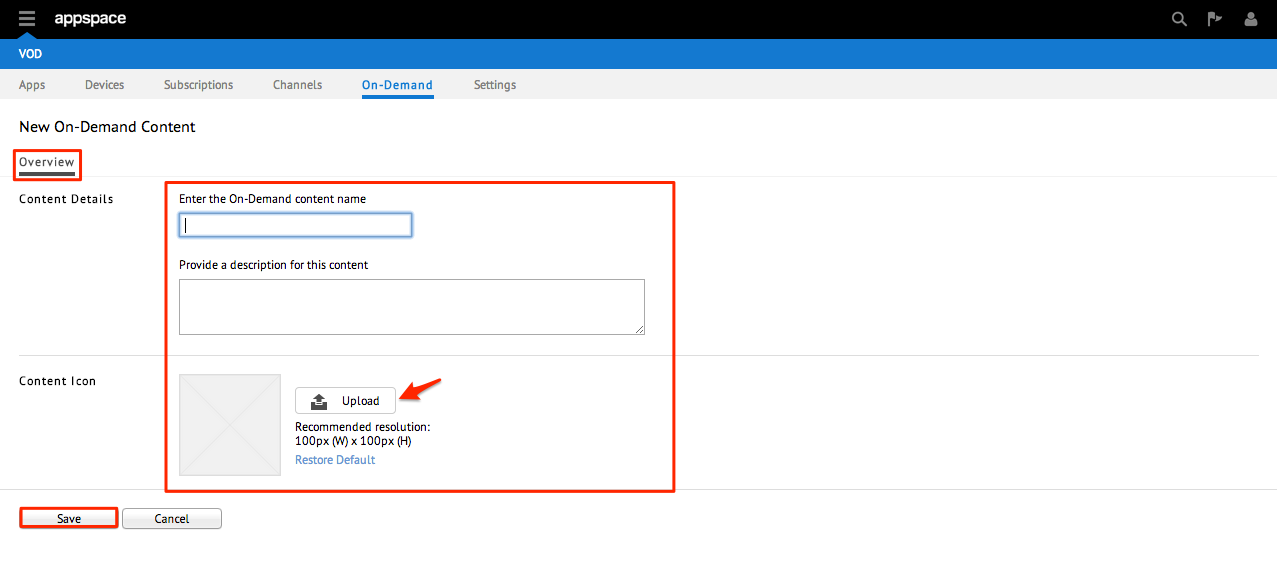
Note
- Content Details: Name and description of the content.
- Content Icon: On-demand menu icon (supported formats: JPG and PNG).
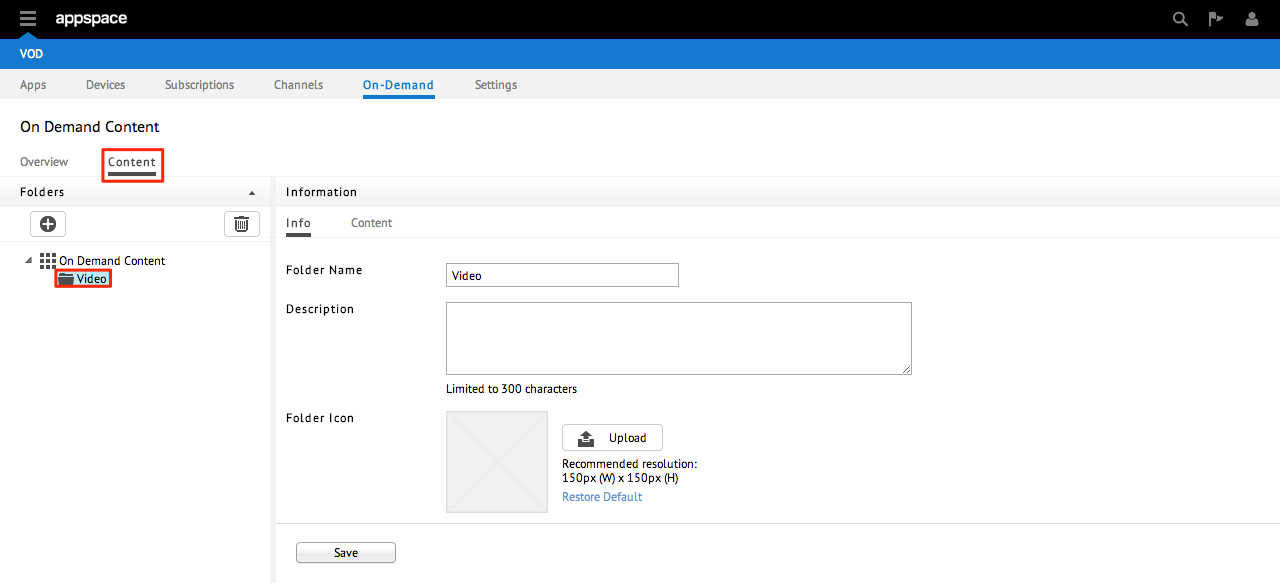
Step 3
Upon saving the on-demand content information, a tab named Contents will be visible. To create a folder, click the + (New Folder) icon in the Folders pane.
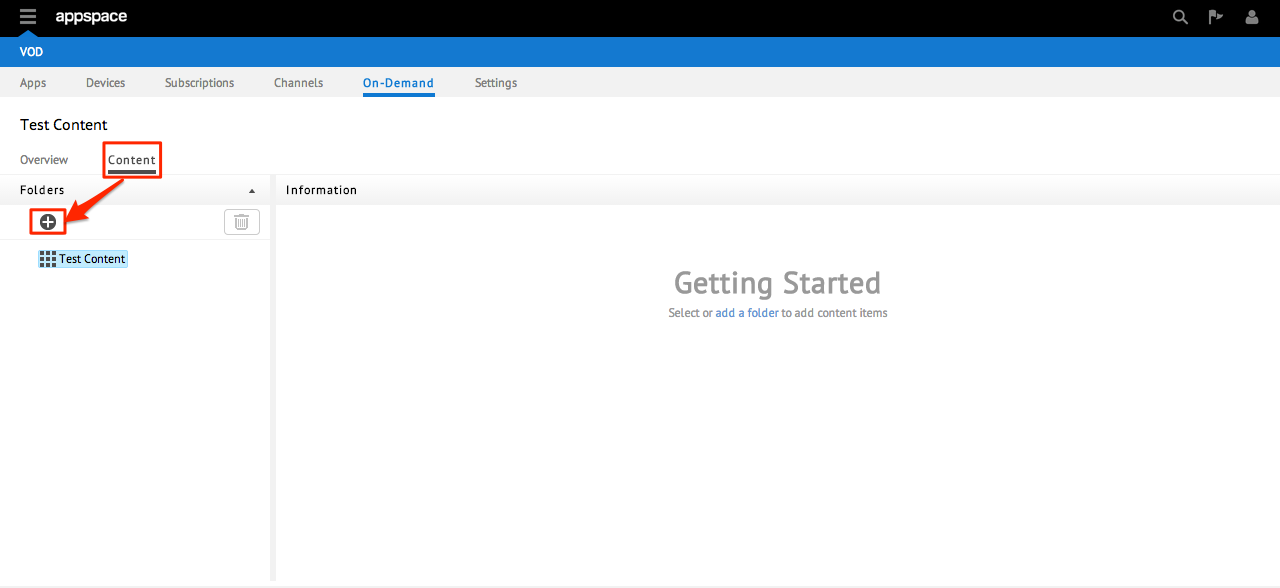
Step 4
Fill in the Folder Name, Description and upload an icon for the Folder Icon. Click Save.
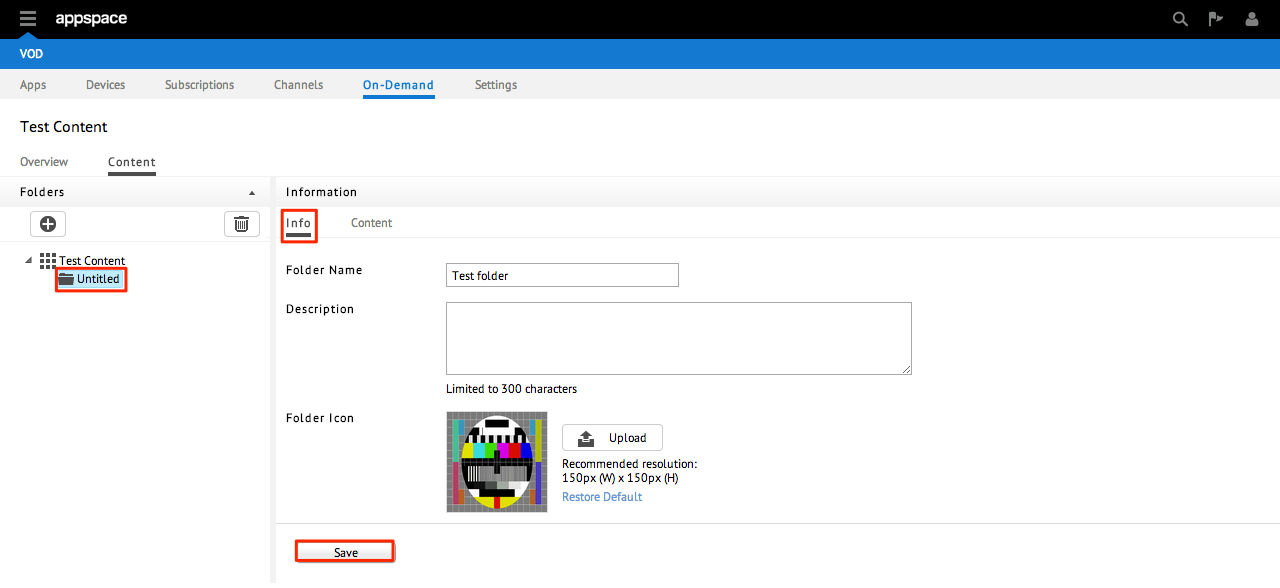
Note
Folder Name: * Name of the content folder. * Description: Description of the content within the folder. * Folder Icon: On-demand menu icon (supported formats: JPG and PNG)
Step 5
Click the Content sub-tab under the Information pane.
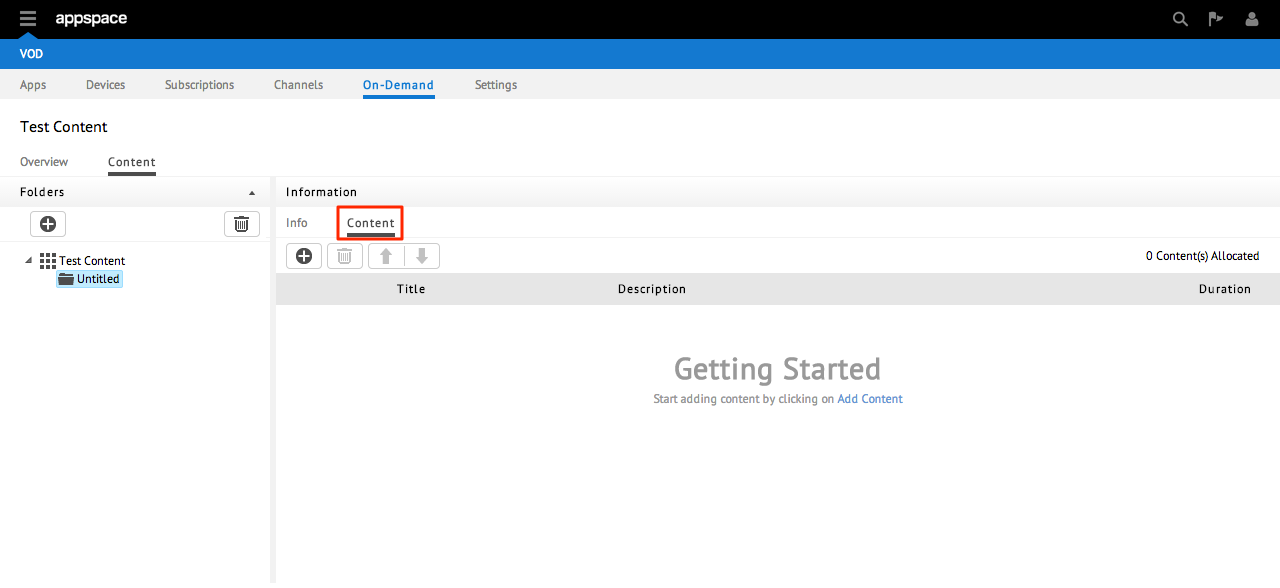
Step 6
Add content by clicking the + (Add Content) icon.
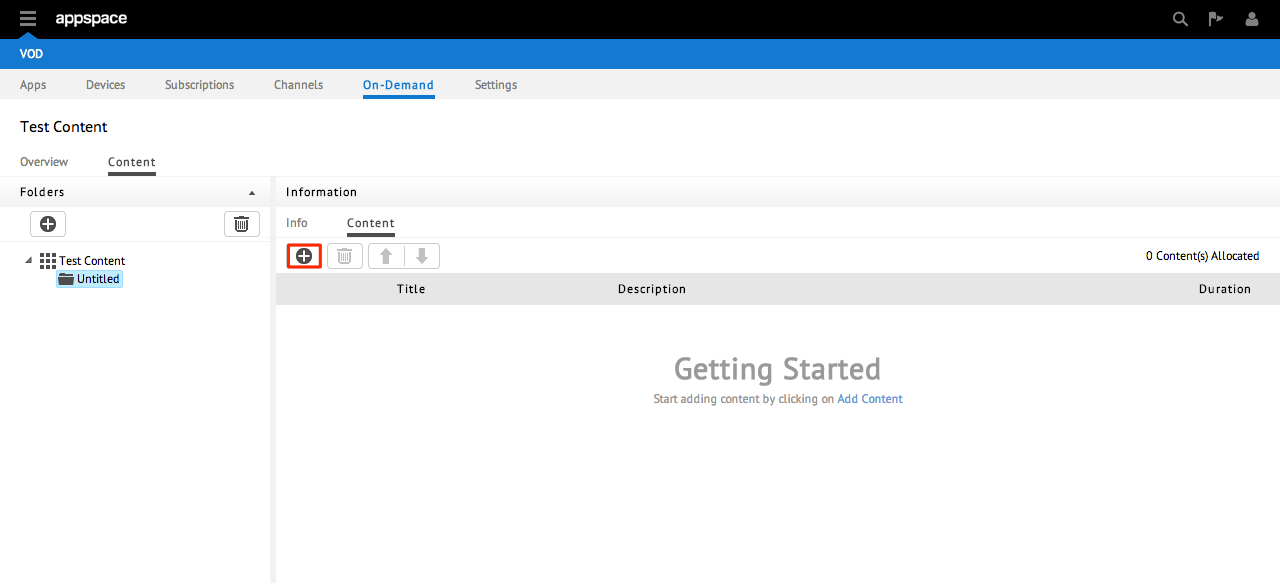
Step 7
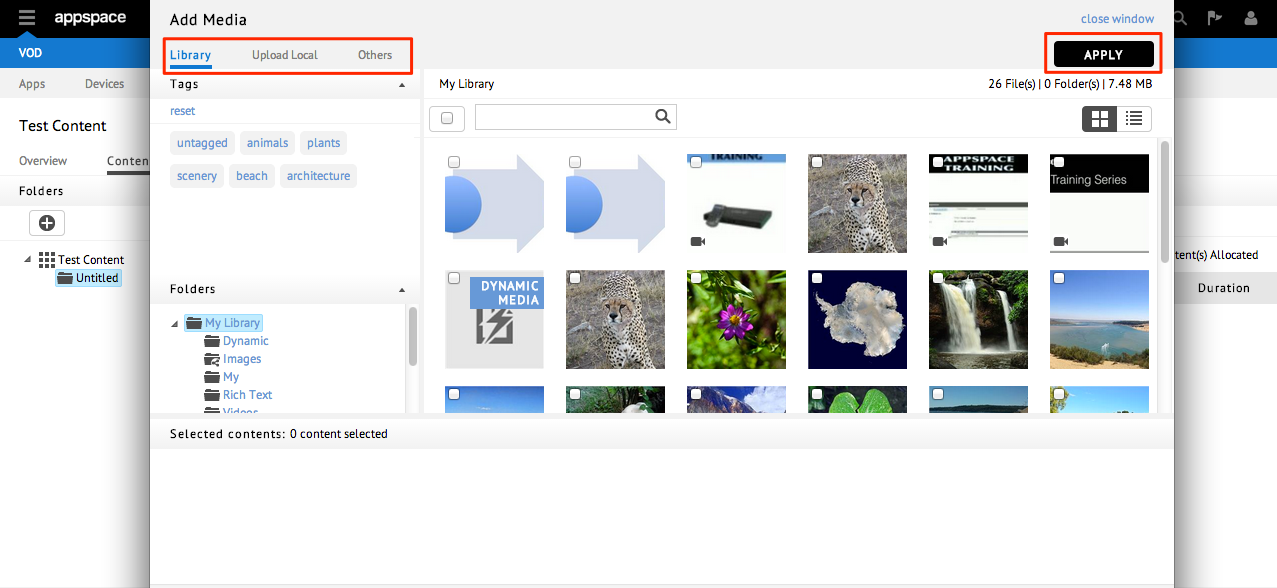
Add content by either adding from the Library, Upload Local, or Others tabs. Make sure to click the APPLY button when you have finished selecting the content.
Step 8
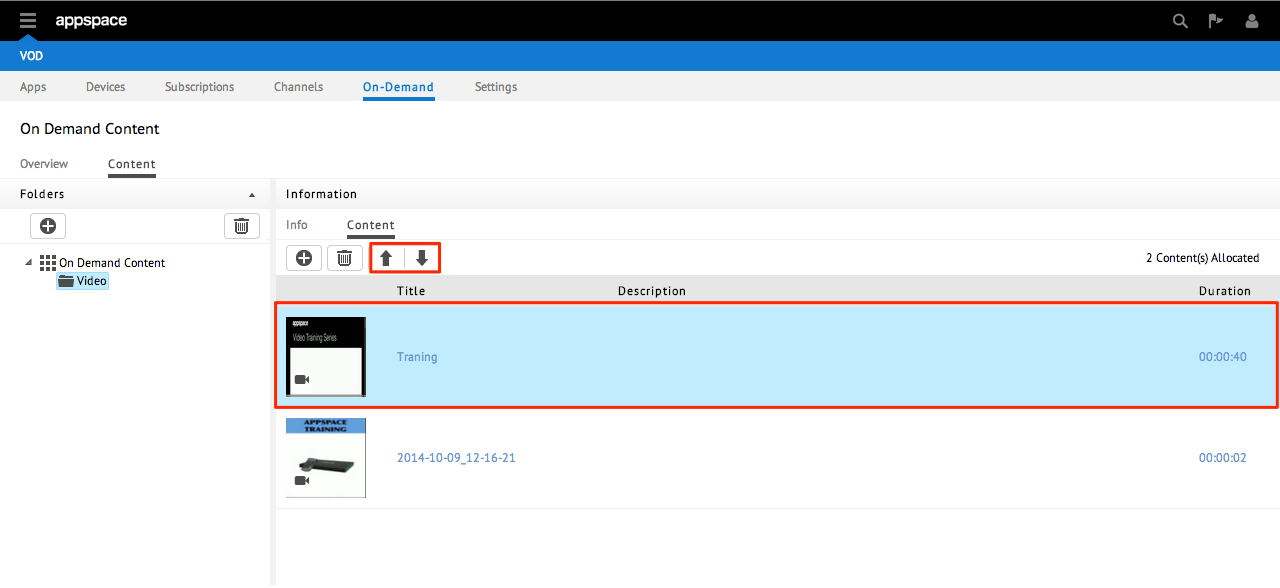
The selected/added content will be visible under the Content sub-tab. You can rearrange (re-order) the content by first clicking along the row of the item to select it (it will appear highlighted). By using the Up/Down arrows, you will have the ability to re-arrange the pieces of content in this folder.
Step 9
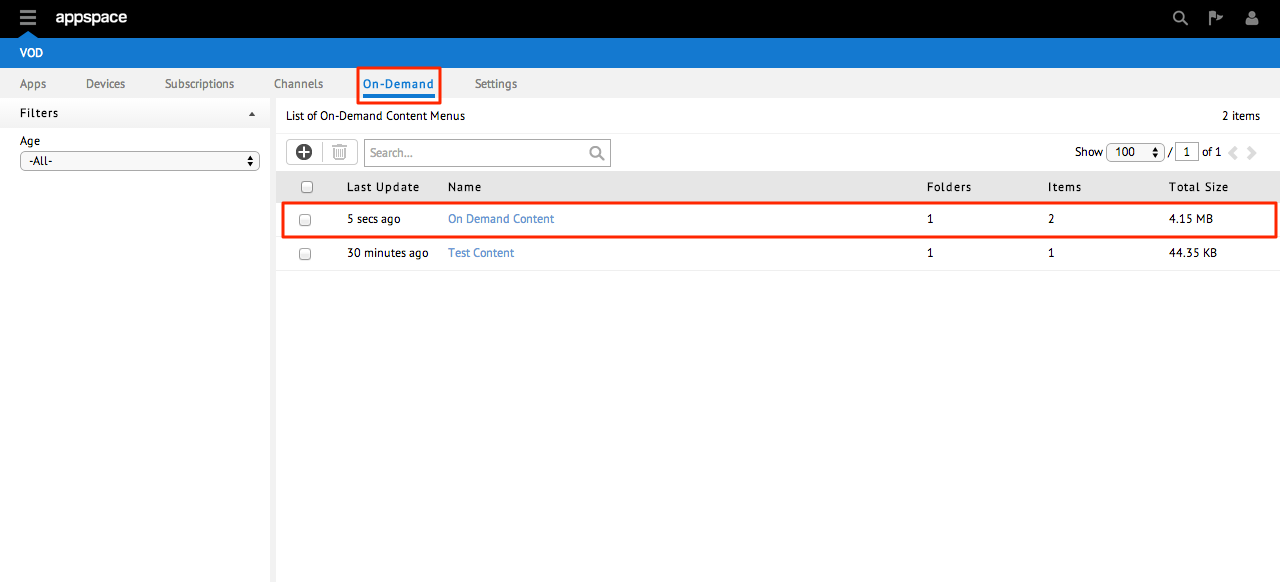
When you return to the main On-Demand page, the newly created on-demand content and associated information about folders, items, and total size should now be visible/listed on the page.
Editing On-Demand Content, Folders, and Content Items
Note
The folder structure and how it’s reflected in the VOD UI is very dependent on the theme itself.
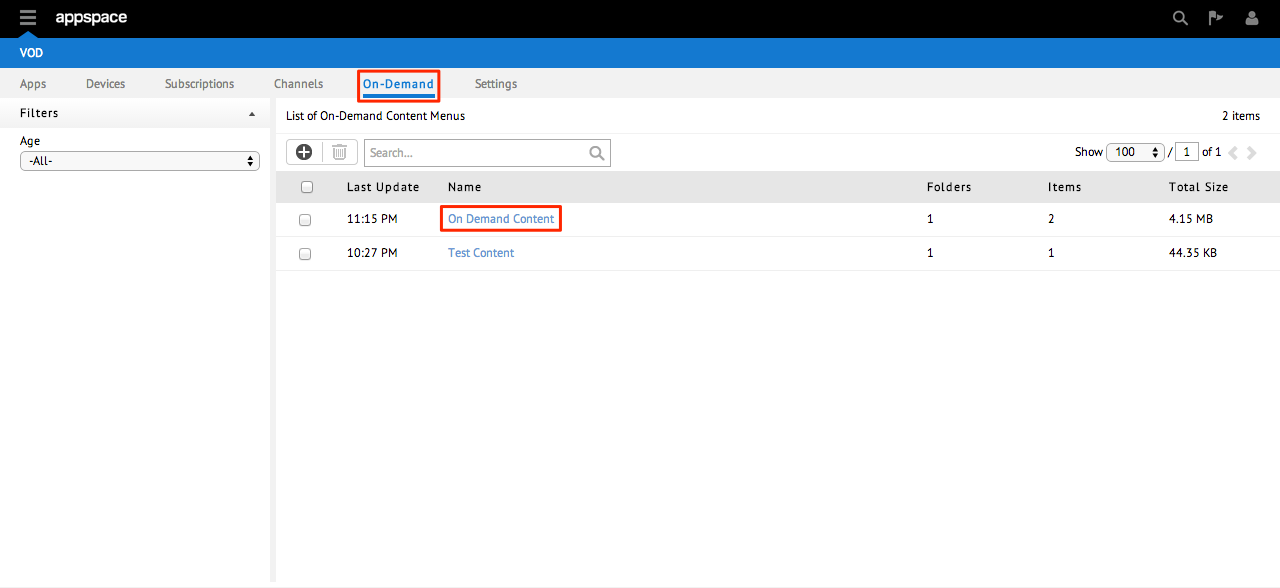
Step 1
From the main On-Demand tab listing all of the content, click the name link of the on-demand content to be edited.
Step 2
Make the desired change(s) to the various fields under the Overview sub-tab. Click Save when finished to apply the changes – if successful, you should see confirmation text.
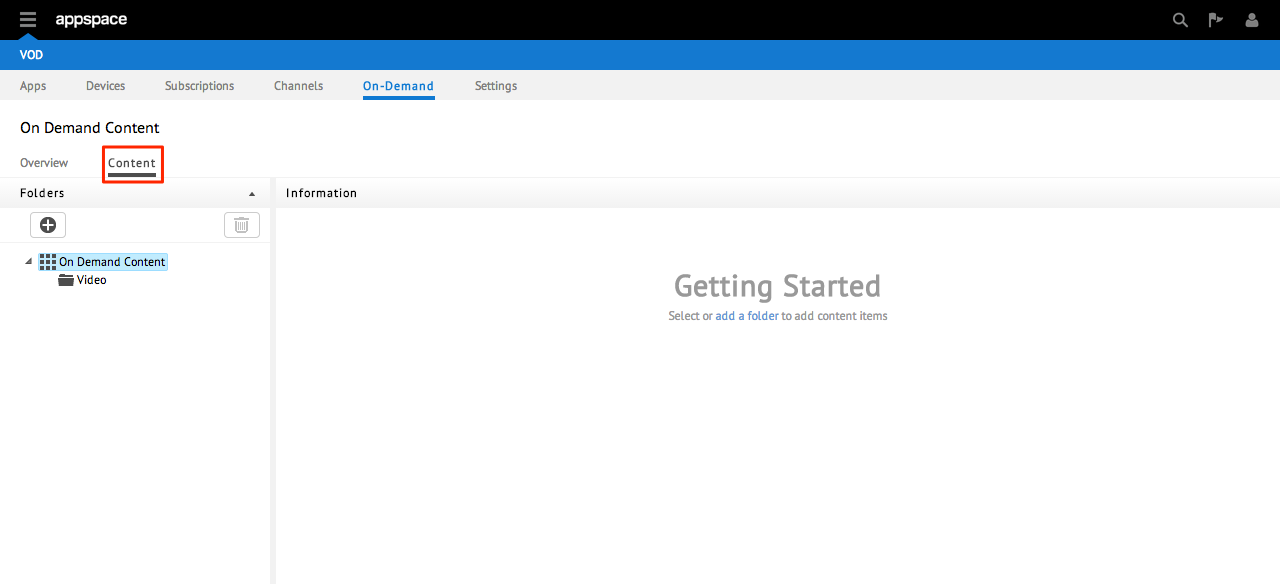
Step 3
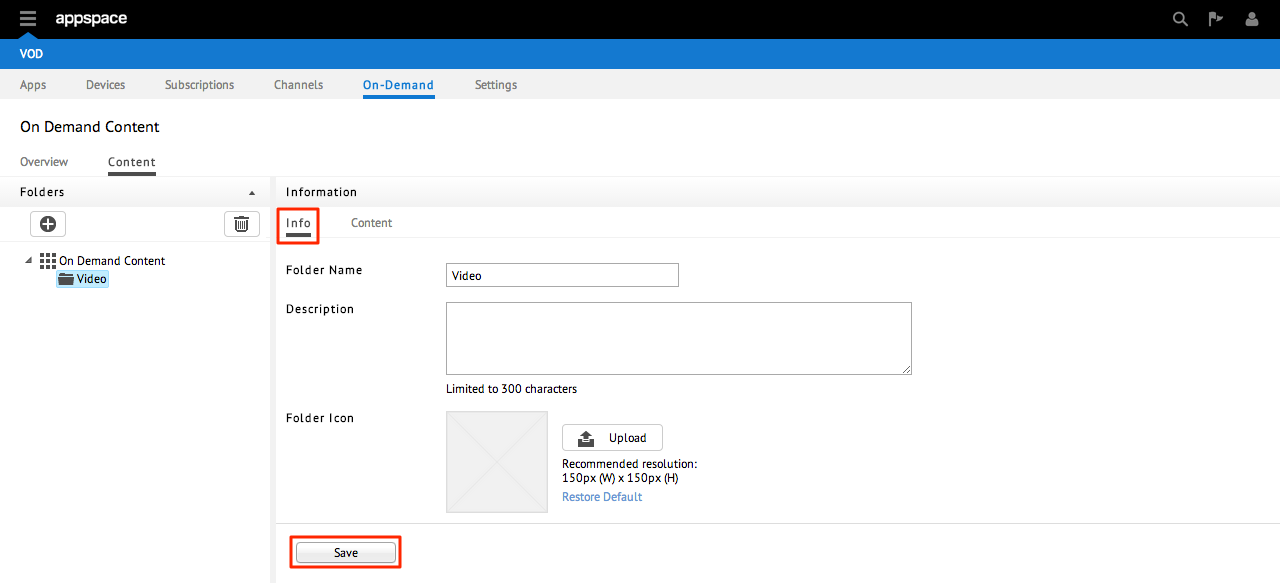
To make changes to the information of an existing folder, first select the Content sub-tab. Select the folder from the Folders pane.
Step 4
Make the desired change(s) to the Folder Name, Description, and FolderIcon from the Info sub-tab. Click Save when finished to apply the changes – if successful, you should see confirmation text.
Step 5
To make changes to the content items within a selected folder, first select the folder from the Folders pane that contains the content items to be edited/rearranged.

Step 6
Click the Content sub-tab that is under the Information pane.

Step 7
Click on the name-link of the content to be edited.
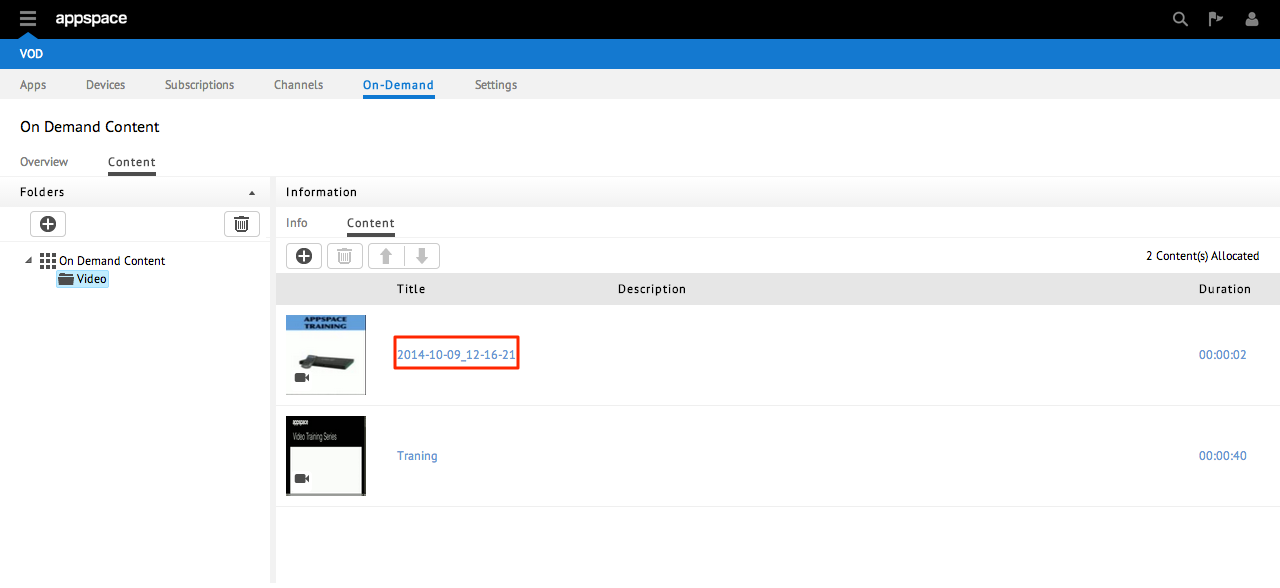
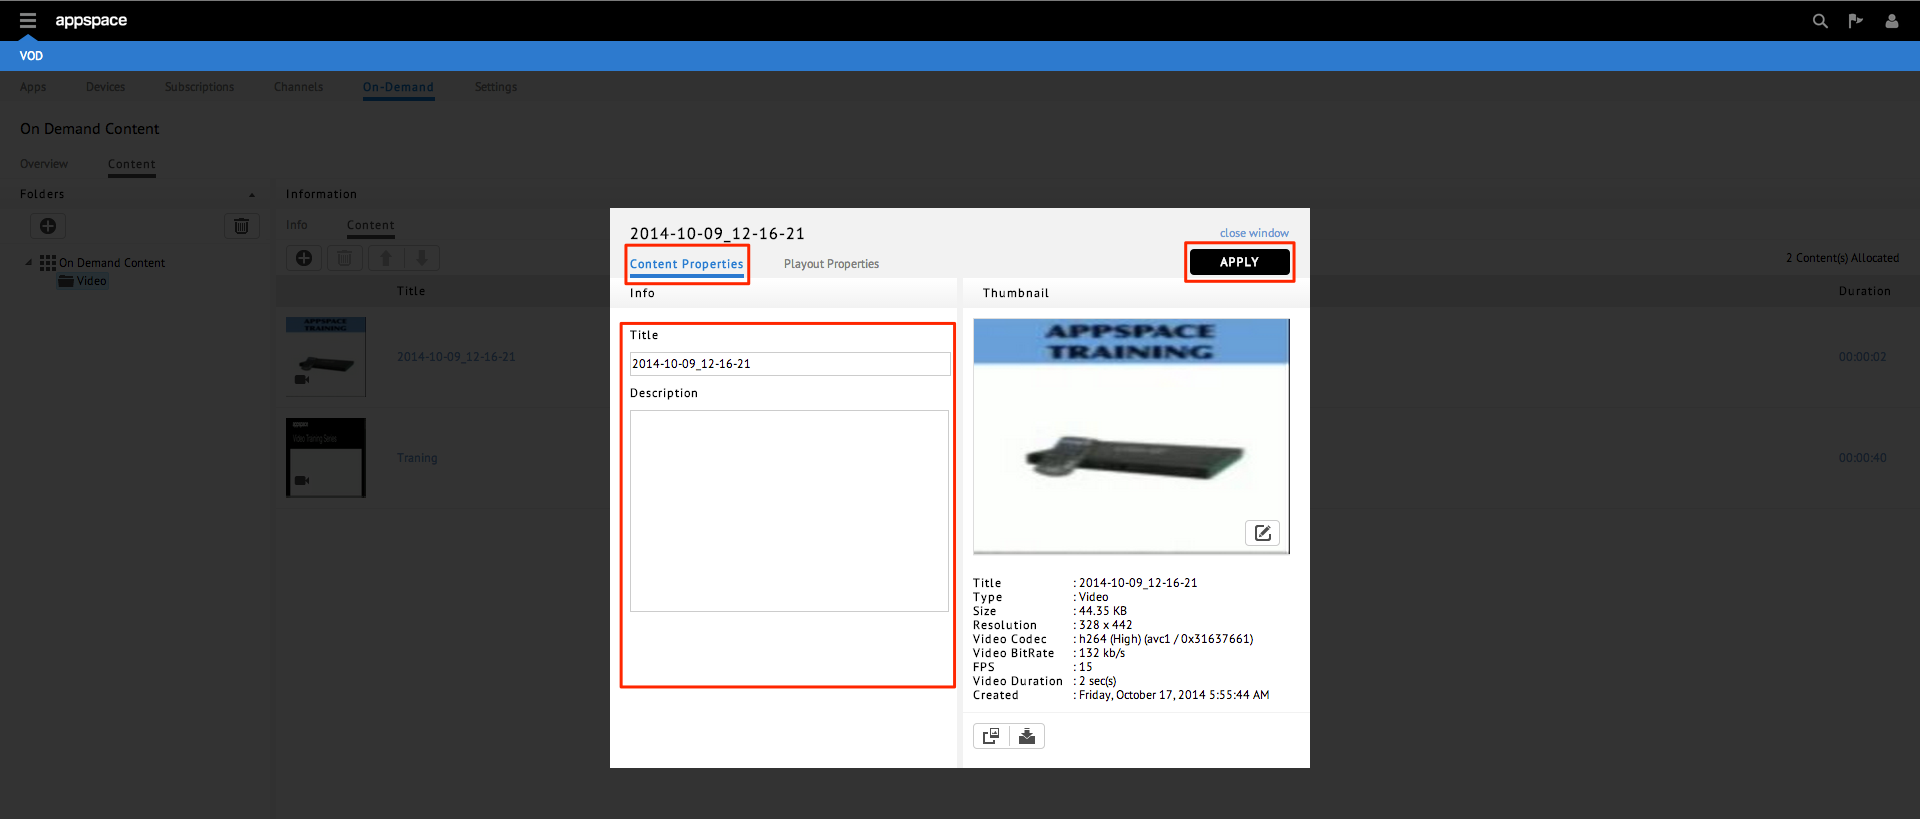
Step 8
Make desired changes to the content item’s Title or Description and click Apply to confirm.
Step 9
On the content listings, you can click along the row of a piece of content to select it (it will appear highlighted) and you can delete or re-arrange the content.
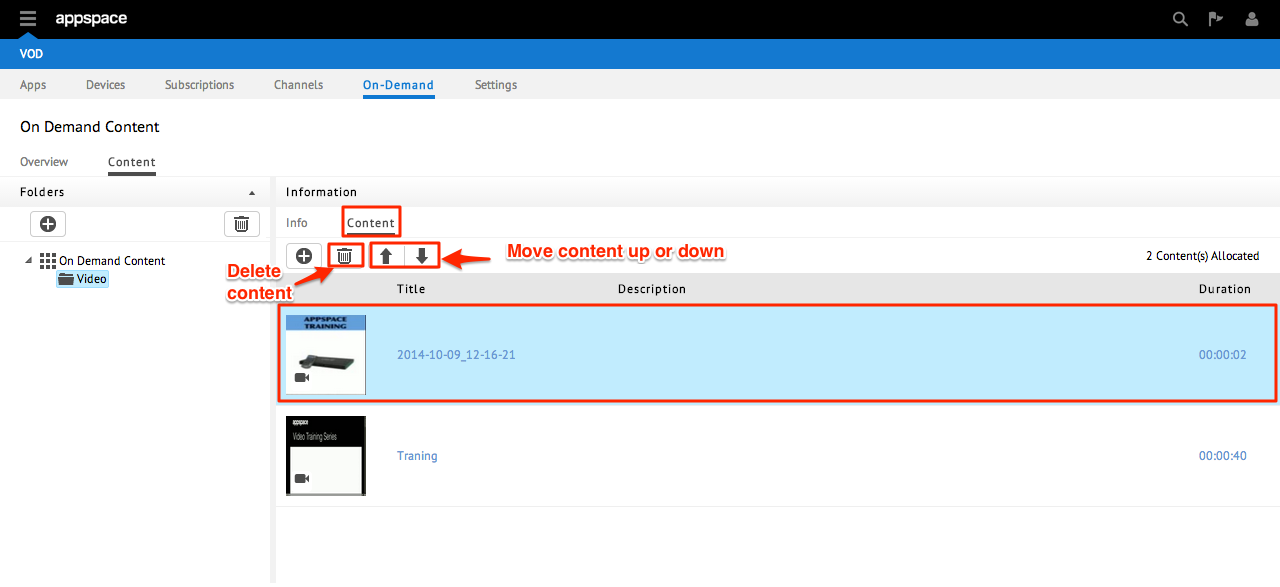
Note
- Delete: Click the trash can (Delete Content) icon to delete the highlighted content item.
- Re-arrange: Click the Up Arrow or Down Arrow to move the content item’s position up or down within the playlist.
Deleting an Entire On-Demand Content, Folders, and Content Items
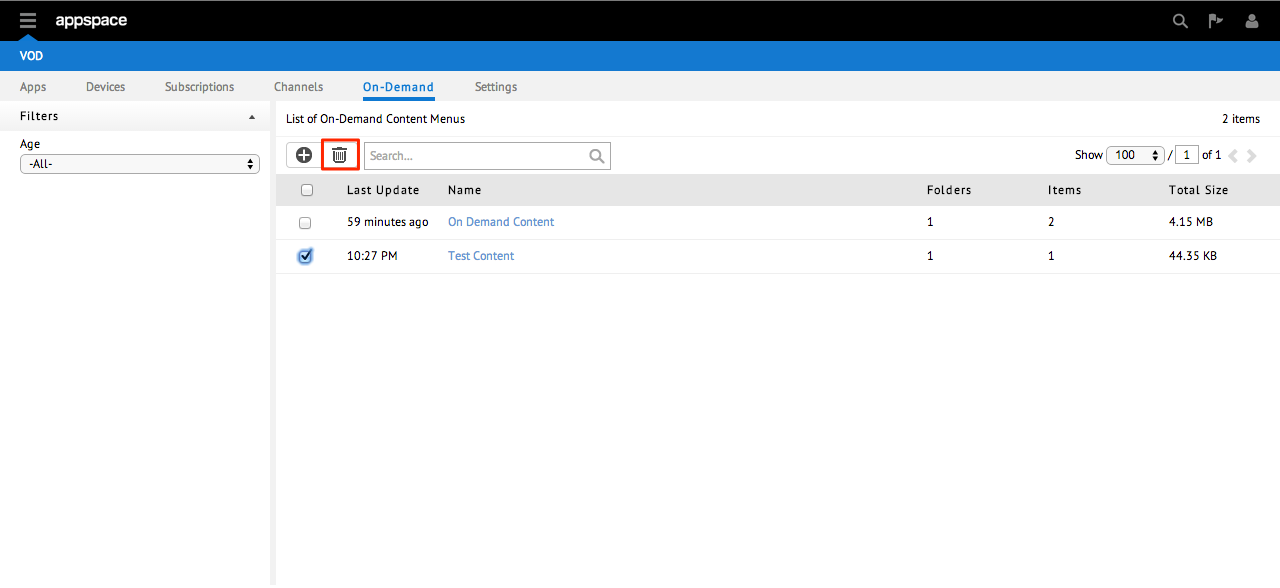
Step 1
From the main On-Demand tab listing all of the content, check the box of the on-demand content to be deleted.
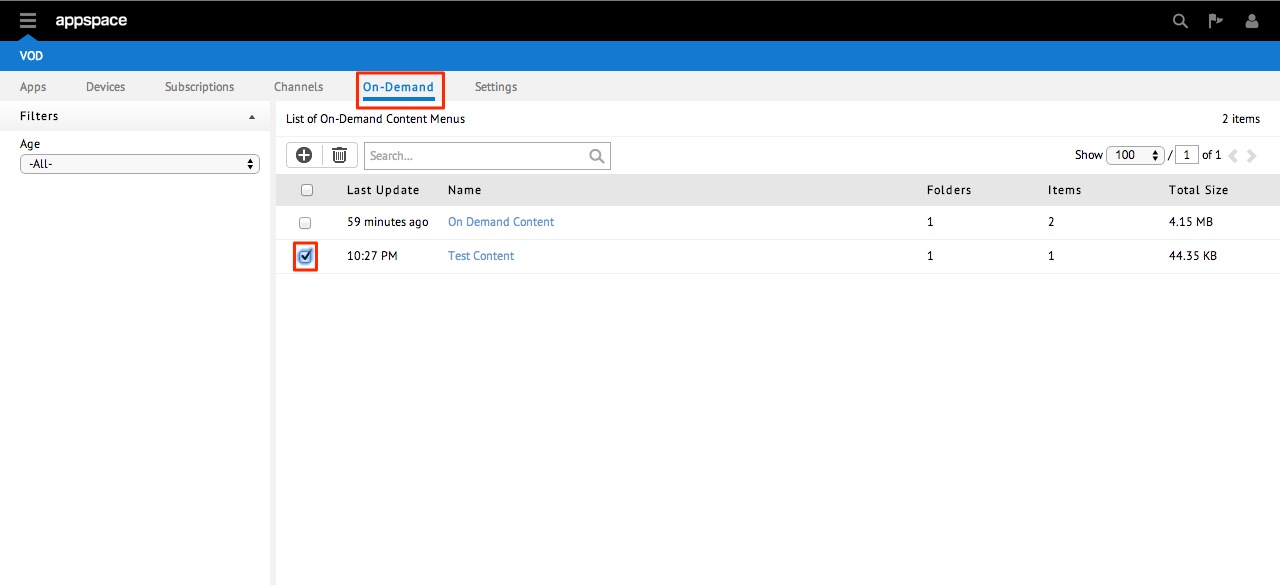
Step 2
Click on the trash bin (Delete Content) button in the toolbar.
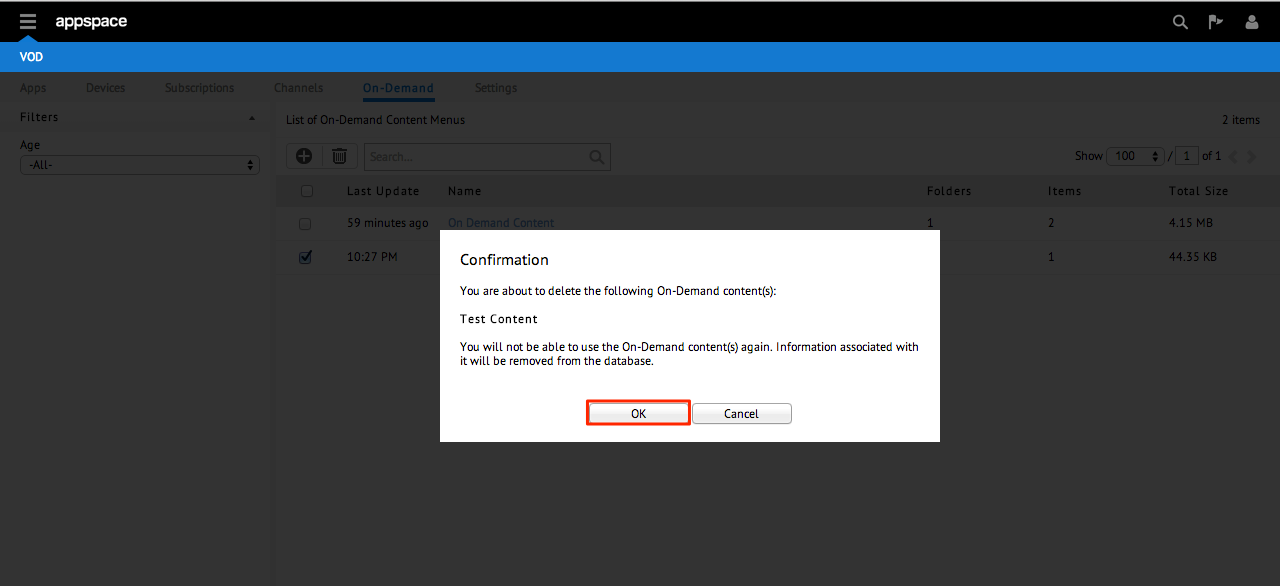
Step 3
Click on OK on the Confirmation page to confirm your action. The on-demand content – including all of the folders and content items within – will no longer be displayed in the On-Demand page.
Deleting Specific Folders and Content Items within On-Demand Content
Note
The folder structure and how it’s reflected in the VOD UI is very dependent on the theme itself.
Step 1
From the main On-Demand tab listing all of the content, click the name link of the on-demand content to be deleted.
Step 1
Select the Contents sub-tab for this on-demand content.
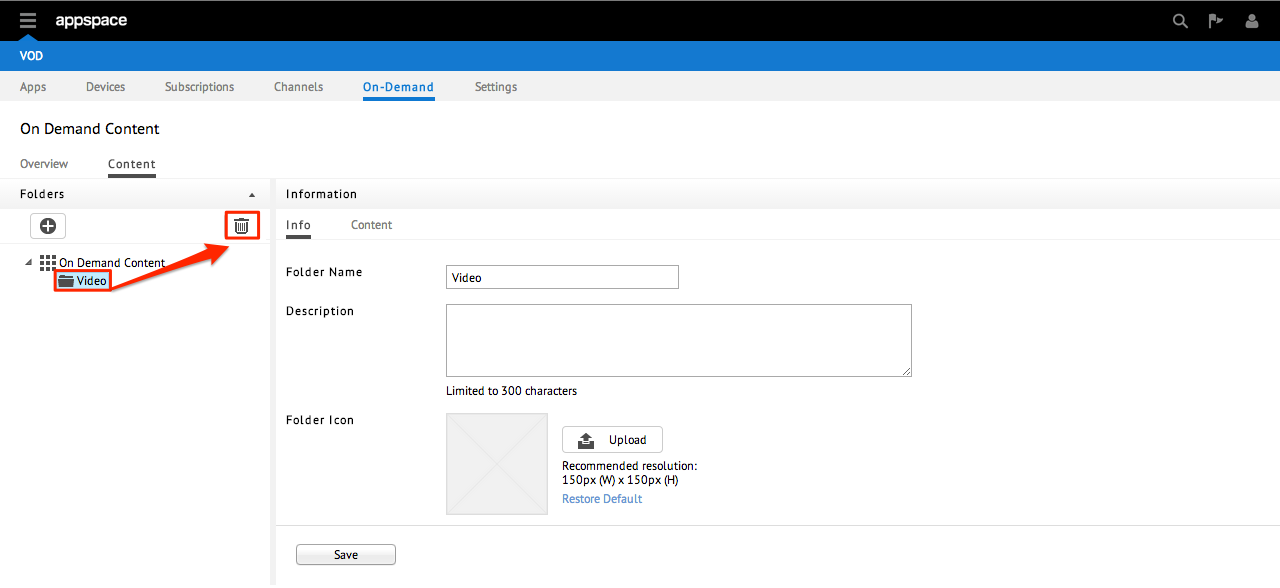
Step 3
From the Folders pane on the left-hand side, you can delete entire folders (and all content assigned to that folder within it) by first clicking on the folder to select it and click on the trash bin (delete folder) icon.
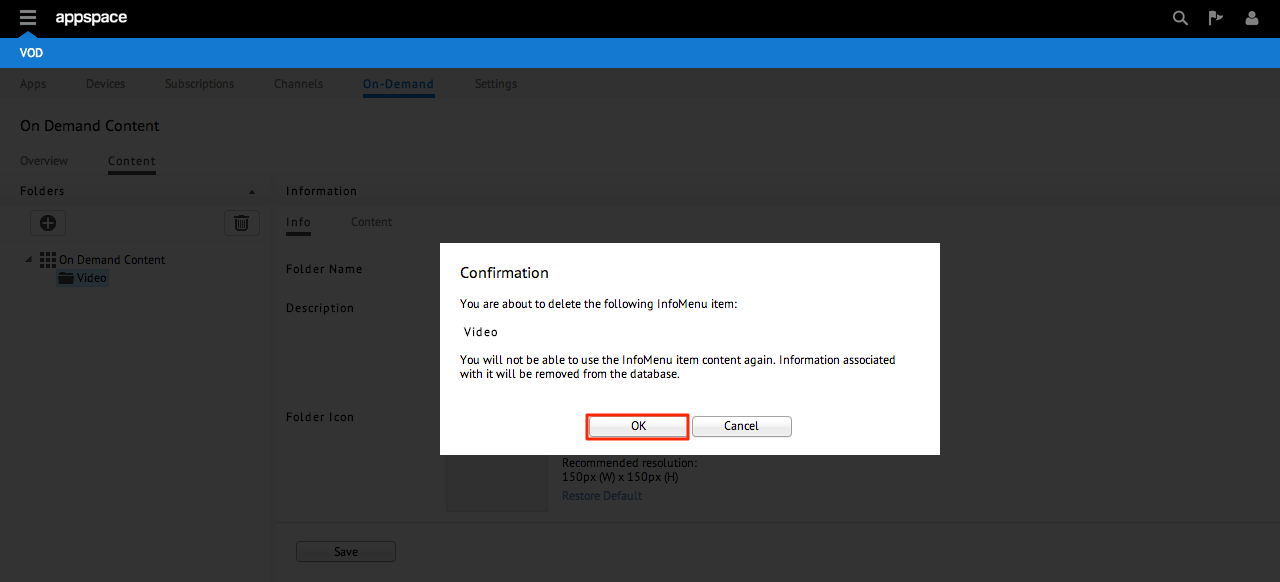
Step 4
Click OK on the Confirmation page to remove the content.
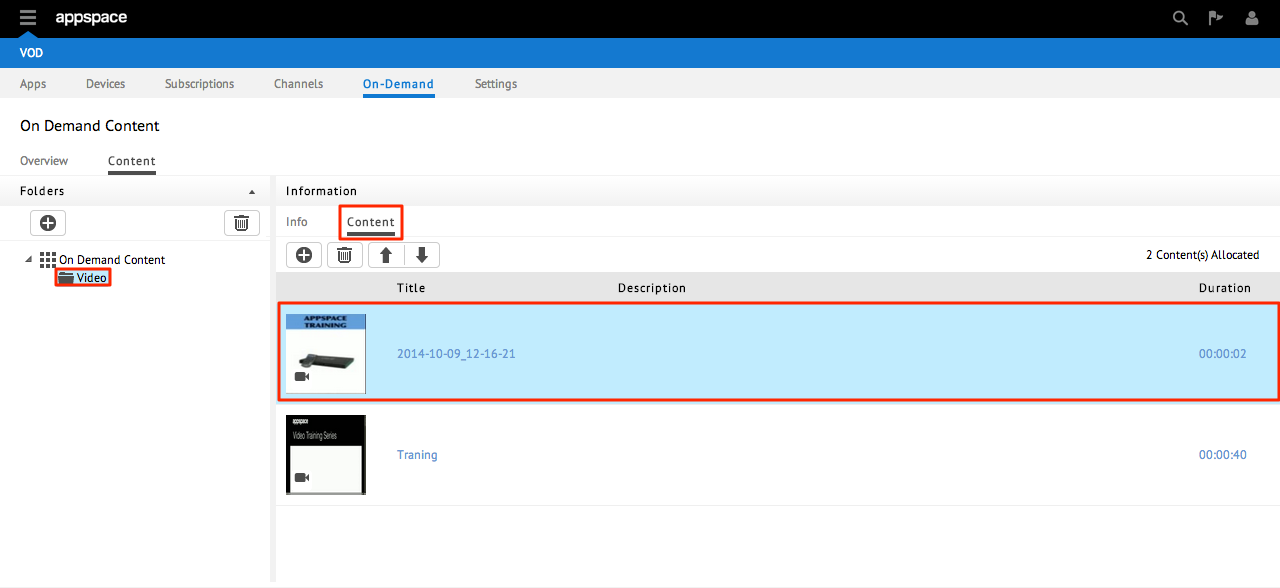
Step 5
To delete specific pieces of content within a folder, first select a folder from the Folders pane and click on the Content sub-tab under the Information pane. Highlight the content that you want to delete and click on the trash can (delete) icon.
Step 6
Click OK on the Confirmation page to confirm.
