In the Appspace Console, Device Settings is a centralized module for administrators to configure and manage Appspace-powered devices. This section provides detailed control over individual device behaviors and enables the application of universal settings across device groups or locations. It is essential for optimizing device performance, ensuring content delivery, and maintaining the operational integrity of digital signage, room scheduling, and kiosk deployments.
This article provides administrators with instructions on how to configure and manage device settings within the Device Settings module.
Prerequisite
- An Appspace Account Owner that has been assigned a Platform User license.
- Location Admin can access all areas of the Devices module except Global > General settings.
- Account Owner can access the entire Devices module.
- Supported Appspace App Devices and Operating Systems.
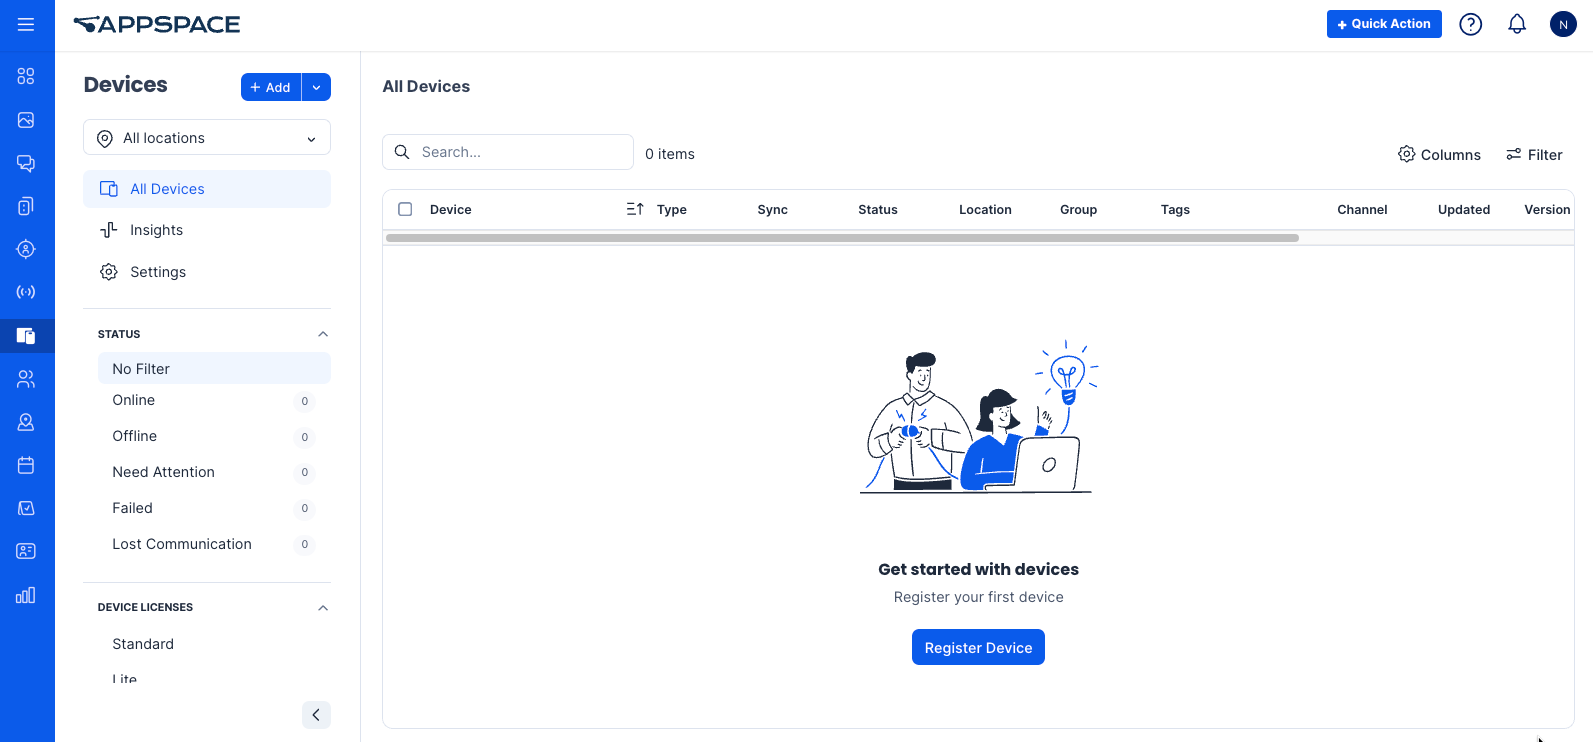
Configure and Manage Devices Settings
The instructions below detail how to configure and manage device settings within the Appspace Console.
- Log in to your Appspace console.
- Click the ☰ Appspace menu, and select Devices from the menu.
- On the Devices dashboard, click Settings.
- From the Devices Settings dashboard, users can configure options across three main tabs:
- Global
- Downloads
- Locations
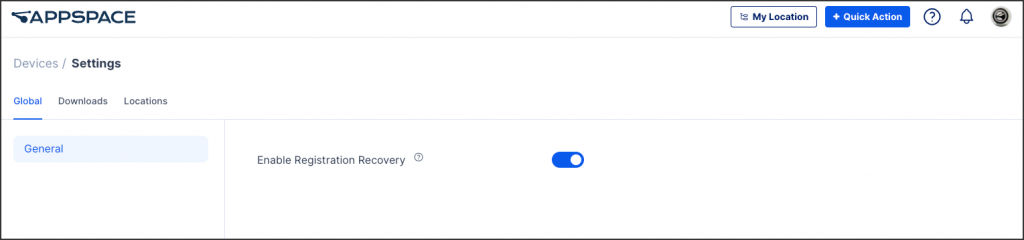
Global Settings
The instructions below detail how to configure and manage global settings within the Appspace Console.
- Log in to your Appspace console.
- Click the ☰ Appspace menu, and select Devices from the menu.
- On the Devices dashboard, click Settings.
- In the Global > General, toggle the Enable Registration Recovery switch to ON to enable the Persistent Device Registration feature.
NoteThis setting, Persistent Device Registration, automatically recovers lost registration information, identity, and configuration settings for devices. It uses a unique hardware identifier like a Serial Number or MAC Address. By enabling this feature, users acknowledge that no notifications or approvals will be provided for recovered devices.
Downloads Settings
The instructions below detail how to configure and manage download settings within the Appspace Console.
- Log in to your Appspace console.
- Click the ☰ Appspace menu, and select Devices from the menu.
- On the Devices dashboard, click Settings.
- In the Downloads tab, users will see a list of device installers, including the device Name, Version, Published date, and Action options.
- To download a desired device installer, select Download in the Action column next to the relevant device.
- In the Download Confirmation window, click Download to proceed. Users can click Cancel to abort the download.
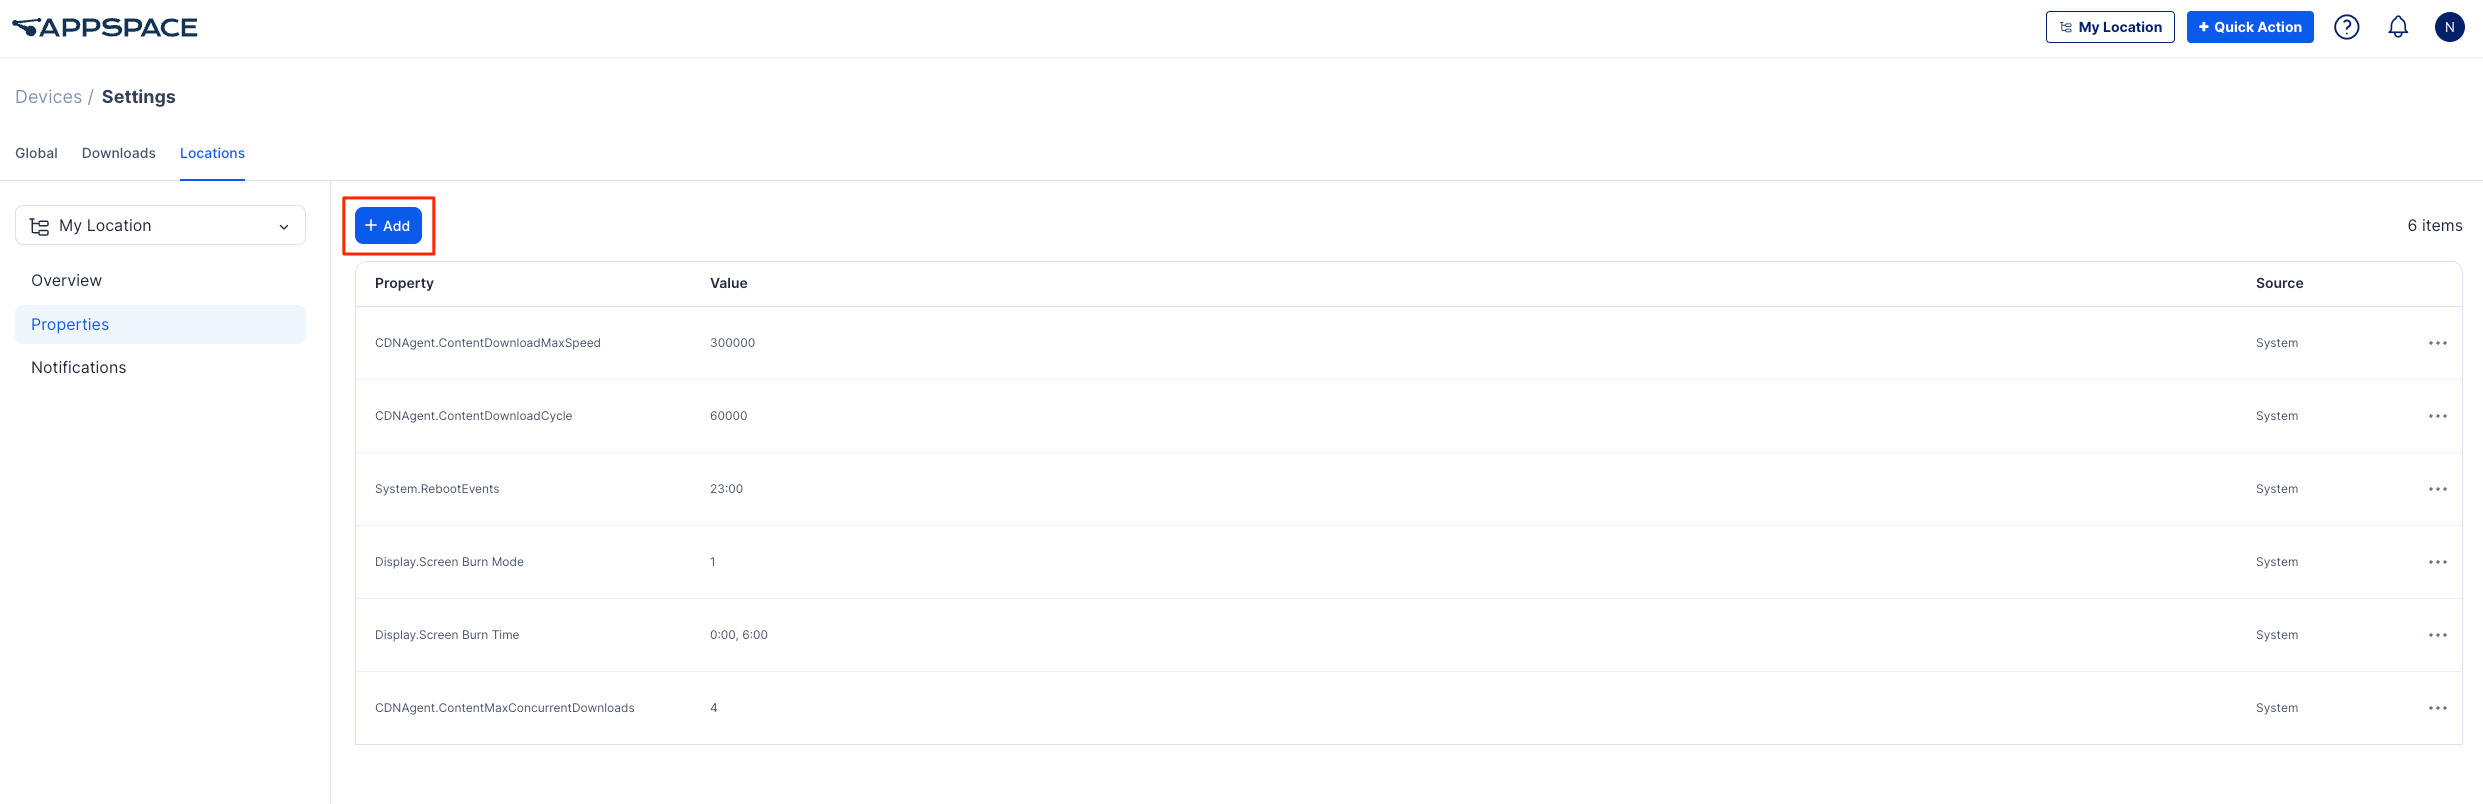
Locations Settings
The instructions below detail how to configure and manage locations settings within the Appspace Console.
- Log in to your Appspace console.
- Click the ☰ Appspace menu, and select Devices from the menu.
- On the Devices dashboard, click Settings.
- In the Locations tab, user may do the following:
- My Location – Set the desired devices location and sub-locations.
- In the Overview, user may do the following:
- Name – Name the desires location.
- Description – Add a description about the location.
- Default Channel – User may select the option of the default channel; not assigned, autoplay all channels, admins assign a single channel and users published channels.
- Permissions – Assign permissions; location admin or publisher, and click Save.
- Software Updates – The software update times are based on the device’s local time. To configure software updates, select one of the following options:
- Inherited (Automatic Updates) – Settings automatically apply from the parent source.
- Automatic Updates – Install software updates automatically at a specified time every day.
- Manual Updates – Manually initiate software updates at your convenience.
- Fallback Content – Define content for uninterrupted playback; user may set none or media.
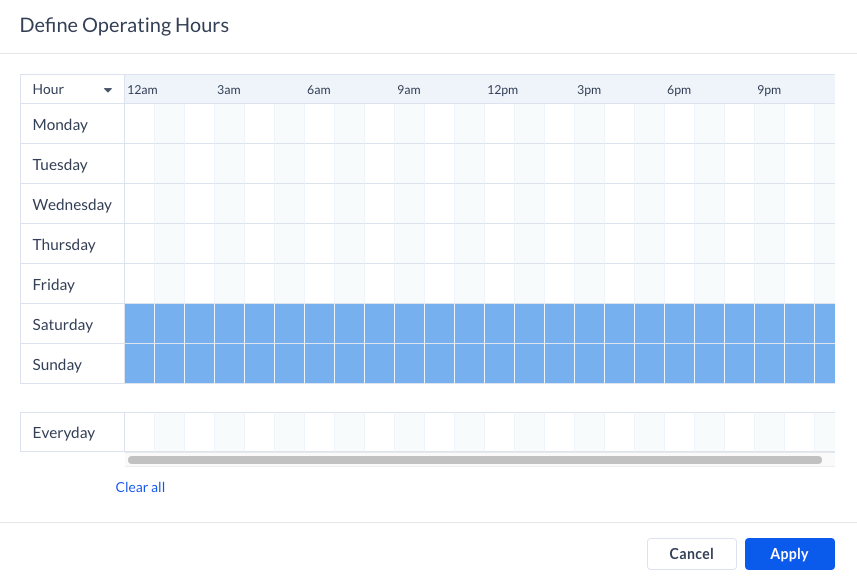
- Operating Hours – Define operating hours to control screen behavior outside business hours. Choose from:
- None – No schedule set.
- Manual – Set custom hours; the user must define the operating hours. To do this, click Define Operating Hours. In Define Operating Hours, users can:
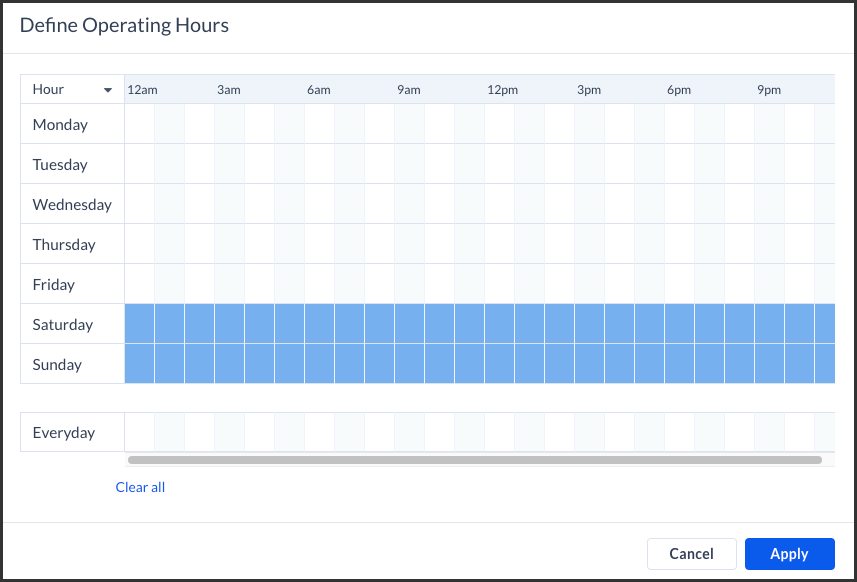
- Click the time Option to choose from Hour, 30 mins, 15 mins, or 1 min.
- Select the desired Day or choose Everyday.
- Once completed, click Apply.
- To make changes, click Edit Hours and repeat the steps.
- To delete a schedule, click the Remove Schedule button.
- Inherited – Apply hours from the parent location.
- In the Properties, the following actions may be performed:
- Add a property by clicking the +Add button.
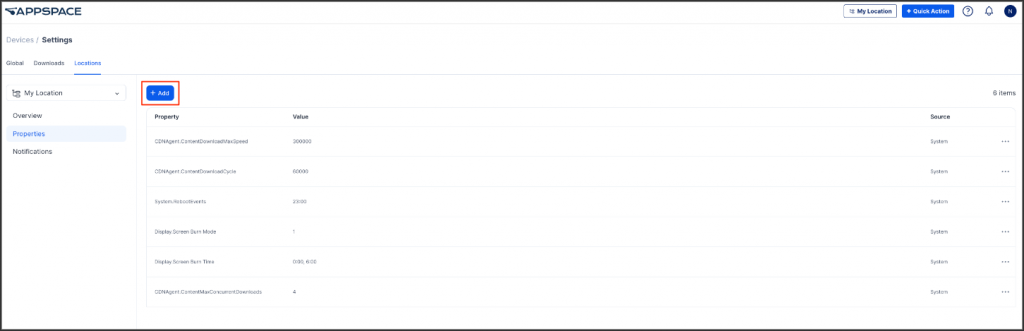
- In Add Property, enter the desired Name and Value, then click Save.
- To edit a property, click the Ellipsis (…), then select Edit. Only the Value of the property can be changed. Once completed, click Save.
- Add a property by clicking the +Add button.
- In the Notifications, the following actions may be performed:
- Add a notification by clicking the +Add button.

- In Add Notification, configure the following fields:
- Name: Enter the desired name for the notification.
- Notification Type: Select the desired type –
- Live Alert: Triggers immediately after an event.
- Summary: Provides timely reports on network status.
- Location: Select the desired location. The checkbox Include sub-locations may also be selected.
- Trigger from: Select the desired time or check All Day.
- Timezone: Select the desired timezone. The checkbox Recipients Inherit Selected Timezone may also be selected.
- Recipients: Add the desired recipients. Once all details are entered, click Save.
- To delete a notification, click the Ellipsis (…), then select Delete.
- Add a notification by clicking the +Add button.

Was this article helpful?