This article provides administrators with the instructions to create and manage audiences in the Audiences module.
Prerequisites
- Account Owner and location publisher.
- Premium user license to access the Appspace Employee App.
What's New
Features released in Appspace 8.8 Lynx
- The Audience Improvement:
- The following attributes have been added to the rule-based audience builder:
- Joined Date
- Last Login
- Manager
- The following attributes have been added to the rule-based audience builder:
Create and Configure Audiences
Follow the instructions below to create and configure audiences.
- Log in to your Appspace console.
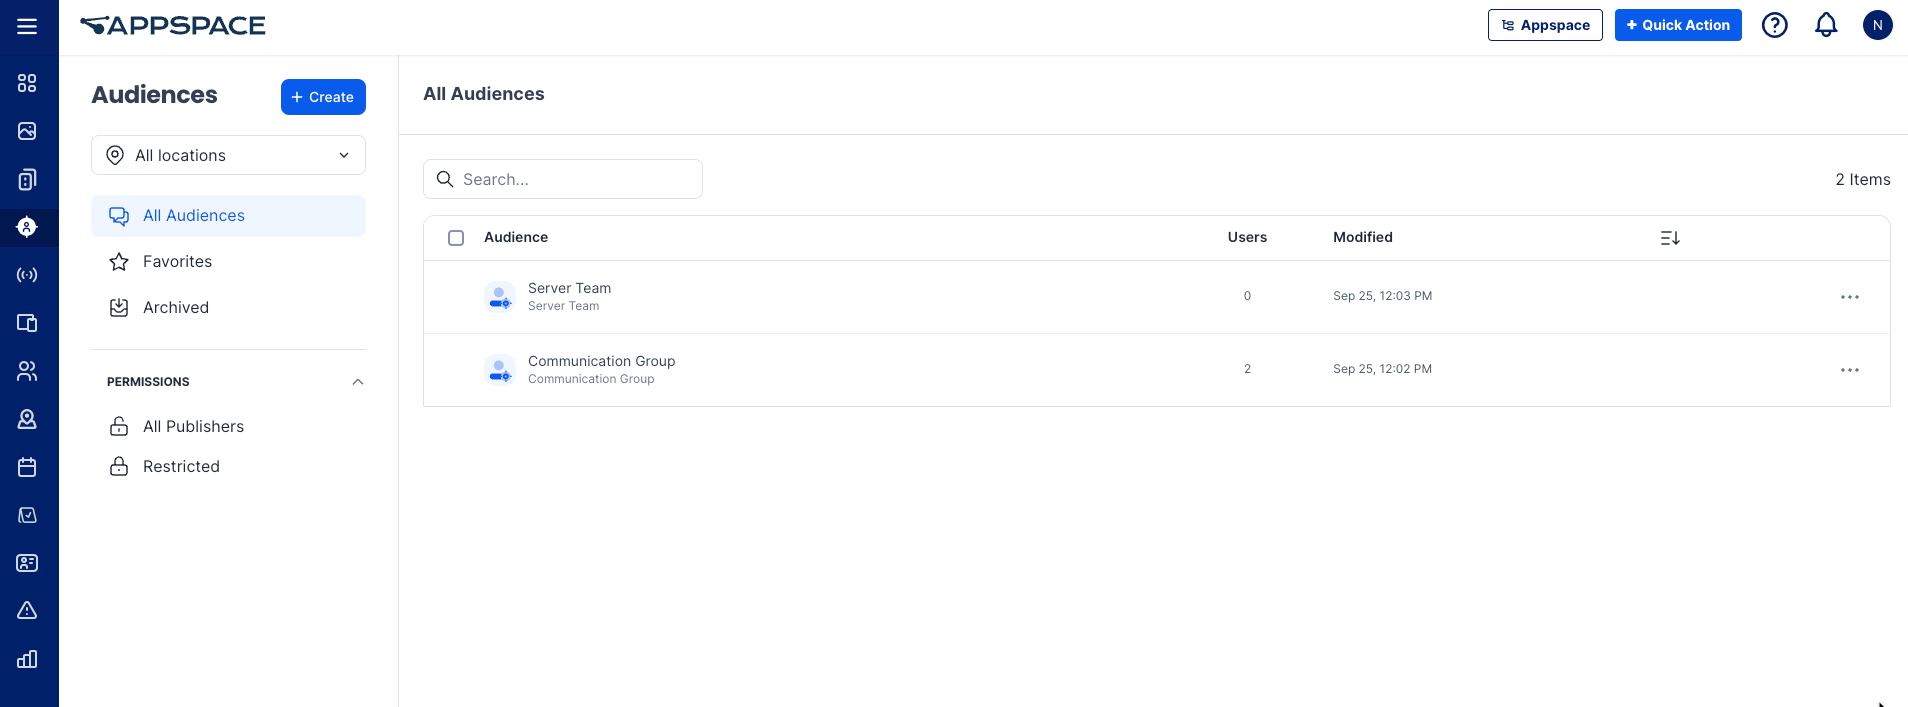
- Click the ☰ Appspace menu, and select Audiences.
- On the Audiences dashboard, click on the +Create button to start adding a new audience.
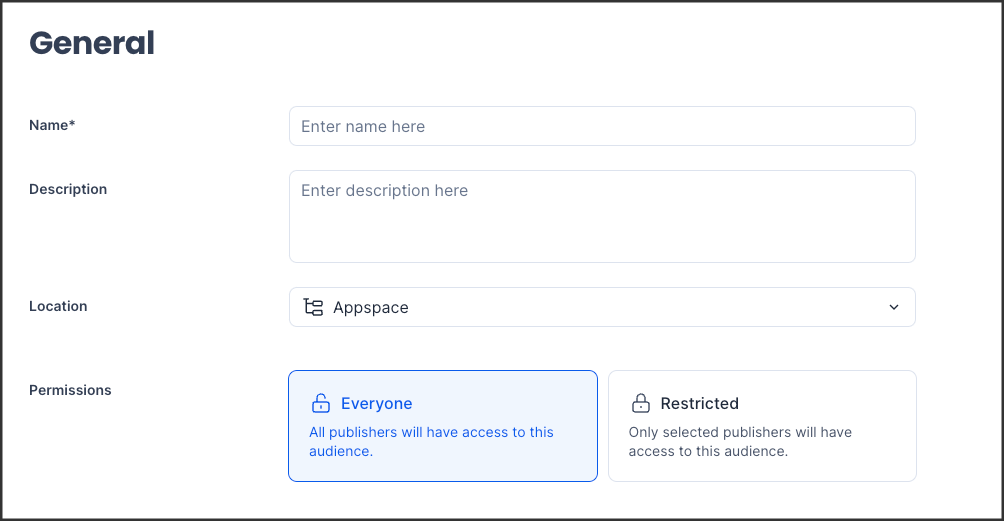
- On the Create Audiences window, you may do the following in the General tab:
- Name – Enter the preferred name.
- Description – Enter the preferred description.
- Location – Select the preferred location.
- Permission:
-
- Everyone – All publishers will have access to this audiences.
- Restricted – Only selected publishers will have access to this audiences.
-
- Once done, click Save.
- On the Audience Builder tab you can select the following:
- Simple Audience – Build an audience from users, groups and/or locations:
- Click +Add.
- Type to add users, group or locations, and click the Add button.
- To remove users, hover your mouse over the ellipsis (…) next to the username and click Remove. Alternatively, you can remove multiple users by selecting the checkboxes next to their names and then clicking Remove.
- Once done, click Save.
- Rule-Based Audience – Build a dynamic audience from user attributes and properties:
- In the first option, you can choose segments based on specific attributes, such as User,User Group, Location, Users, Joined Date, Last Login, User Attribute, Custom, Custom Field, Department, Email, Hobby, Job Title, Manager, Some other info, Vehicle license number and Website.
- Select the operator: Equals or Not Equals.
- Select your desired attributes based on the first option you selected.
- If you need to add a group, click the +Add Group button and choose either the Or or And operator.
- Simple Audience – Build an audience from users, groups and/or locations:
- On the Users tab, you can access comprehensive information about individual users who are interacting with the platform. In this section, you can:
-
- View user profiles and details such as roles, permissions, and activity.
- Manage user access by adjusting their permissions or roles.
- Monitor user engagement to gain insights into their interactions with the platform.
-
Edit Audiences
Follow the instructions below to edit an audience.
- Log in to your Appspace console.
- Click the ☰ Appspace menu, and select Audiences.
- On the Audiences dashboard, to edit the audience, you may do the following:
- Select the desired audience and edit as needed, or
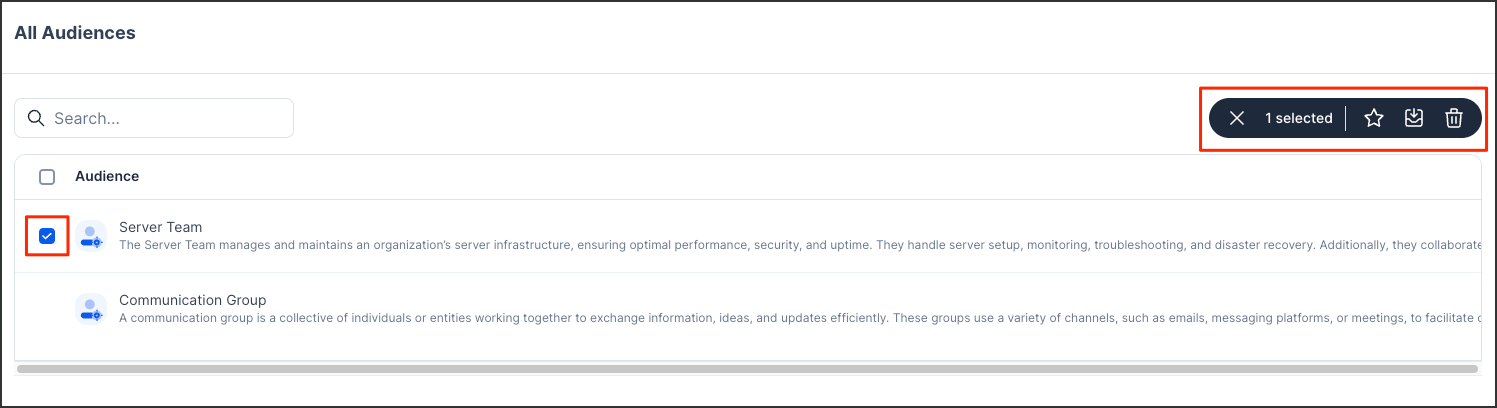
- Check the box next to the audience name. You can then perform the following actions:
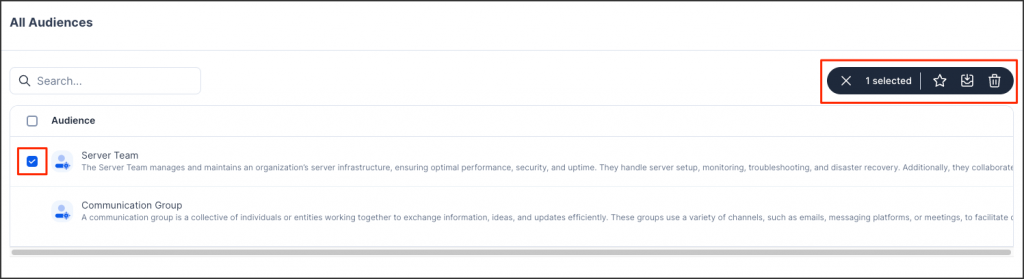
- Add the audience to favorites or remove from favorites.
- Archive the audience.
- Delete the audience.
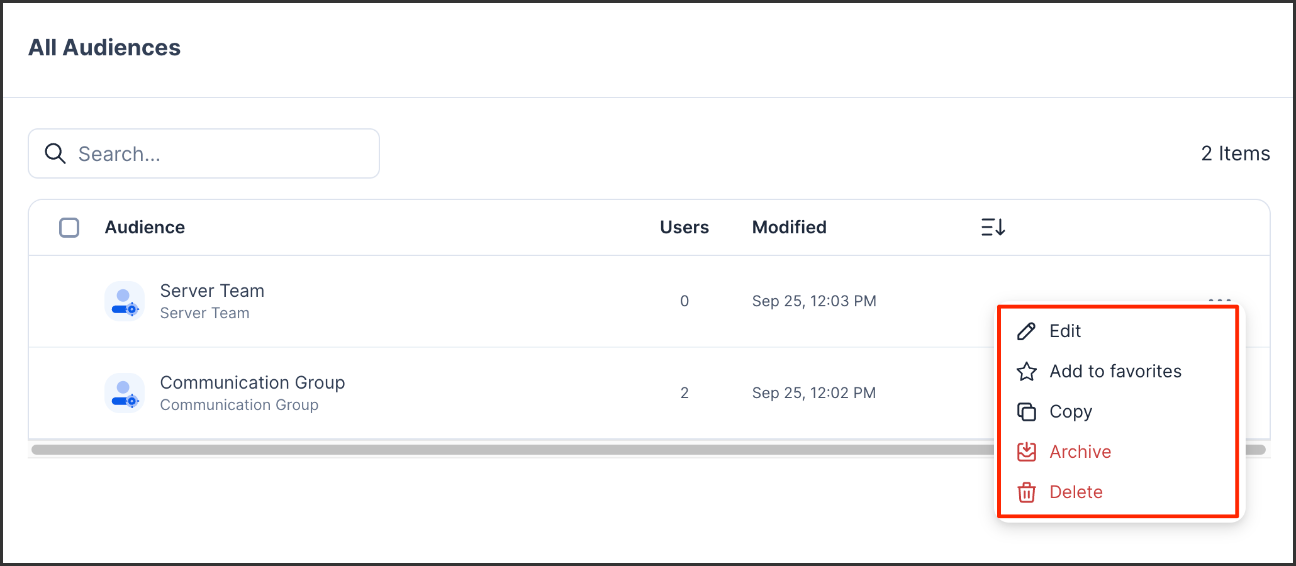
- Another way to edit the audience is to select the desired audience, click on the ellipsis (…), and then choose from the following options:

- Edit
- Add to favorites
- Copy
- Archive
- Delete
Was this article helpful?