Appspace is introducing the Posts Management module, a significant improvement inside Employee Communications. This new feature streamlines the administration of diverse post kinds by unifying responsibilities inside a unified portal for location publishers and console users. The module substantially decreases inefficiencies, lowers mistakes, and enhances content supervision by obviating the need to traverse several interfaces. Users may effectively execute CRUD operations (Create, Read, Update, Delete), use powerful filtering capabilities, and manage reported or featured material using its integrated platform. This simplified approach encourages improved organization, operational efficiency, and adherence to community and brand rules.
This article provides administrators with an introduction to navigating the user interface and features available within the Post Management module in the Appspace console.
User Interface and Navigation

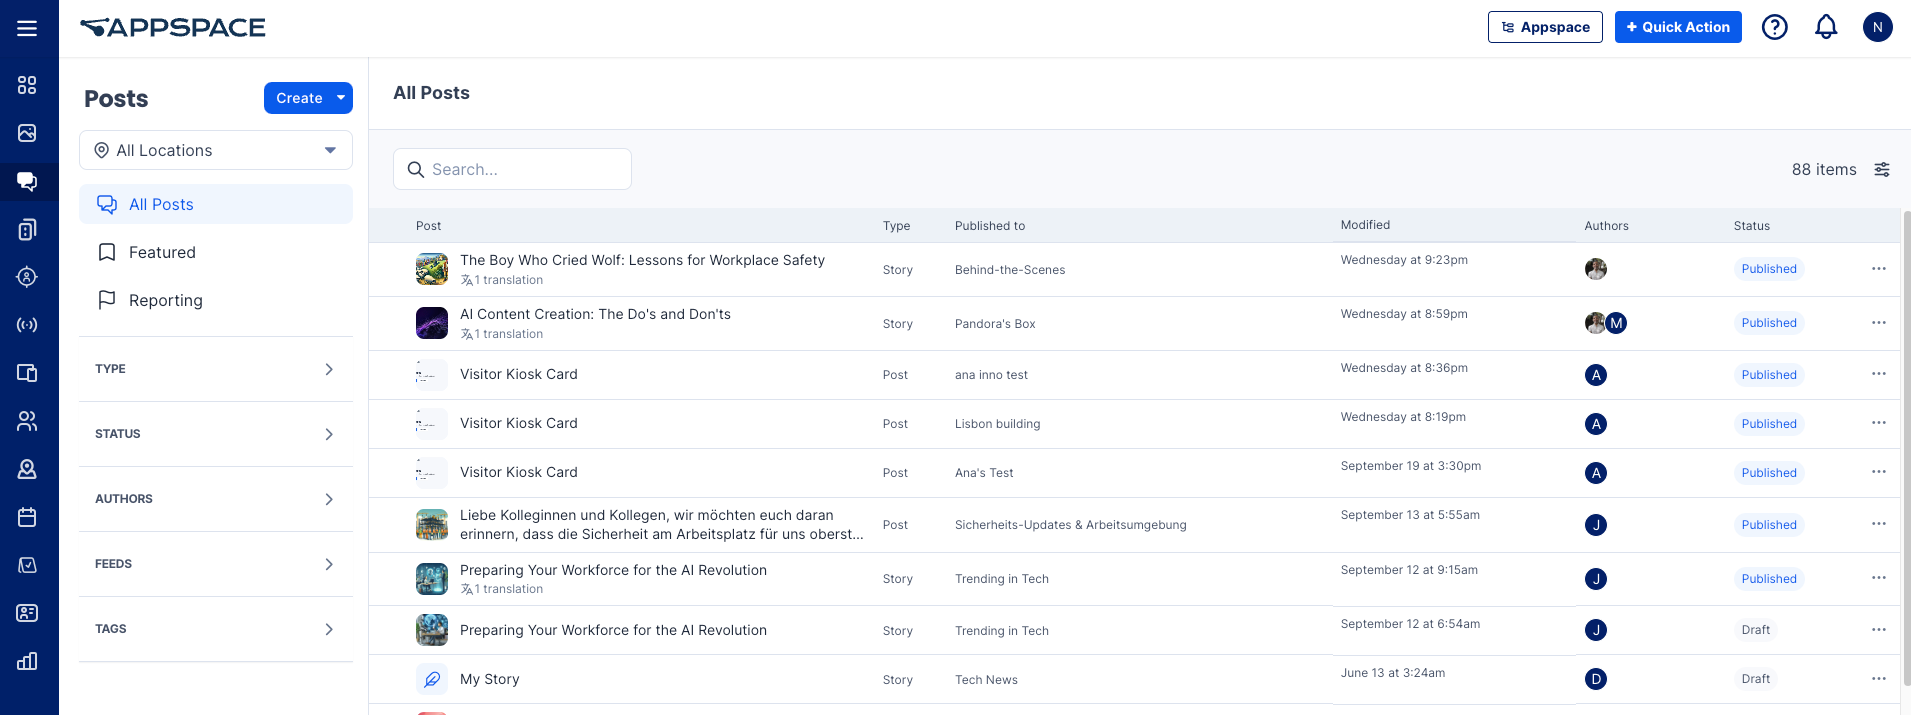
Posts Dashboard
- The Posts dashboard can be accessed via the ☰ Appspace menu under Content from the Appspace console sidebar. Here, you’ll be able to view, create, and manage all posts within the Appspace console.
- The Create button on the dashboard enables administrators to create a Posts, Story, Page, Event, and Praise instantly.
- The side panel on the Posts dashboard provide administrators with a quick glance at the following information:
- All Locations
- All Posts
- Featured
- Calendar (New)
- Reporting
- On the Type section, the administrator can filter and view the following:
- Posts
- Stories
- Pages
- Events
- Polls (New)
- Praises
- Questions (New)
- On the Status section, administrators can filter and view the status of posts, including:
- Published
- Draft
- Scheduled
- Expired
- On the Authors section, the administrator can search for post authors.
- On the Feeds section, the administrator can search for feeds.
- On the Connectors section, the administrator can search for connectors.
- On the Tags section, the administrator can search for tags.
- The Search allows you to perform a search across all posts.
- The Checkbox icon allows administrator to select the post to perform the following actions:
- Set the feature posts in bulk.
- Delete the posts in bulk.
- The Filter icon allows the administrator to sort the posts by:
- Modified Date
- Created Date
- Published Date
- Languages
- The Ellipsis (…) icon allows the administrator to:
- Edit
- Preview
- Copy Link
- Feature
- Unpublished
- Delete
Posts Listing
The Posts listing provides quick access to the following information, as follows:
- Post – Displays created posts for easy reference.
- Types – Displays the different types of posts.
- Published to – Indicates where the post has been published, such as in a Community, Topic, or Channel.
- Modified – Indicates the last modification date and time.
- Authors – Displays the author of the posts.
- Status – Displays the status of the posts.
- Ellipsis – Used to edit post details.
Calendar
(New) The Calendar displays scheduled posts (including event posts, questions, polls, and praises), stories, and pages, and highlights posts nearing their expiration date. You can switch the calendar view to a monthly or weekly format.
To view the calendar, click on Calendar from the left bar under Posts.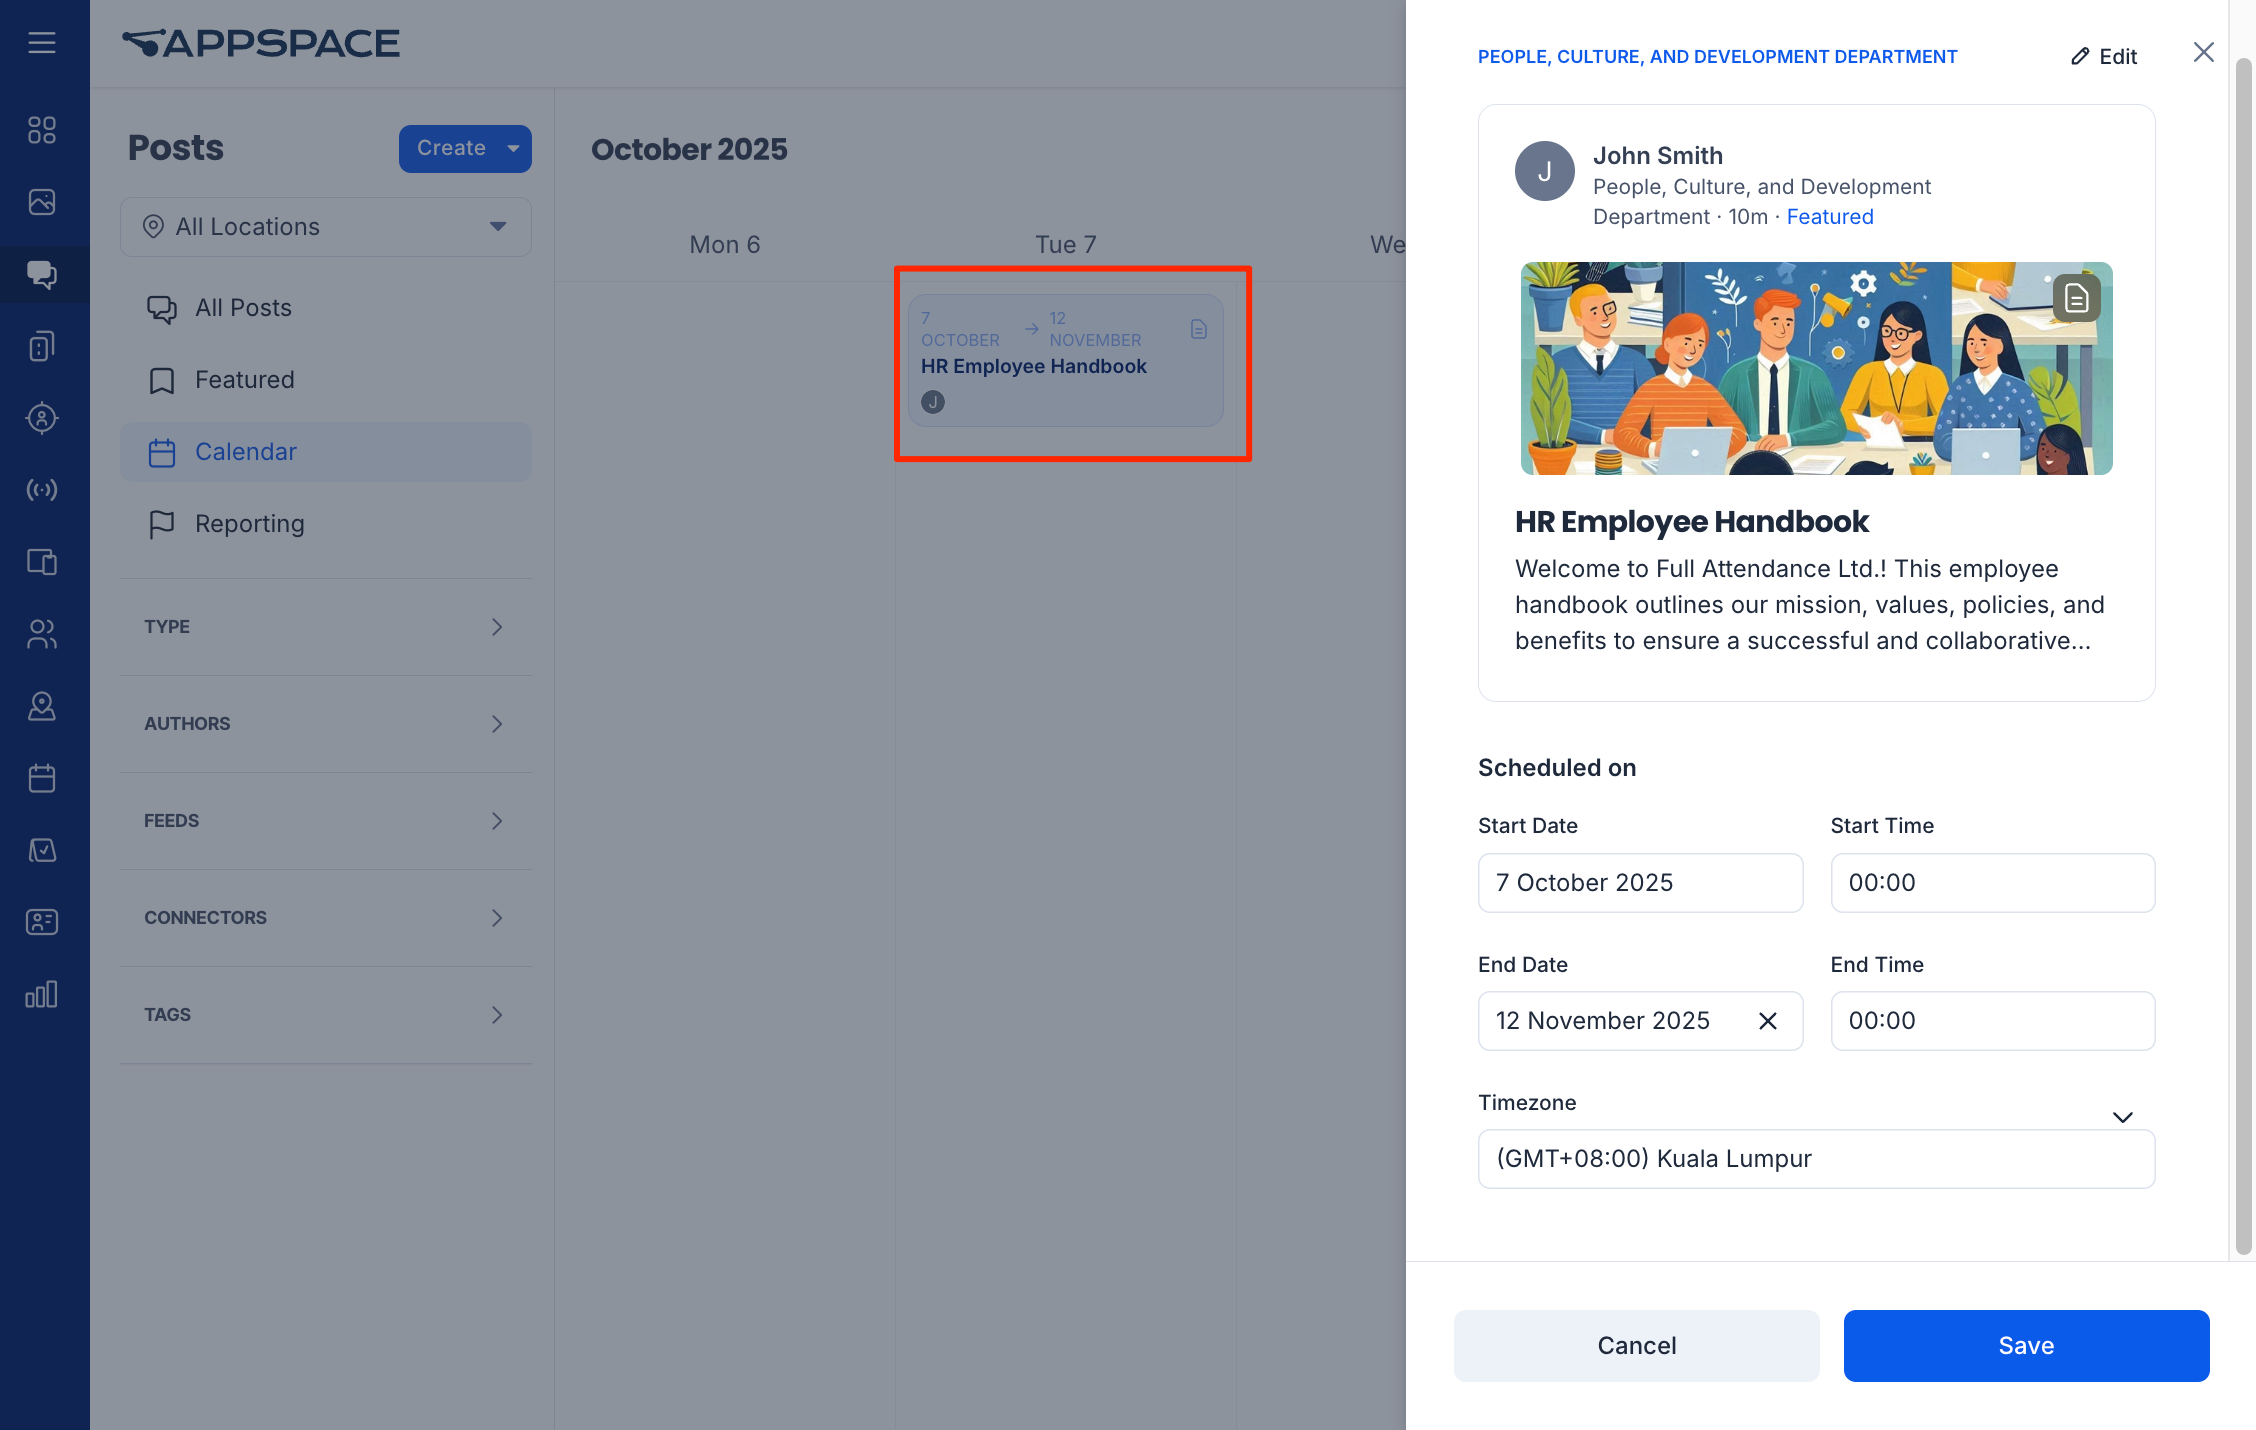
- You can view past, expired, and future scheduled posts (including event posts, questions, polls, and praises), stories, and pages. Different icons are used to represent each post type.
- Posts that are nearing expiration or already expired are highlighted.
- Expired posts do not display a Start Date/Time, End Date/Time, or Timezone, only an Expired status.
- Click on a scheduled future post to view it with the Start and End Date/Time, and Timezone.
- Click the Edit icon to edit the post.
- You can also modify the Start and End Date/Time, Timezone, and click Save.
The following are not included in the calendar:
- Posts that are under Draft status.
- Posts that are set to be published immediately without scheduling.
Reports
The Report feature supports post moderation by identifying content that may require further review by administrators.
- On the Status section under Reporting, administrators can filter and view post statuses, including:
- Pending
- Allowed
- Removed
Reporting Dashboard
- On the Reporting dashboard, administrators can access the following information:
- Posts – Displays created posts for easy reference.
- Reported By – Displays the person who reported the post.
- Reported on – Displays the date and time the report was submitted.
- Reason – Displays the reason why the post was reported. Reasons include Inappropriate, Offensive, False information, or Other.
- Status – Displays the current status of the report.
- The Ellipsis (…) icon allows the administrator to:
- Review
- Allow
- Remove
Managing Reported Posts
- To manage a reported post, select the desired post. The selected post will display the following:
- Reported by
- Reason
- Reported on
Was this article helpful?