Please follow the instructions in the following sections to create, import, and export device task templates.
Note
For Appspace on-premise users, Device Tasks can still be found directly on the ☰ Appspace menu.
Note
For a complete list of device tasks that are supported, or to download the latest device tasks package, please refer to the link provided in the Device Tasks: Introduction & Download article.
Create Task Template
- Log in to the Appspace console.
- Click the ☰ Appspace menu, and then click Devices > Device Tasks.
- Click the Task Templates tab, and click the +ADD button to create a task template.
- In the Task Template Details page, select the Task Class, and enter in the Task Name and Description of the task template.
- In the Common Parameters section, click the Add button, and select the parameter type to be defined. Proceed to enter in the required details for the common parameter.

Additional common parameters can be added by repeating this step. - In the Task Definition section, click the Add button, and select the target device. Click the arrow to expand the task definition, and proceed to enter in the required Parameters, Command, and Transform sections.
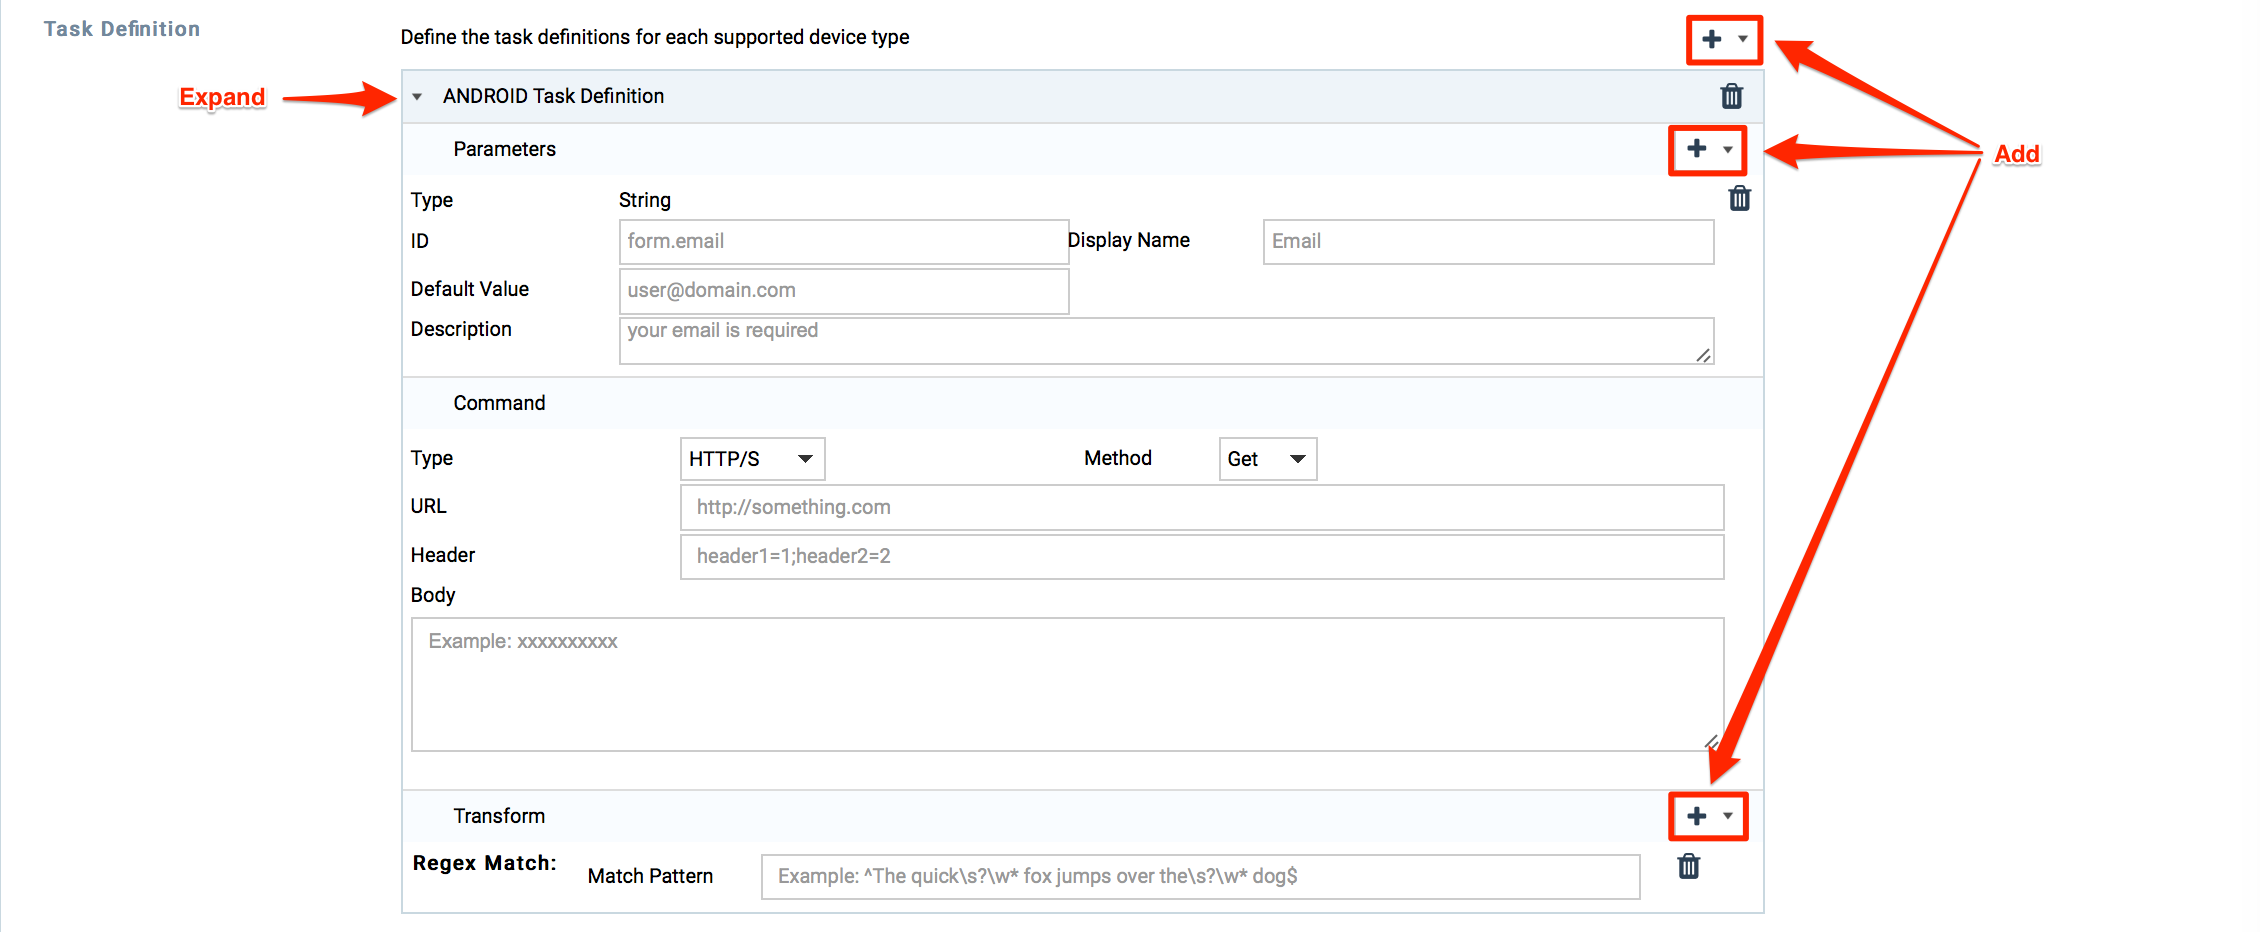
If the task is designed to target multiple devices, additional task definitions can be added by repeating this step.NoteFor more information on Parameters, Command, and Transform sections, please refer to the following Device Tasks: Define Task article. - In the Availability section, select the availability of the task template.
NoteOnly Portal Administrators are able to set tasks to Global.
- In the Schedule section, select when the task template is to be deployed.
NoteConsider the Schedule section as a guideline, as schedules can always change at the time of deployment.
-
Click Save once done.
Edit Task Templates
Note
- Configuring task templates will take effect after an update has been set.
- Monitoring or Advanced tasks will need to be re-deployed after the task template has been modified.
- Log in to the Appspace console.
- Click the ☰ Appspace menu, and then click Devices > Device Tasks.
- Click the Task Templates tab, and click the desired task template’s name link to edit, and make the necessary edits.
- Once done, click Save.
Import Task Templates
- Log in to the Appspace console.
- Click the ☰ Appspace menu, and then click Devices > Device Tasks.
- Click the Task Templates tab, and click the Import button.
- Click the Browse button, and navigate to the task template package you wish to import, and click Upload.
NoteWhen importing, always ensure that the task package is a valid .admpkg file, and not an externally modified file.
Export Existing Templates
- Log in to the Appspace console.
- Click the ☰ Appspace menu, and then click Devices > Device Tasks.
- Click the Task Templates tab, and select the desired task template(s) to export.
- Once selected, click the Export button. The task template package will be downloaded to your default download folder with the .admpkg file extension.
Delete Task Templates
- Log in to the Appspace console.
- Click the ☰ Appspace menu, and then click Devices > Device Tasks.
- Click the Task Templates tab, and select the desired task template(s) to delete.
- Once selected, click the Delete button. Click OK to confirm deletion.
Was this article helpful?