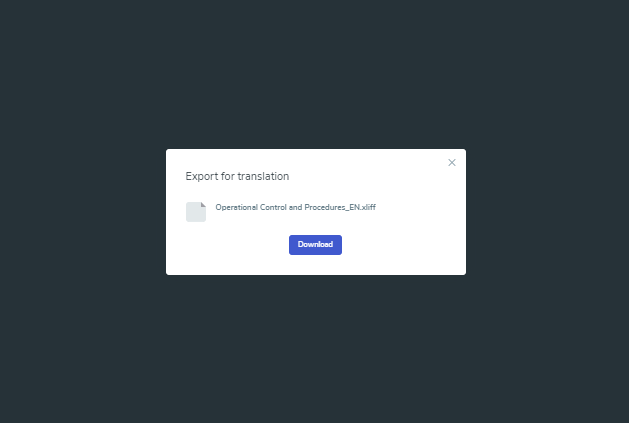
Open the Page or Story in Edit mode, click on the Languages drop-down menu, click on Export Default Language.

Click on the Download button. After the export is complete, use the XLIFF file to proceed with its translation.
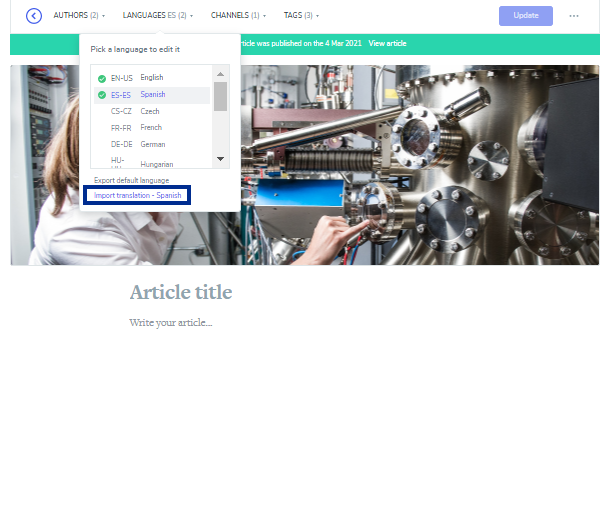
Once the translation is completed and converted into a new XLIFF file, click on the Languages drop-down menu and select the appropriate Language.
On the new empty version of the Page or Story, click on the Languages drop-down menu, click on Import Translation and upload your translated file.
![]()
Automatically the contents are transferred from the XLIFF file to their corresponding text blocks of the page. When an author tries to publish a story, the system validates all its language versions’ rules and constraints. If, for instance, a version doesn’t have a valid title, the story is not allowed to be published.
Once the translation is imported and ready to be published, click on Update.
The check the final result, click on View Article.
![]()
Please Note: To use import and export content for external translations, the XLIFF format is the only supported file format.
Was this article helpful?