The all-new Reports feature introduced in Appspace 8.1 provides organizations with the operational and behavioral information required to make data-driven decisions in order to optimize customer facilities and the Appspace service itself for a better user experience.
With the increased adoption and expansion of Broadcast, Space Reservations and Visitor Management solutions, the initial release of Reports focuses on providing organizations with basic reporting capabilities that leverage raw metrics, utilization metrics, and trending information collected via Analytics, such as reservations, resources, visitors, and much more into a spreadsheet that can be downloaded immediately, or scheduled to run at any given time.
The new reporting feature provides the following general functionality:
- Create, generate, and view reports based on predetermined report templates, or create your own customized report templates.
- Schedule reports to run periodically, while being notified via email notifications, or enterprise messaging apps.
- Download reports to .xlsx spreadsheets for external use.
- Data filtering and Search capabilities.
In this release, the following Report templates will be readily available to customers, with more being planned in upcoming releases:
This article provides illustrations on navigating the Reports dashboard and its features.
User Interface and Navigation

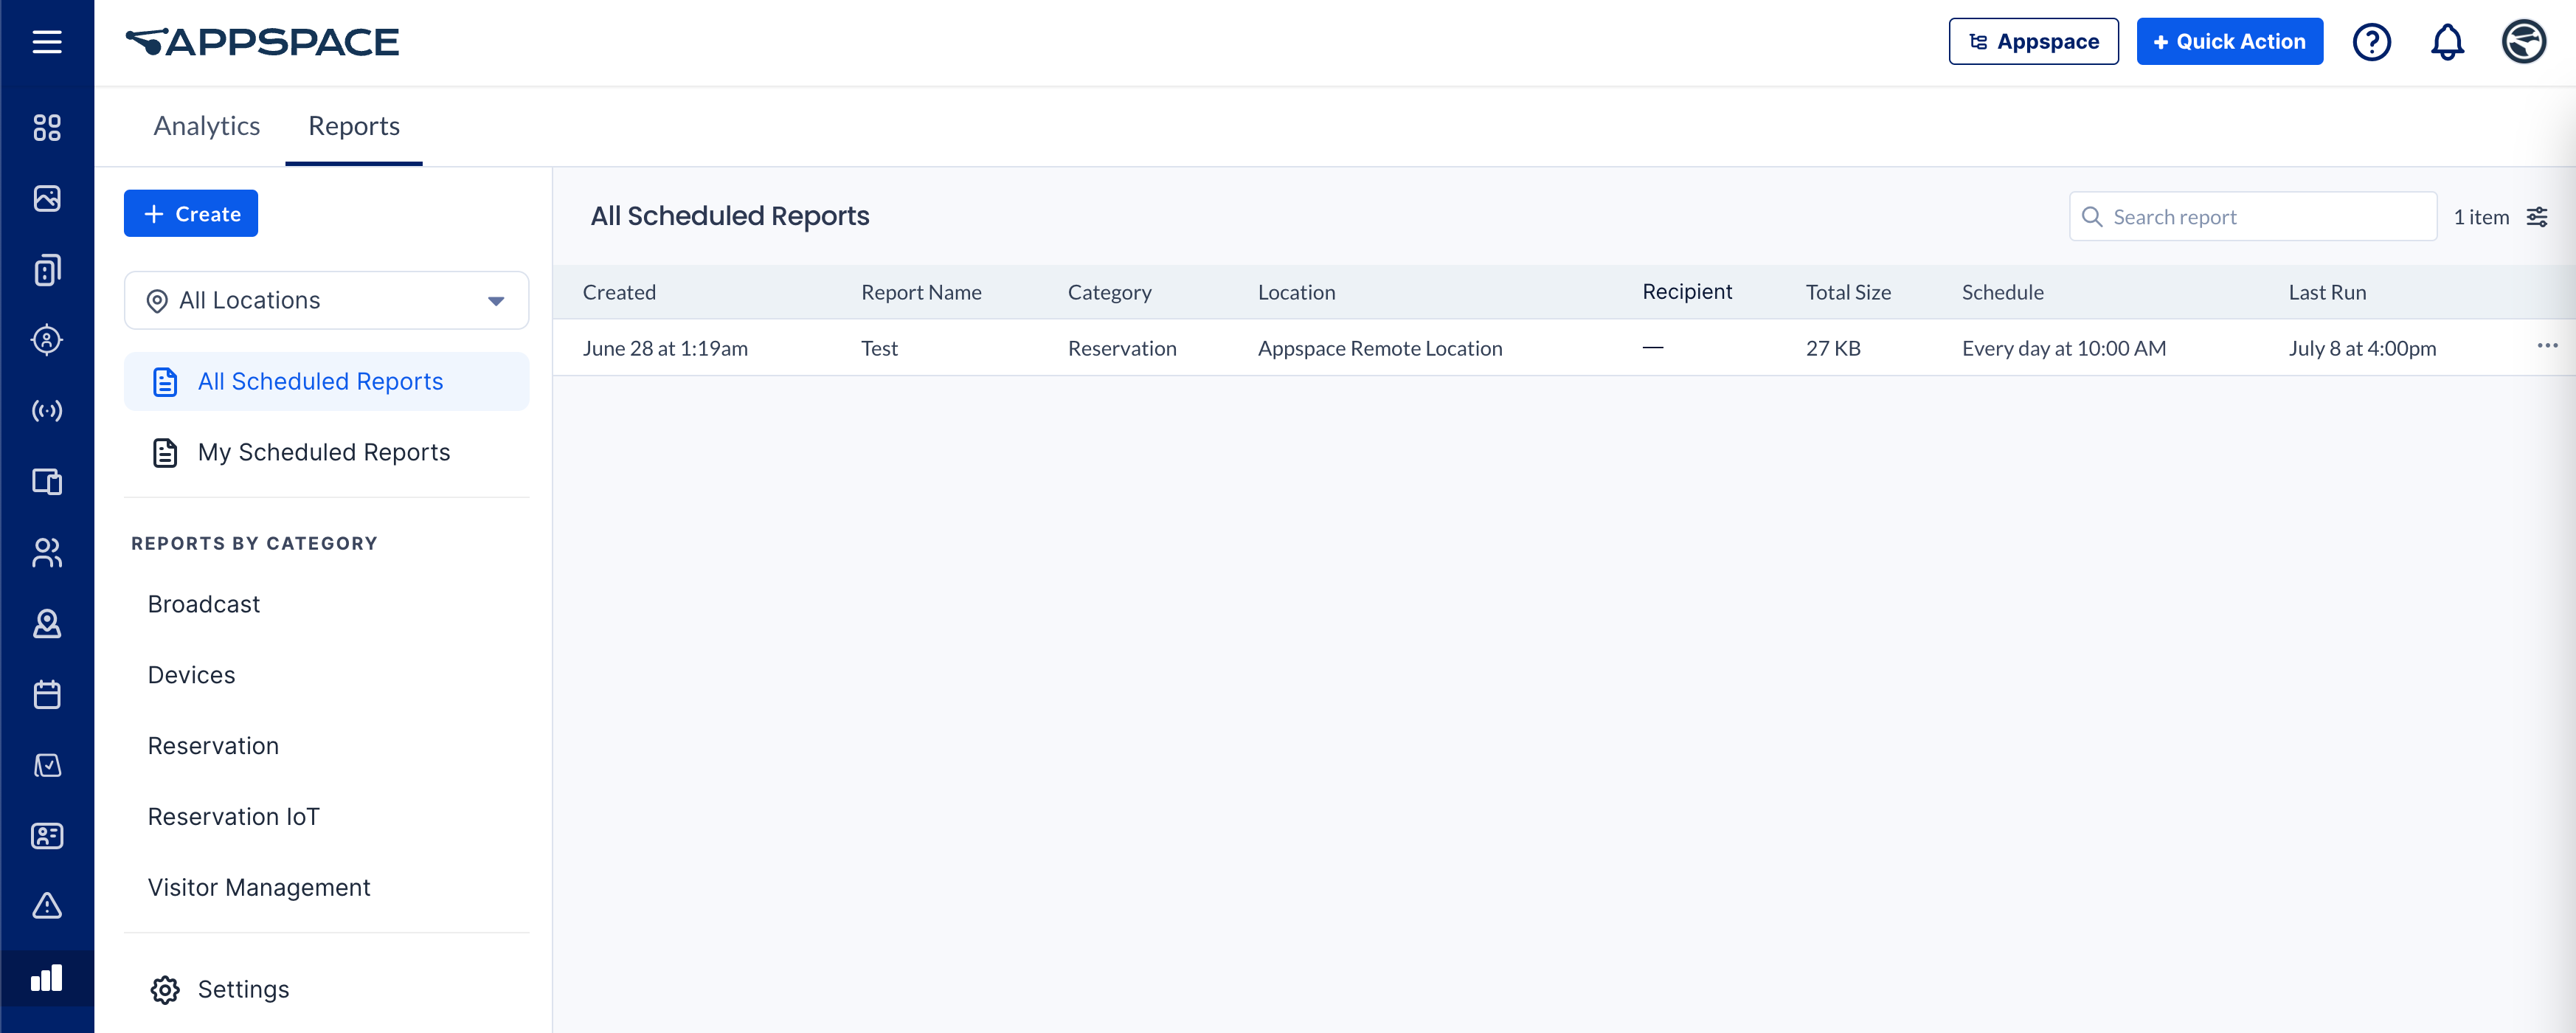
Reports Dashboard
In order to access the Reports dashboard, click Analytics from the ☰ Appspace menu, and click the Reports tab.
From here, Account Owners and Location Admins may create, customize, generate, view, and schedule reports based on the available templates from Space Reservations, Visitor Management, Broadcast, and other areas of the Appspace platform (coming soon).
Search and Filters
Search
The Search field is used to search scheduled reports based on the name. The corresponding results appear in the field as you type a keyword, and when you click on a name in the search result, the report is automatically displayed.
If the scheduled report is not displayed in the search drop-down menu, click Enter or Return on your keyboard. The search results will be listed on the dashboard.
Filters
Click the Filter icon to display the filter bar, allowing you to filter the reports based on a specific user.
- In the Reports dashboard, you may filter the reports based on a specific user.
- In Settings page, the filter bar displays two filter options, All Types and All Categories, which you may use to filter the report templates with.
- All Types
- System – Displays Appspace report templates.
- Custom – Displays custom report templates.
- All Categories – Displays the Report categories available.
- All Types
Create and Schedule Reports
To create and schedule reports, click the + Create button, and configure the report depending on the desired report template.
For more detailed instructions, please refer to the articles below:
- Create and Schedule Visitor Management Reports in Analytics
- Create and Schedule Space Reservation Reports in Analytics
Manage Reports
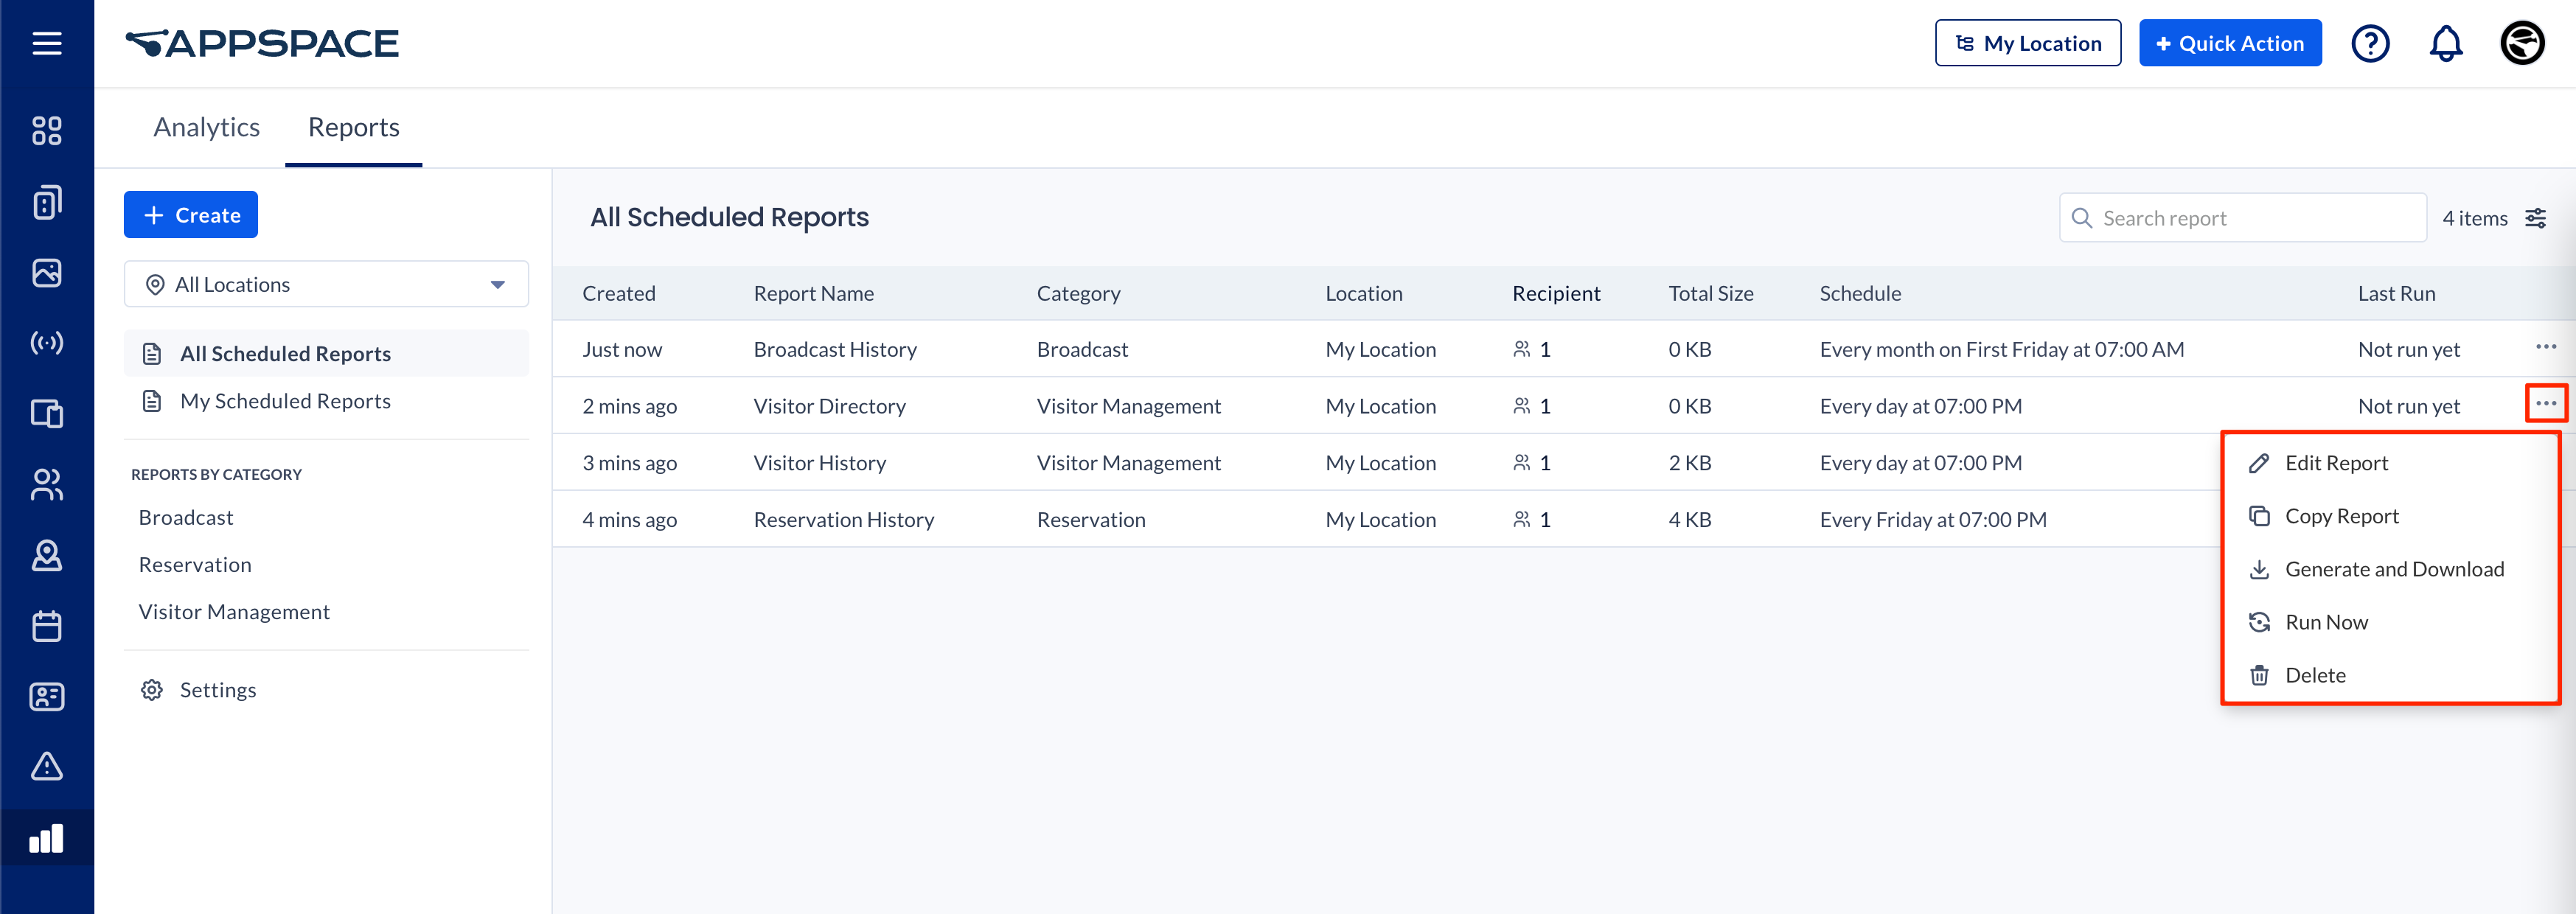
To manage scheduled reports, click the ellipsis of the report, and select one of the following actions:
- Edit Report – Edit the report or view the History of the report and previous reports generated.
- Copy Report – Copy previously generated report.
- Generate and Download – Generate and download the previously generated report.
- Run Now – Generate the latest version of the report.
- Delete – Delete generated report.
Settings
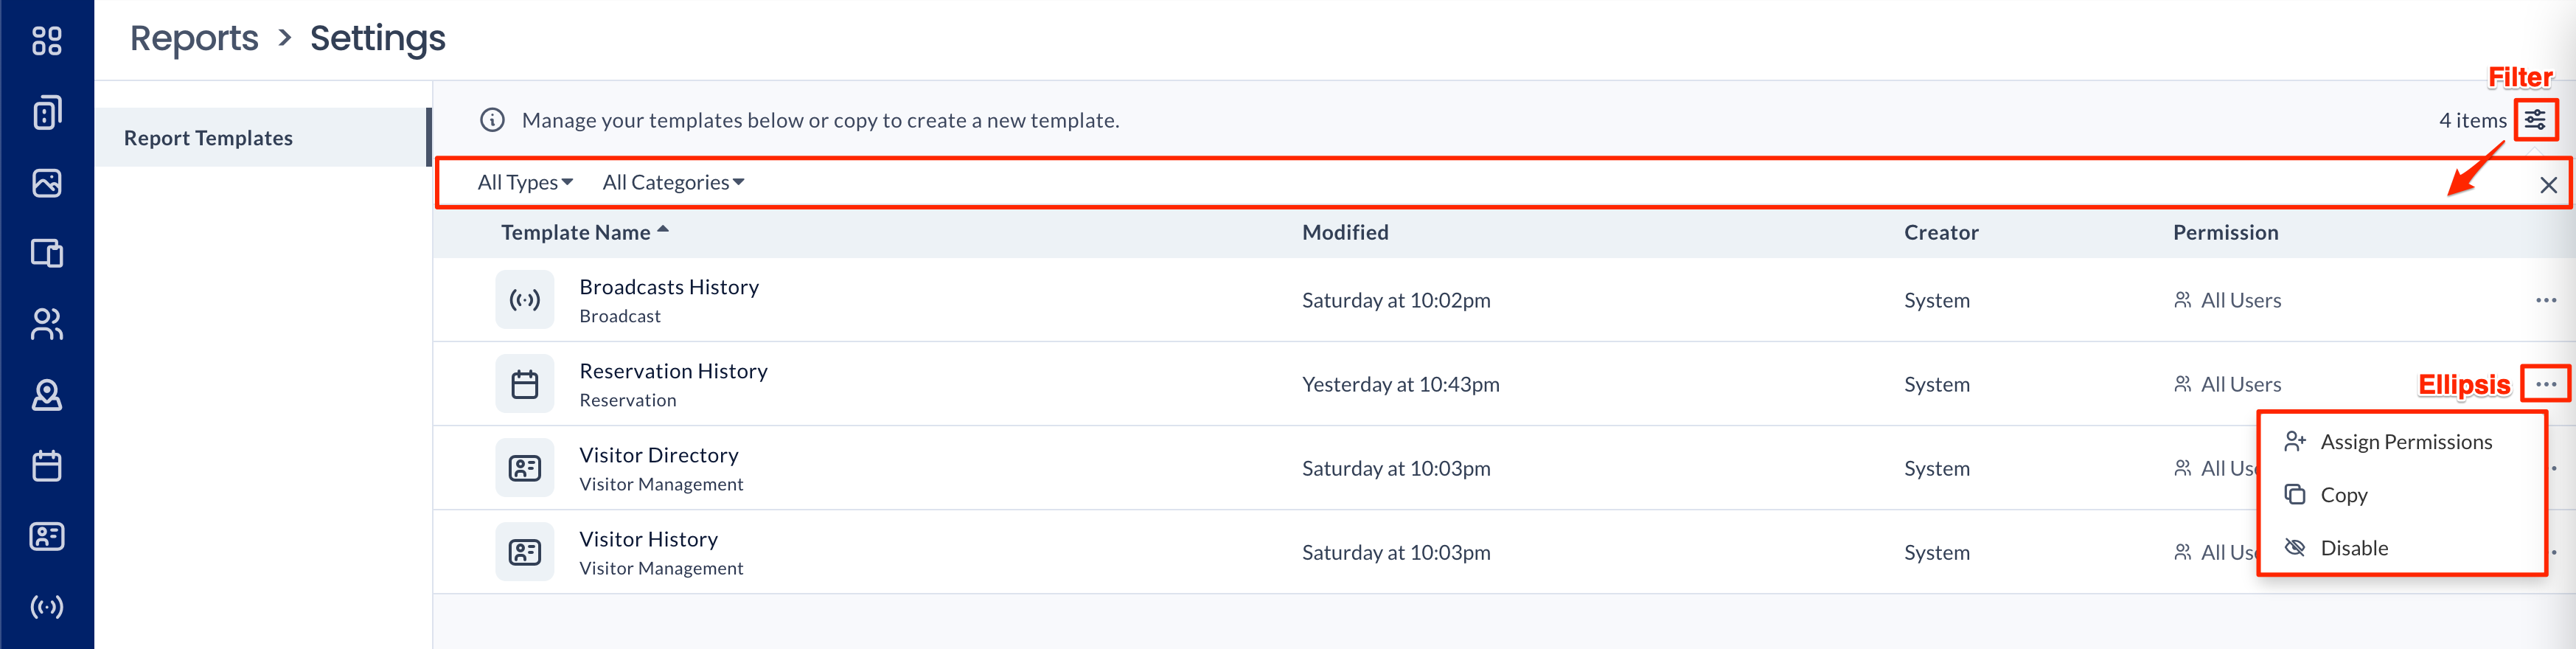
The Settings page allows you to manage the Report templates that are available. Click the ellipsis to perform the following actions:
- Assign Permissions – Enter the user(s) or user group(s) to assign permissions to use the report template.
- Copy – Copy report template from previous report.
- Disable – Disable and Enable the report template.
Click the Filter icon to display the filter bar, which displays two filter options All Types and All Categories, allowing you to filter the reports templates.
- All Types
- System – Displays Appspace report templates.
- Custom – Displays custom report templates.
- All Categories – Displays the Report categories available.
Glossary
As a reference, below is a glossary for the columns you intended to include in the report.
Broadcast
- Title – Title of the broadcast content.
- Activated At – Displays date and time of the broadcast content.
- Activated By – Displays broadcast content created by the user.
- Priority – Displays broadcast content created by the user.
- Location – Displays the location created earlier.
- Trigger Type – Displays the broadcast trigger type.
- Target Type – Displays the broadcast target.
Reservation
- Event Id – Displays the Id of the event.
- Meeting Name – Displays the name of the event.
- Resource Id – Displays the Id of the resource.
- Resource Name – Displays the resource name.
- Resource IsReservable – Displays the current status of reservations.
- Network Id – Displays the network Id.
- Network Name – Displays the network name.
- Resource Type – Displays the resource type.
- Resource SubType – Displays the subtype of resource.
- Organizer Id – Displays the organizer Id.
- Organizer Name – Displays the organizer name.
- Organizer Type – Displays the organizer type.
- Organiser Email – Displays the organizer’s email.
- Start DateTime – Displays the email of the organizer.
- Start Date – Displays the date of the event.
- Start Time – Displays the date of the event.
Visitor Directory
- First Name – Displays visitor’s first name.
- Last Name – Displays visitor’s last name.
- Email – Displays visitor’s first name.
- Created Date – Displays the date created.
- Created By –
- Registration Status – Displays the status of registration.
- Registration Status Updated Date – Displays the status of the updated date registration.
- Visitor Type – Displays type of visitor.
- Updated Date – Displays the date of the most recent update.
- Custom Fields – Displays optional visitor registration information.
Visitor History
- Start Date – Displays the start date of the event.
- End Date – Displays the end date of the event
- Visitor Name – Displays visitor name.
- Visitor Type – Displays type of visitor.
- Visitor Email – Displays visitor emails.
- Purpose – Displays the reason for the visit.
- Host – Displays the invitation’s host.
- Time – Displays the time of the event.
- Building – Displays the building of the event.
- Location – Displays the location of the event.
- Invite Status – Displays the invitation status of the event.
- Registration Status – Displays the registration status.
- Checked-in Time – Displays checked-in time.
- Checked-out Time – Displays checked-out time.
Was this article helpful?