Installing the Appspace App on Chrome OS
This article provides instructions to configure and register Chrome OS based devices with the Appspace App.
Prerequisites
The device must meet the manufacturer’s minimum hardware and technical specifications, as well as the Appspace App’s minimum requirements. Please refer to Appspace App requirements.
An active Appspace account, with sufficient Device IDs to register the device.
An active Internet connection.
A USB keyboard for activation.
Ensure your network/firewall/anti-virus software is configured to allow access to the following:
- Google Chrome web browser
- Network port 80 (HTTP)
- Network port 443 (HTTPS)
On your proxy server, whitelist the hostnames listed in the ‘How to set up networks with SSL content filters’ section in the following article: https://support.google.com/chrome/a/answer/3504942#sslinspection.
Install Appspace App
Follow the instructions below to download and install the Appspace App:
Launch the Google Chrome web browser on your device.
Click the following link to select the Appspace App on the Chrome Web Store: https://chrome.google.com/webstore/detail/appspace/gmdgbdlpbnhiogedlhmdiceocbgcbpgi?hl=en.
Click the ‘ADD TO CHROME’ button.
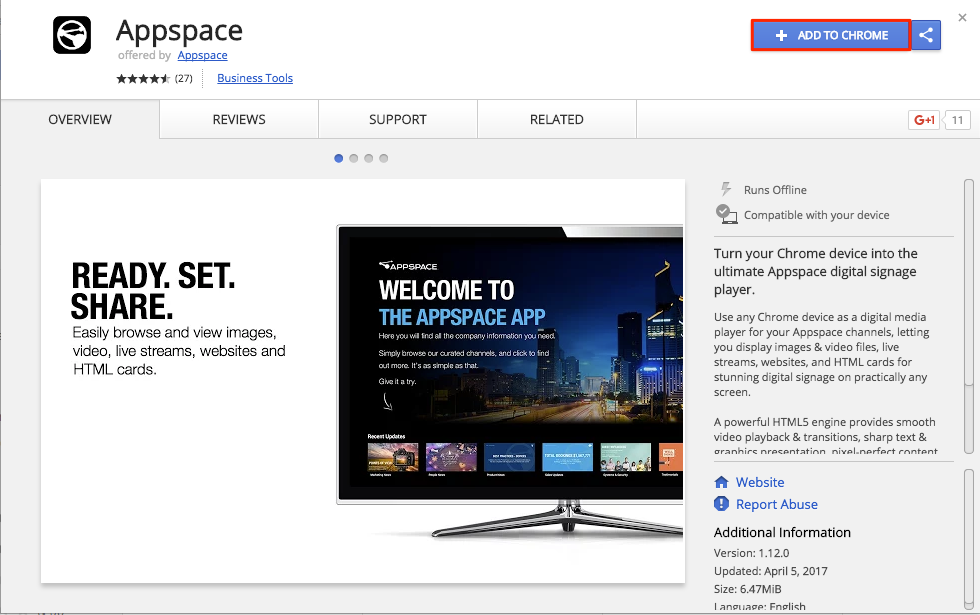
Once installed, the Appspace App is visible in the Chrome App Launcher.

Launch the Appspace App.
Register your device using one of the many options listed in the Introduction to registering a device with the Appspace App article.
Configure Chrome version control
Important
You must upgrade the Appspace App to version 1.27 (and later) for this feature to work.
You can now allow Appspace App to determine the Chrome OS version that will be installed on your devices. With this feature enabled, Chrome firmware upgrade will only occur after Appspace engineers have fully verified the Chrome OS version and the Appspace App function well together. Enabling this feature, will result in the following:
If you are running Chrome v60 and below, the Appspace App will trigger an upgrade to Chrome v61.
If you are running Chrome v61, the Appspace App will keep Chrome at that version until Appspace verifies the next stable version.
If you are running Chrome v62, the Appspace App will hold at this version as there is a technical limitation that results in no display/video output via HDMI when using the Appspace App. It is not possible to automate a rollback of Chrome. However we have several workarounds listed in the Appspace App 1.27 Release Notes.
To configure the Chrome device settings to disable auto updates and allow Appspace App to control the Chrome OS version, follow the instructions below:
Important
You must have Google Admin credentials with a G Suite (Google Apps) account.
Navigate to Device settings as per the ‘Manage Chrome device settings’ article: https://support.google.com/chrome/a/answer/1375678?hl=en.
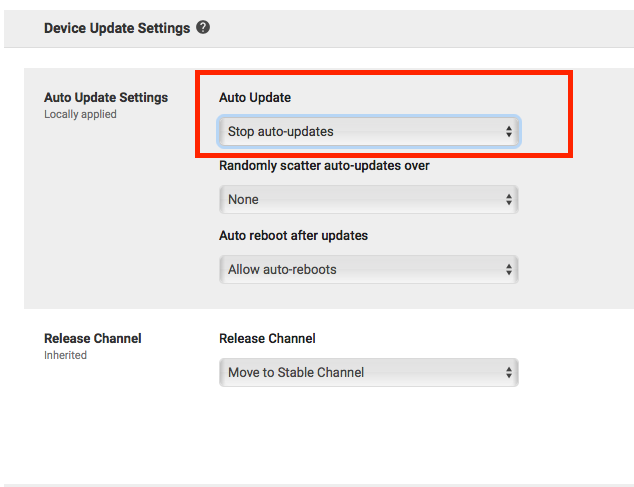
To disable auto-updates, navigate to Device Update Settings, and select ‘Stop auto-updates’ in the Auto Update drop-down menu.
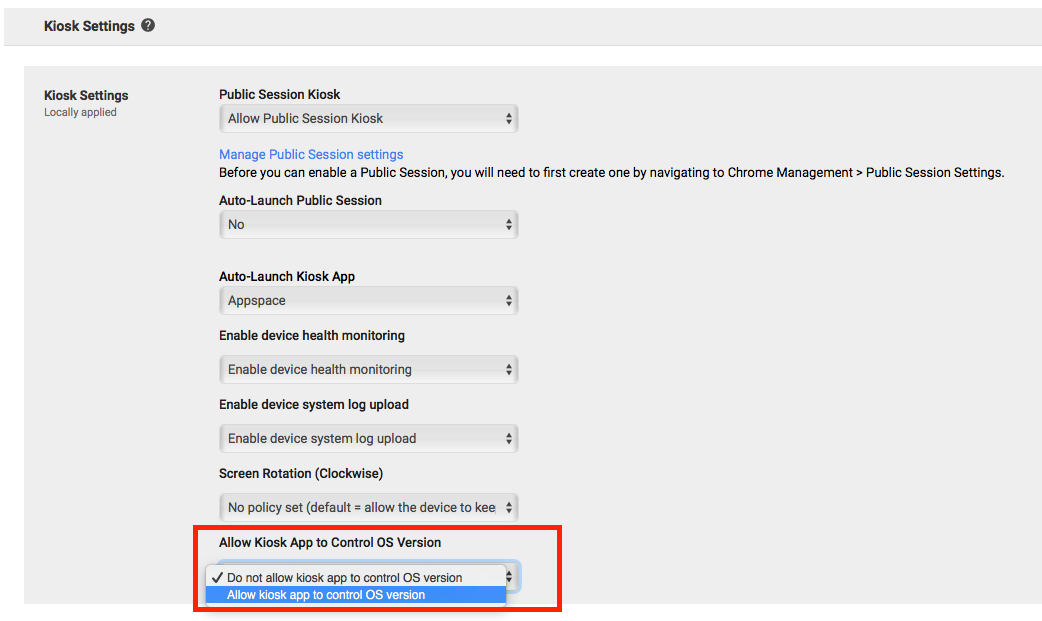
To allow Appspace App to control the OS version, navigate to Kiosk Settings, and select ‘Allow kiosk app to control OS version’ from the Allow Kiosk App to Control OS Version drop-down menu.
Confirm and verify your selection.
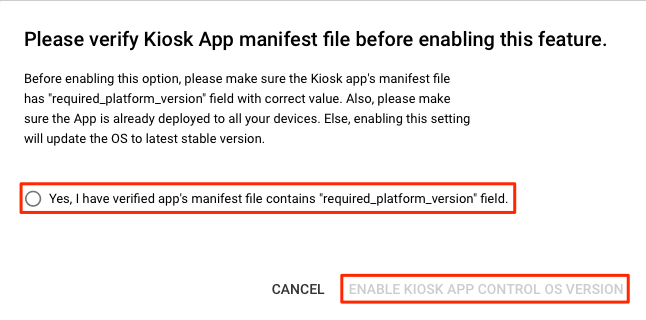
Save your settings.
Uninstall Appspace App
To uninstall the Appspace App from device, follow the instructions in the ‘Uninstall an extension’ section in the following article: https://support.google.com/chrome_webstore/answer/2664769?hl=en.