This widget is used to display static plain text in Advanced Channel. Depending on its location in the advanced channel layout, a Plain Text widget is commonly used as:
- Titles and headers preceding another widget.
- Descriptions for elements such as photos and graphical content.
- Labels for specific content in the layout.
This article provides the instructions to add and configure a Plain Text widget.
Adding a Plain Text Widget
To add a Plain Text widget to your advanced channel, follow the instructions in the Adding Widgets section in the Widget: Add Widget to Advanced Channel article and select the Plain Text widget in the Widget Library.
Configuring a Plain Text Widget
To configure a Plain Text widget’s properties, please follow the instructions below:
-
In your advanced channel layout, click the RSS Viewer widget under the Widgets section.
-
In the Widget Properties window, configure the common tabs as per this article: Widget: Configure Widget Properties.
-
In the Widget Properties window, click the APPEARANCE tab, and edit the PROPERTIES section as per description below:
- Dynamic Text – Enable Dynamic text to be displayed.
- Text Content – Display static text.
-
In the STYLE section, customize the widget font type, size, alignment, and color.
If you choose to define a custom size that is measured based on pixels, select the Custom option from the Size drop-down menu to define the pixel size of your font.
Adding Dynamic Text
-
In the Widget Properties window, click the APPEARANCE tab.
-
In the PROPERTY section, check the Dynamic Text checkbox to activate the dynamic text field feature.
-
Enter in the Text Source and set the Refresh Interval, and Max words to be displayed. A Delimiter can be added if necessary.
NoteClick [update] to update the editor with your text source. By default, null is displayed. -
Click Apply to confirm your settings when finished.
Xpath Expressions in Dynamic Text
This feature enables users to include customized Xpath (XML Path Language) expressions when creating dynamic queries from XML files via the properties of a text widget. The below is sample code from https://www.w3schools.com/xml/xpath_syntax.asp.
<bookstore>
 <book category="cooking">
   <title lang="en">Everyday Italian</title>
   <author>Giada De Laurentiis</author>
   <year>2005</year>
   <price>30.00</price>
 </book>
 <book category="children">
   <title lang="en">Harry Potter</title>
   <author>J K. Rowling</author>
   <year>2005</year>
   <price>29.99</price>
 </book>
 <book category="web">
   <title lang="en">XQuery Kick Start</title>
   <author>James McGovern</author>
   <author>Per Bothner</author>
   <author>Kurt Cagle</author>
   <author>James Linn</author>
   <author>Vaidyanathan Nagarajan</author>
   <year>2003</year>
   <price>49.99</price>
 </book>
 <book category="web" cover="paperback">
   <title lang="en">Learning XML</title>
   <author>Erik T. Ray</author>
   <year>2003</year>
   <price>39.95</price>
 </book>
</bookstore>
Sample Xpath: /bookstore/book[1]/title
Output: Everyday Italian
Adding Xpath Expressions to Dynamic Text
To add the Xpath Expressions to Dynamic Text in your Plain Text widget, follow the instructions below:
-
In the Widget Properties window, click the APPEARANCE tab.
-
In the PROPERTY section, check the Dynamic Text checkbox to activate the dynamic text field feature.
-
Enter in the Text Source (ensure text source is an XML file) and set the Refresh Interval, and Max words to be displayed. A Delimiter can be added if necessary.
NoteClick [update] to update the editor with your text source. By default, null is displayed. -
Select the PROPERTIES tab, and click the Edit button, and click the Add New Property button.
-
Enter in the property Key and Value, and click OK to save the entry.
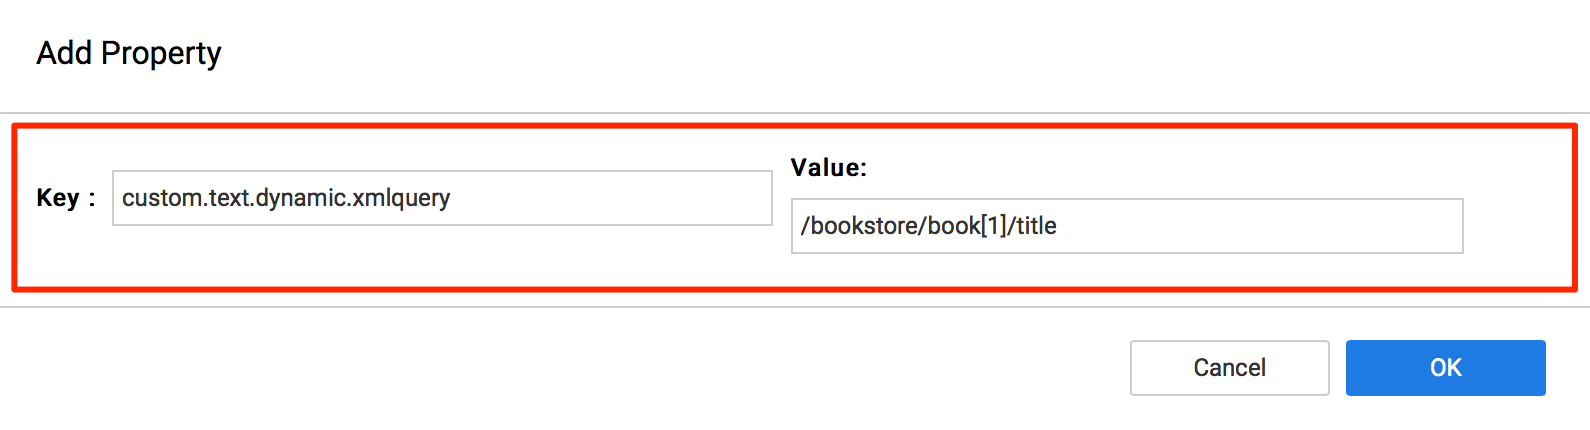 NoteIn this example, custom.text.dynamic.xmlquery was assigned as the Key, and /bookstore/book[1]/title was assigned as the Value. This expression fetches the title from the first book.
 -
Click Finish to complete the process.
-
To confirm that the XML query is working, click the APPEARANCE tab. The text in the widget will now be updated (Everyday Italian) as a result of the dynamic text query for the first book title in the code of the XML file.
Was this article helpful?