Introducing the all-new Reports feature within the Appspace 8.1 platform delivering operational and behavioral data organizations require to make informed decisions and optimize the workplace experience to enhance efficiency and user satisfaction across the Appspace platform.
Reports provide a wealth of benefits to organizations, including the following key advantages:
This article provides Administrators with instructions to create (generate) and schedule reports based on the Broadcasts report templates available in Analytics.
Prerequisites
- An Account Owner or Locations Admin role, assigned with a Platform user license.
- Optional – Enterprise Messaging has been configured for notifications
Create and Schedule Broadcasts Reports
- Log in to your Appspace console.
- Click the ☰ Appspace menu, and select Analytics from the menu.
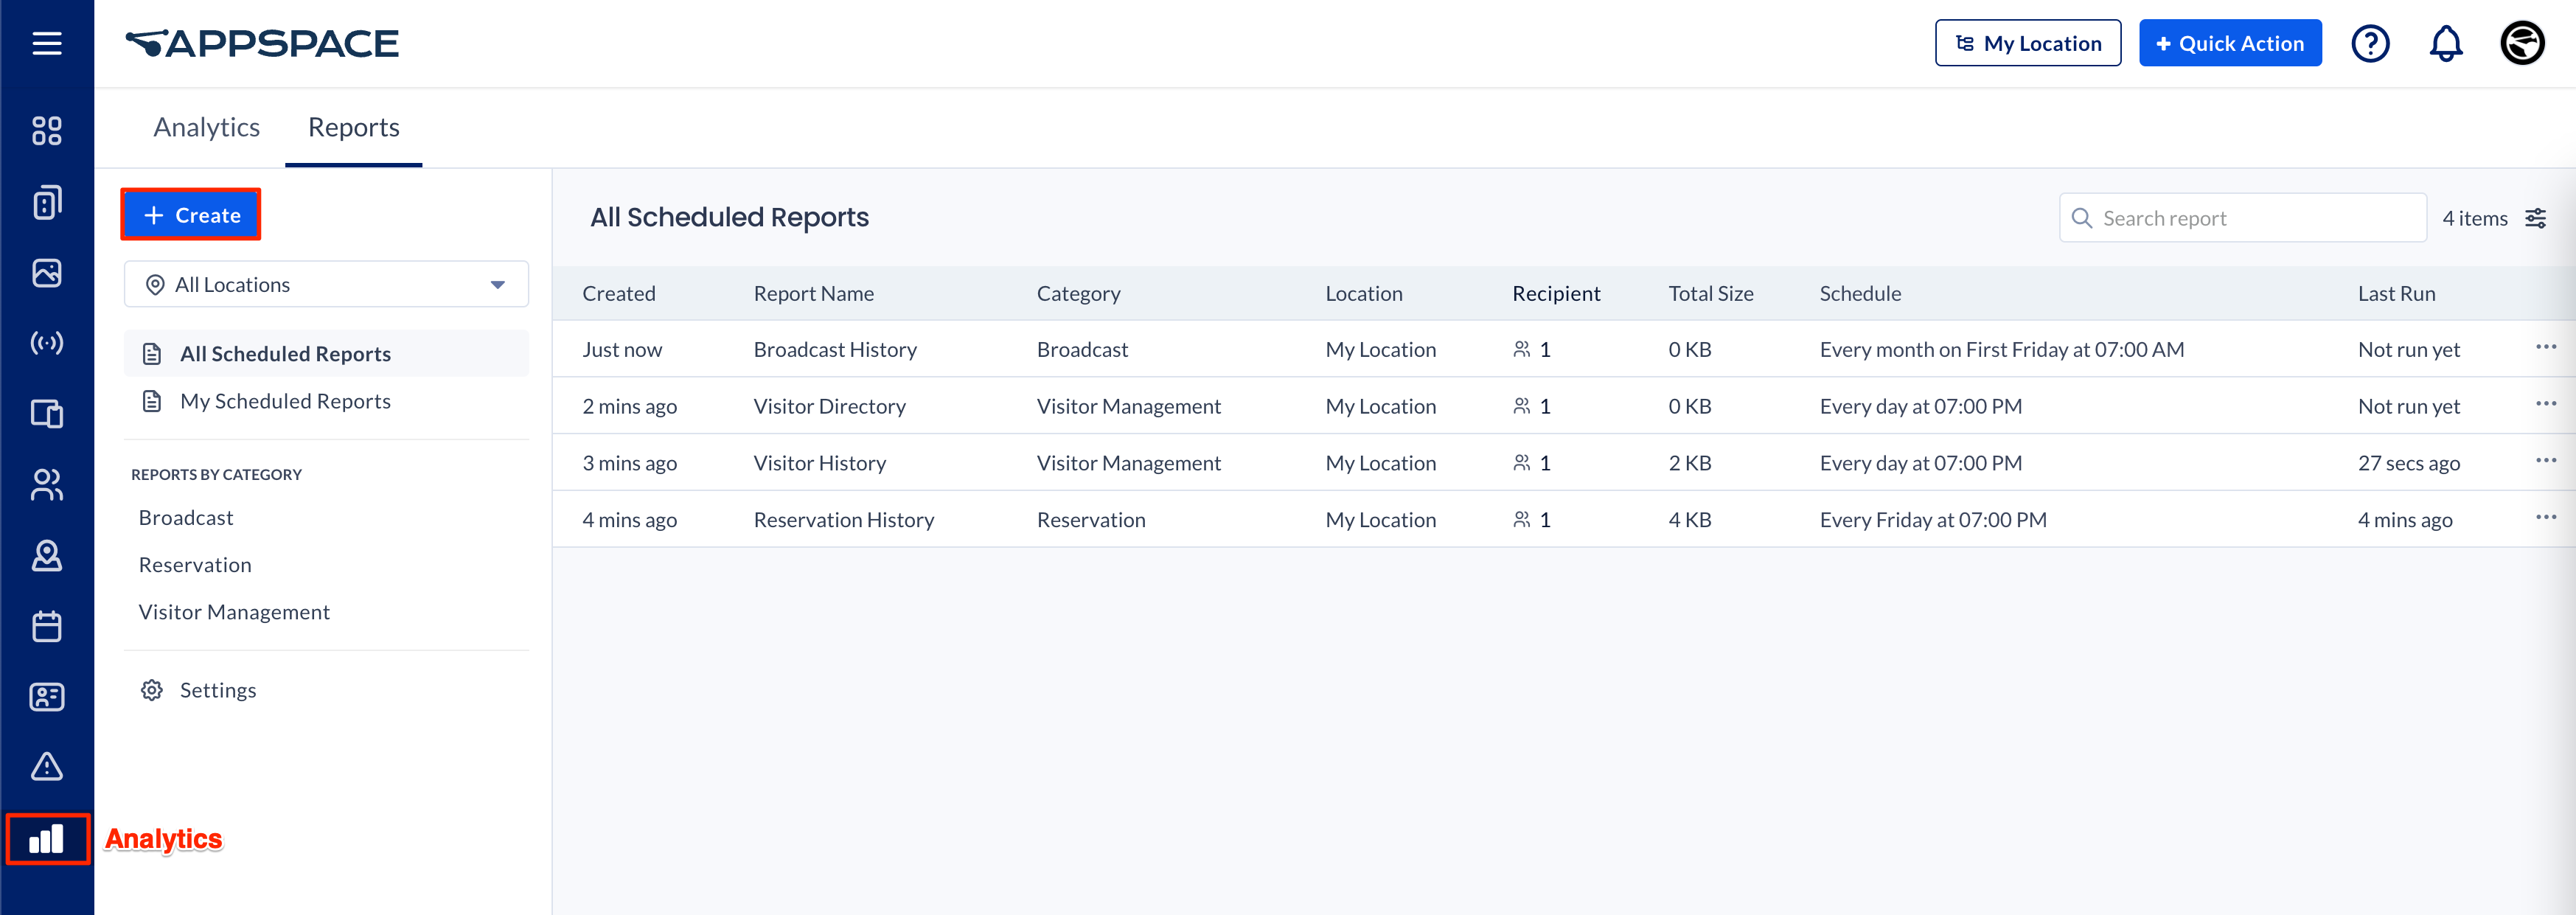
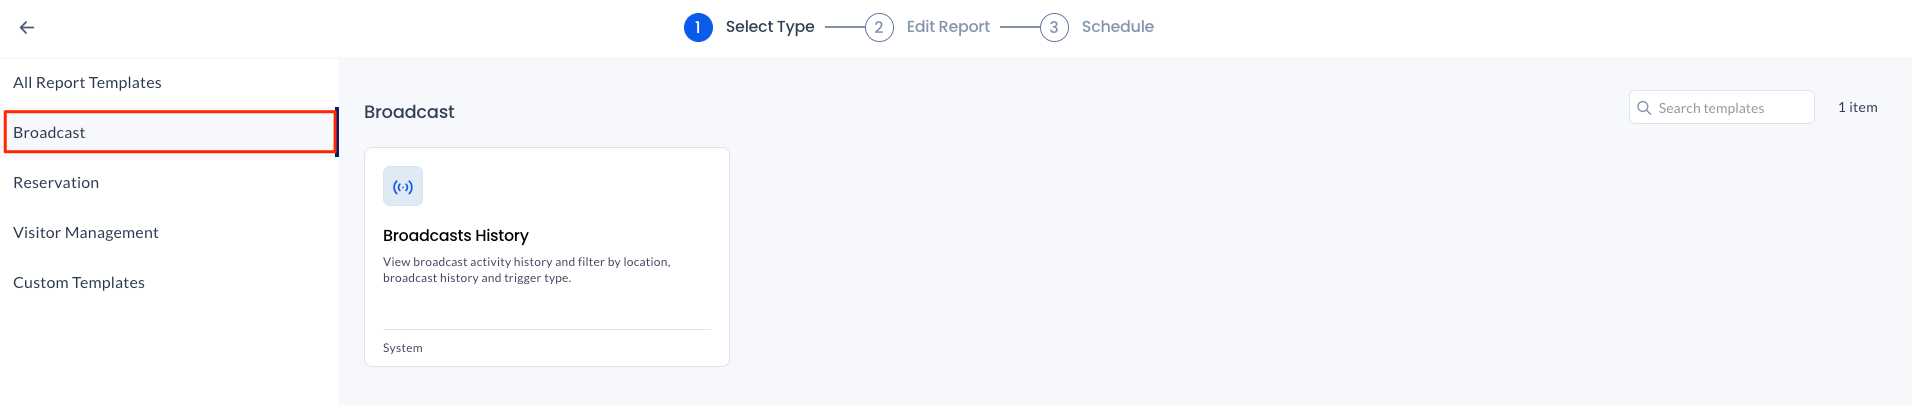
- Click the Reports tab, and click the + Create button.
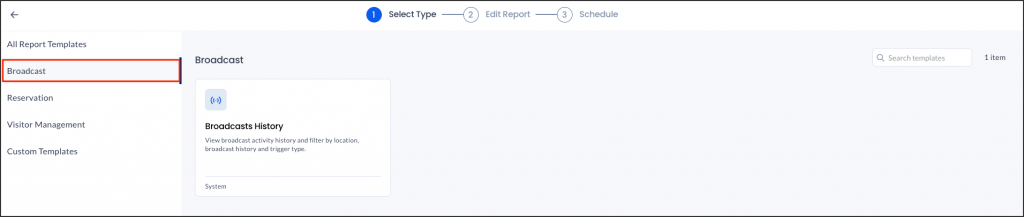
- In the Select Type step, search and select the desired Broadcast Report Template available.
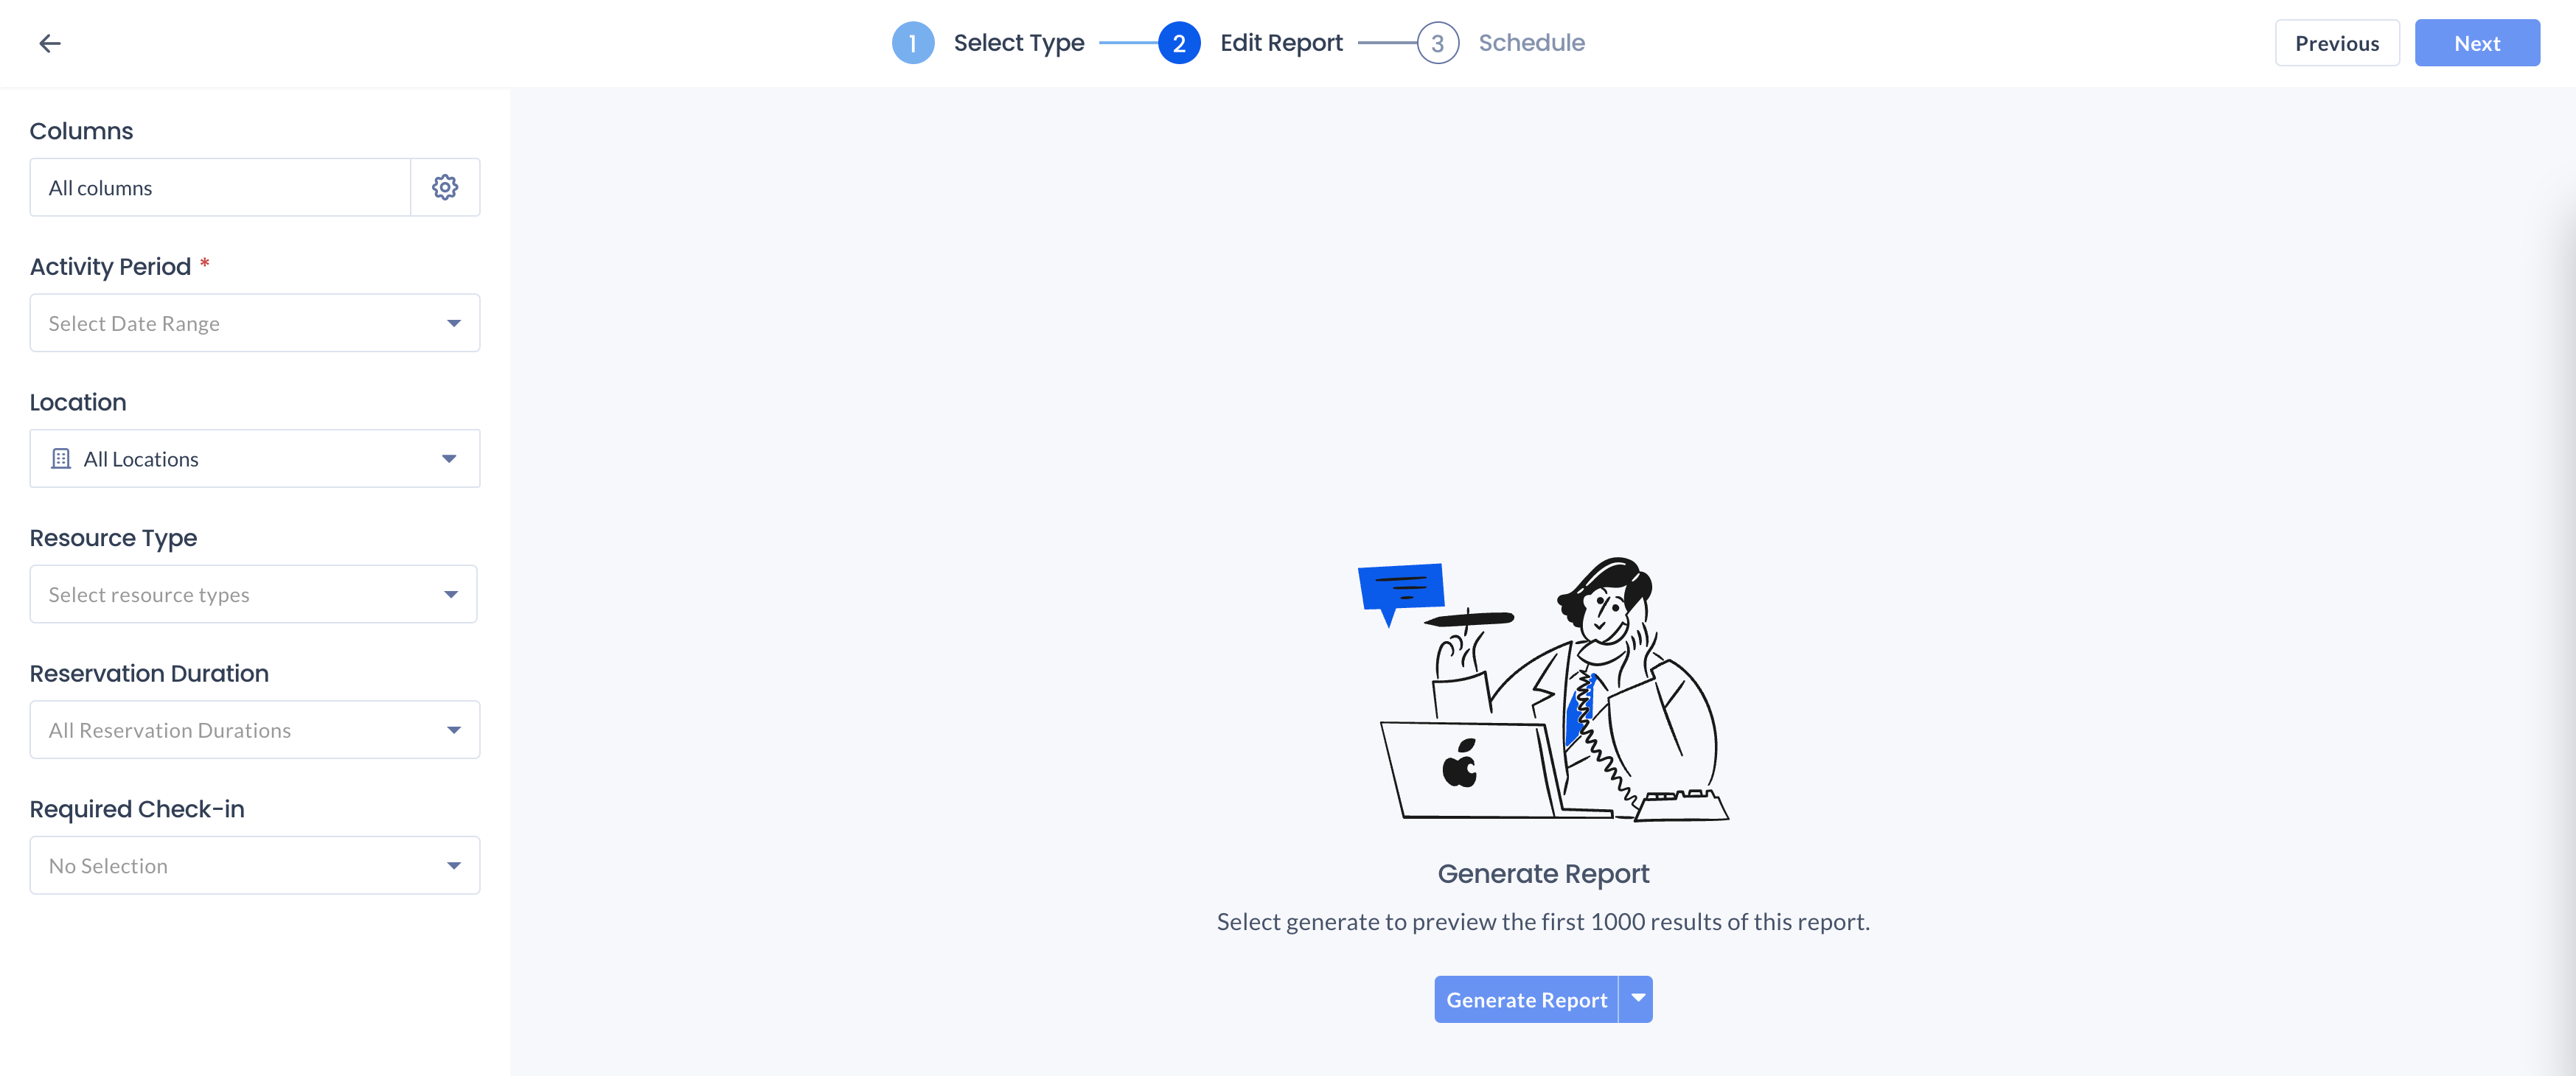
- In the Edit Report step, proceed to configure the following reporting fields from the drop-down based on the Broadcast report template selected:
- Device Directory
- Columns – All Columns (Default) or customize the columns generated in the report.
- Customize Columns – Click the ⚙ Gear icon to customize, and select the fields you wish to include, exclude, or rearrange the order of the fields for a customized report format. Once done, click Save.
- Activated –
- Location – All Locations (Default), or select the location of the devices.
- Priority –
- Trigger Type –
- Target Type – A
- Source Type – All Sources (Default), or select the specific device type.
- Columns – All Columns (Default) or customize the columns generated in the report.
- Device Directory
- Once configured, click the Generate Report button to generate a preview of the first 1000 results, or Download the Full Report by clicking the drop-down arrow. The generated report (in .xlsx format) will be automatically downloaded to your default download folder. Alternatively, you may also download the full report in preview mode.
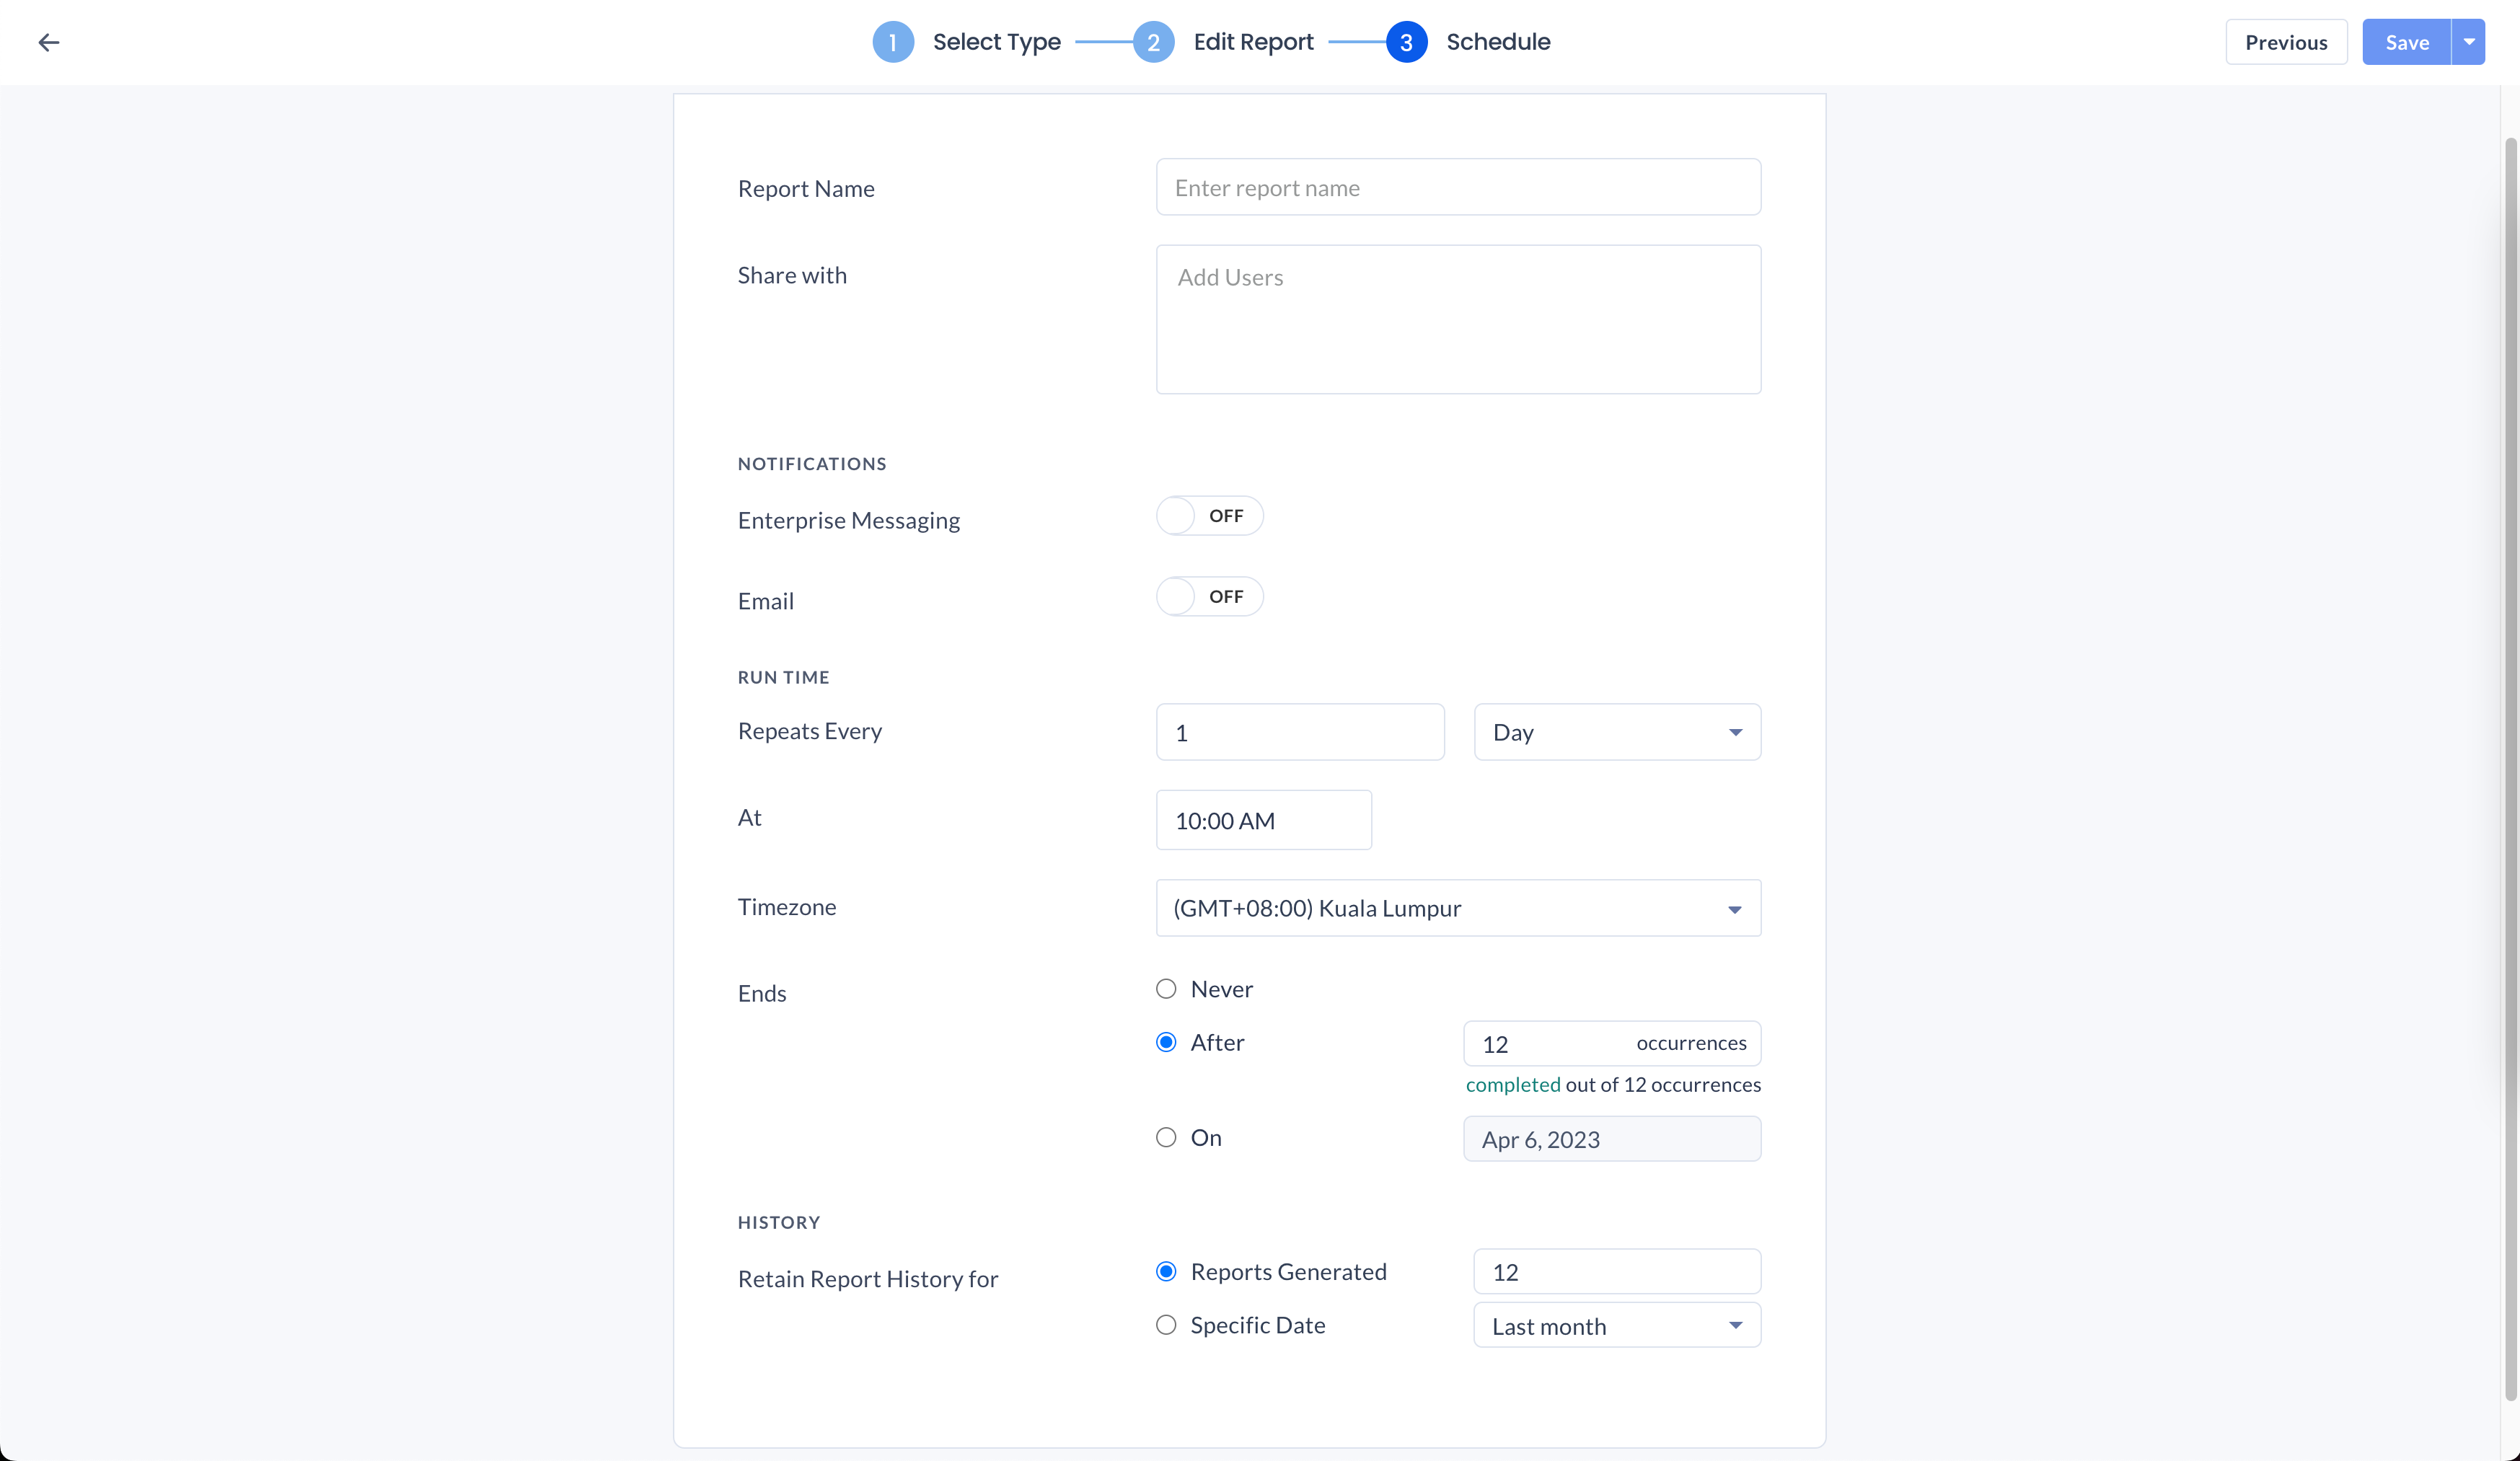
- Click Next, and in the Schedule step, proceed to configure the following scheduling fields:
-
- Report Name – Enter the report name.
- Share with – Add the users to share the report with.
- NOTIFICATIONS – Send a notification with a download link to the report.
- Enterprise Messaging – Slide the toggle switch to ON to enable sending notifications via the enterprise messaging app. OFF to disable.
- Email – Slide the toggle switch to ON to enable sending notifications via email. OFF to disable.
- RUN TIME – Define the report schedule run time.
- Repeats Every – Select the number of times per Day, Week, Month, or Year the report is run from the dropdown.
- Repeats On – Appears only when week, month, or year is selected.
- If Week is selected, choose the day(s) of the week from the available options for example: M, T, W, T, F, S, S.
- (New) If Month is selected, choose a specific day, the first day of the month, or customize the day from the dropdown.
- If Year is selected, select the date, or the day of the month from the dropdown.
- At – Determine the time the report is run from the dropdown.
- Timezone – Select the timezone for the report from the dropdown.
- Ends – Define when the report ends.
- Never –
- After – Enter the number of occurrences before it ends.
- On – Select the specific date for the report to end.
- HISTORY – Define how long the report is retained.
- Retain Report History for
- Reports Generated – Select the number of reports to be kept from the dropdown.
- Specific Date – Select Last month, Last 2 months, or Last Year of reports to be kept from the dropdown.
- Retain Report History for
-
- Once configured, click Save. Alternatively, you may also click the dropdown arrow to Save and Download the report, or Save as Template to generate future reports based on the saved report template.
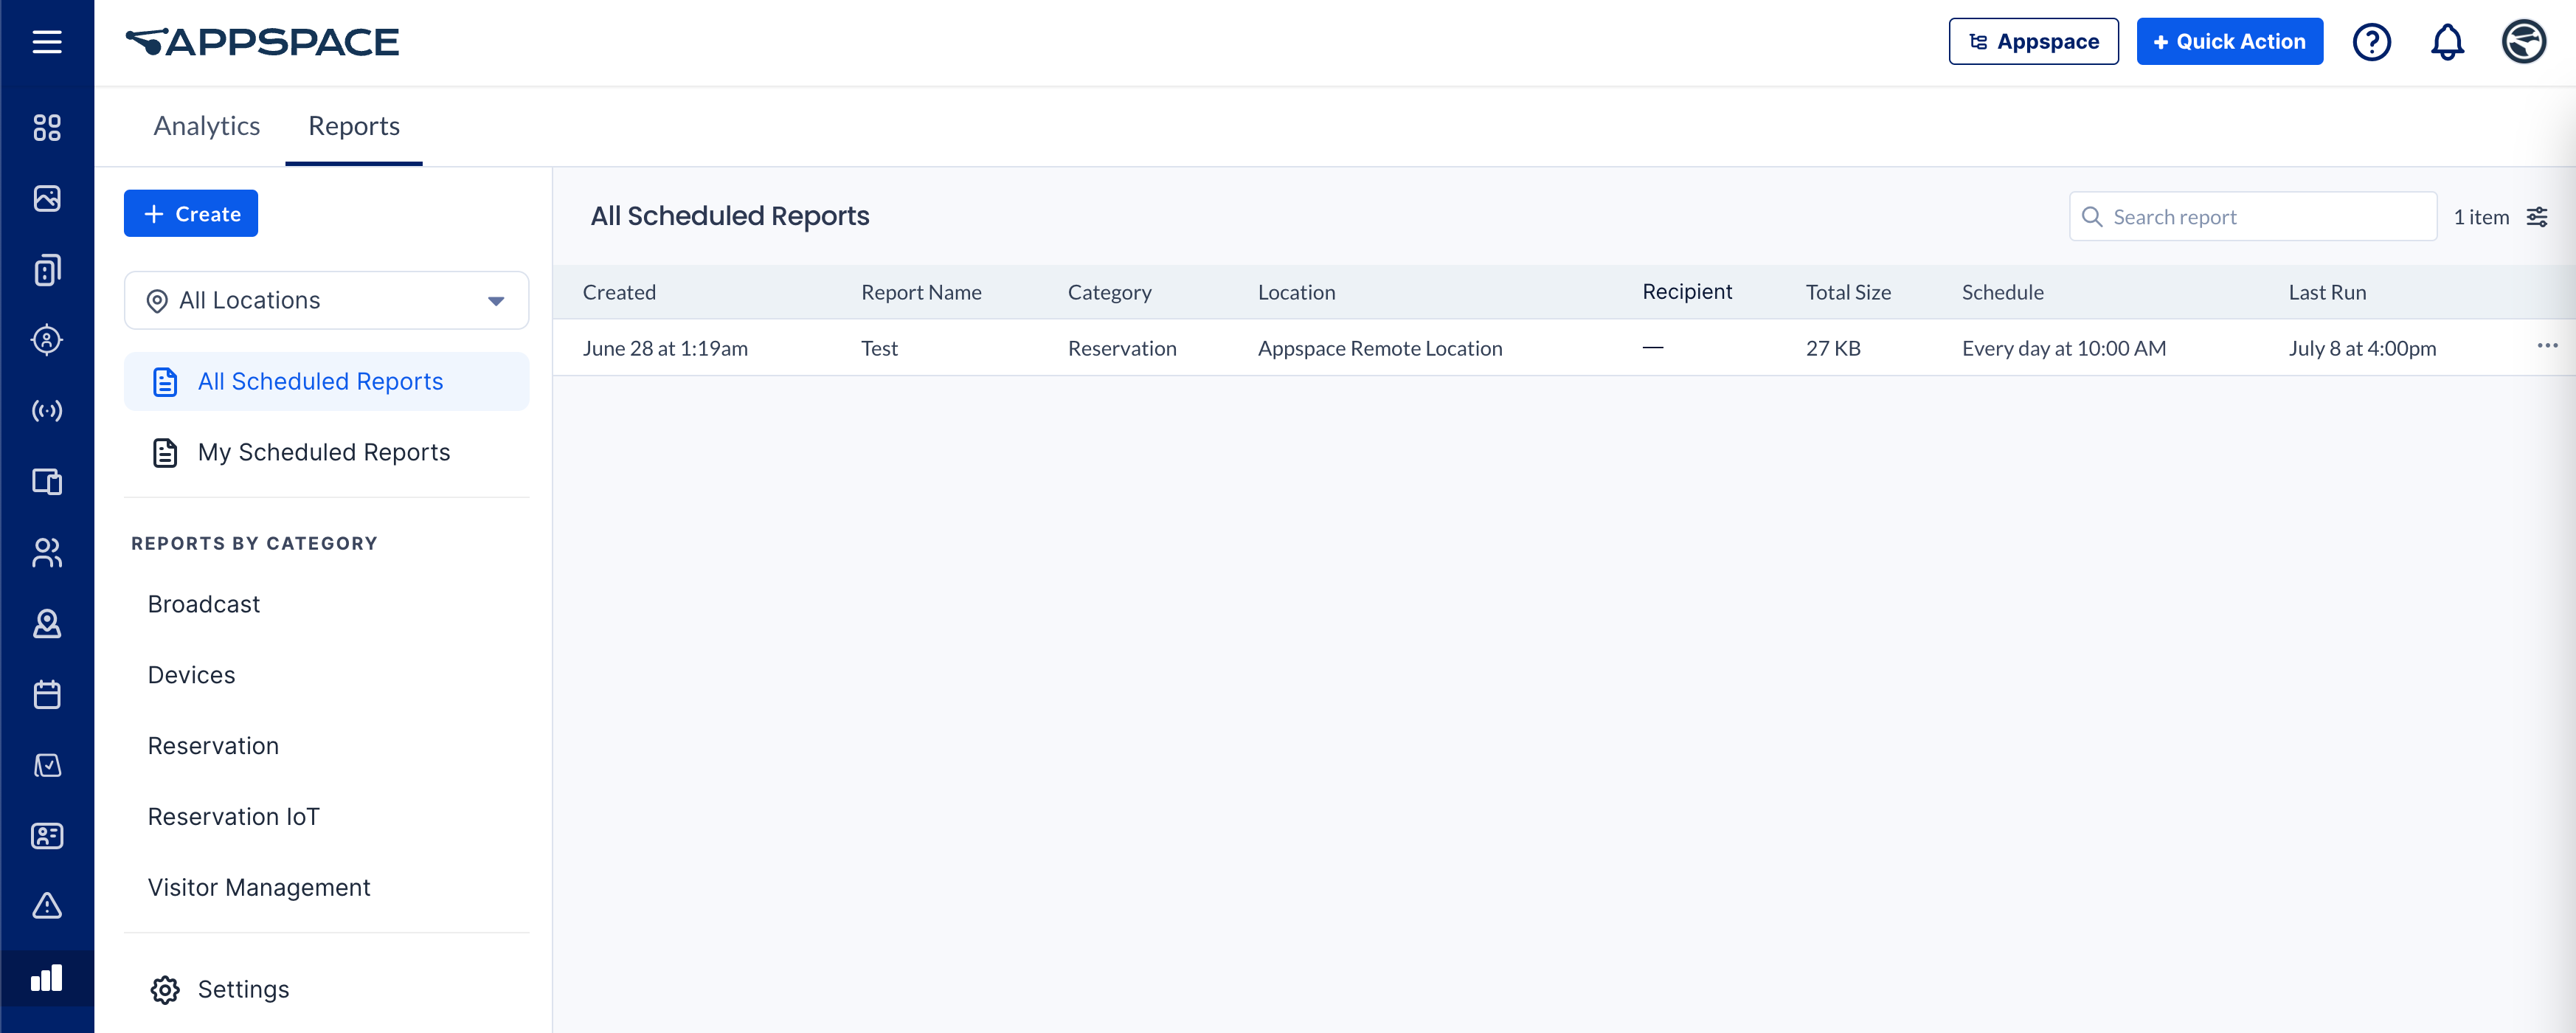
- Saved reports will be listed and displayed within the All Scheduled Reports section, while the saved report templates will be listed in the All Report Templates section when creating and scheduling reports.
Manage Reports
Follow the instructions below to manage a report.
- Log in to your Appspace console.
- Click the ☰ Appspace menu, and select Analytics from the menu.
- Click the Reports tab, and click the ellipsis of the desired report and select one of the following actions:
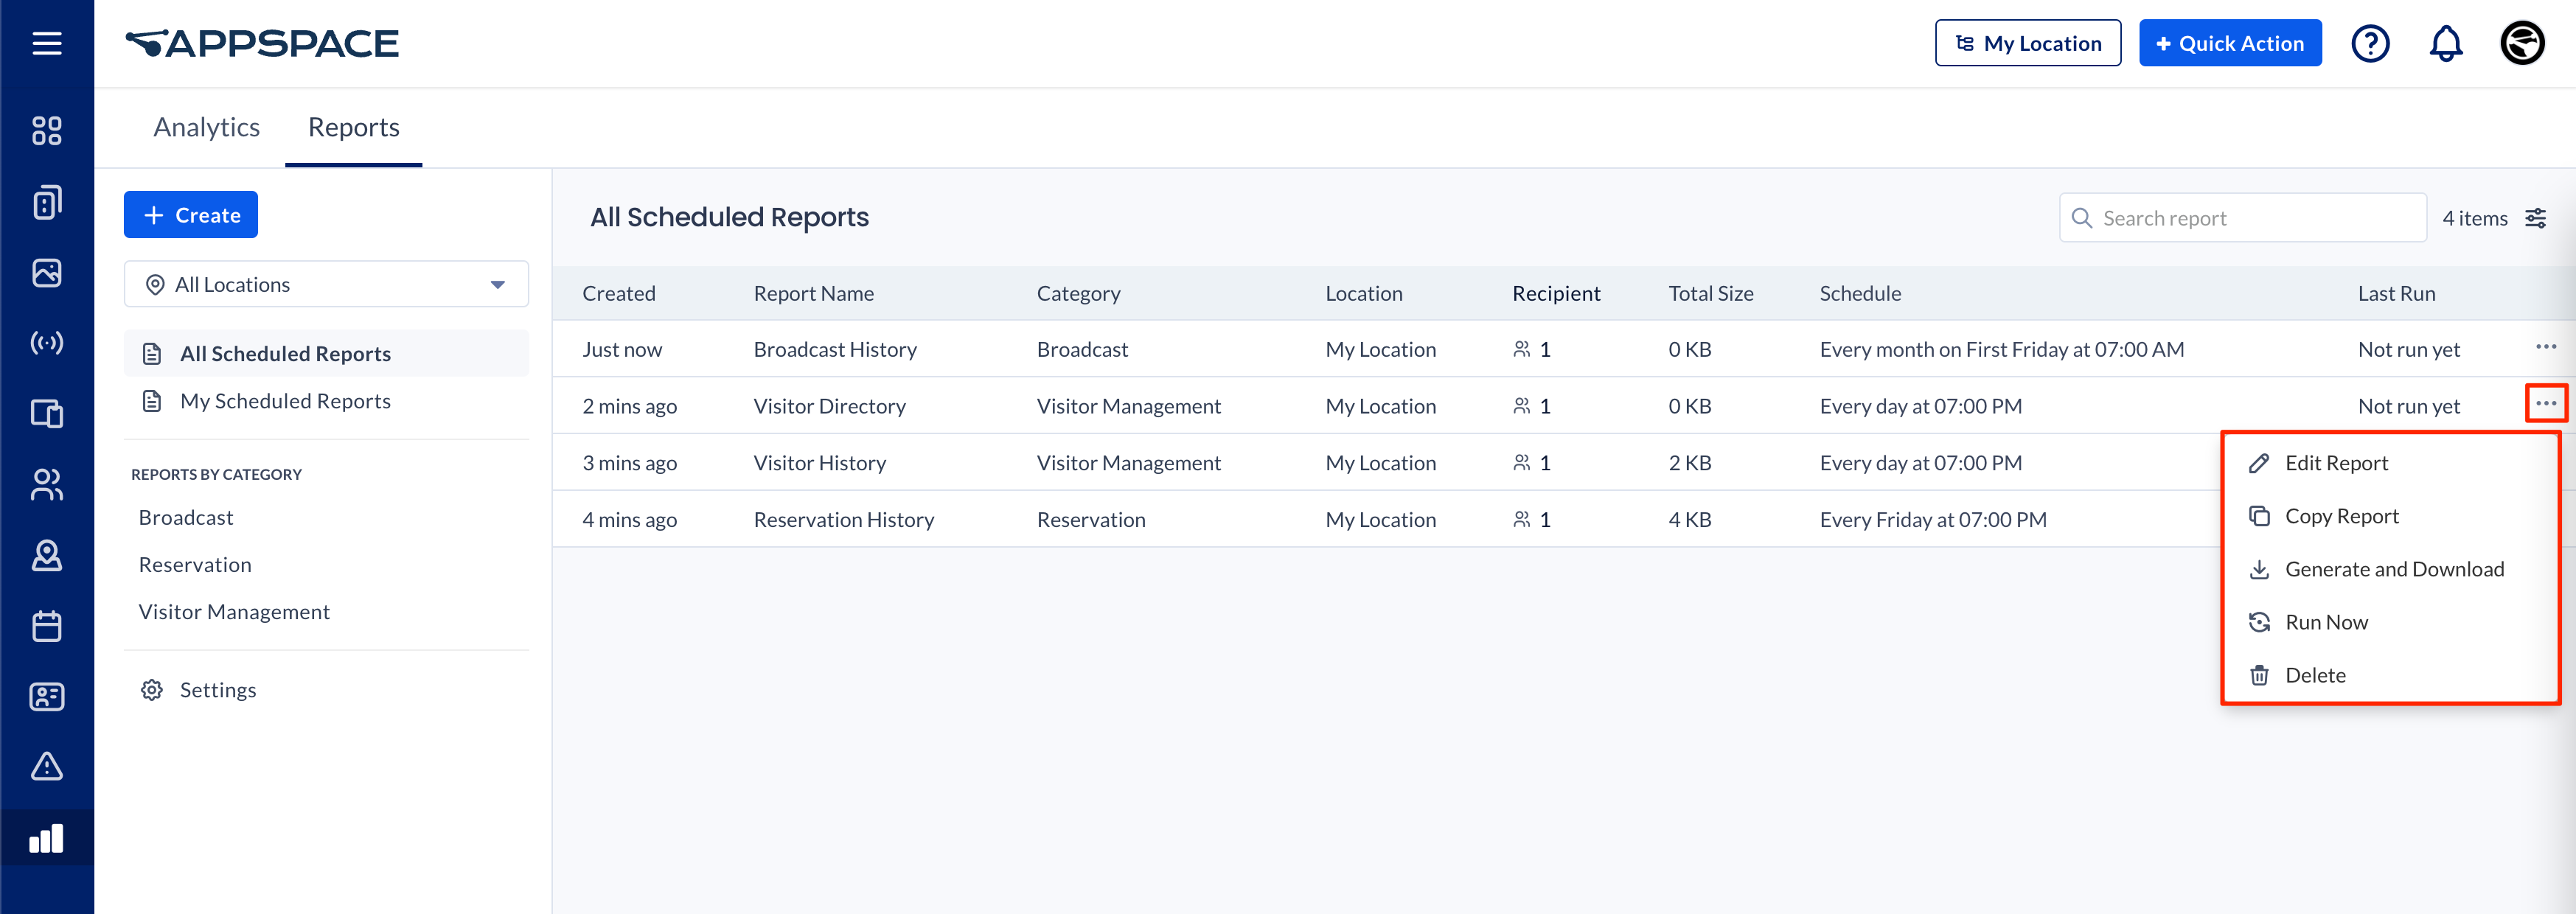
- Edit Report – Edit the report or view the History of the report and previous reports generated.
- Copy Report –
- Generate and Download –
- Run Now – Generate the latest version of the report.
- Delete –
Was this article helpful?