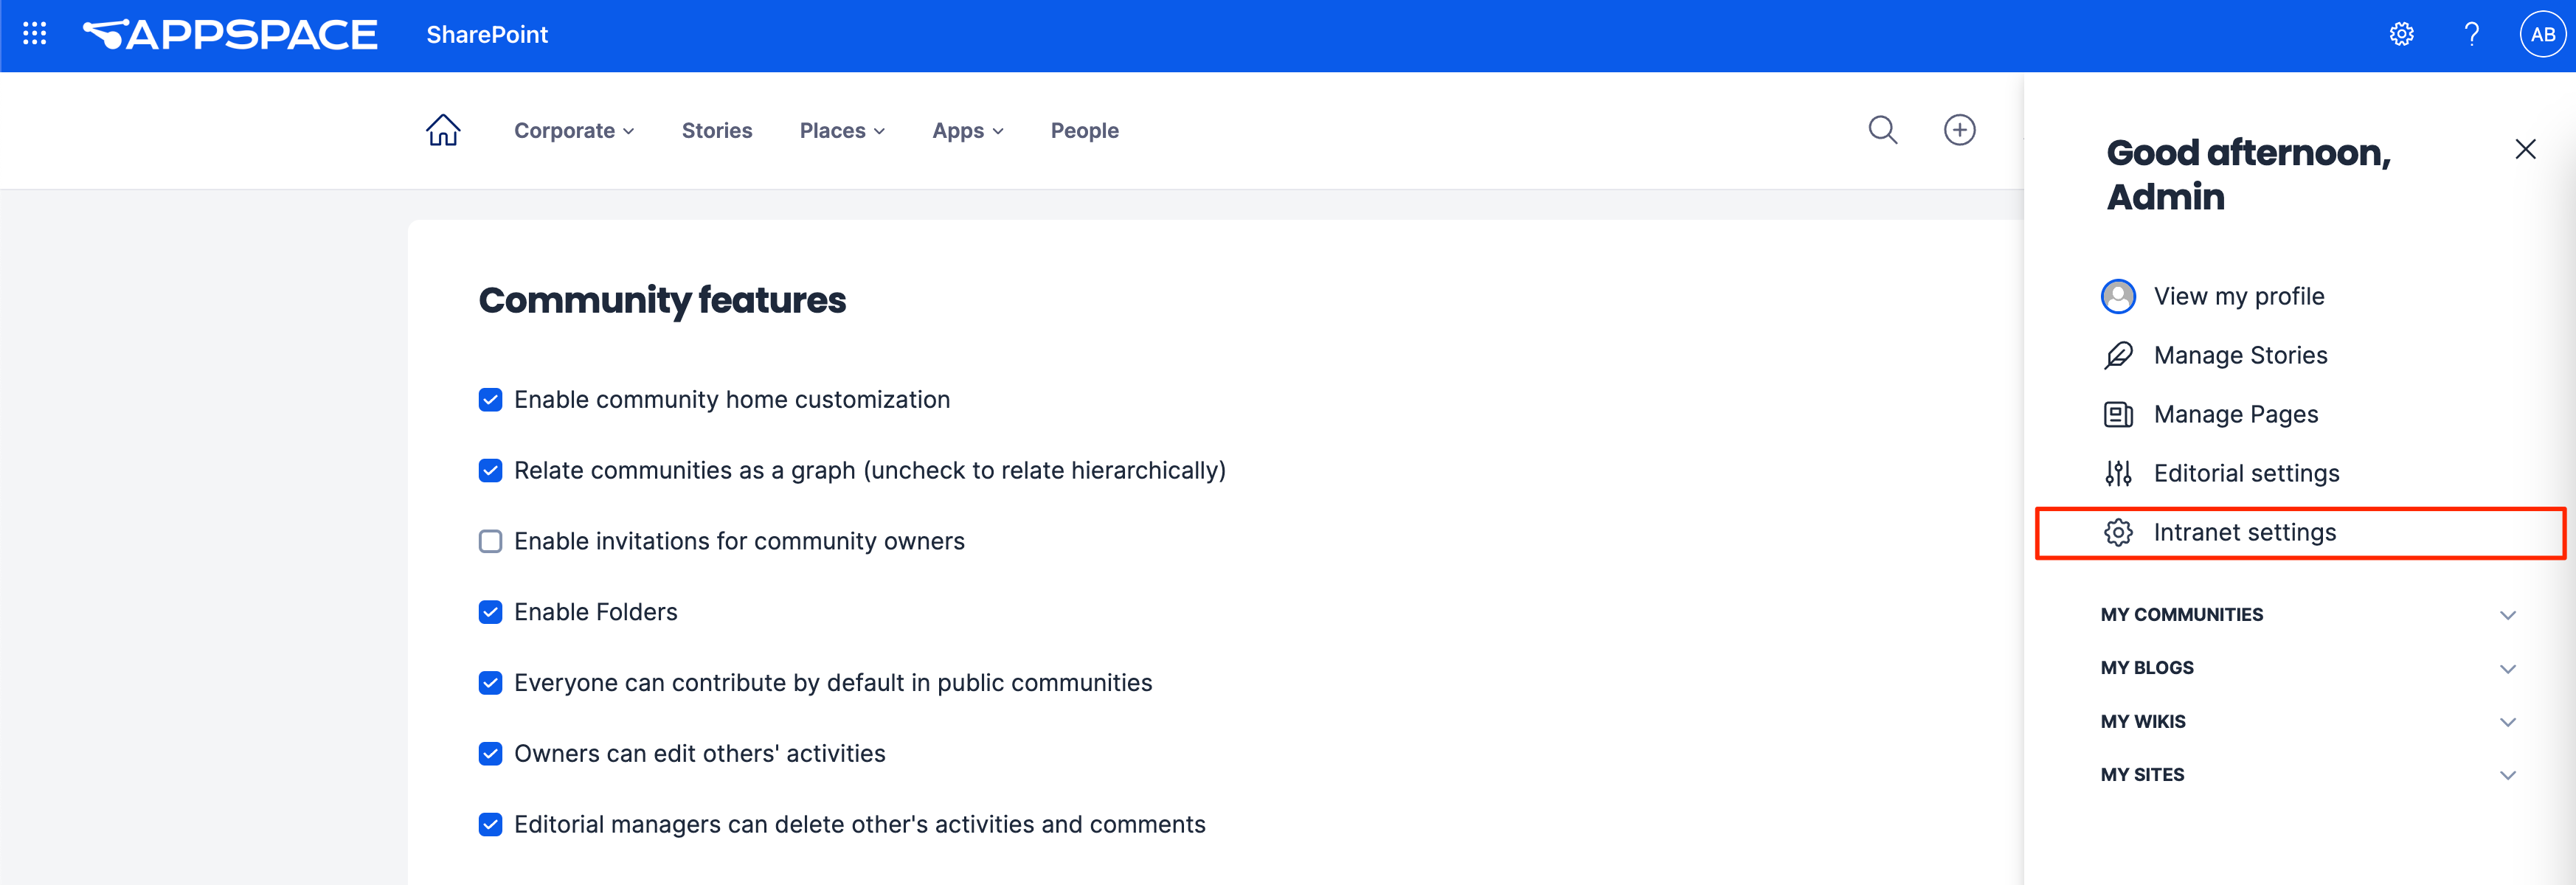
In order to access the Community Features settings, navigate to the User Menu > Intranet Settings > Community Features.
This article provides Administrators with instructions to configure the Community Features on the Appspace SharePoint Intranet.
Configure Community Features
- Log in to your Appspace SharePoint Intranet account.
- Click the User Menu > Intranet Settings > Community features.
- Enable the following Community features by checking the relevant checkboxes:
- Enable community home customization
- Relate communities as a graph – (uncheck to relate hierarchically)
- Enable invitations for community owners
- Enable folders
- Everyone can contribute by default in public communities
- Owners can edit others’ activities
- Editorial managers can delete other’s activities and comments
- Once done, click Save.
Configure Community Privacy Types
- Log in to your Appspace SharePoint Intranet account.
- Click the User Menu > Intranet Settings > Community features.
- Enable the following Privacy Types by checking the relevant checkboxes:
- Enable Public Communities
- Enable Moderated Communities
- Enable Restricted Discoverable Communities
- Enable Restricted Hidden Communities
- Once done, click Save.
Configure Community Tools Configuration
- Log in to your Appspace SharePoint Intranet account.
- Click the User Menu > Intranet Settings > Community features.
- Enable the following Tools Configuration by checking the relevant checkboxes:
- Polls
- Files
- Wiki
- Blog
- Ideas
- Questions
- Tasks
- Links
- Calendar
- Praises
- Once done, click Save.
Configure Community Media Gallery
- Log in to your Appspace SharePoint Intranet account.
- Click the User Menu > Intranet Settings > Community features.
- Enter the supported file types (separate each file type with “;”) for the community in the relevant fields:
- Audio file extensions
- Video file extensions
- Image file extensions
- Once done, click Save.
Was this article helpful?