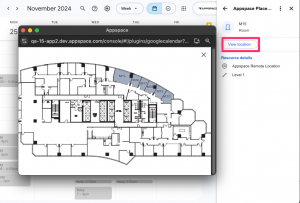
Appspace has introduced the Appspace Places add-on, which integrates Appspace Space Reservations with Google Calendar. This feature enables employees in Google Calendar to view resources and workspaces configured in the Appspace reservation system from their web browser. Additionally, Appspace Places allows meeting organizers and attendees to view existing reservations and check in to their meetings, while meeting organizers can choose to end ongoing meetings.
This add-on integrates Appspace Space Reservations with Google Calendar to provide the following features:
- Appspace Places is available in the Google Marketplace and is easily installed as an add-on for Google Calendar.
- After installation, an Appspace Places icon appears on the side panel of Google Calendar. Clicking the icon displays Appspace Places within the side panel.
- View information about buildings, such as map layout, and number of resources and floors.
- View information about resources and workspaces, such as map layout, building or location, and level.
- Filter/search resources based on the following criteria:
- Building
- Floor
- Zone (if a floor has zones)
- Workspace type (Room or Space)
- Capacity
- Amenities
- View current reservations where you are a host or attendee, with details like time, date, and workspace information, and perform check-ins for these reservations (if available).
This article provides instructions on how to install and use the Appspace Places add-on for Google Calendar.
Prerequisites
- An Appspace user account with Premium user licenses.
- Appspace Space Reservations system configured with Google Calendar as the calendar provider.
- Resources and workspaces configured in the Appspace Space Reservations system.
- The Appspace Places add-on available from Google Marketplace.
- A Google Calendar email account.
Configure Google Calendar Passport – Space Reservations Administrator
The Appspace Space Reservations administrator must select a default calendar authentication passport that will be used to integrate the Appspace Places add-in with the calendar provider used for reservations. This passport will be used by default to search any resources/rooms by email once the add-in is installed.
Follow the instructions below to configure the Google Calendar passport for integration with the Appspace Places add-in:
- Log in to the Appspace console.
- Click the ☰ Appspace menu, and click Integrations.
- Click the Passports tab, and click the +ADD button.
- Select Google Calendar and click Next.
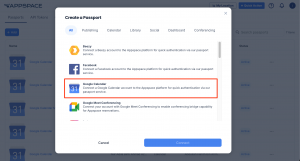
- Select the preferred permissions as described below.
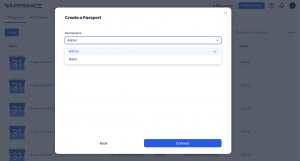
- Admin – Admin permission gives Appspace access to Google calendar resources based on the permissions of the service account you use to authorize the passport. This will require the service account to be added as a full delegate to each calendar resource needed to sync the information from and to Appspace and G Suite.
- Basic – Basic permission uses the user permission model and is very similar to the Admin Permission option, however, this option only includes access to users’ calendars based on delegated access to each user’s calendar.
- Click Connect.
- You may be required to sign in with your Google credentials if you are currently signed out. Select Continue and select Allow to access the calendar provider account.
- Follow any on-screen instructions to continue to configure the calendar provider passport.
- Once authenticated, in the Account Settings tab, you may perform the following actions:
- Change the name of the passport, by entering a different name in the Name field.
- View the Account ID of the passport.
- View the App Permissions granted to the passport.
- View and refresh the Status of the passport.
- Remove the passport, by clicking the Remove Account button.
- In the Permissions tab, you may grant the following users or user groups permissions to view or edit this passport configuration at any time:
- Enter and select the user(s) or user group(s) from the drop-down list, or click the Find users or user groups link, and select the desired user(s) or user group(s). Proceed to grant either Can Manage or Can View permissions by clicking the Select permissions drop-down menu.
- You may also view or remove the user(s) or user group(s) that have already been granted permissions, by clicking the delete icon.
- Once done, please configure the Reservations System by authenticating the calendar provider passport.
- Ensure that the created Google calendar passport is selected in the Book on Behalf / Plugin Passport setting option under Settings > Integrations tab within the Reservations module.
Install Appspace Places Add-On for Google Calendar – Employees
Follow the instructions below to install and configure the Appspace Places add-on to Google Calendar on your browser:
- Install the Appspace Places add-on for Google Calendar, by referring to the Find and Install Calendar add-ons article.
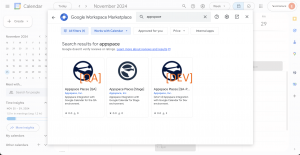
- Once installed and enabled, click the Appspace Places icon on the side panel to display it.
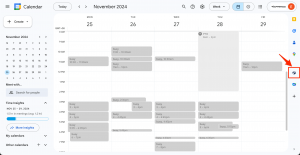
- Click the Sign In button.
- Proceed to select your Appspace deployment type and enter your Appspace credentials, as follows:
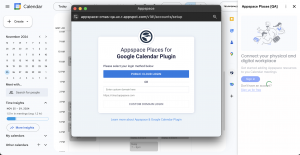
- Click PUBLIC CLOUD LOGIN, if your organization’s Appspace deployment is on the public cloud and accessed via https://cloud.appspace.com.
- If your organization’s Appspace deployment is on the private cloud or accessed via a custom domain, enter the Appspace URL, and click CUSTOM DOMAIN LOGIN.
- Proceed to enter your Appspace credentials and click LOG IN.
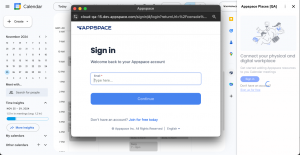
- The Appspace Places Outlook add-in will begin establishing a connection and configuring the add-in with your organization’s Appspace deployment.
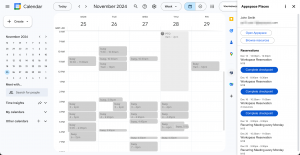
- Once done and login is successful, close the Appspace Setup is Complete window. The Appspace Places side panel be displayed on the Google Calendar.
View Workspace in Appspace Places Add-On in Google Calendar
Follow the instructions below to select a workspace and view its information via the Appspace Places add-on in Google Calendar:
-
-
- Log in to Google Calendar using Google credentials.
- In Google Calendar, click the Appspace Places icon on the side panel to display Appspace Places.
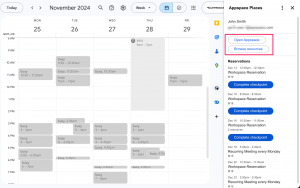
- You can click Open Appspace to open the Admin Console in another browser window or tab.
- Click Browse Resources. You may perform the following options:
- Click the Search resources field and enter a building or resource to search.
- Select a building under the Building section, then click View all resources. The workspace resources available in the building are listed.
- Select a workspace listed under Recently Reserved Rooms.
- Select a workspace resource to view the following details:
-
View Reservations in Appspace Places Add-On in Google Calendar
Follow the instructions below to select a reservation where you are a host or attendee, view its information, and perform check-ins (if available) via the Appspace Places add-on in Google Calendar:
-
-
- Log in to Google Calendar using Google credentials.
- In Google Calendar, click the Appspace Places icon in the side panel to display Appspace Places.
- The Reservations section displays the current reservations where you are a host or attendee, with the following information:
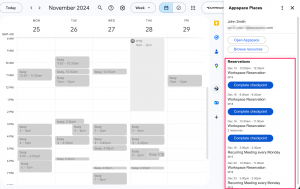
- Date and Start and End time.
- Resource (s) used for the reservation.
- The Complete checkpoint button appears under the meeting if the reservation currently allows check-in. Click it to perform the meeting check-in as the meeting host or attendee.
- Click on a reservation to perform the following actions:
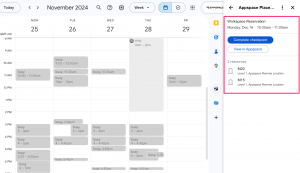
- View the reservation Title, Date, Start time and End time.
- The Complete checkpoint button appears under the meeting if the reservation currently allows check-in. Click it to perform the meeting check-in as the meeting host or attendee.
- The End button appears under the meeting once the event has started. Click it to end the meeting before the scheduled time.
- Click View in Appspace to view more information on the reservation in the Appspace Employee App.
- View the Resource (s) used for the reservation.
-
Was this article helpful?
