This article provides Administrators with instructions to configure ChromeOS kiosk devices managed by Chrome Enterprise (previously known as ChromeOS Device Management (CDM)) with Appspace.
Prerequisites
- An Account Owner or Location Admin user role, with the Platform User license assigned.
- Sufficient Device licenses when registering the device, and Content licenses if displaying premium content.
- Ensure the device meets the manufacturer’s minimum hardware and technical specifications, as per our Supported Devices and Operating Systems article.
- Ensure your network is configured to allow Appspace Approved URLs and the relevant network ports.
- Ensure the device clock is set to automatically retrieve time from a Network Time Protocol (NTP) server, with the correct time zone in order for it to sync correctly with the Appspace server. Note
- Appspace Cloud servers are configured to retrieve time from an NTP server by default. If an On-prem server is used, ensure the server is configured to retrieve time from an NTP server automatically.
- Appspace timezone configuration includes time zones other than GMT. This enables users with daylight savings to adjust time accordingly.
Device Specific Requirements
- An Admin account on the Chrome Enterprise platform.
- An existing Organizational Unit by following the instructions in the Add An Organizational Unit Google help article.
- Supporting Google Documents:
- Long-term Support (LTS) on ChromeOS: https://support.google.com/chrome/a/answer/11333726
ChromeOS Version Recommendation
There are three (3) ChromeOS release channels available for enterprise customers to update their devices. The first being the Stable (S) release channel which is updated every 4 weeks, with minor updates consisting of security fixes and software updates every 2 weeks. Then we have the Long-Term support Candidate (LTC) and Long-Term Support (LTS) release channels that have a slower release cadence, but are generally much more stable and secure.
With that in mind, Appspace recommends organizations configure their ChromeOS devices to auto-update to the latest Chrome OS LTS release channel, as organization devices are usually left unattended, running for long periods non-stop, and without the risk of breaking anything due to frequent feature updates if organizations were to update to the Stable (S) release channel. With that in mind, Appspace engineers focus their efforts on ensuring the latest Chrome OS LTS release channel release is certified and supports all Appspace App functionality.
Benefits of ChromeOS LTS release channel:
- ChromeOS LTS release channel is the most stable and secure version of ChromeOS.
- Appspace certifies its App against pre-defined LTS versions of ChromeOS on a recurring basis, with certifications performed every six months, resulting in two new Appspace App for Devices on ChromeOS certified per year.
- Rollback is possible with ChromeOS LTS release channel.
- For more information, please review the supporting Google Education: Long-term Support Release article.
Configure Chrome Enterprise with Appspace
The following instructions are performed on your Chrome Enterprise cloud platform.
- Log in to the Chrome Enterprise cloud platform (admin.google.com)
- Click the Admin menu, and navigate to Devices > Chrome > Settings.
- Proceed to configure the ChromeOS kiosk device settings listed below:
- Configure the MANAGE GUEST SESSION SETTINGS section as outlined in the Managed Guest Session Devices Google help article, with the specific configurations set below:
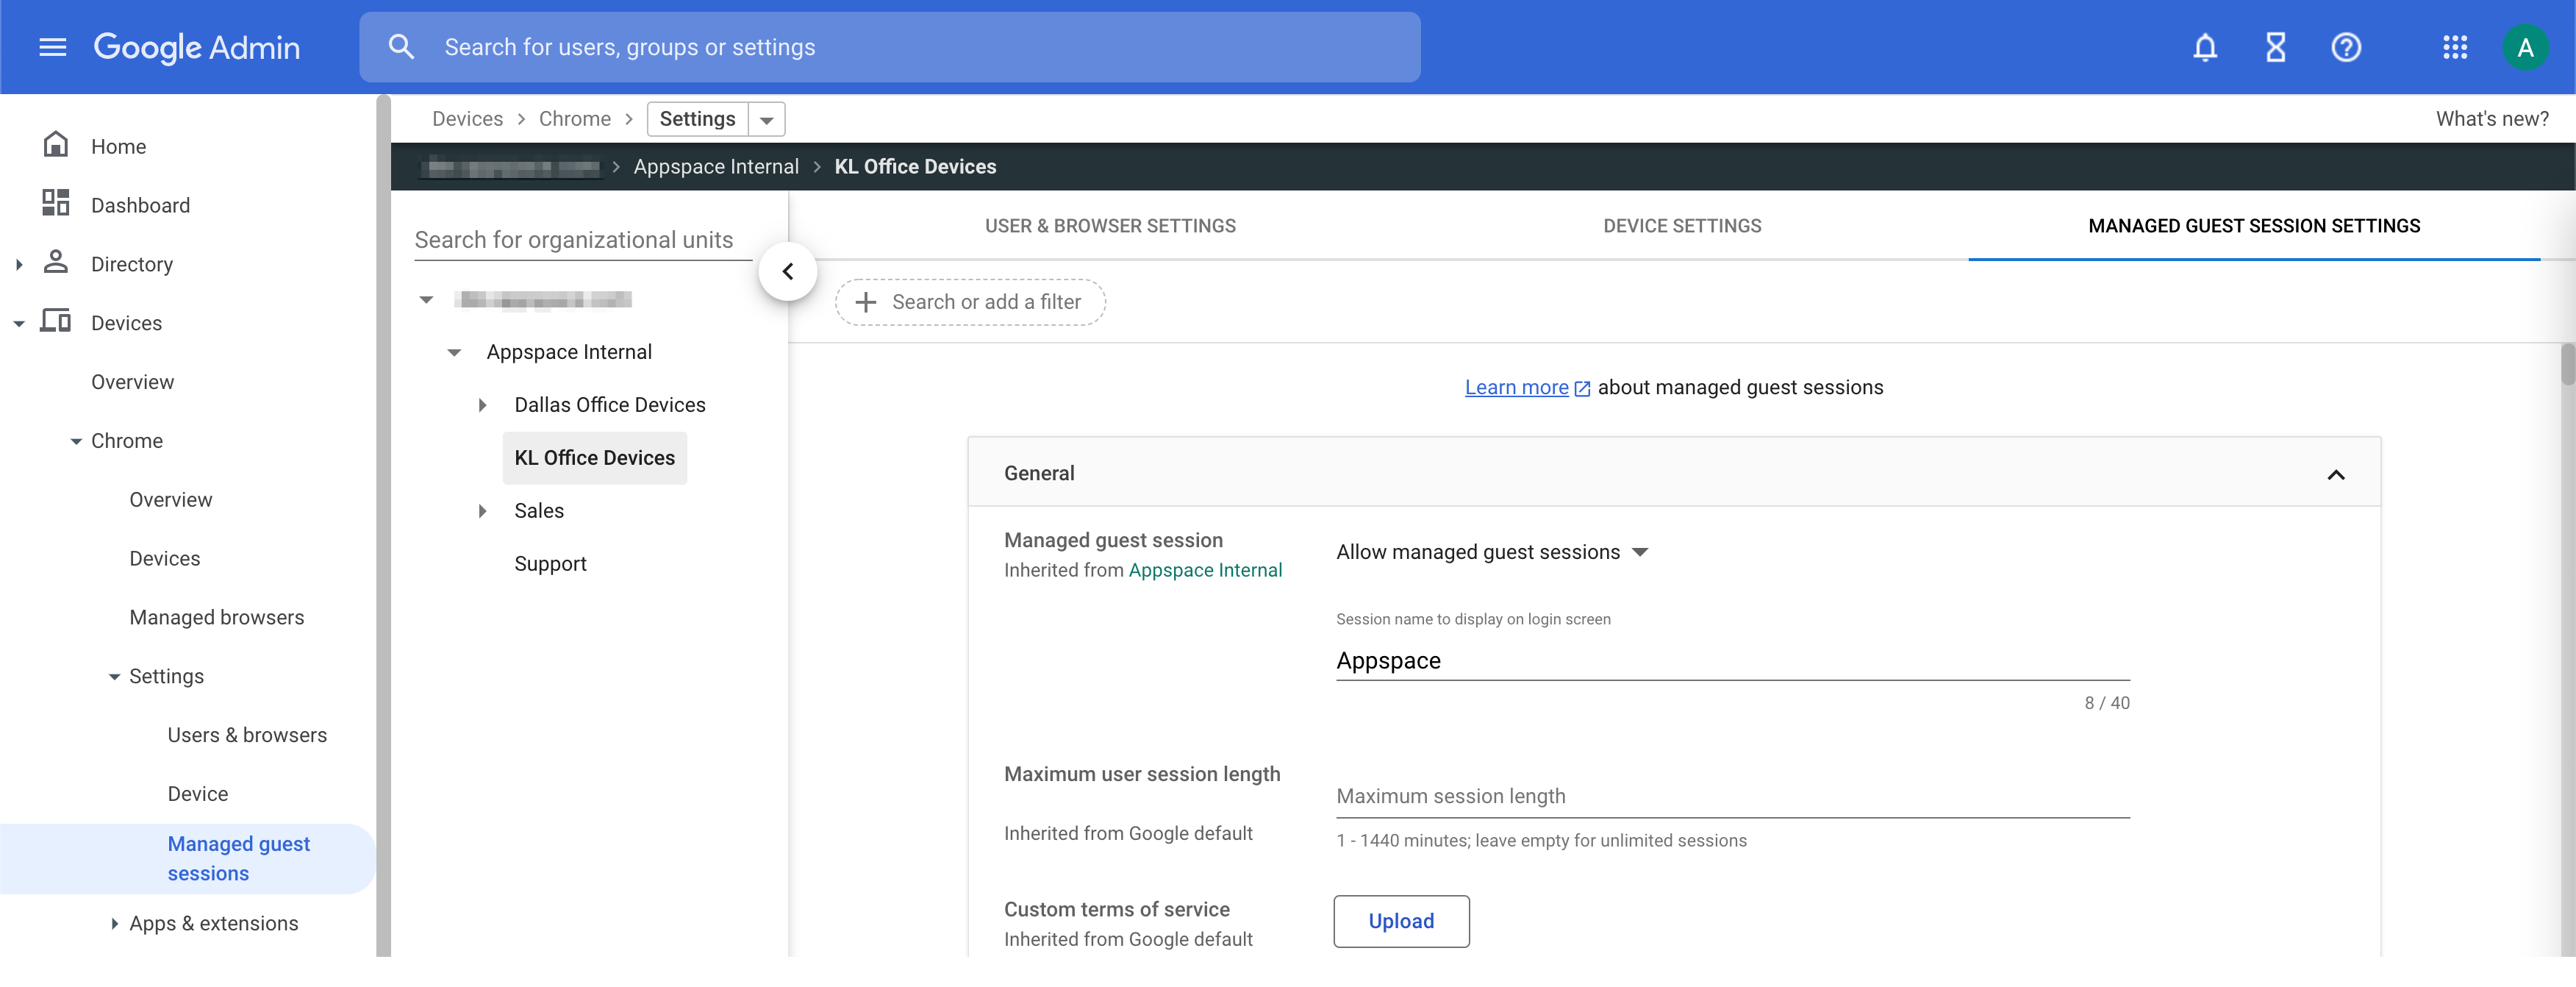
- General
- Managed guest session: Set to Allow managed guest sessions.
- Session display name: Enter the desired session name to be displayed on the login screen, ie. Appspace.
- Maximum user session length: Ensure this field is left blank.
- General
- Configure the DEVICE SETTINGS section as outlined in the Set ChromeOS Device Policies Google help article, with the specific configurations set below:
- Device update settings
- Auto-update settings: Set to Block updates, and select Long-Term Support for the release channel.
- Kiosk-controlled updates: Set to Allow Kiosk app to control OS version. NoteIn the Kiosk manifest file, the app must include “kiosk_enabled”: true and specify the required ChromeOS version, required_platform_version. It can take up to 24 hours for updates in the manifest file to take effect on devices. For information on configuring settings in the app’s manifest file, see Let a kiosk app control the Chrome version Google help article.
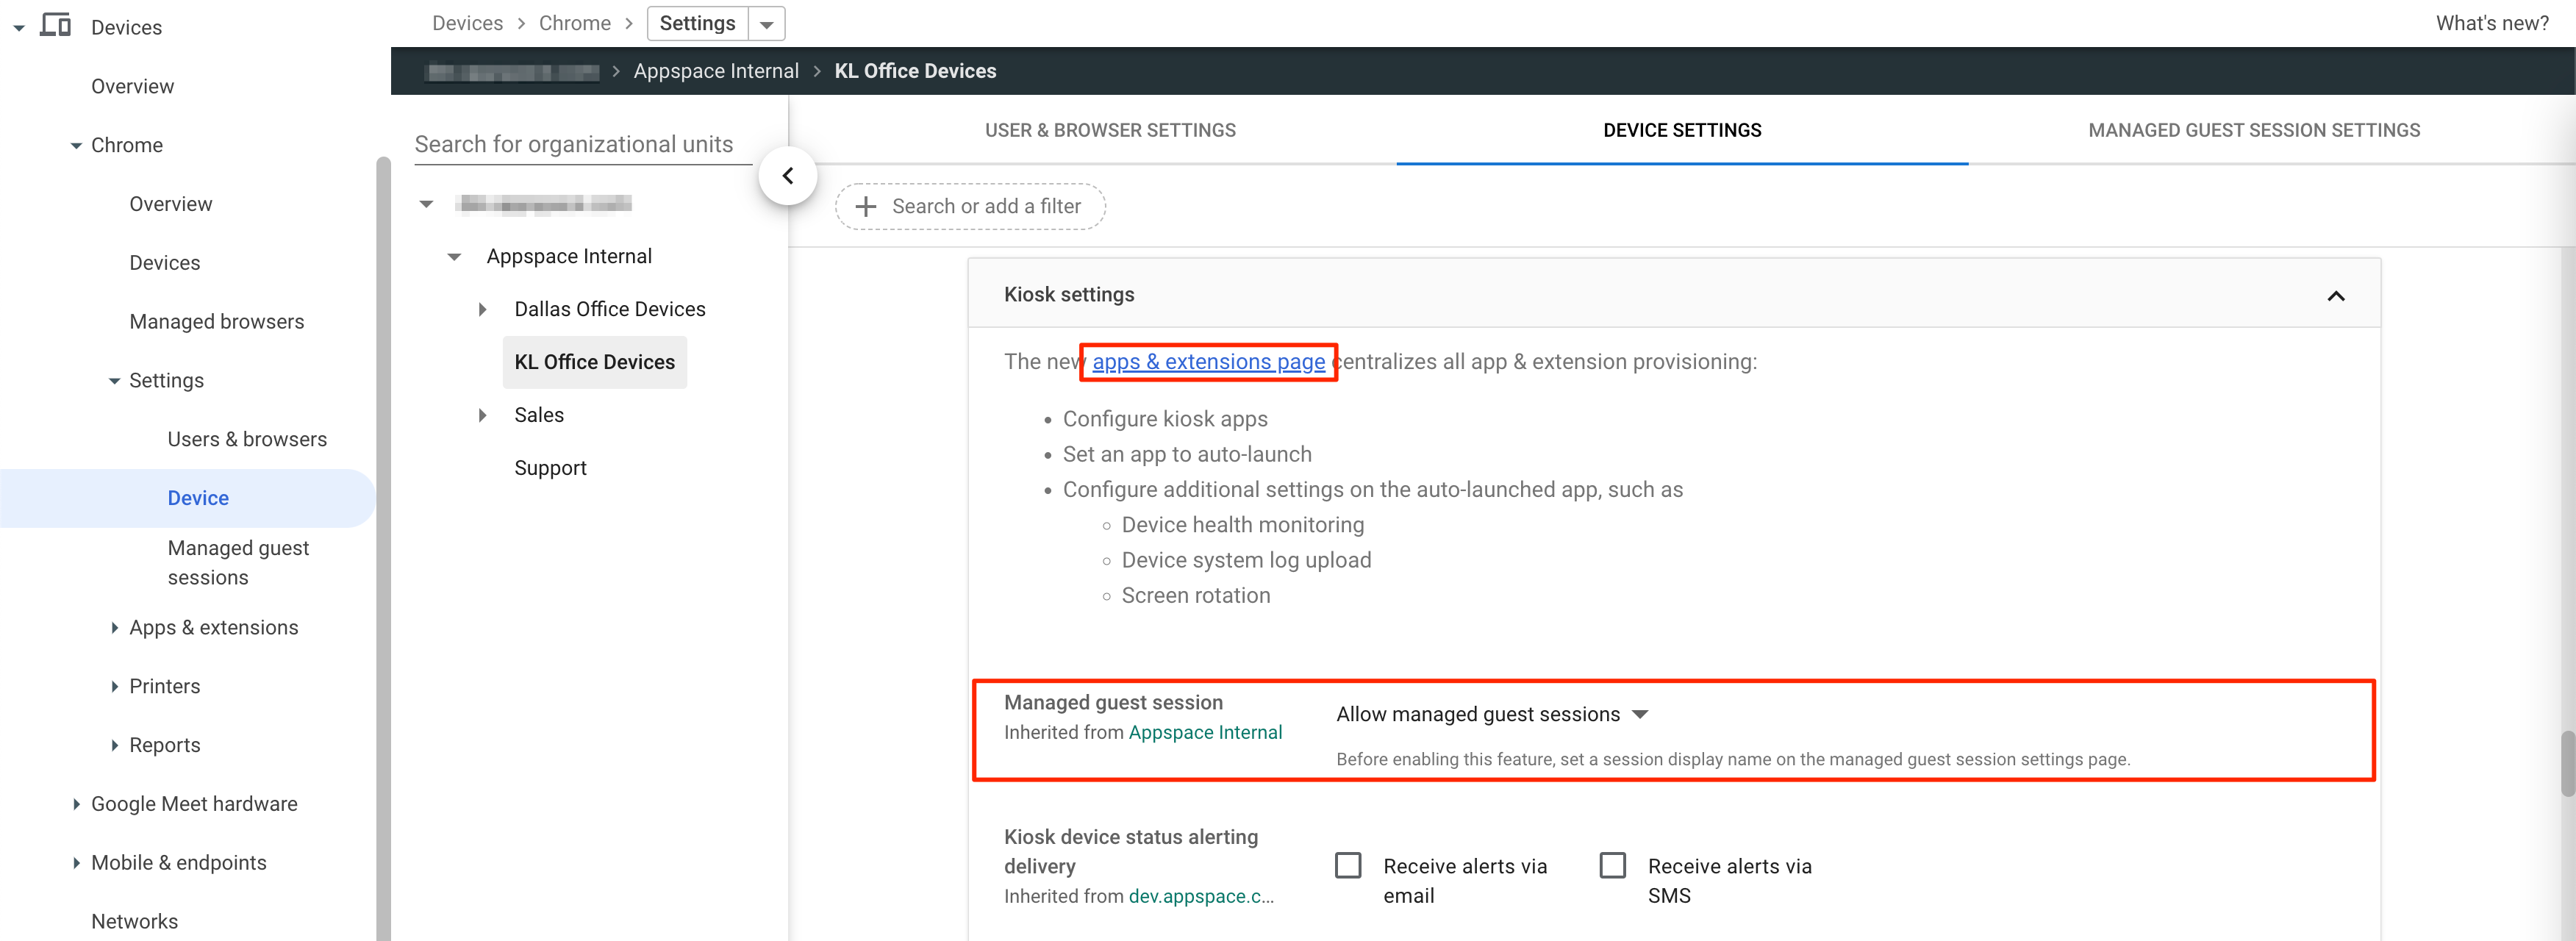
- Kiosk Settings
- Click the apps & extensions page link, and perform the following Kiosk configurations:
- Auto-launch app: Set to Appspace.
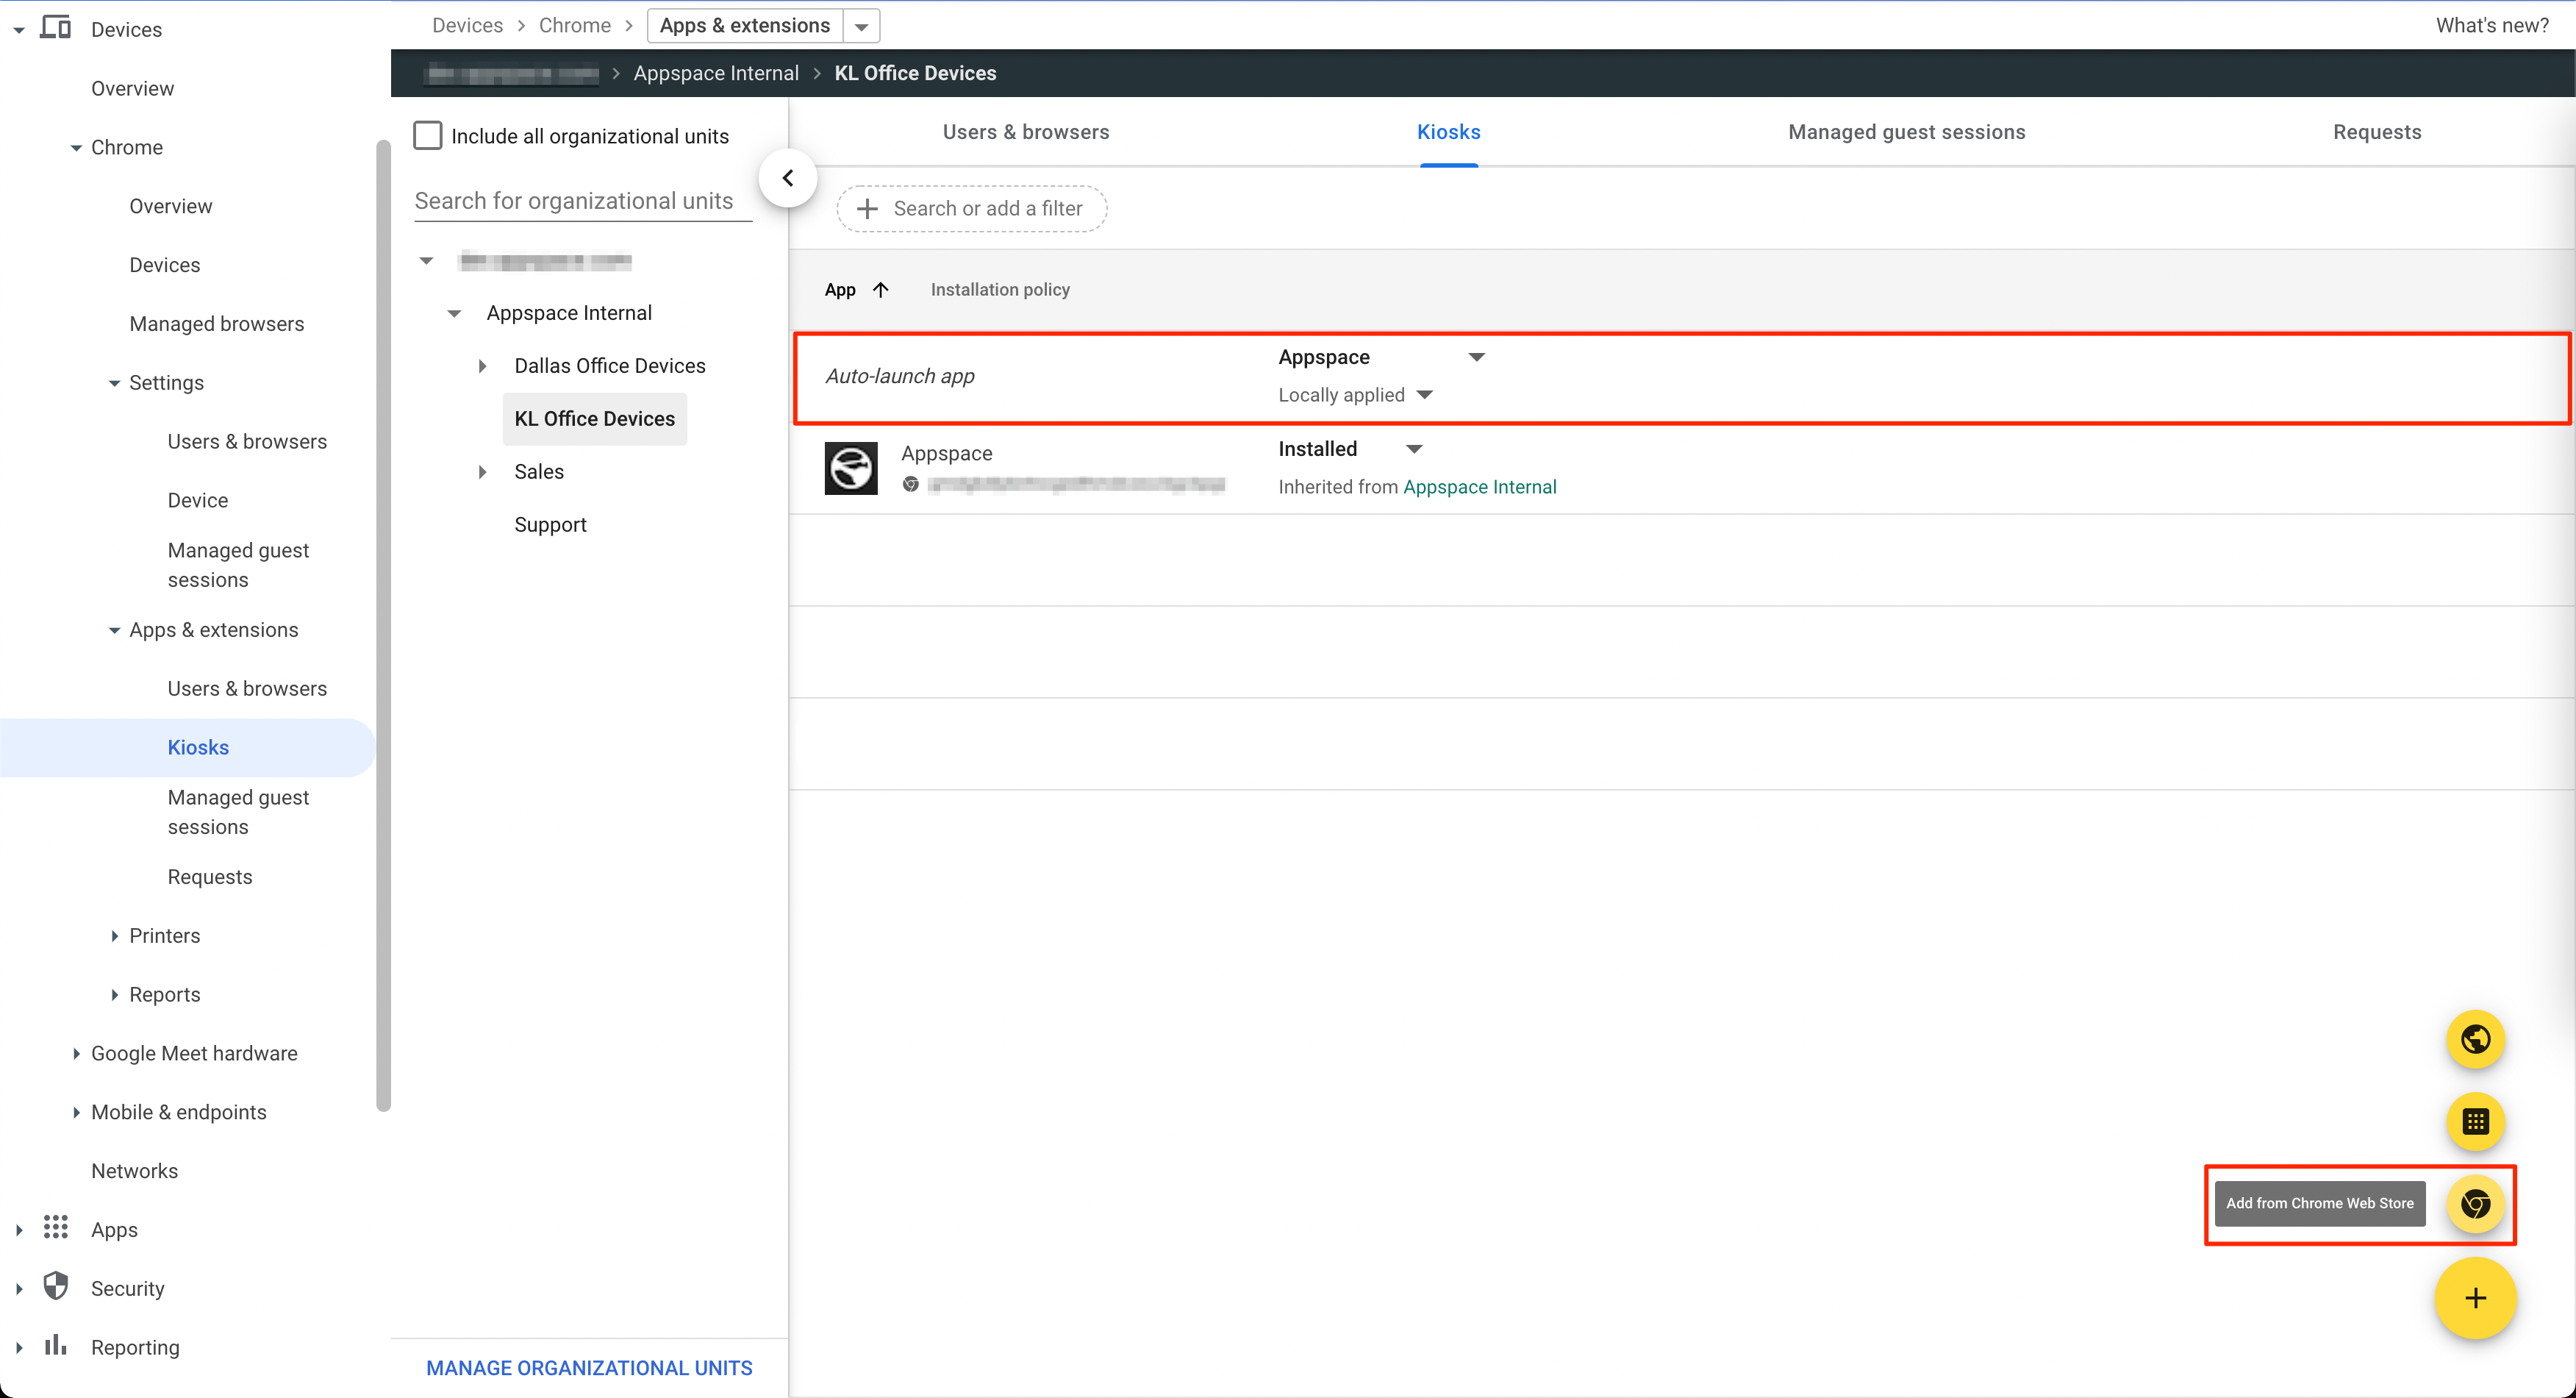
- Click the Add from Chrome Web Store icon, and search for “Appspace”.
- Select and add the Appspace app, and in the Auto-launch app dropdown menu, select Appspace.
- Auto-Launch Kiosk App Settings (side panel)
- Enable Health Monitoring: Toggle switch to Enable.
- Enable System Log Upload: Toggle switch to Enable.
- Auto-launch app: Set to Appspace.
- Managed Guest session: Set to Allow managed guest sessions.
- Power and shutdown
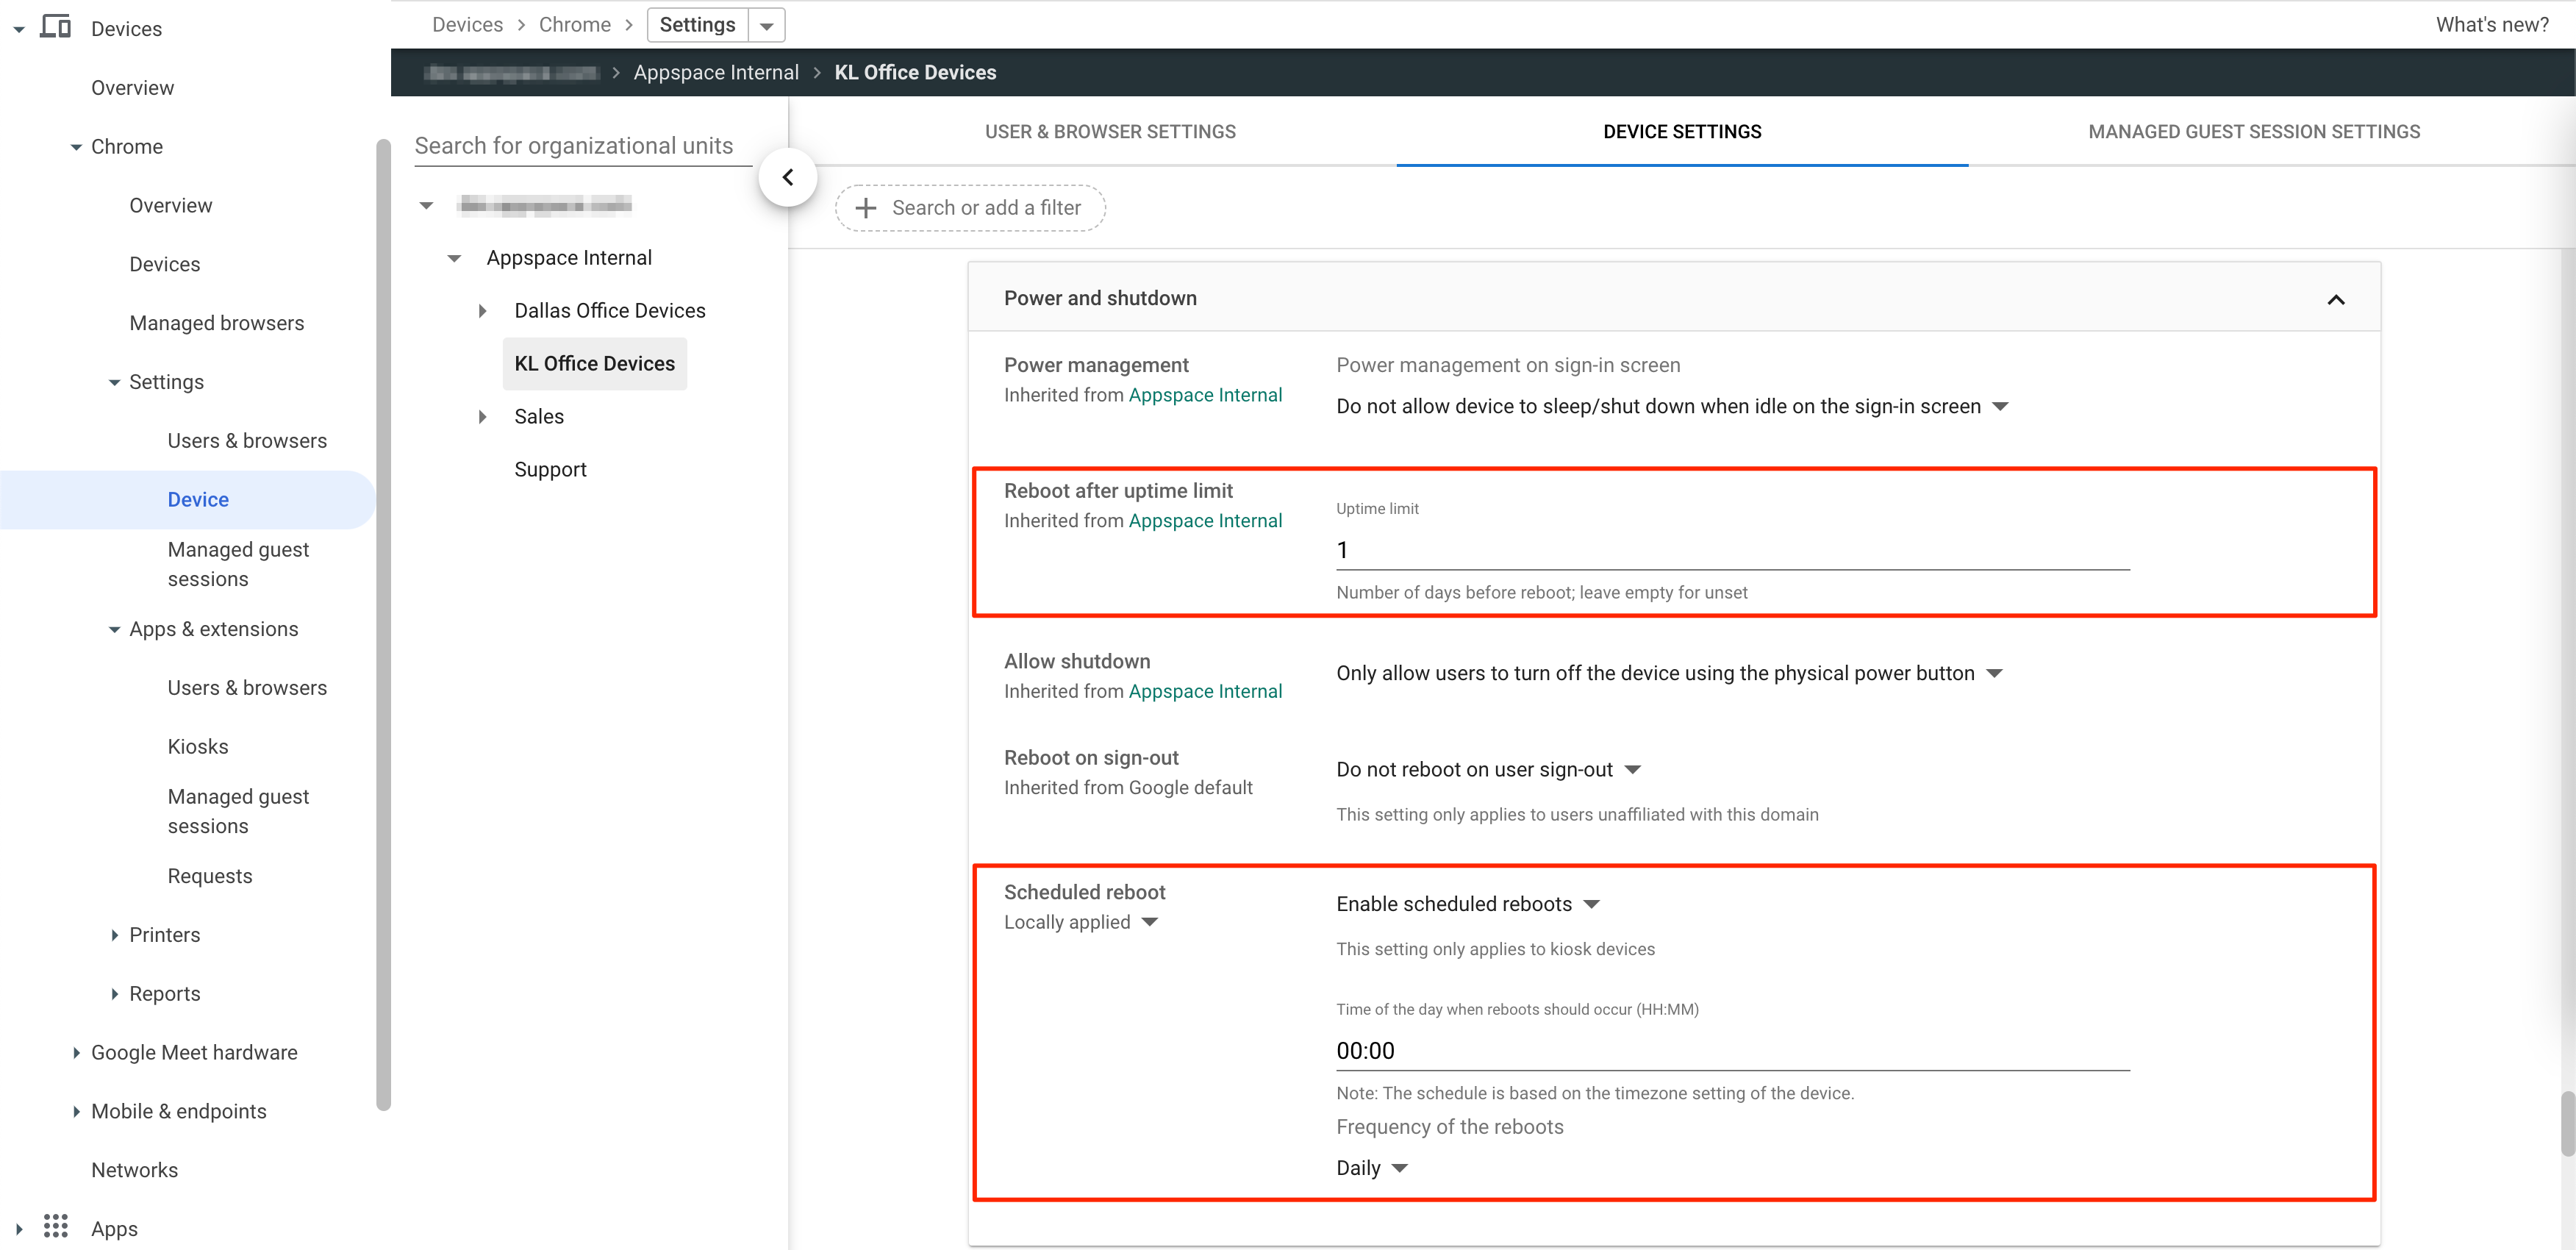
- Reboot after uptime limit: Set to 1 (one).
- Scheduled Reboot: Set to Enable schedule reboots, and proceed to select the Time (HH:MM) and select Daily for Frequency of the reboots.
- Click the apps & extensions page link, and perform the following Kiosk configurations:
- Device update settings
- Configure the USER & BROWSER SETTINGS section as outlined in the Set Chrome Policies for Users or Browsers Google help article, with the specific configurations set below:

- Content
- Screenshot: Set to Allow users to take screenshots and video recordings.
- Hardware
- Audio output: Set to Enable Audio Output.
- Content
- Configure the MANAGE GUEST SESSION SETTINGS section as outlined in the Managed Guest Session Devices Google help article, with the specific configurations set below:
- Once done, click SAVE.
- Proceed to enroll the ChromeOS kiosk device by following the instructions outlined in the Enroll ChromeOS Devices Google help article.
- The ChromeOS kiosk device begins downloading the policy settings and applications that have been configured in Chrome Enterprise above, as part of the enrollment process.
- Once complete, click Restart to reboot the device and launch the Appspace App, which has been automatically registered.
Chrome Enterprise Features
The table below provides a description of the features of Chrome Enterprise (Chrome device management).
| Feature | Description | Management Console |
|---|---|---|
| Firmware / OS Upgrade | Perform and determine when Firmware/OS updates are done. | Yes |
| Reboot | Reboot device on-demand and on schedule. | Yes, on-demand reboot request can be sent to specific devices running Kiosk Apps, or via OU policies. |
| App Restart | Restart application on schedule. | No |
| Run Application with Parameters | Start application, with set of parameters. For auto registration to Appspace. | Yes, via config file. |
| App Status | Displays status of application. | Yes |
| Device Status | Displays status of device, whether online or playing an application. If device is offline, it displays last known online time. | Yes |
| Crash Report | Detect application crash, and relaunch via email. | Yes, crashed app will restart. Application freeze will remain frozen. |
| App Control | Push different applications to different devices based on predetermined groups. | Yes, based on OU. |
| App Updates | Push application updates to one or more devices from a central location. | Not on-demand, updates go through at next reboot. |
| Automatic Login | Automatically log into the device and launch an application, or launch an application within login. | Yes, application required to be a Kiosk App, and will be launched before login. |
| File Management | Delete or download files from the devices. For log gathering. | No |
| System/Device Info | Get CPU, memory, and disk space information, both total and current use. Trigger warnings when CPU or memory usage is too high or when disk space is low. | Yes |
| Network Settings | Set up Ethernet and WiFi, with proxy information if available. | Yes |
| NTP | Set up NTP server and timezone on devices. Supports 5h timezones. | No, Google Time. Device requires specific list of websites in order to function correctly. |
| SSL Certificate Installation | Install SSL certificates generated by enterprise CALs. | Yes |
| Screen Control | Turn screens connected to a device ON and OFF. | No |
| Screen Capture | Take screenshots, so remote users are able to see what is being played on the device. | Yes |
| Screen Rotation | Rotate the screen to support portrait mode applications. | No, unable to be done via policy. |
Was this article helpful?