This article provides instructions to configure custom SAML attributes in Appspace that match the attributes from an external IdP or SCIM provider.
With the introduction of the Appspace Employee App together with the new user licensing model, Appspace has enhanced its Security Assertion Markup Language (SAML) 2.0 integration to enable organizations to utilize and map their own user attributes with Appspace.
This improvement not only provides for a better Single Sign-On (SSO) user experience, but also allows for improved user provisioning using JIT or SCIM, as administrators can now assign users to multiple user groups by creating rules based on the added custom user attributes. This results in greater flexibility when it comes to targeting content or performing system functions as these properties can be used for reporting needs, assigning membership to Appspace groups, or (eventually) assignment to a work location.
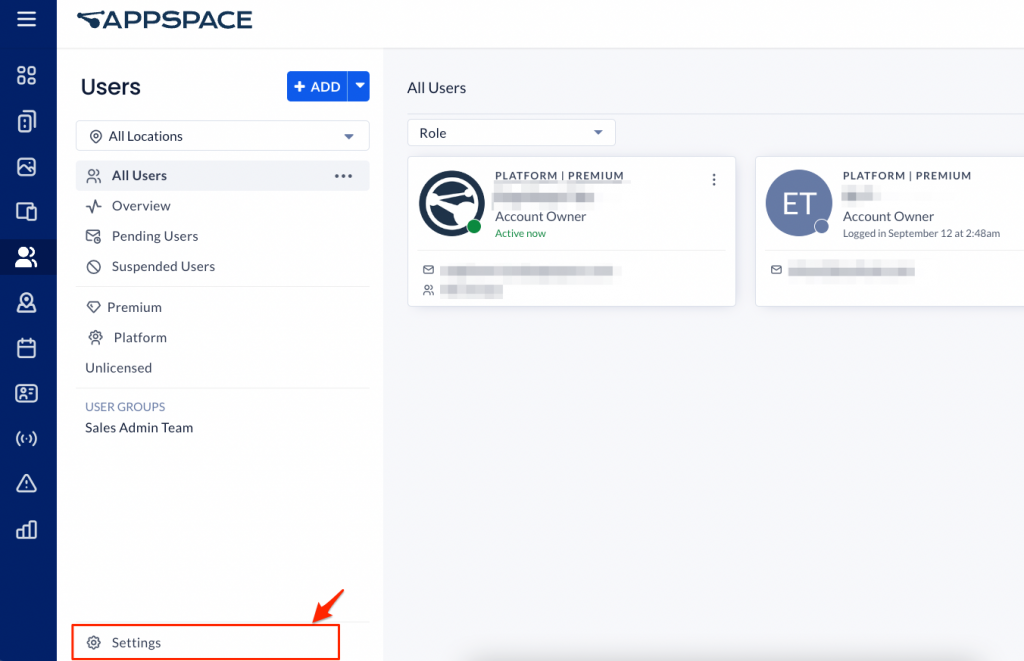
SAML Attributes can be accessed by clicking Users from the ☰ Appspace menu, then clicking the Settings icon at the bottom of the left menu.

The Settings page lists all the system attributes, as well as any new custom SAML attributes added.
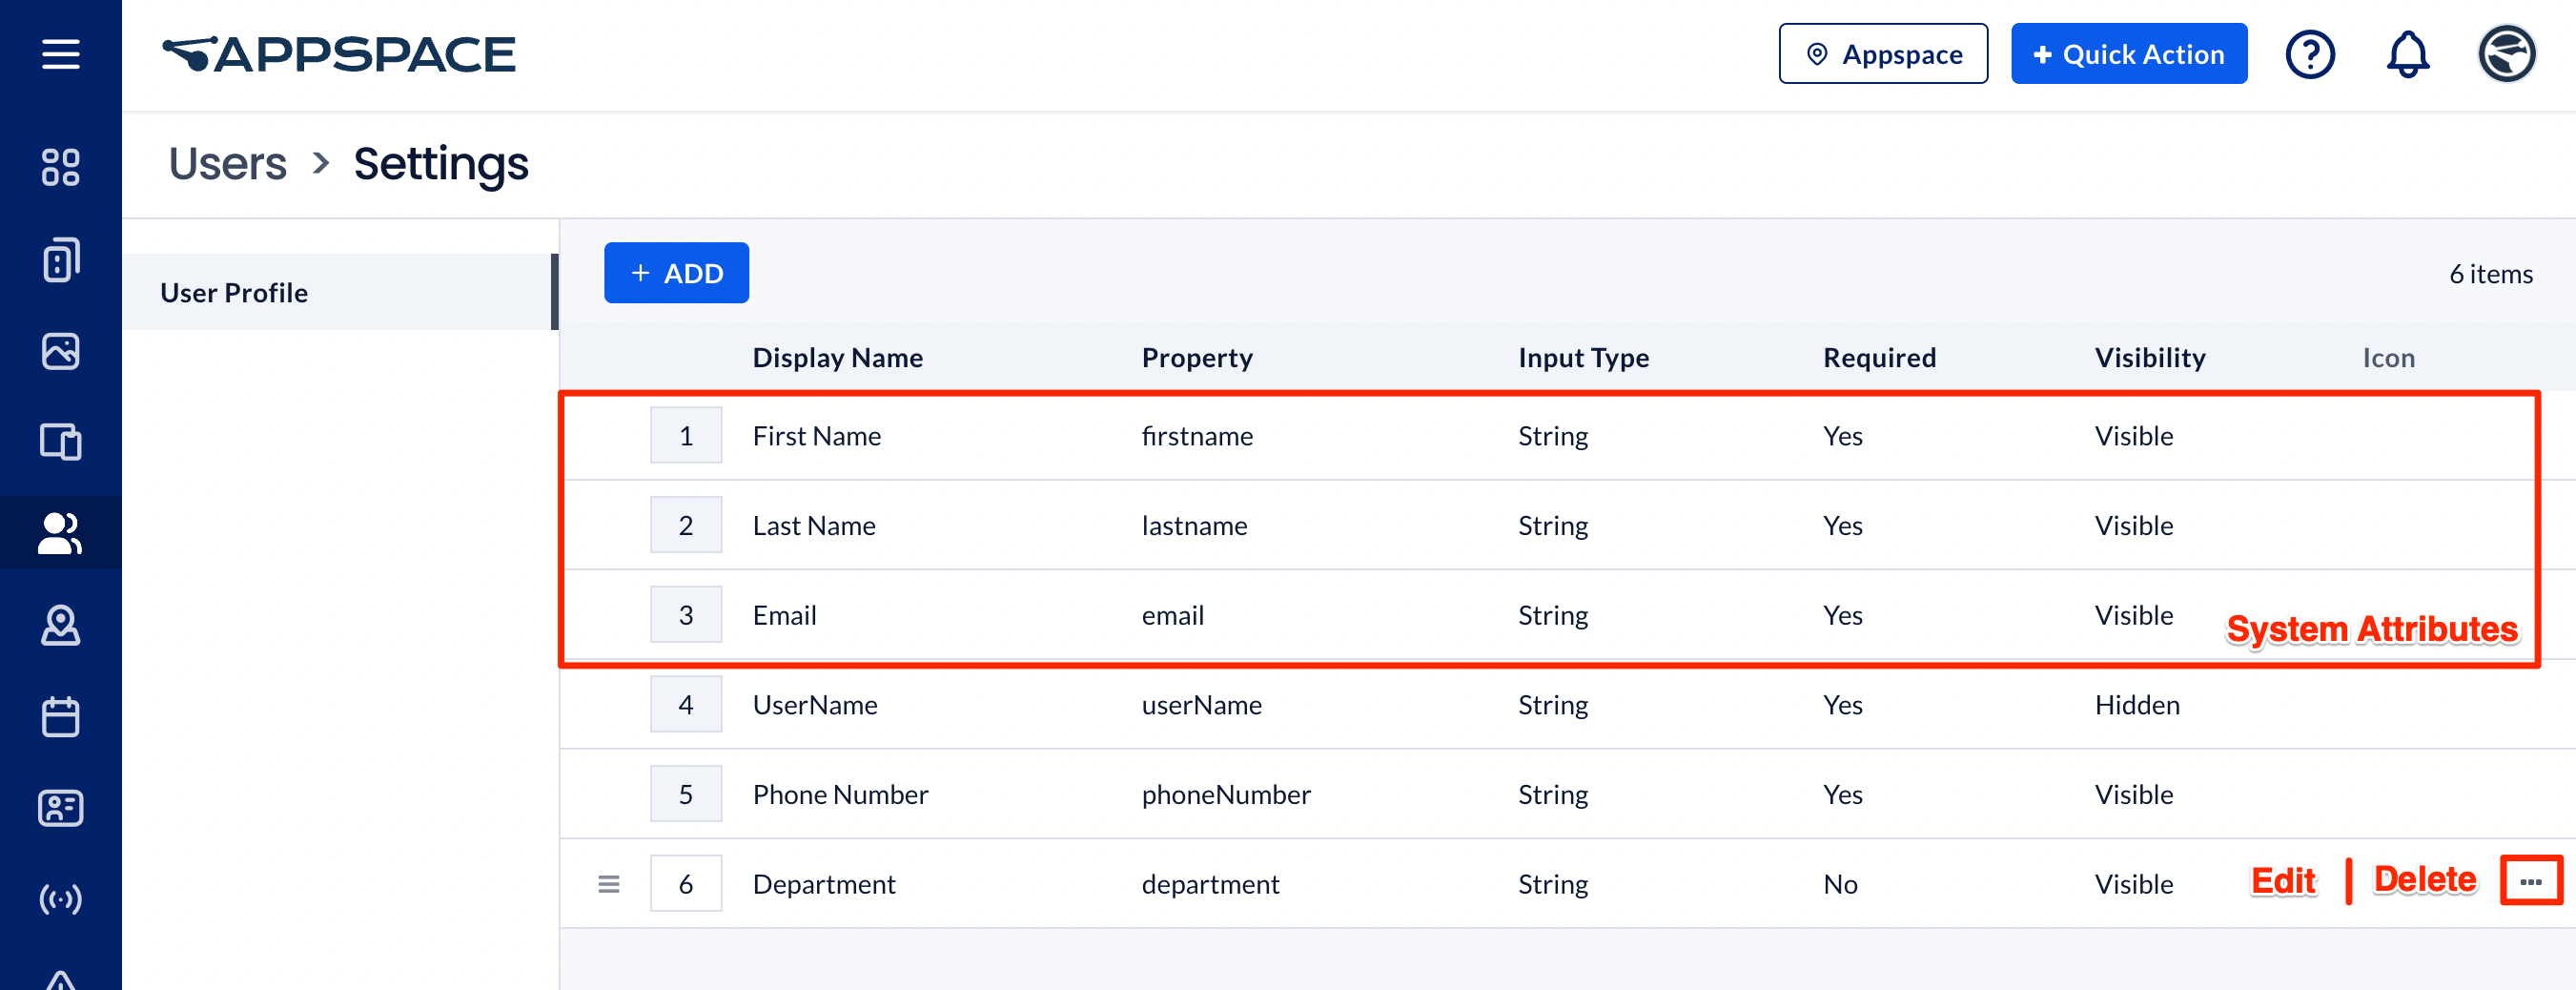
Appspace currently only stores the following external user data, which are reflected in the Appspace user profile for all users. These system attributes cannot be deleted or edited as they are tied directly to Appspace user provisioning.
| Display Name | Property | Input Type | Required | Visibility |
|---|---|---|---|---|
| First Name | firstname | String | Yes | Visible |
| Last Name | lastname | String | Yes | Visible |
| String | Yes | Visible | ||
| UserName | userName | String | Yes | Hidden |
| Phone Number | phoneNumber | String | No | Visible |
| Manager | manager | String | No | Visible |
| Department | department | String | No | Visible |
| Job Title | jobTitle | String | No | Visible |
Below is a summary of the required workflow to configure the SAML attributes and user mapping:
- Configure SSO and enable JIT provisioning, or SCIM user provisioning on your Appspace deployment.
- Determine the custom user attributes on the external IdP provider that will be mapped to your Appspace deployment.
- In your Appspace console, navigate to the Users page, and begin adding the custom user attributes. Ensure that all Property and Input Types for an attribute are added correctly and match (case sensitive) the ones listed in the IdP provider.
- Next, configure the SAML Mapping rules for each of the desired user groups in Appspace. Multiple custom rules may be set to further filter users assigned to the user group.
- New users will then be provisioned and assigned to their respective user groups based on the custom rules set within the user group in Appspace.
- User profile data displaying out-of-date data.
- User groups based on SAML property rules not reflecting accurate membership.
- Users accessing the Employee App only via the mobile app will never trigger another login event and thus never populate or update the SAML values.
For organizations with high volumes of mobile-only users, it is suggested to use the Appspace API to update these values when changes occur in the source system.
This article provides administrators with the instructions to configure SAML attributes, and user groups rules for SAML mapping:
Prerequisites
- Appspace Portal Admin, Account Admin, or Account Owner user roles.
- SSO configured with Just-In-Time (JIT), or SCIM provisioning enabled on the Appspace console.
- Ensure system and custom attribute field names that are created in the external IdP match (case sensitive) the attributes added in the Appspace SAML Attributes fields below.
Configure SAML Attributes in Appspace
Follow the instructions below to add a custom SAML attribute in Appspace that matches the attribute configured in your IdP or SCIM:
- Log in to the Appspace console.
- Click the ☰ Appspace menu, and select Users. Click Settings at the bottom of the left menu.
- On the SAML Attributes dashboard, click the + ADD button to add an attribute.
- In the Add Field window, configure the following fields:
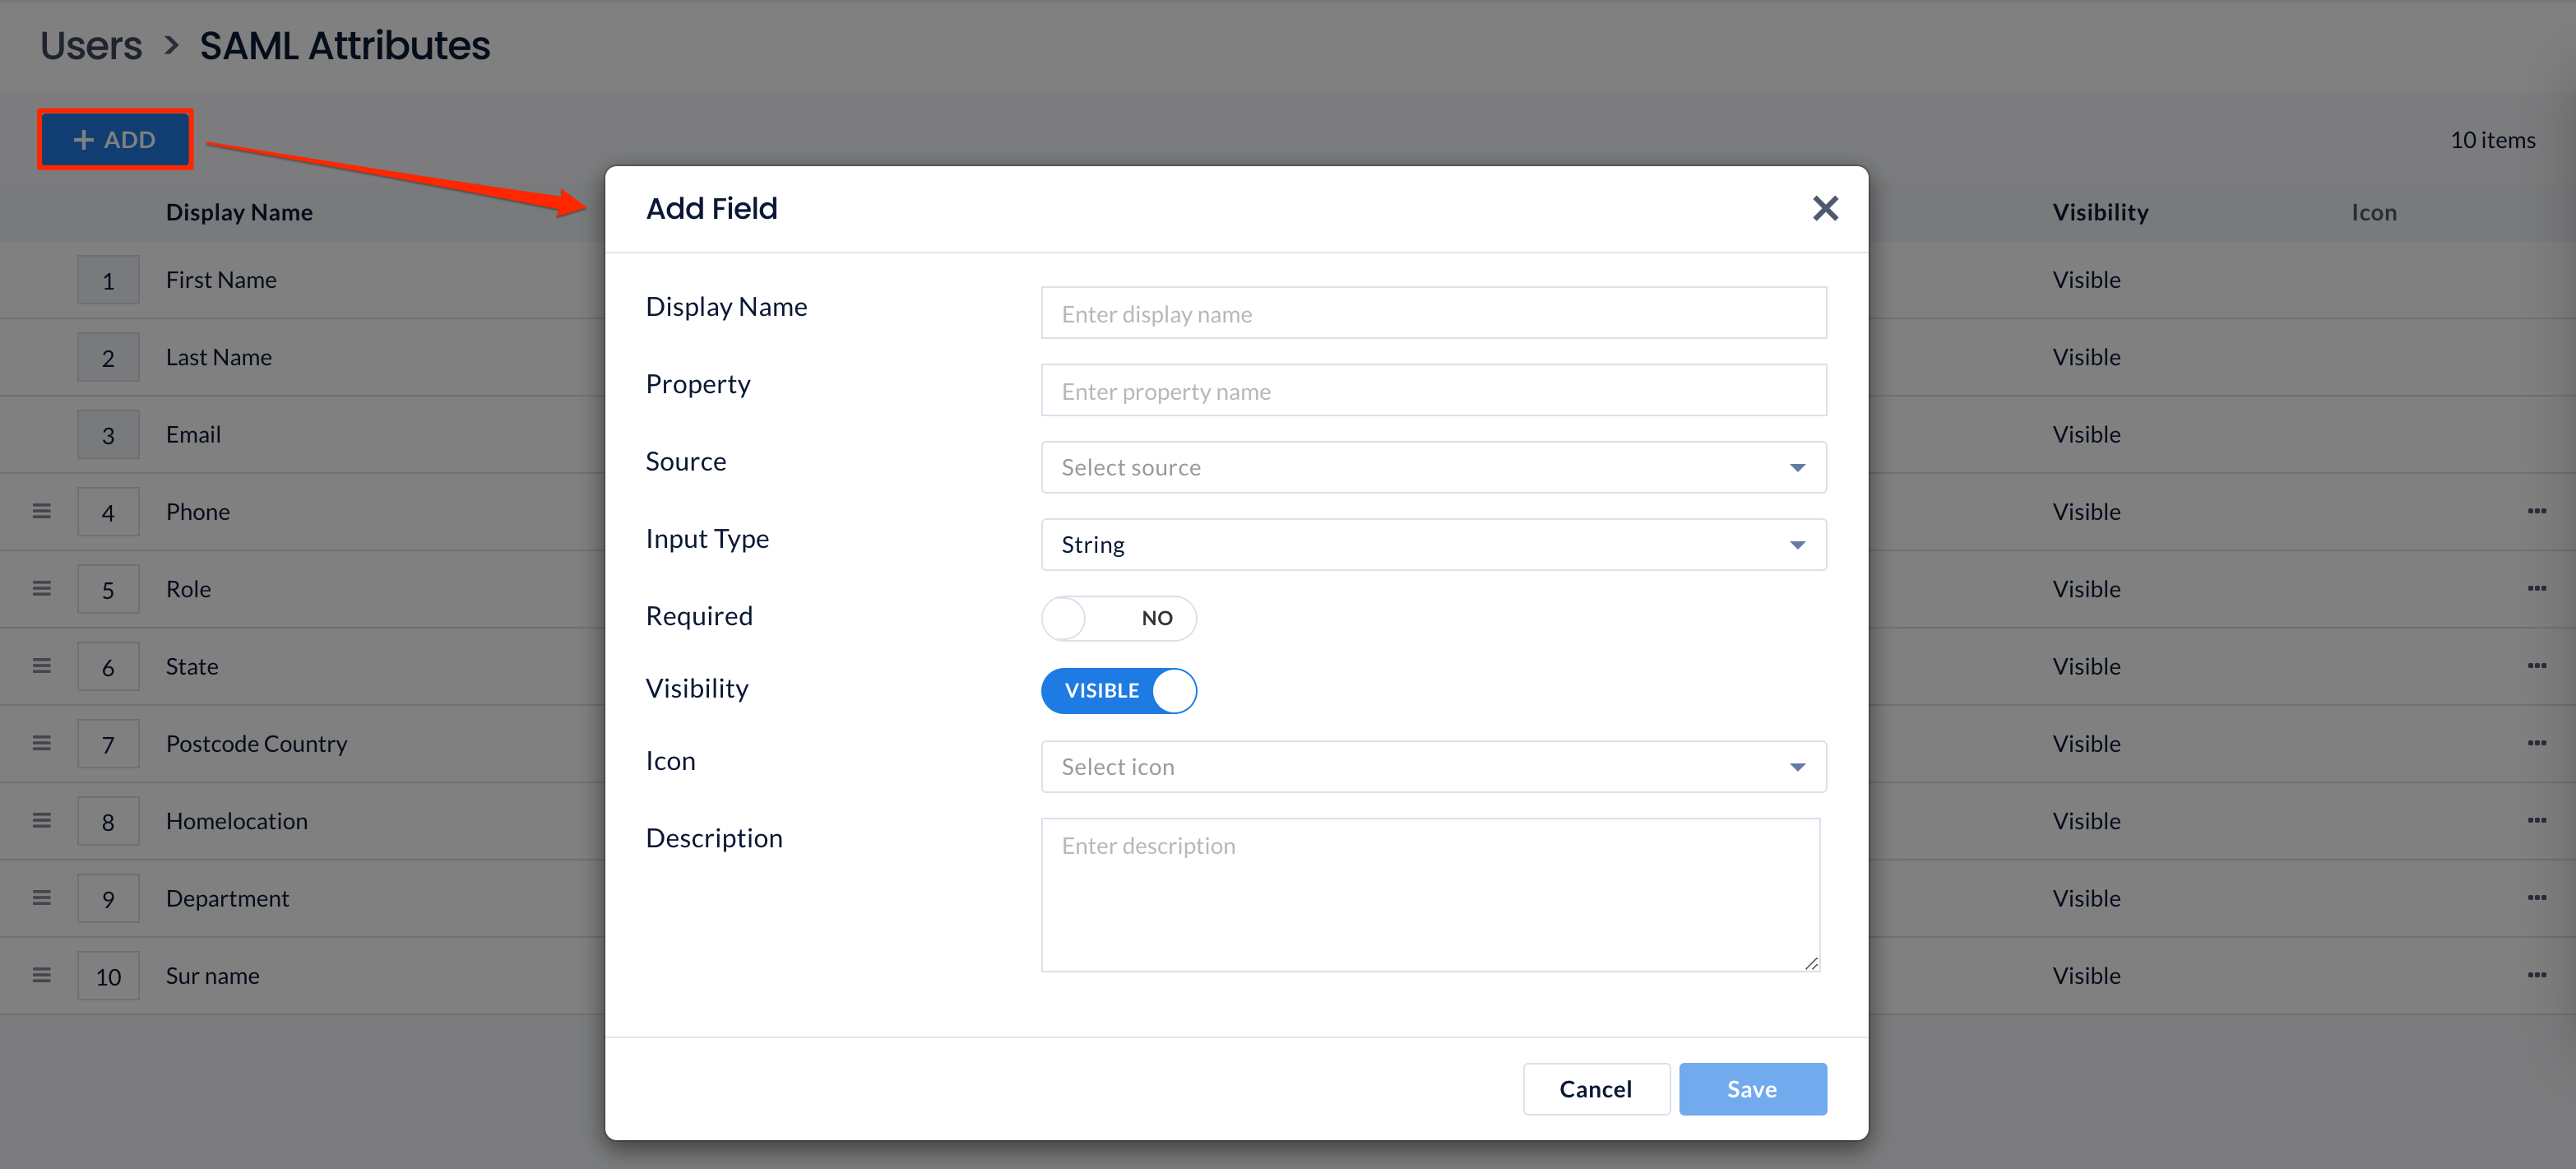
ImportantPlease ensure the attribute Property and Input Type is correct and matches the external IdP provider, as these fields can’t be changed once saved.- Display Name – Enter the name of the attribute to be displayed.
- Property – Enter the property of the attribute.
- Source – Select SAML as the source of the attribute from the drop-down menu.
- Input Type – Determine the attribute input type, by selecting one of the following options from the drop-down menu.
- Integer – only numeric characters
- String – alphanumeric characters
- Required – Determine if the attribute is required, by switching the toggle switch to the following option:
- YES
- NO (default)
- Visibility – Determine if the attribute is displayed in the user profile, by switching the toggle switch to the following option:
- VISIBLE (default)
- HIDDEN
- Icon – Select an icon for the attribute that is displayed in the user profile.
- Description – Enter the description of the attribute.
- Once done, click Save.
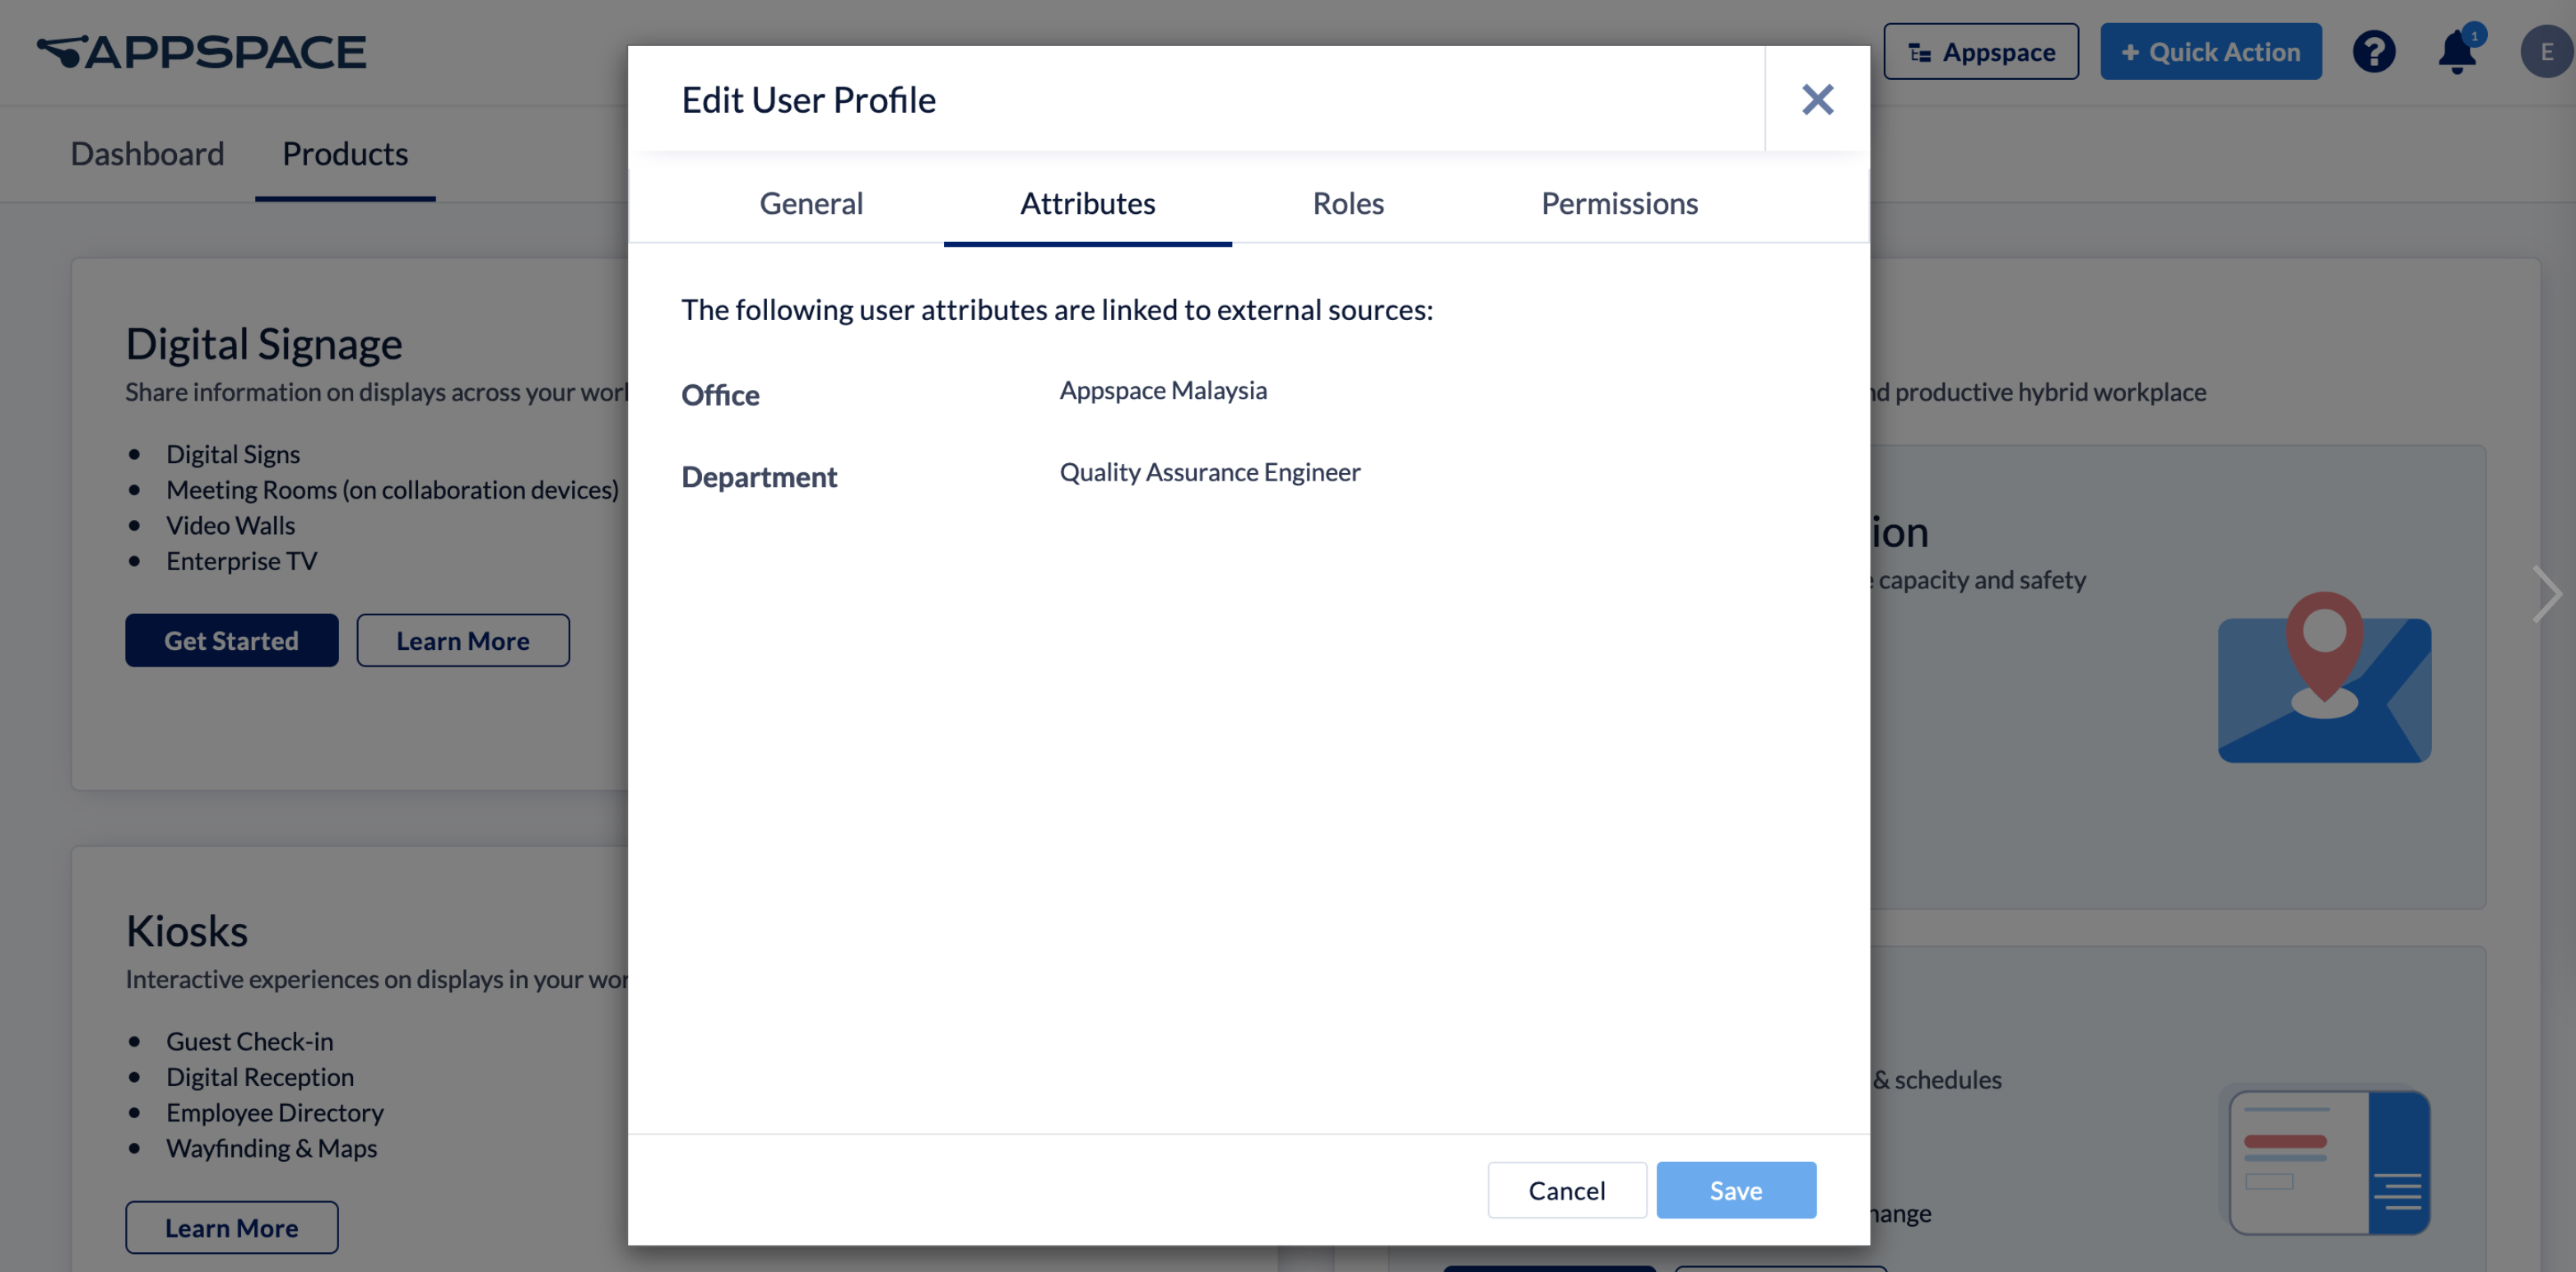
- Custom user attributes that are added can be edited or deleted, and are displayed in the Attributes tab in the User Profile of each user who signs in to Appspace using SSO (provisioned with the JIT) credentials.
Configure User Groups with SAML Mapping and Rules
Follow the instructions below to configure each user group with rules for SAML mapping:
- Log in to the Appspace console.
- Click Users from the ☰ Appspace menu.
- Click the ellipsis of the desired user group, and select Edit User Group.
NoteIf a user group had not been created, or if you wish to user a new user group, follow the instructions in the Create User Group section in the article.
- In the Edit User Group window, select Custom Rule from the SAML Mapping drop-down menu.
- In the Manage Rules window, click Create Rule to help define and filter external user group membership.
- In the Create Rule window, configure the following fields:

- Rule – Select the following rule from the drop-down menu:
- Include
- Exclude
- Property – Select the SAML attribute property the rule applies to from the drop-down menu.
- Operator – Define the condition between the attribute property and value from the drop-down menu:
- Equal
- Not Equal
- Contain
- Not Contain
- In – New Operator
- Match
- Value – Enter the value of the attribute property that is required.
- Rule – Select the following rule from the drop-down menu:
- Once done, click OK.
- All users that fit the custom rule created will be displayed. Click Apply to confirm that the selected users will be assigned to the user group.

NoteUsers that fit the rule, but have yet to accept their user invitations from Appspace, will only be assigned to the user group once they have accepted the invitation.
Was this article helpful?