Assigning a default channel to a location is an ideal solution for organizations requiring to quickly replace, or add a device to a display without having to worry about which channel to select or mode to put it on. This allows almost anyone to just plug in and register a digital media device, and leave the channel selection to your content team that can be based anywhere.
This article provides the instructions to assign a default channel or playlist channel to a location or sub-location, enabling devices to automatically be assigned with a channel once the device is registered.
Prerequisites
- An existing channel or channel playlist within the location. Click here for instructions to create a playlist channel.
- An Account Owner or Location Administrator.
Assign Channel to Location
- Log in to the Appspace console.
- Click Devices from the ☰ Appspace menu.
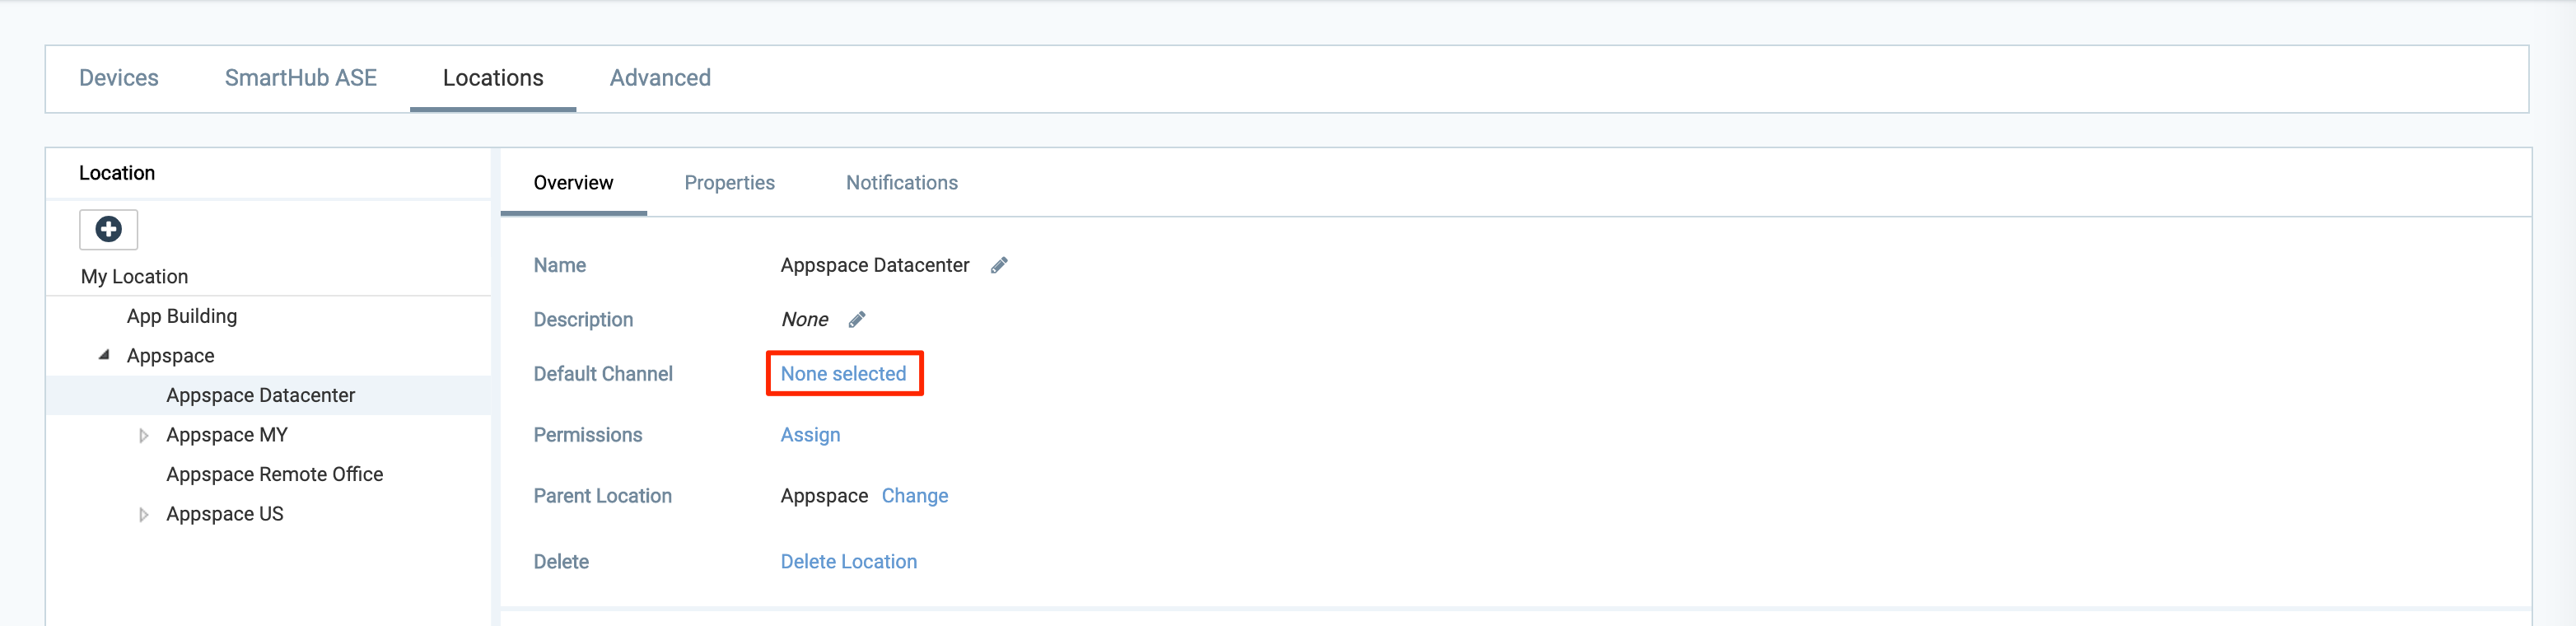
- Click the Locations tab, and select the desired location or sub-location to assign the default channel to.
- Click the Overview tab, and click the None selected link for Default Channel.
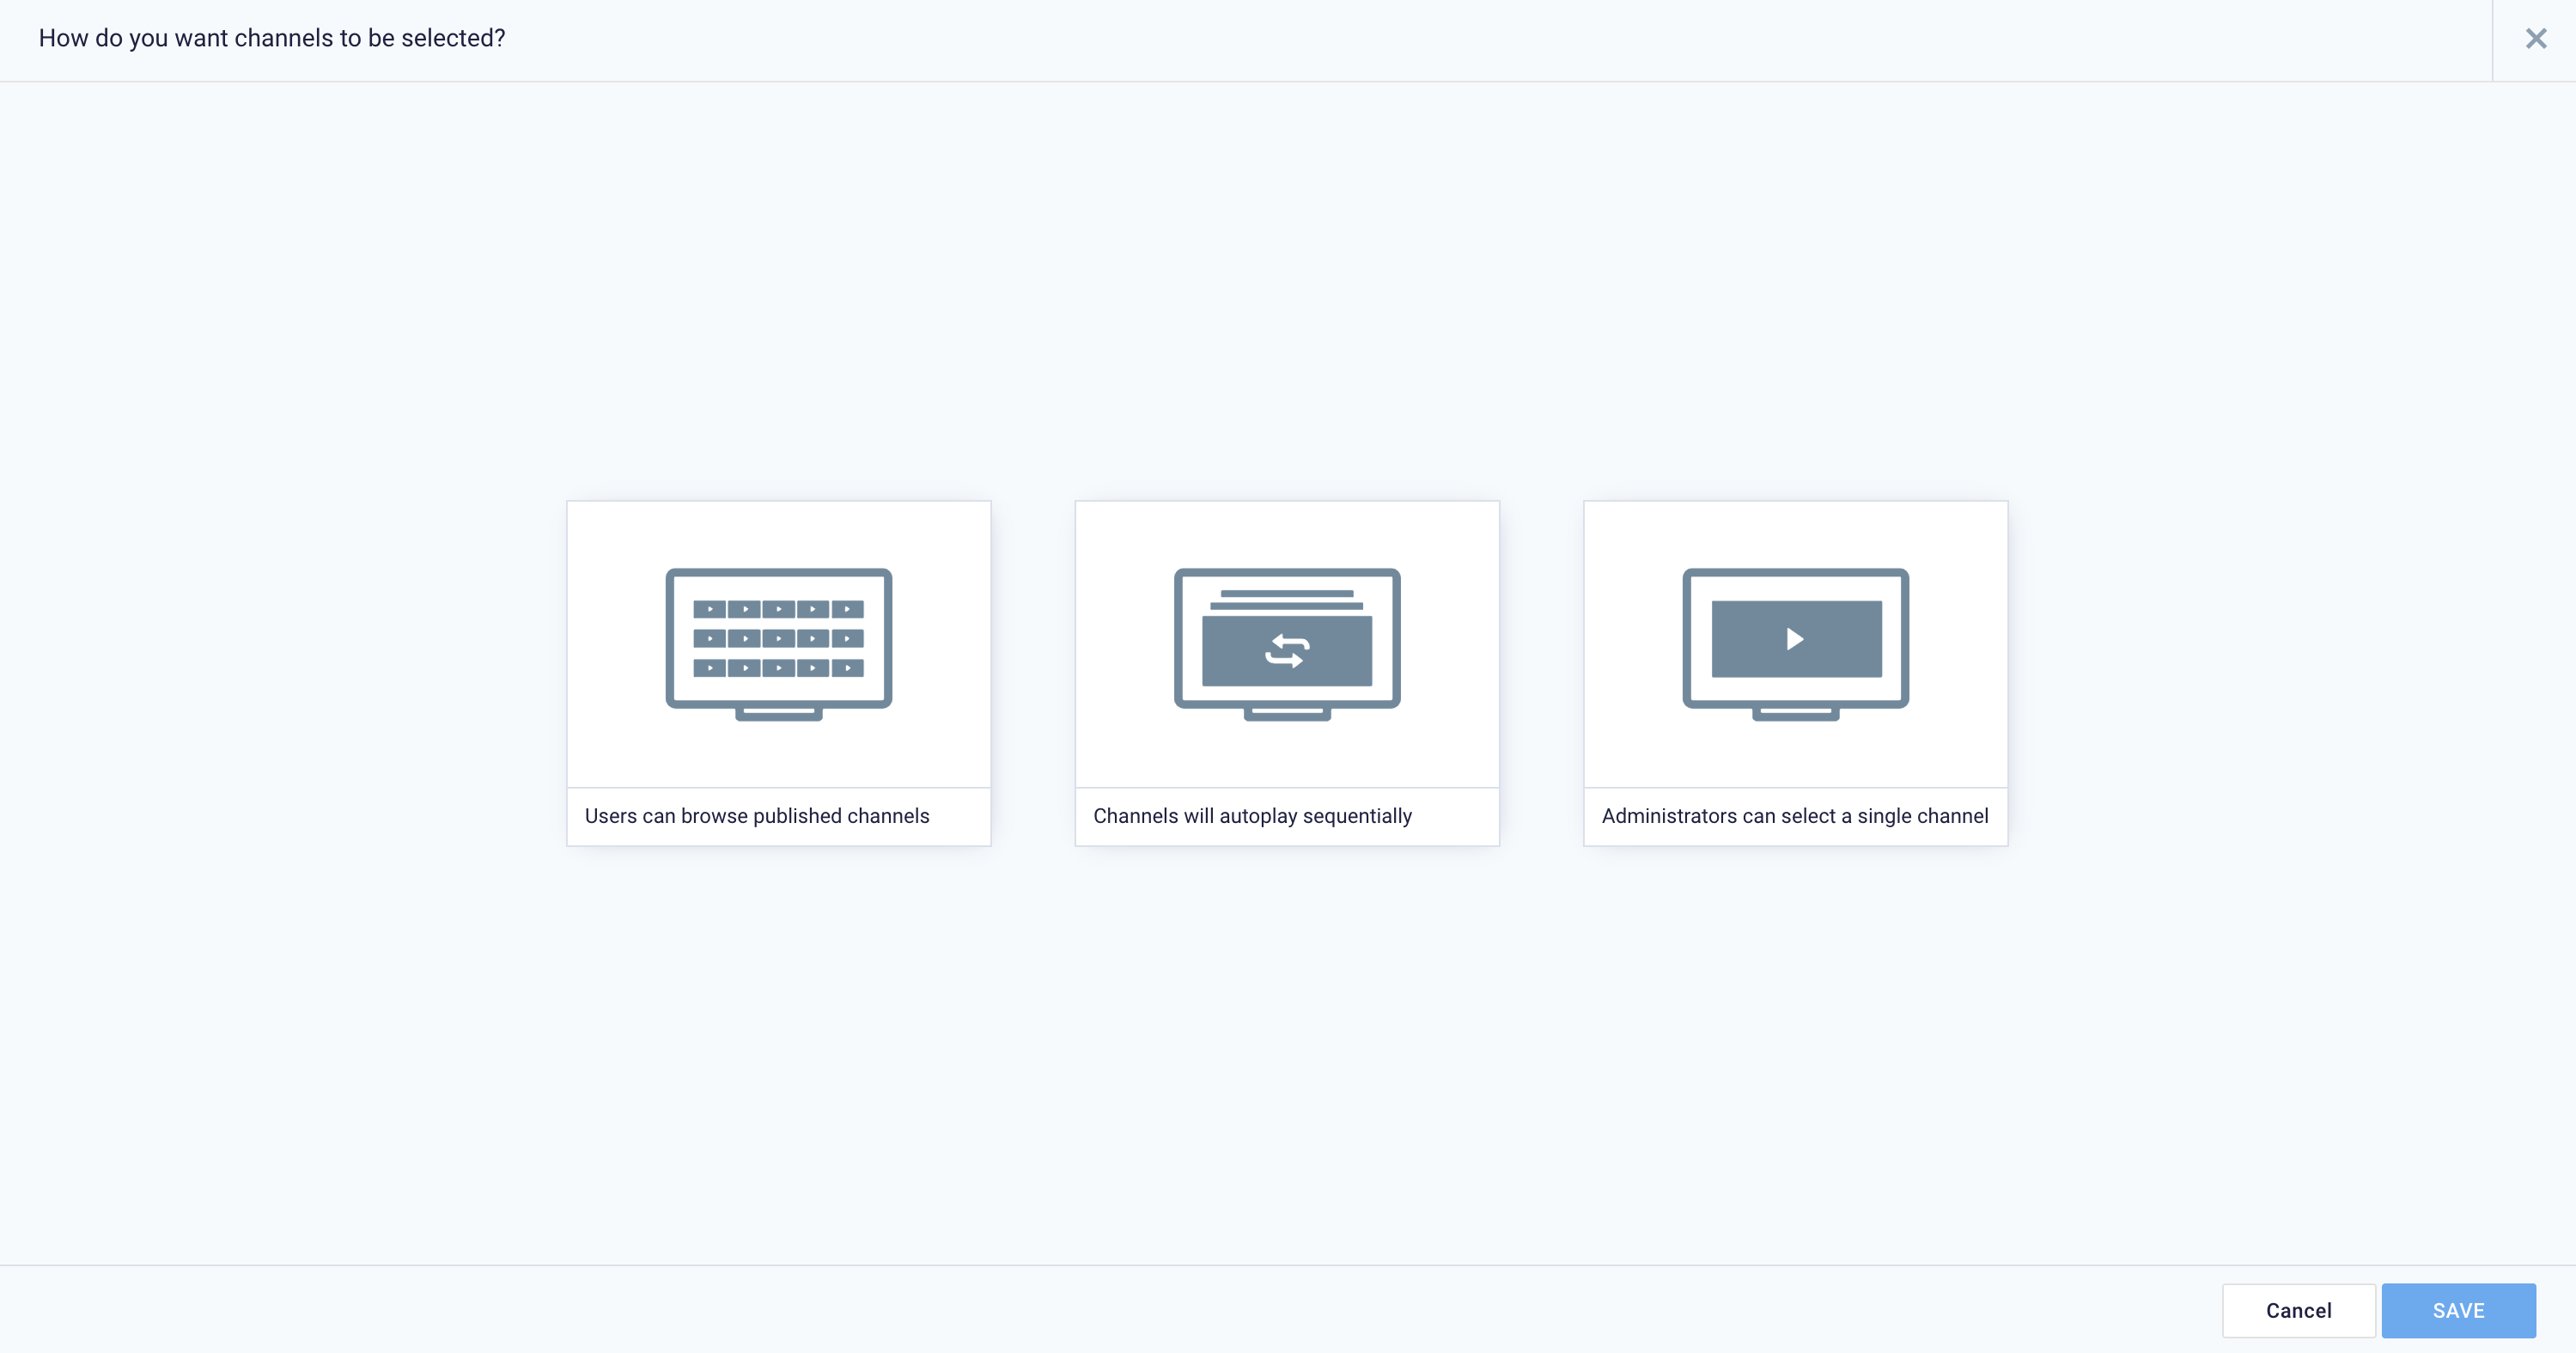
- In the Channel selection mode field, select one of the following options:
 NotePlease be reminded that only channels or playlist channels within the location can be selected as the default channel. Thus, you must create or move an existing channel to the location before being able to assign it as the default channel.
- Users can browse published channels – This is the interactive mode or channel browsing mode, ideal for TVs or displays with touch-screen, or with a mouse/keyboard attached.
- Channels will autoplay sequentially – This option is currently available only for playlist channels. Channels with autoplay based on the playlist sequence or any scheduling or dayparting settings configured.
- Administrators can select a single channel – Ideally for digital signage, thus only a single channel will be played.
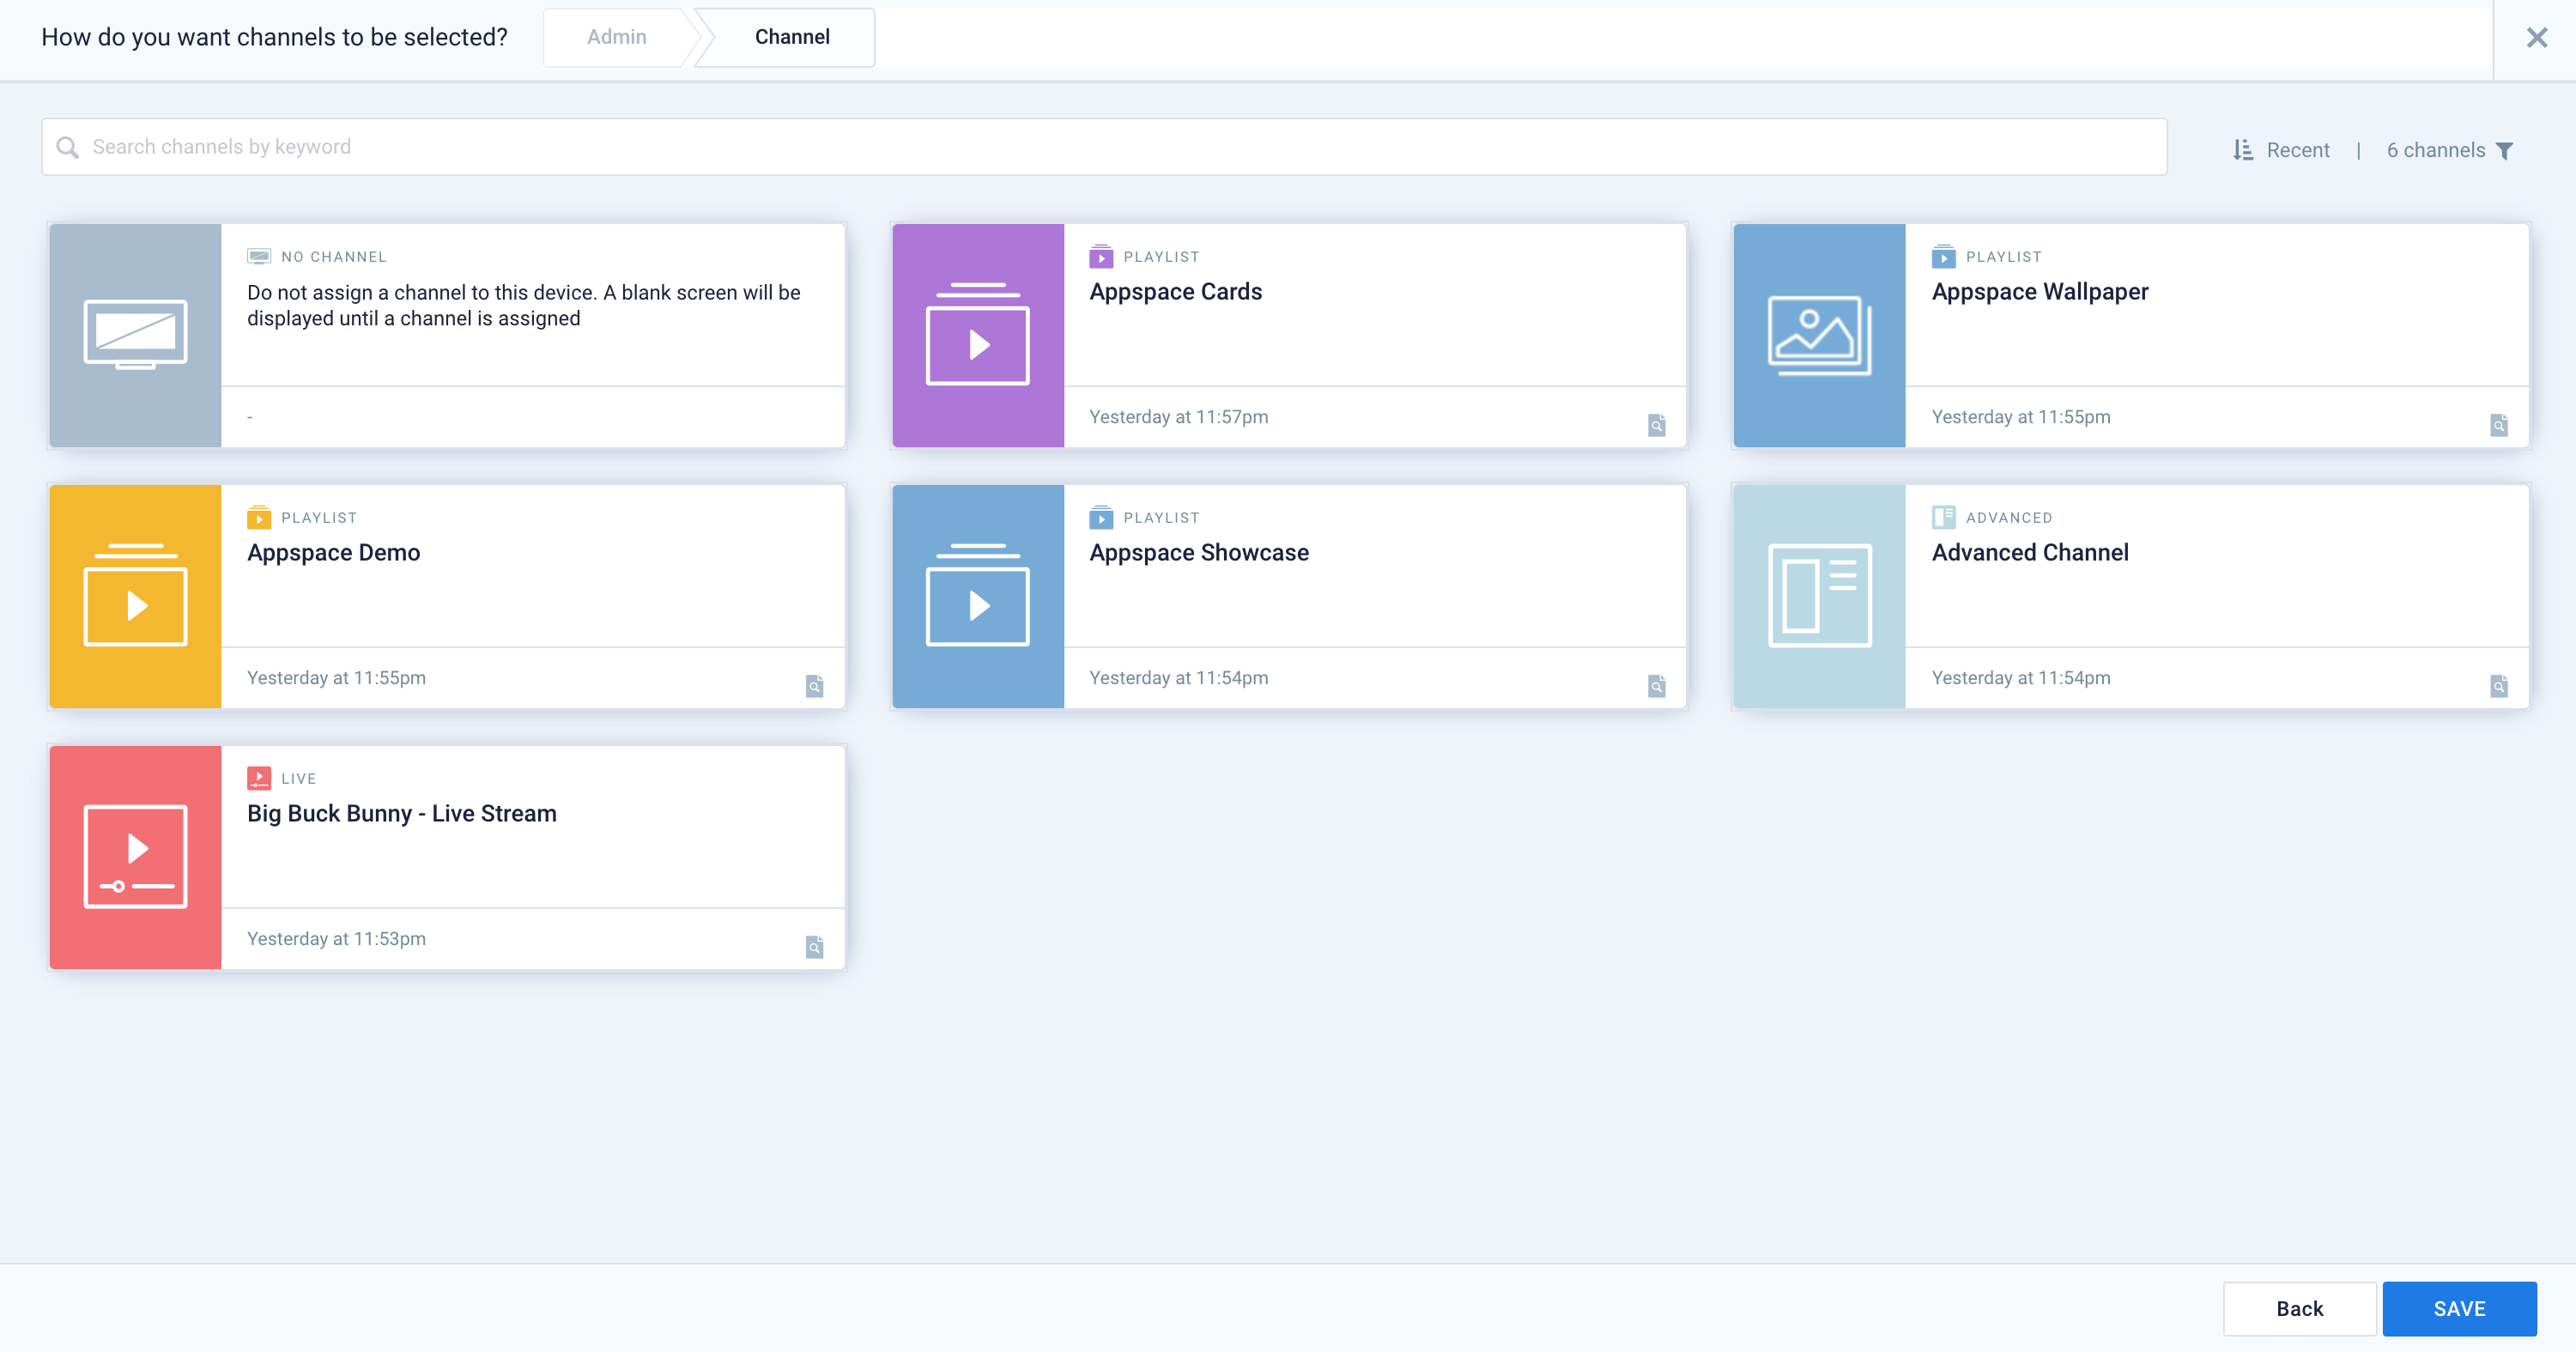
- If this option is selected, you will be required to select an advanced channel, playlist channel, or live channel.
- Once selected, click SAVE.
- Once done, click SAVE. The device will begin syncing the selected channel(s). Please note that this may take some time depending on the channel size and network speed. ImportantIf the device is not displaying any channels, please ensure that the desired channel has been published to the location. If not, please proceed to publish content to the location, by following the Publish Content to Device, and selecting the desired location the device is on.
Was this article helpful?