This article provides the instructions to add, edit, and manage your event actions and conditional events in your widget property within an advanced channel.
Event Actions that are added in widgets are actions that are triggered by an event, created based on event-driven scripting. An event is an object sent to a widget to inform it of user or system actions such as multi-touch events, motion events, and events for controlling multimedia. An action is a piece of code linked to an event that can occur in your advanced channel. When the event occurs, the action code is executed. These actions are triggered when an event occurs in the system, or widget. You can also set conditional events that allow you to create actions that only execute when an event’s set conditions or rules are met.
In a widget, the types of events and actions available vary depending on the widget and its functions. The below are the default fields in a widget’s Event Action window:
-
When – set the event that triggers the action.
-
Condition – set a condition to the event before the action is triggered.
-
Select – set where the action should be placed (the location), which can either be the system, advanced channel, or widget.
-
Do – set the action that is to be triggered when the above event occurs and condition is met.
Add New Action
To add a new action, please follow the instructions below:
-
Click Channels in the navigation bar.
-
Select the desired advanced channel from the Channels tab, and click the Edit tab.
-
Select the layout and click the desired widget in the Widgets column.

-
In the Widget Properties window, click the ACTIONS tab, and click the New Action button.
-
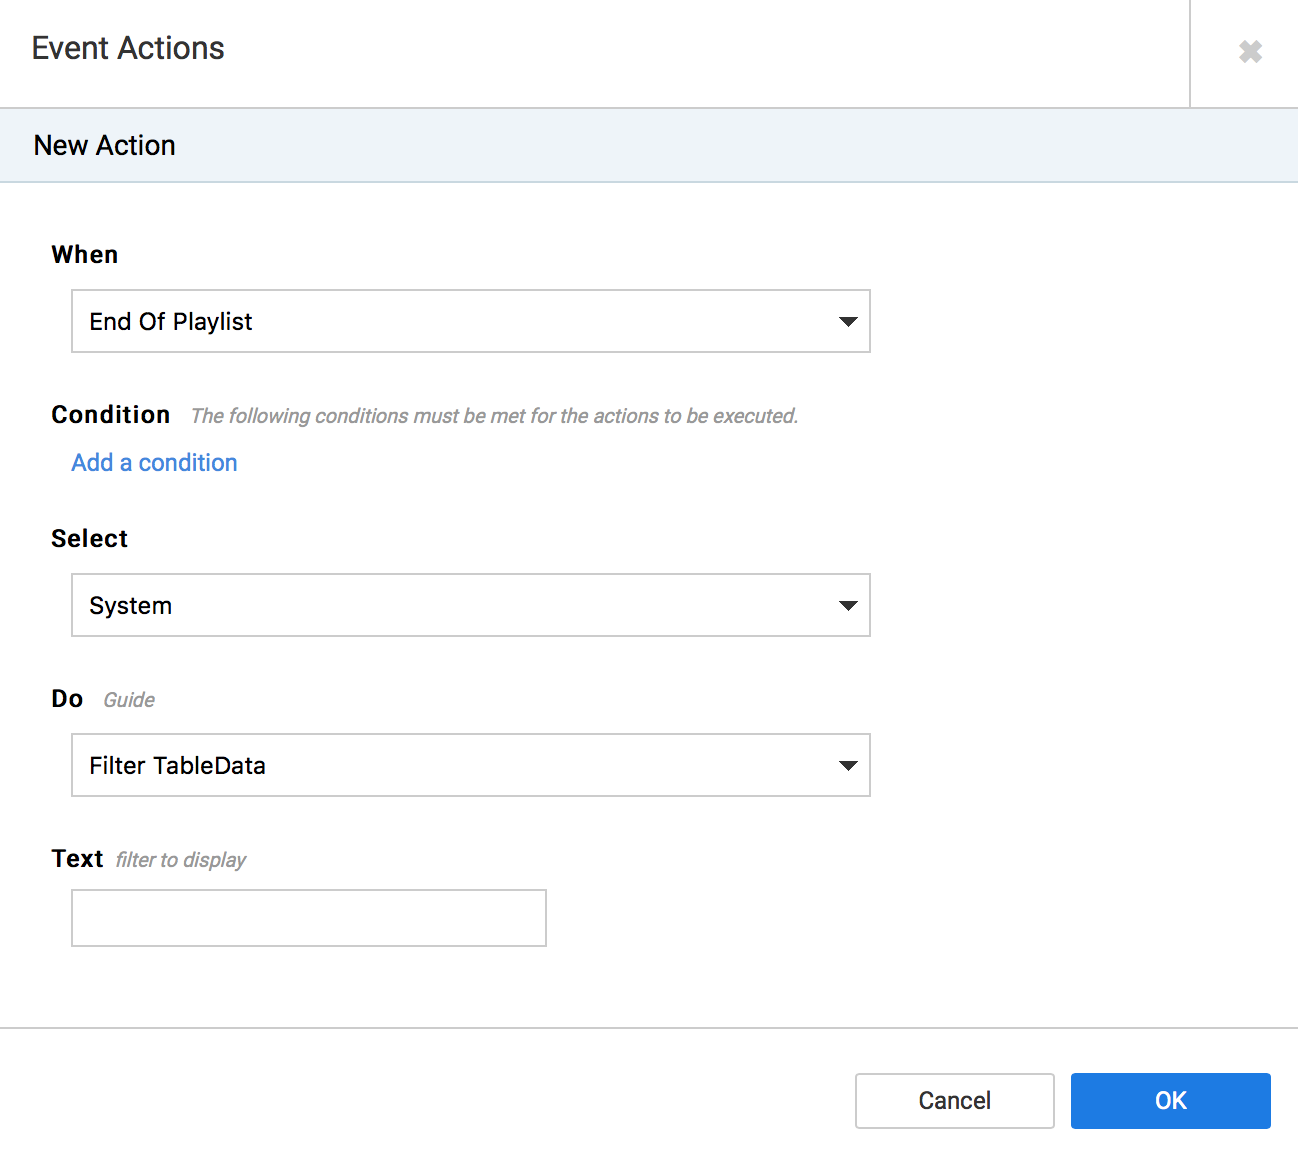
In the Event Actions window, select the required parameters.
- When – set the event that triggers the action.
- Condition – set a condition to the event before the action is triggered.
- Select – set where the action should be placed (the location), which can either be the system, sign, or widget.
- Do – set the action that is to be triggered when the above event occurs and condition is met.
-
Click the Add condition link to create actions that only execute when an event occurs and one or more conditions are met.
Select a Rule, and input your Condition.
-
Click OK to save.
Edit an Action
To edit an action, please follow the instructions below:
-
Click Channels in the navigation bar.
-
Select the desired advanced channel from the Channels tab, and click the Edit tab.
-
Select the layout and click the desired widget in the Widgets column.
-
In the Widget Properties window, click the ACTIONS tab.
-
Select the desired action from the list, and click Edit.
-
In the Event Actions window, make the desired changes, and click OK to save.
Delete an Action
To delete an action, please follow the instructions below:
-
Click Channels in the navigation bar.
-
Select the desired advanced channel from the Channels tab, and click the Edit tab.
-
Select the layout and click the desired widget in the Widgets column.
-
In the Widget Properties window, click the ACTIONS tab.
-
Select the desired action from the list, and click Delete. Click OK to confirm.
Was this article helpful?