Appspace has developed the Appspace Places plugin/add-in that integrates the Appspace Space Reservations system with Microsoft Outlook, allowing users to directly book resources and workspaces configured in the Appspace reservations system, from a Microsoft Outlook desktop or web client. For organizations using Microsoft 365 (previously Office 365), the solution offers integration with Exchange resources.
This feature integrates and synchronizes the Appspace Space Reservations capabilities with Microsoft Outlook appointment forms to provide the following capabilities:
- Installable as an add-in to the Microsoft Outlook desktop and web clients.
- Displays an Appspace Places button in the Appointment tab, on the Microsoft Outlook Meeting ribbon.
- When the Appspace Places button is clicked, an Appspace Places for Outlook365 pane is displayed on the right side panel.
- The Appspace Places for Outlook365 pane can be toggled On or Off.
- Search for any meeting space if one hasn’t been selected:
- Once the user selects a meeting space, the location field is updated with the appropriate Microsoft Exchange resource.
- If the date and time have been selected in the Outlook form, apply filtering to the Appspace add-in.
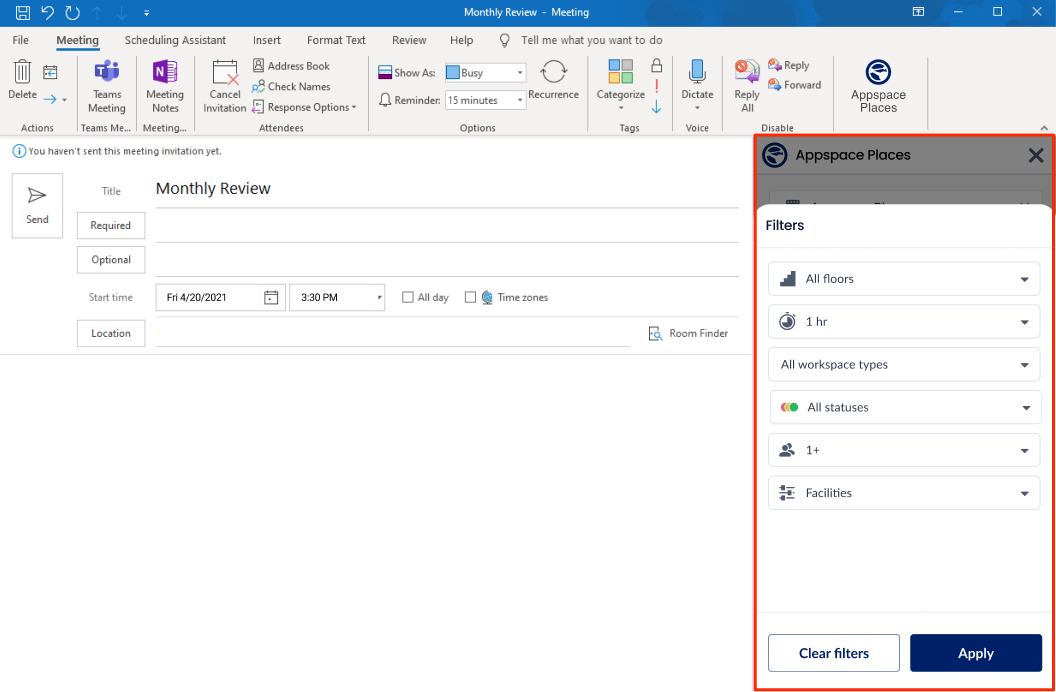
- Filter/search for the following resources:
- Building
- Floor
- Zone (if a floor has zones)
- Workplace type (Room or Space)
- Workspace (Subtype)
- Status (Available & Unavailable)
- Room capacity
- Facilities
- Create, cancel, update, or delete your own meetings.
- Create, edit, or delete the meetings on behalf of another employee, if their O365 account has been delegated by the booking account used to authenticate the O365 add-in.
This article provides instructions to install the Appspace Places add-in for Microsoft Outlook.
Prerequisites
- An Appspace user account with Premium user licenses.
- Appspace Space Reservations system configured with a Microsoft 365 calendar provider.
- Resources and workspaces configured in the Appspace Space Reservations system.
- The Appspace Places add-in available from the Microsoft store.
- A Microsoft Outlook email account.
- For the Microsoft Outlook requirement set, please refer to this article: Nested App Authentication Requirement Set.
Configure Office 365 Passport – Space Reservations Administrator
The Appspace Space Reservations administrator must select a default calendar authentication passport that will be used to integrate the Appspace Places add-in with the calendar provider used for reservations. This passport will be used by default to search any resources/rooms by email once the add-in is installed.
Follow the instructions below to configure the Office 365 passport for integration with the Appspace Places Outlook add-in:
- Log in to the Appspace console.
- Click the ☰ Appspace menu, and click Integrations.
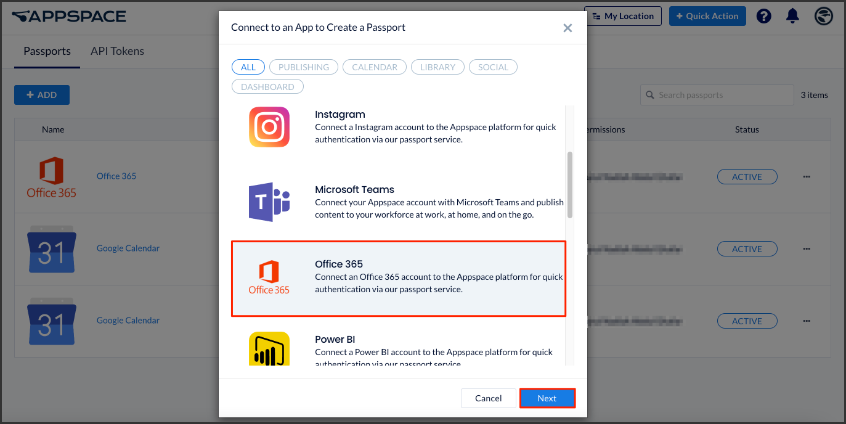
- Click the Passports tab, and click the +ADD button.
- Select Office 365 and click Next.
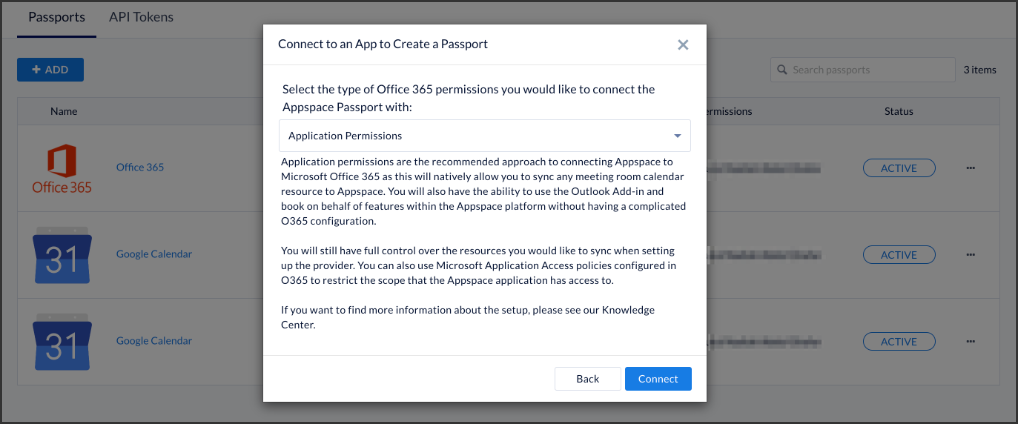
- Select the preferred permissions as described below:
-
- Application Permissions – Application permissions are the recommended approach to connecting Appspace to Microsoft Office 365 (O365) as this will natively allow you to sync any meeting room calendar resource to Appspace. You will also have the ability to use the Appspace Places Outlook add-in and book on behalf of features within the Appspace platform without having a complicated O365 configuration.
You will still have full control over the resources you would like to sync when setting up the provider. You can also use Microsoft Application Access policies configured in O365 to restrict the scope that the Appspace application has access to.
NoteApplication permissions enable apps to run without a signed-in user present, allowing it to run in the background. An administrator account is needed to simply authenticate this passport and the required permissions.
- Delegated Permissions – Delegated permission gives Appspace access to Microsoft Office Calendar Resources based on the permissions of the service account you use to authorize the passport. For this, the service account must be added as a full delegate to each calendar resource needed to sync the information from and to Appspace and Office 365. This can include Meeting Room Calendars as well as possibly users’ calendars if utilizing the Appspace Places Outlook add-in and book-on-behalf feature.
- User Permissions Only (does not sync resources ) – User Permissions uses the delegated permission model and is very similar to the Delegated Permission option. But this option only includes access to users’ calendars based on delegated access to each user’s calendar. Use this option if you want a dedicated passport for the Appspace Places Outlook add-in and book-on-behalf. NoteFor more information on the passport permission types, between Delegated (Admin and Basic user) and Application permissions, please visit the Permissions and consent in the Microsoft identity platform here: https://docs.microsoft.com/en-us/azure/active-directory/develop/v2-permissions-and-consent#request-the-permissions-in-the-app-registration-portal
- Application Permissions – Application permissions are the recommended approach to connecting Appspace to Microsoft Office 365 (O365) as this will natively allow you to sync any meeting room calendar resource to Appspace. You will also have the ability to use the Appspace Places Outlook add-in and book on behalf of features within the Appspace platform without having a complicated O365 configuration.
You will still have full control over the resources you would like to sync when setting up the provider. You can also use Microsoft Application Access policies configured in O365 to restrict the scope that the Appspace application has access to.
-
- Click CONNECT.
- Proceed to authenticate the passport, and grant permissions to access the calendar provider account. You may be required to sign in with your calendar provider credentials if you are currently signed out.
- Follow the on-screen instructions to continue to configure the calendar provider passport.
- Once authenticated, in the Account Settings tab, you may perform the following actions:
- Change the name of the passport, by entering a different name in the Name field.
- View the Account ID of the passport.
- View the App Permissions granted to the passport.
- View and refresh the Status of the passport.
- Remove the passport, by clicking the Remove Account button.
- In the Permissions tab, you may grant the following users or user groups permissions to view or edit this passport configuration at any time:
- Enter and select the user(s) or user group(s) from the drop-down list, or click the Find users or user groups link, and select the desired user(s) or user group(s). Proceed to grant either Can Manage or Can View permissions by clicking the Select permissions drop-down menu.
- You may also view or remove the user(s) or user group(s) that have already been granted permissions, by clicking the delete icon.
- Once done, please configure the Reservations System by authenticating the calendar provider passport.

Configure Office 365 Calendar Provider for Private Reservations
Follow the instructions below to configure the Office 365 Calendar Provider to enable Private Reservations attendees to be hidden when created on the Appspace platform:
- Link your Office 365 Calendar Provider via Powershell by following the instructions in the Connect to Exchange Online Powershell article: https://docs.microsoft.com/en-us/powershell/exchange/connect-to-exchange-online-powershell?view=exchange-ps.
- Proceed to set the following calendar property using the powershell script below to modify the calendar processing options for the resource mailbox:
For more information, please refer to the following article here: https://docs.microsoft.com/en-us/powershell/module/exchange/set-calendarprocessing?view=exchange-ps
Set-CalendarProcessing "ROOMNAME" -RemovePrivateProperty $false
Install Appspace Places Add-In – Employees
Follow the instructions below to install and configure the Appspace Places Outlook add-in on your computer:
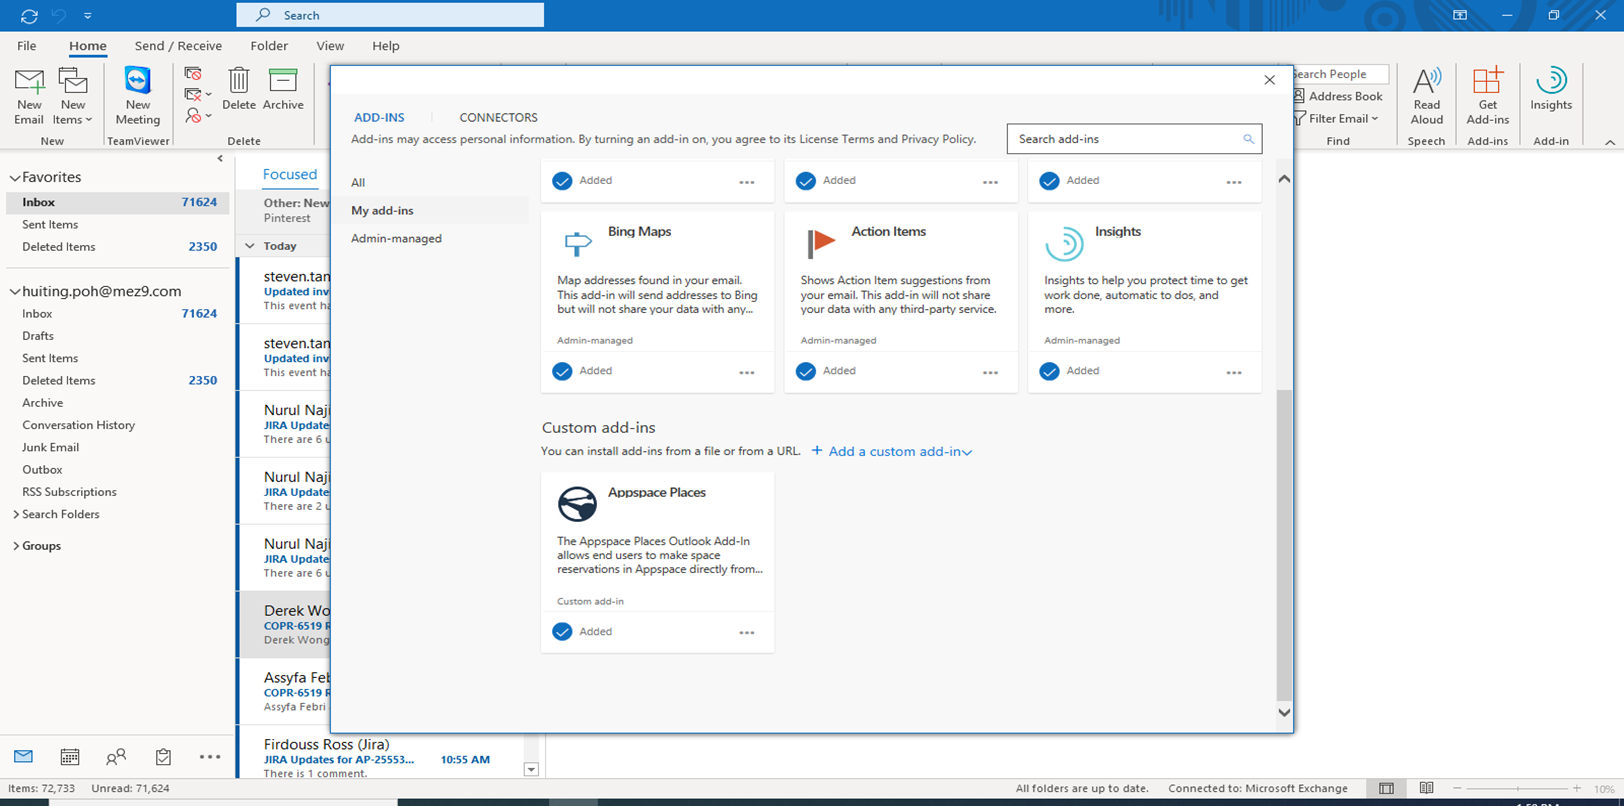
- Install the Appspace Places Outlook add-in, by referring to the following article: Installing Office Add-ins to your mailbox
- Once installed and enabled, click the Appspace Places button on the ribbon to display the Appspace Places for Outlook365 pane on the right side panel.

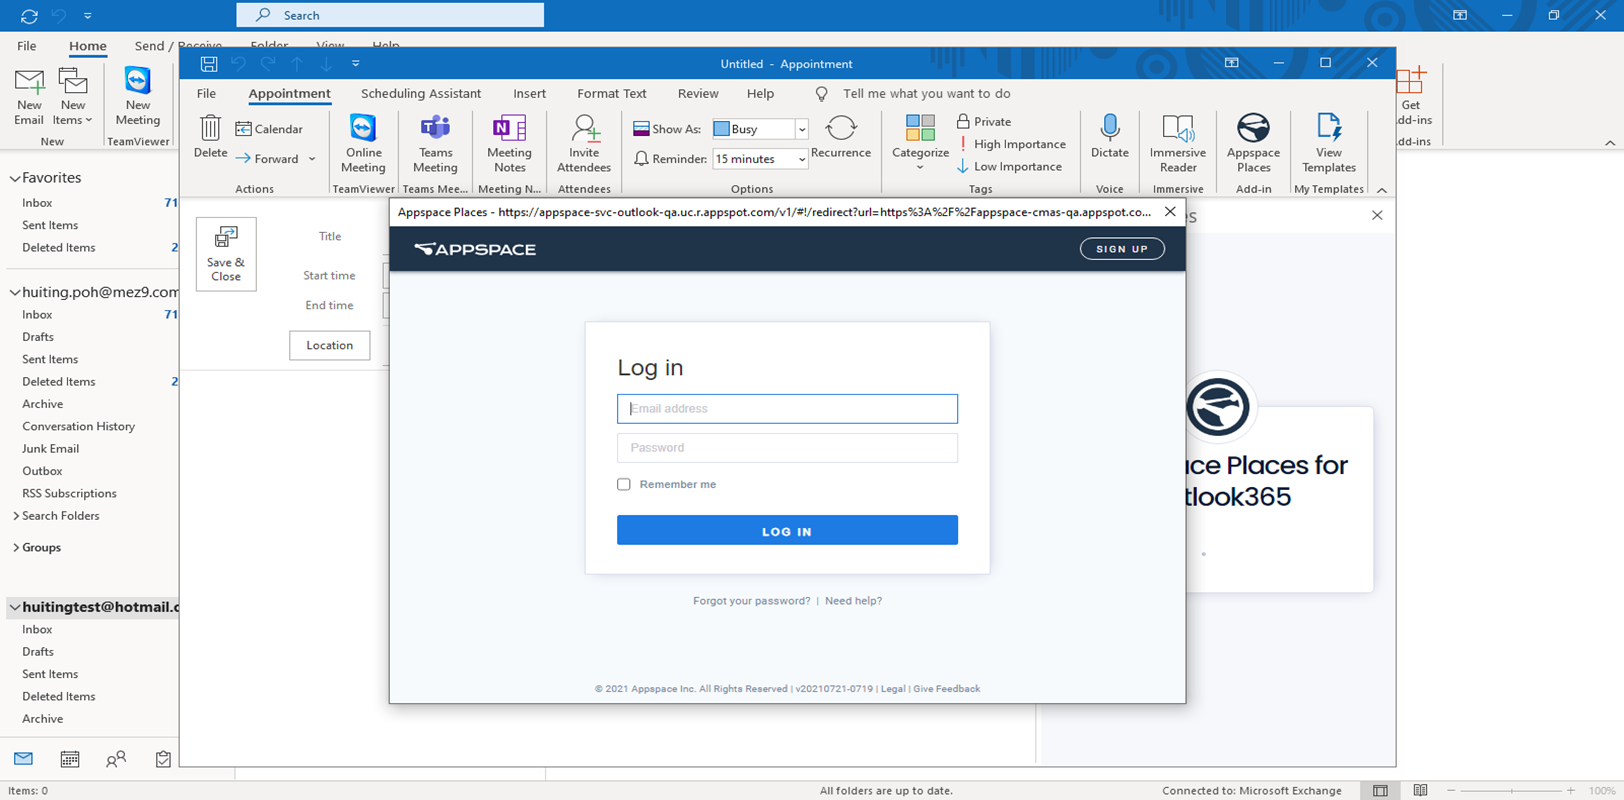
- Click the Sign In button.
- Proceed to select your Appspace deployment type and enter your Appspace credentials, as follows:
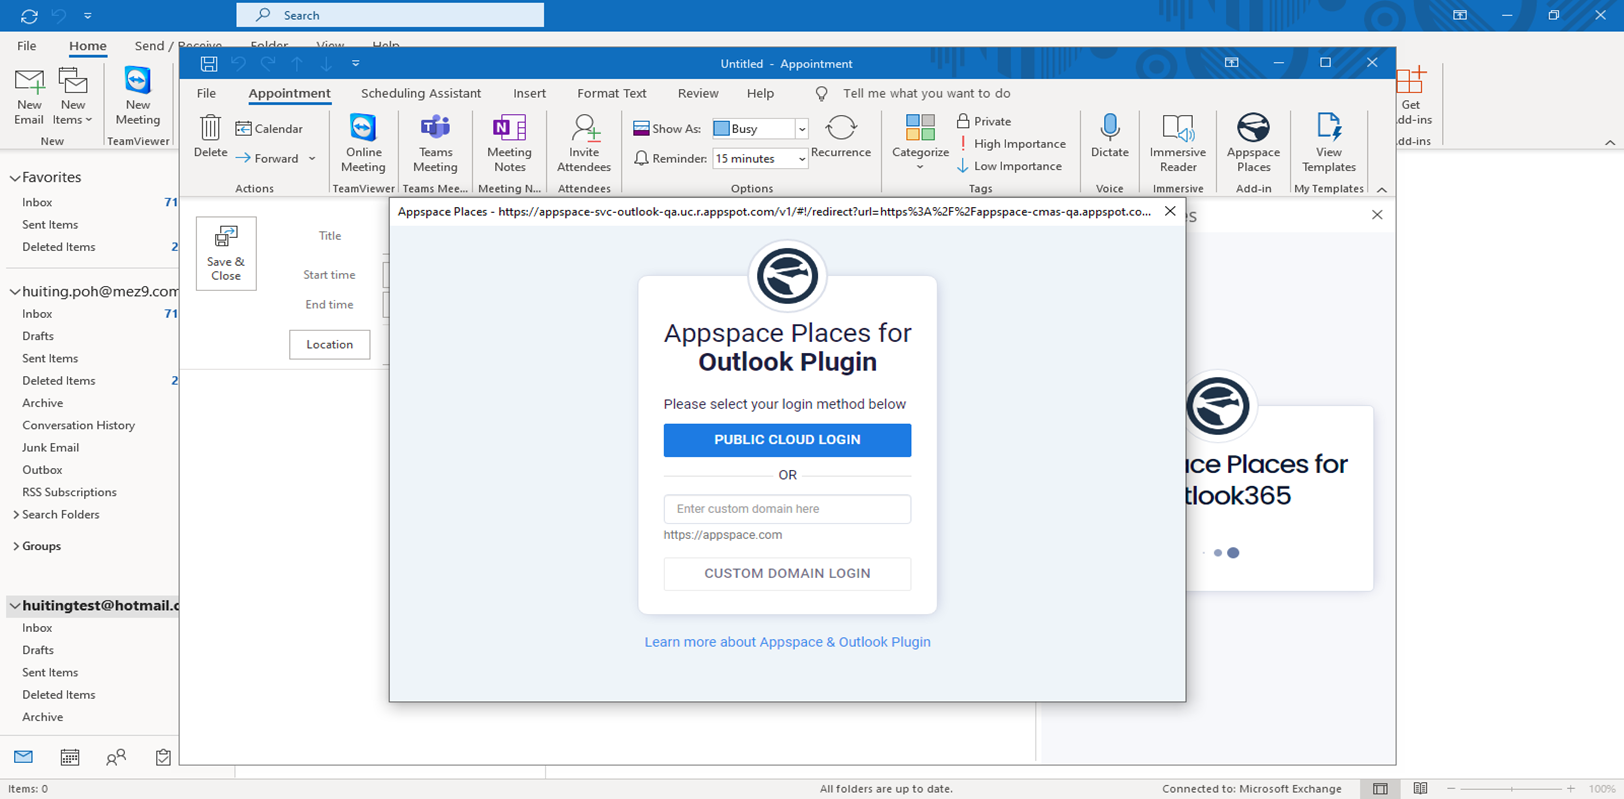
- Click PUBLIC CLOUD LOGIN, if your organization’s Appspace deployment is on the public cloud and accessed via https://cloud.appspace.com.
- If your organization’s Appspace deployment is on the private cloud or accessed via a custom domain, enter the Appspace URL, and click CUSTOM DOMAIN LOGIN.
- As a user, you are required to accept the consent before logging into the Outlook Plugin. (New)
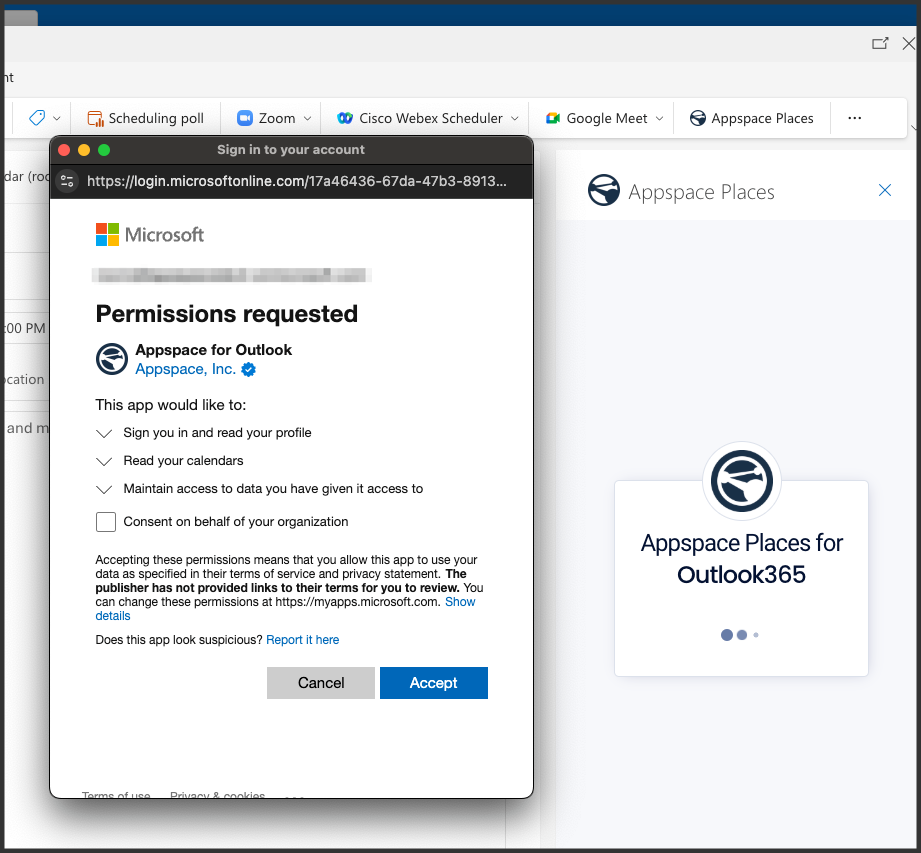
- If the user is an admin, they can grant consent on behalf of their organization by selecting the checkbox. (New)

- Proceed to enter your Appspace credentials and click LOG IN.
- The Appspace Places Outlook add-in will begin establishing a connection and configuring the add-in with your organization’s Appspace deployment.
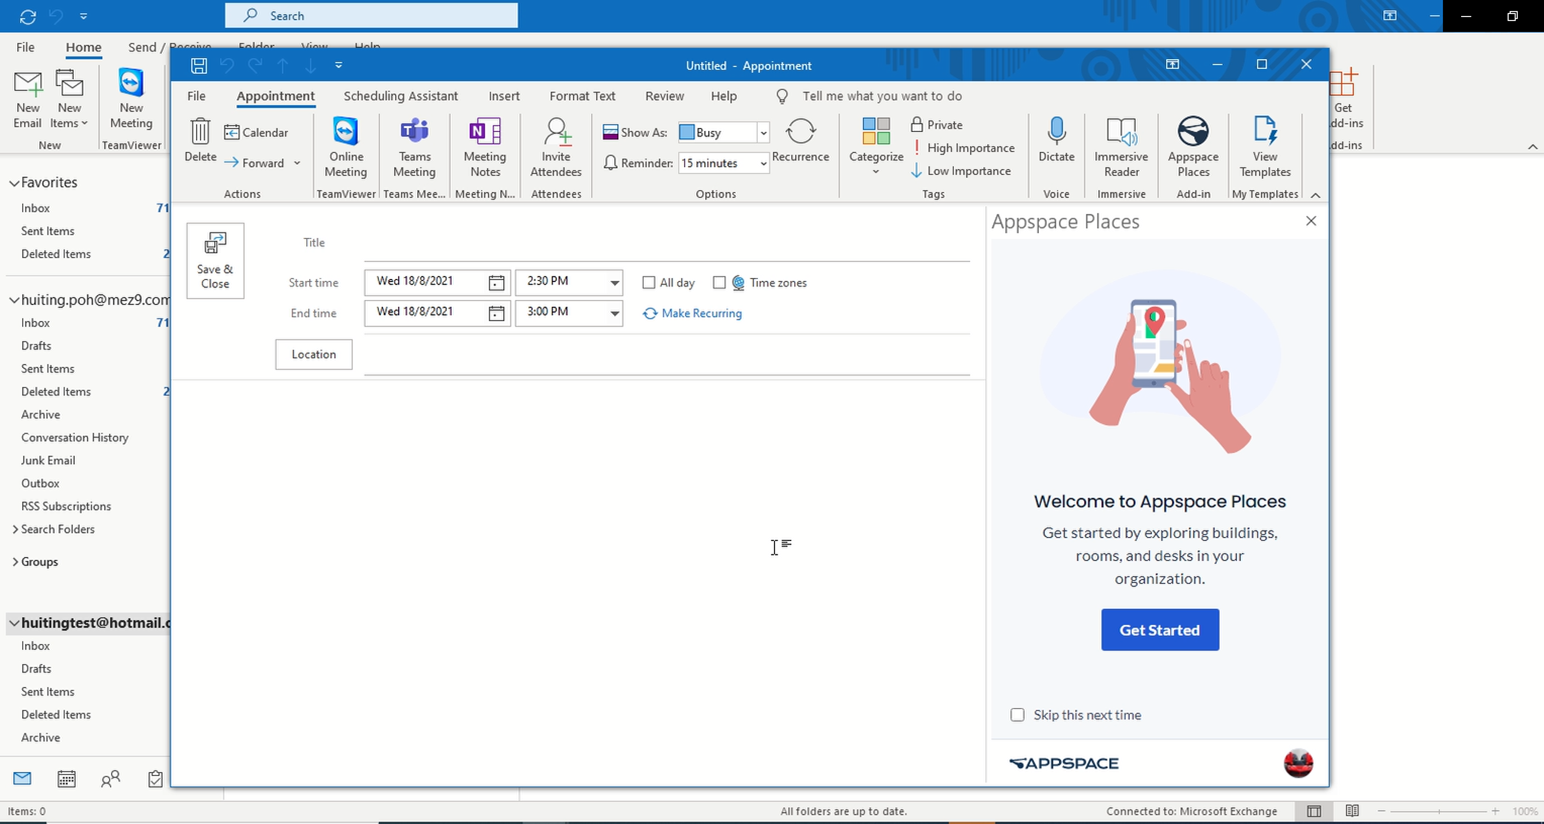
- Once done and login is successful, the Appspace Places side panel will display the Welcome to Appspace Places window.


Reserve Workspace via MS Outlook
Follow the instructions below to reserve a workspace via the Appspace Places Outlook add-in in a Microsoft Outlook client:
-
-
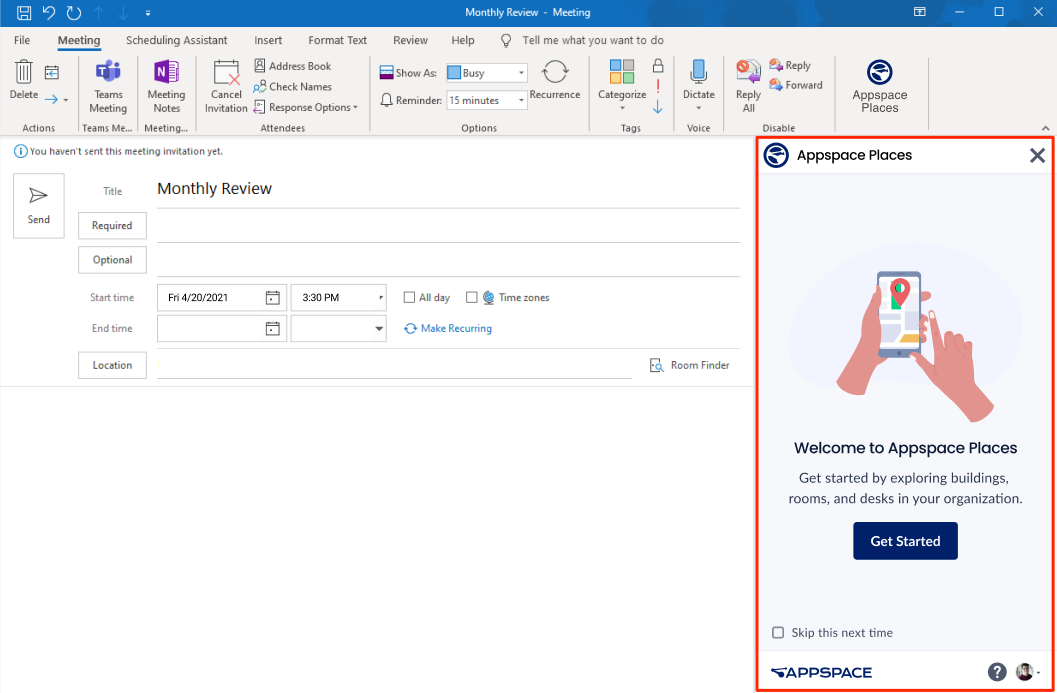
- Log in to your Microsoft Outlook email client, and proceed to create a New Meeting.
- Click the Appspace Places button in the ribbon to display the Appspace Places side panel.

- Enter the following meeting details:
- Title
- Required and Optional attendees
- Start and End date and time
- Additionally, you may select the All day checkbox, select a time zone, and make the meeting recurring.
- Optionally you may also click the Get Started button to explore the features available in Appspace Places, and step-by-step instructions to select your workspace, or you may check the Skip this next time checkbox to access the Appspace Places directly.
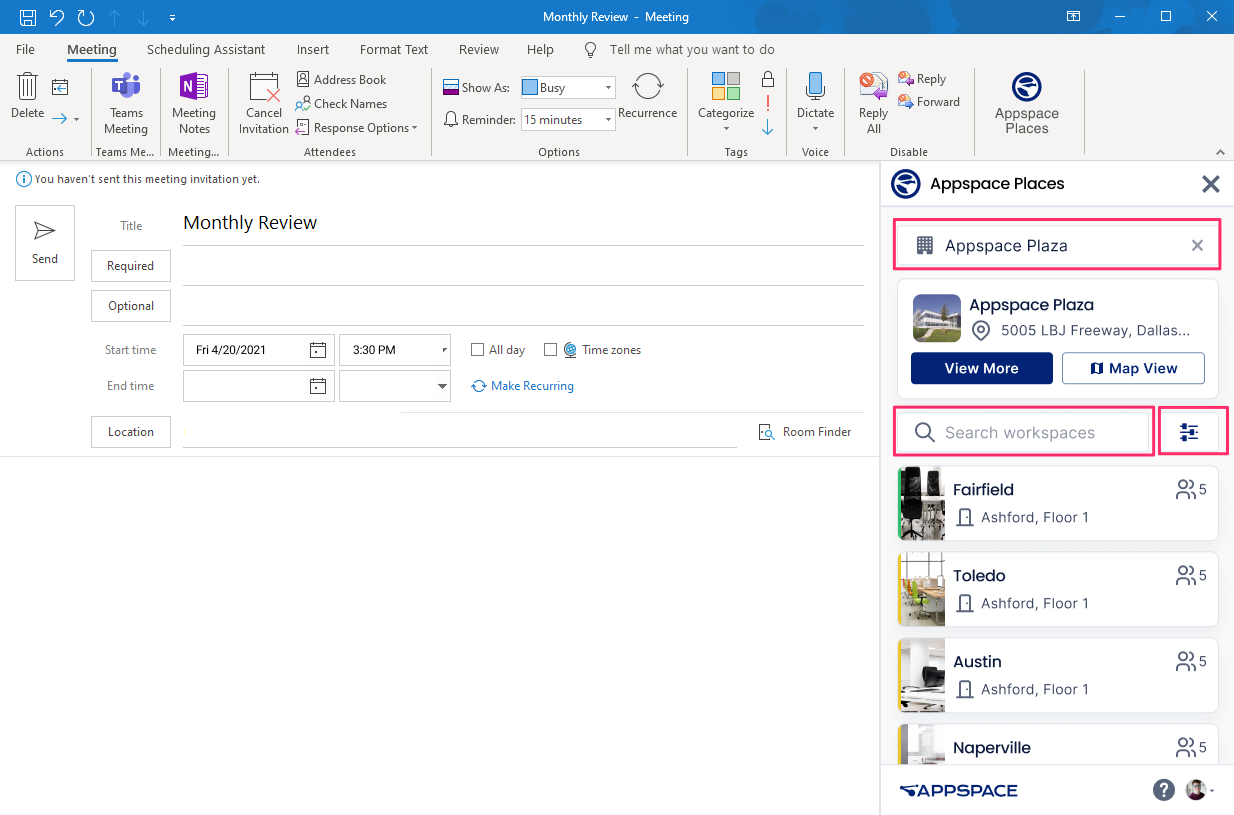
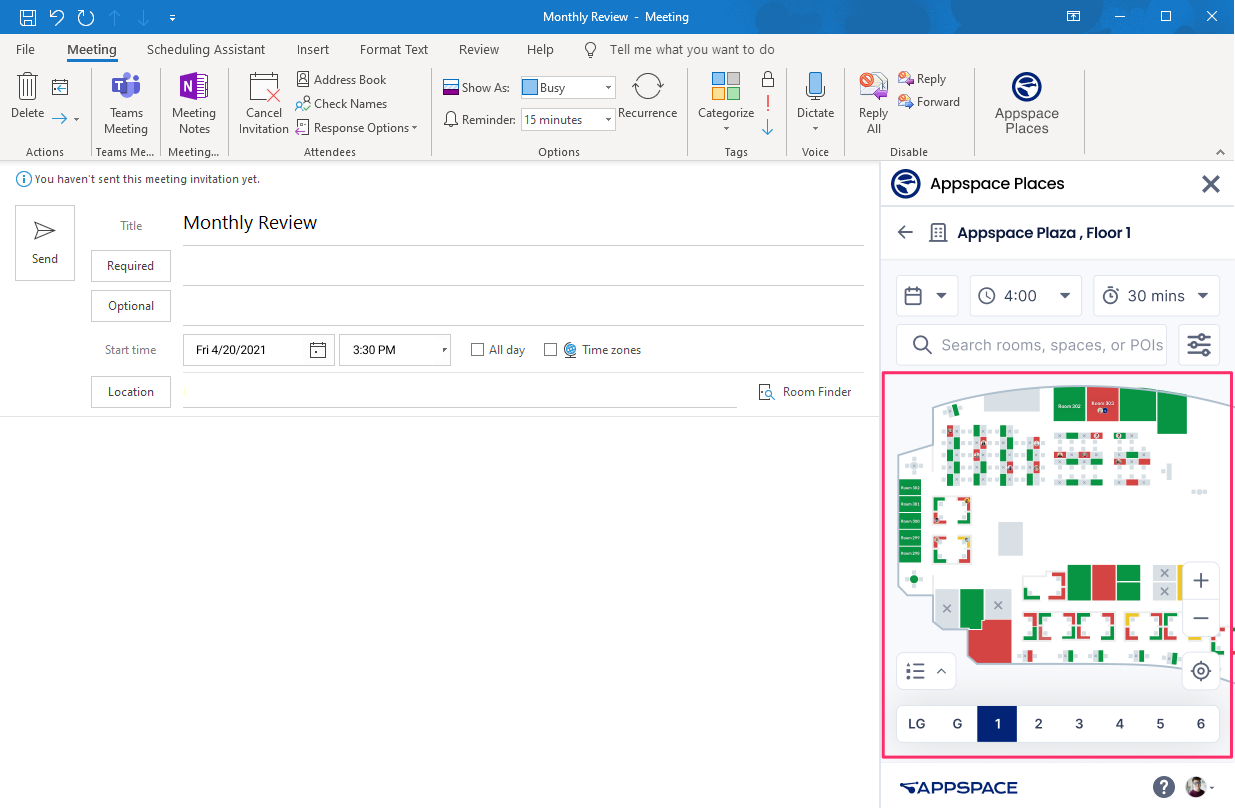
- Search and select your building, then search or filter for your desired workspace resource, similar to how you would on the Appspace Employee App.
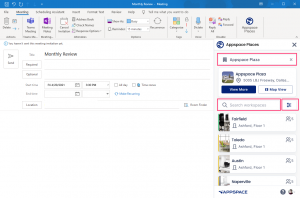
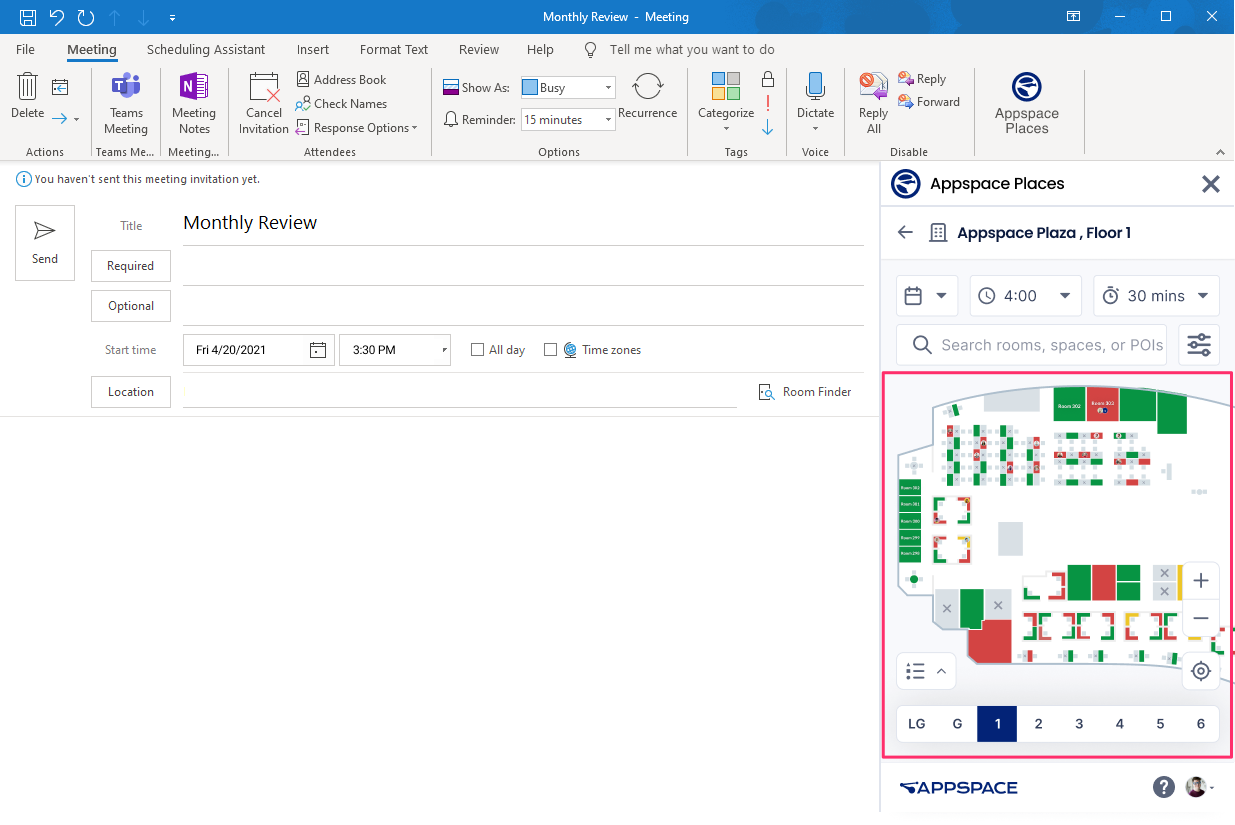
- When in a building, you may also click Map View to display the map and floors to search for the desired workspace resource. Only resources that you have permissions to are displayed.
- You can use the filters to further narrow down and find your workspace resources.
- Once a workspace resource has been selected, click Apply.
- Click Send on your invite to complete the reservation process. The meeting invitation will be sent to all attendees.
-
Was this article helpful?