This article provides instructions to create and manage content folders in the Appspace content Library, in Appspace 8.0. With the newly redesigned Library module, improved operations and functionality provide the opportunity to create, share, move, rename, and download folders directly from the Library dashboard in several ways.
Prerequisites
- Account Owner, Publisher, Editor, or Content Producer (Author) role to add or edit content/folder in Library.
- Account Owner, Publisher, or Editor, only role to add or edit content in Channels.
Create Folder
Follow the instructions below to create a content folder in the Appspace content Library.
- Log in to the Appspace console and click Library from the Appspace menu.
- You may create a folder using one of these options:
- Click the + CREATE button and select Folder.
- Right-click on any folder in the library navigation tree on the left, and select Create folder.
- Right-click on the dashboard on the right and select Create folder.

- Enter a name for the folder, and hit Enter.
Move Folder
Follow the instructions below to move a content folder in Library.
- Log in to the Appspace console and click Library from the Appspace menu.
- Browse the library and its folders, or simply search by name, type, location, or tags.
- You may select folder(s) using one of these options:
- Use the mouse pointer to select one or multiple folders, and drag and move the selected folder(s) to any folder or sub-folder in the Library navigation tree on the left.
- Use the mouse pointer to select multiple folders and click the Move to a new folder icon on the blue bar that appears at the bottom of the dashboard.
Share Folder
Follow the instructions below to share a content folder in Library.
- Log in to the Appspace console and click Library from the Appspace menu.
- Browse the library and its folders, or simply search by name, type, location, or tags.
- You may select folder(s) using one of these options:
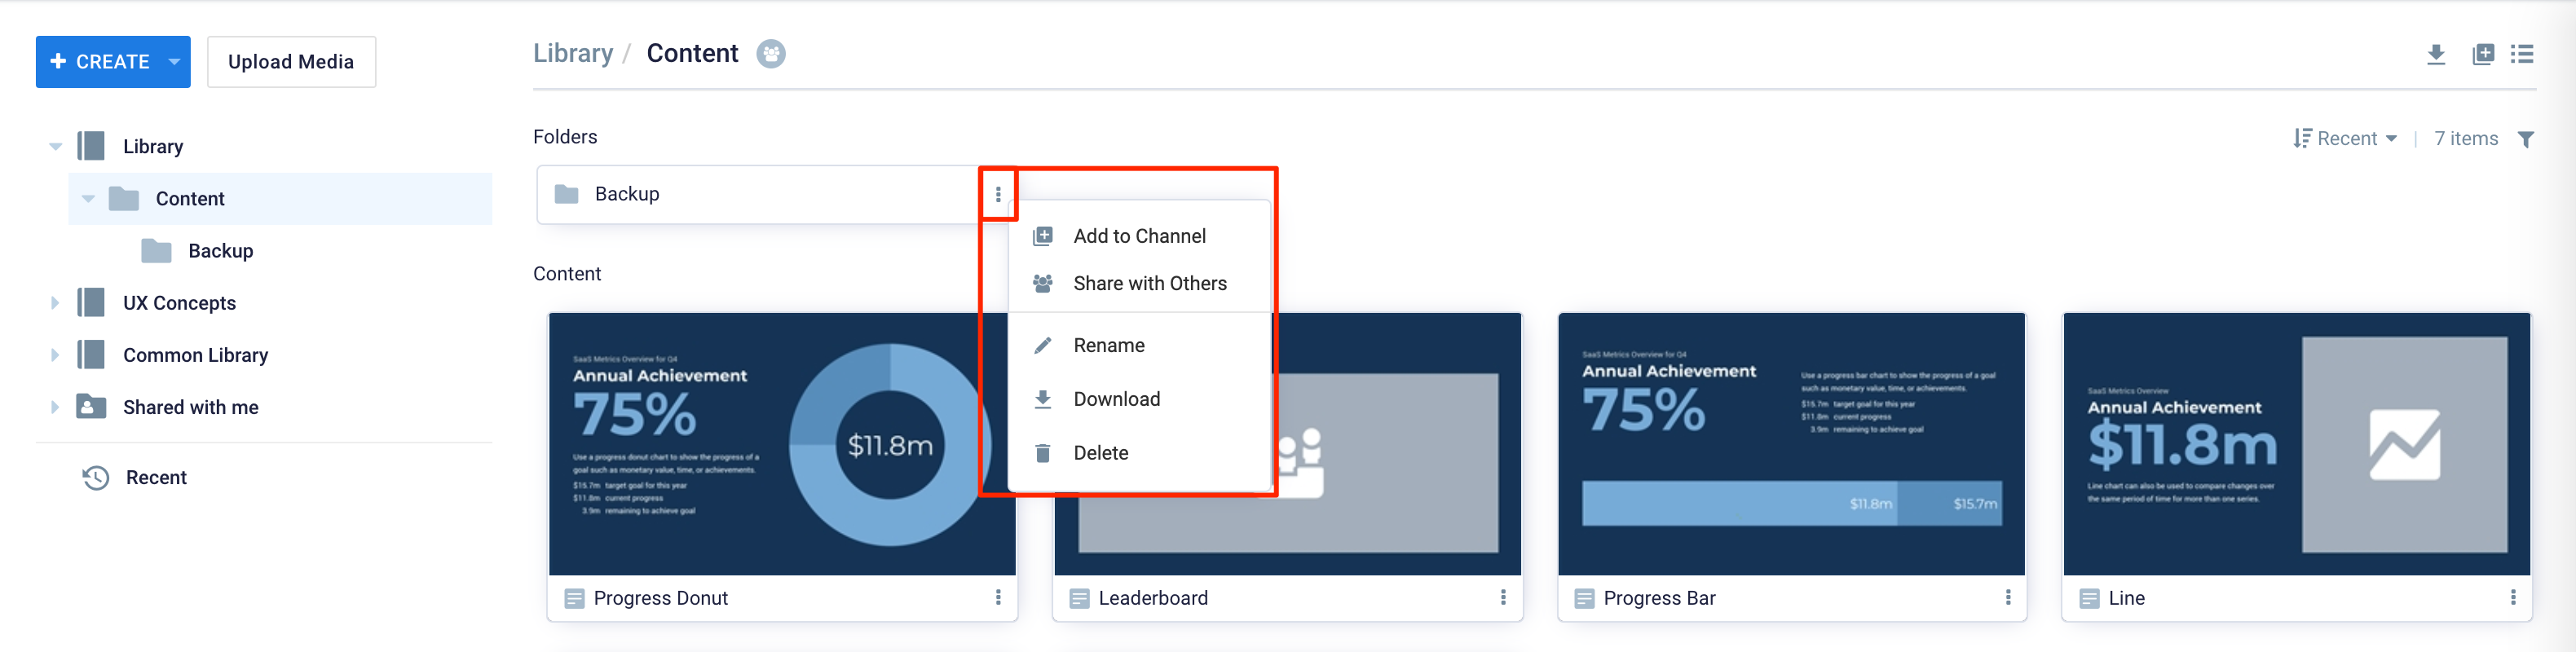
- Right-click on the selected folder either in the navigation tree on the left, or on the dashboard on the right, and click Share with Others.
- Click the ellipsis icon on the desired folder and select Share with Others.
- In the Share window, enter the desired user(s) or user group(s), and select one of the following share permissions:
- Viewer – Users can only view content in this folder.
- Editor – Users are given full access to view and edit contents of this folder.
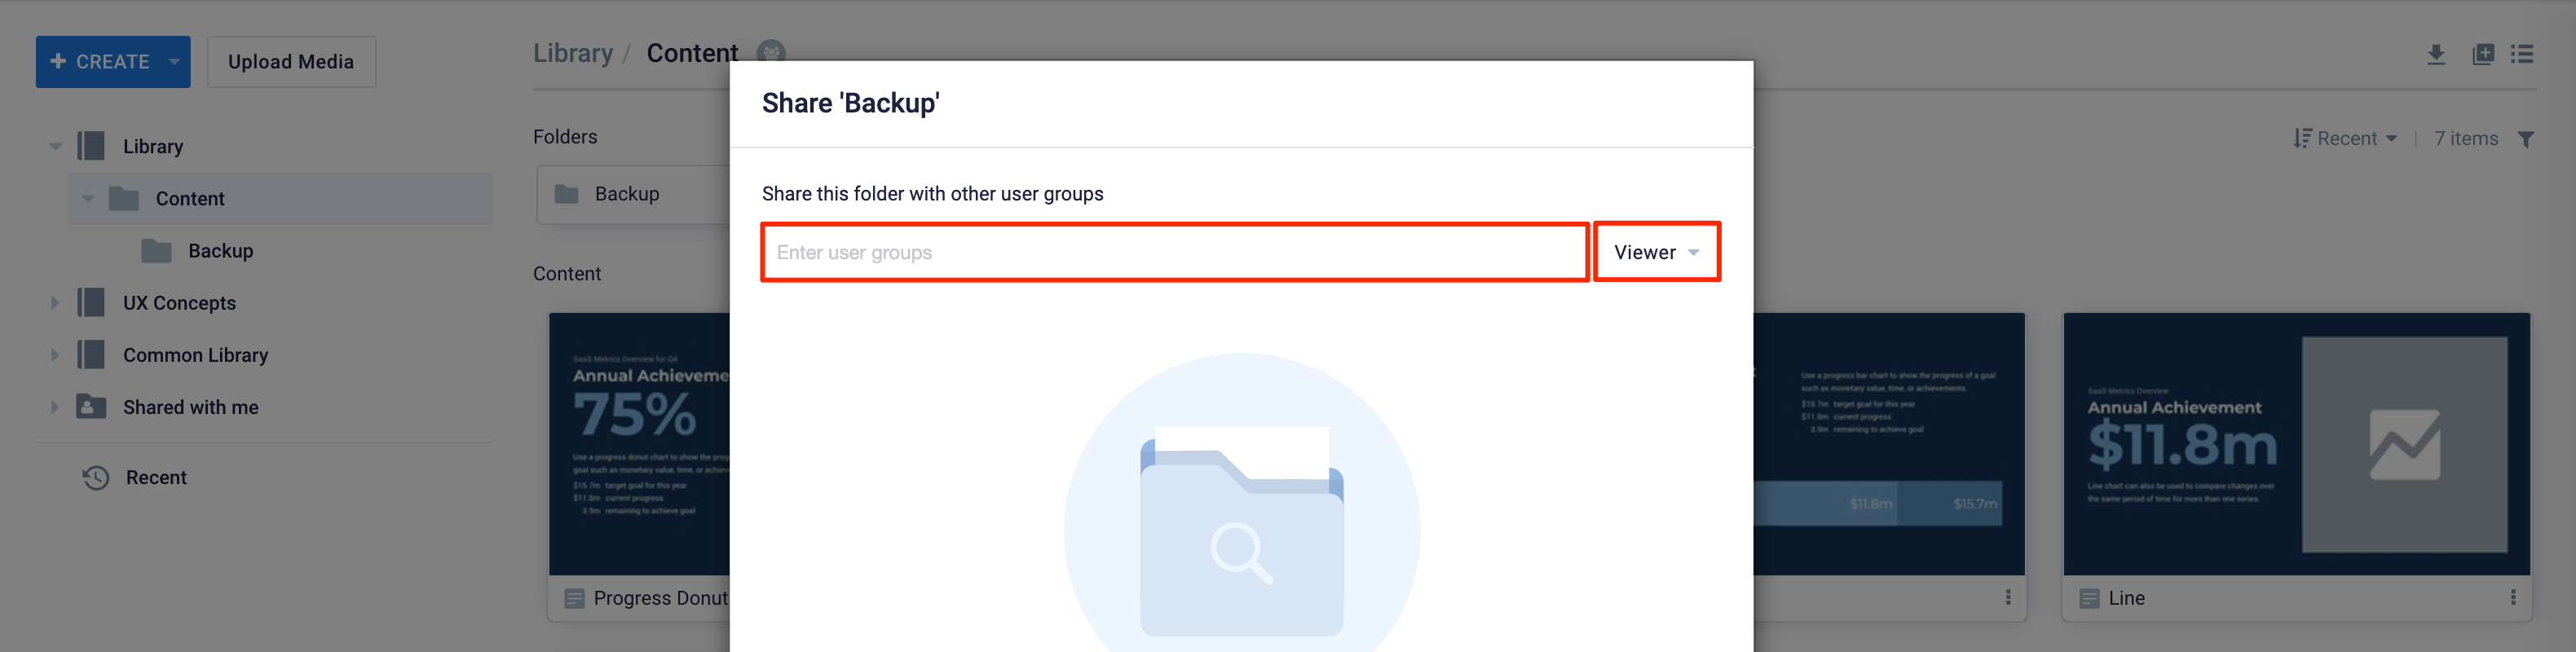
- Click the DONE button.
- The shared folder will be displayed in the user’s Shared with me library folder.
Rename Folder
Follow the instructions below to rename a content folder:
- Log in to the Appspace console and click Library from the Appspace menu.
- Browse the library and its folders, or simply search by name, type, location, or tags.
- You may select folder(s) using one of these options:
- Right-click on the selected folder either in the navigation tree on the left, or on the dashboard on the right, and select Rename.
- Click the ellipsis icon on the desired folder and select Rename.
- Enter a name for the folder in the Rename pop-up window, and click the SAVE button.
Download Folder
Follow the instructions below to download one folder or multiple folders.
- Log in to the Appspace console and click Library from the Appspace menu.
- Browse the library and its folders, or simply search by name, type, location, or tags.
- You may select folder(s) using one of these options:
- Right-click on the selected folder either in the navigation tree on the left, or on the dashboard on the right, and select Download.
- Click the ellipsis icon on the desired folder and select Download.
- Double-click a selected folder and click the Download icon on the top right from within the folder, to download everything in the folder.
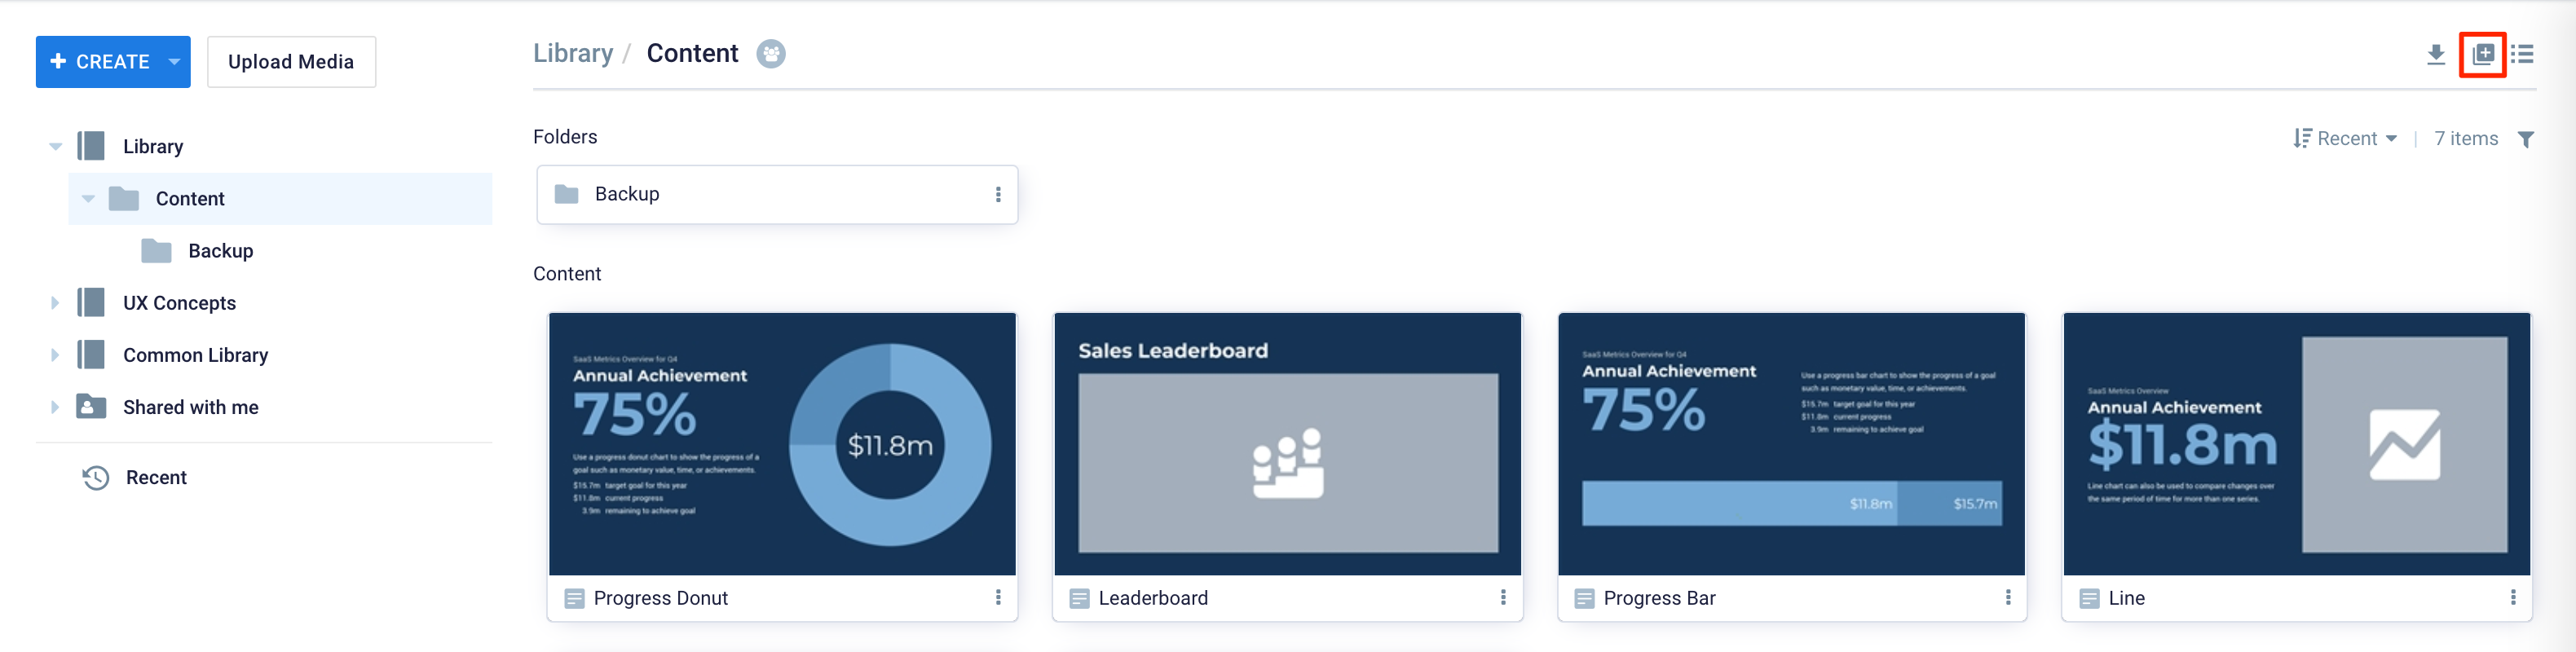
- Use the mouse pointer to select multiple folders and click the Download icon on the blue bar that appears at the bottom of the dashboard.
- The entire folder(s) and its content will automatically be downloaded in .zip format to your default download folder on your computer.
Add Folder to Playlist Channel
For instructions to add a content folder to a playlist channel directly from the Library, follow the instructions in the Add Content to Playlist Channels article.
Delete Folder
Follow the instructions below to delete any content folder(s):
- Log in to the Appspace console and click Library from the Appspace menu.
- Browse the library and its folders, or simply search by name, type, location, or tags.
- You may select folder(s) using one of these options:
- Right-click on the selected folder either in the navigation tree on the left, or on the dashboard on the right, and select Delete.
- Click the ellipsis icon on the desired folder and select Delete.
- Use the mouse pointer to select multiple folders and click the Delete icon on the blue bar that appears at the bottom of the dashboard.
- To confirm the deletion, click the DELETE button.
Was this article helpful?