Pre-requisites
The Beezy Connector for Power Automate has the following software prerequisites:
- Beezy installation for Microsoft 365 version 3.8.0 or higher.
- Power Automate license (you can find more details here).
In order to provide authentication for the flows, you will need to operate with the Azure Active Directory app created during the Beezy installation. Please ask your IT department or browse to your Azure subscription to perform the following operations:
- Get the client ID and tenant ID of the Azure Active Directory app.
- Create a new client secret for the app and get its value.
- Add a new redirect URI to the app.
It’s necessary to have a Beezy user with enough permissions for community creation if the flows need to create communities and community ownership if the flows need to create content inside them. Alternately, you can use a Beezy administrator user in order to provide full permissions to the workflows.
Configure the Beezy connector
Introduction
As you already know, Beezy provides an extensive API to interact with the data in the backend. We will use some methods of this API to interact with Beezy from Power Automate.
To establish the connection between Power Automate and your Beezy installation, we will use Swagger and OpenAPI, technologies widely used across the web to define how the two systems will interact using API methods.
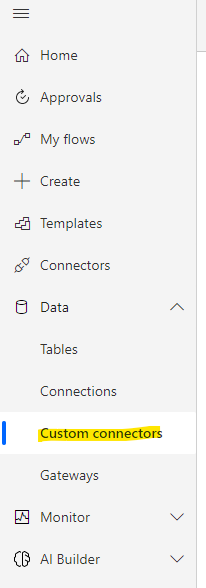
Creating the custom connector
Go to your Power Automate home page and click on the Custom connectors page:
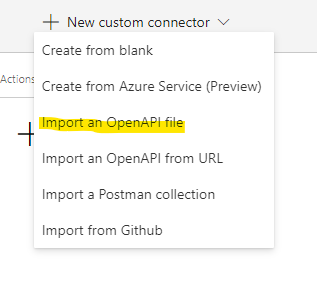
Once there, we can create our custom connector by importing an OpenAPI file:
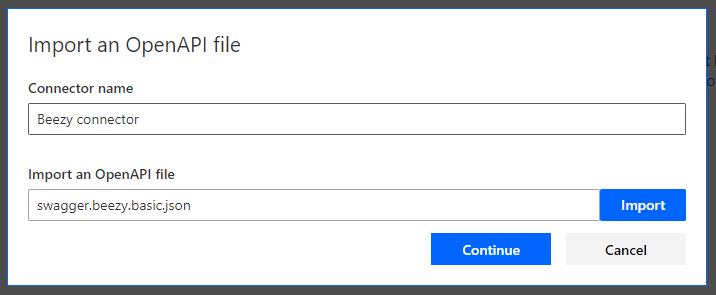
Select the “swagger.beezy.basic.json” file from the Beezy connector package and click “Continue”:
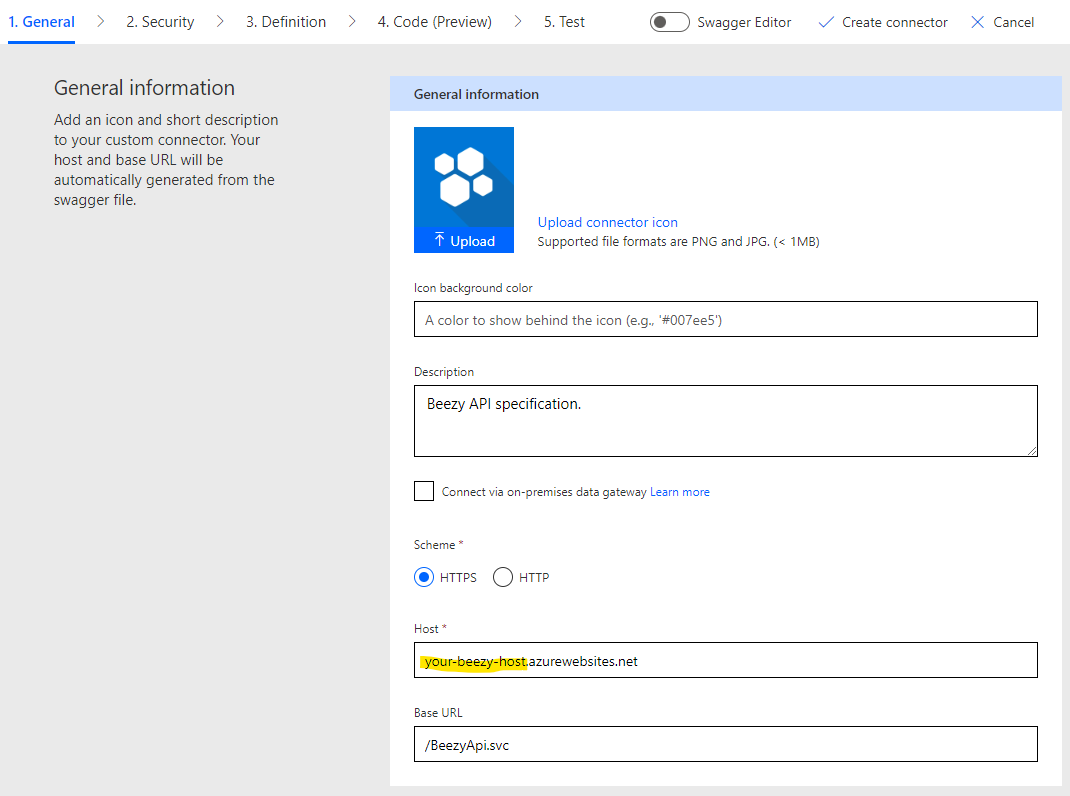
A wizard with several sections will appear. The first section “General” will allow us to customize our Beezy connector. It is very important that you edit the Host field to point to your Beezy Web Application in Azure. This is the endpoint that your Beezy installation uses to retrieve data from the API:
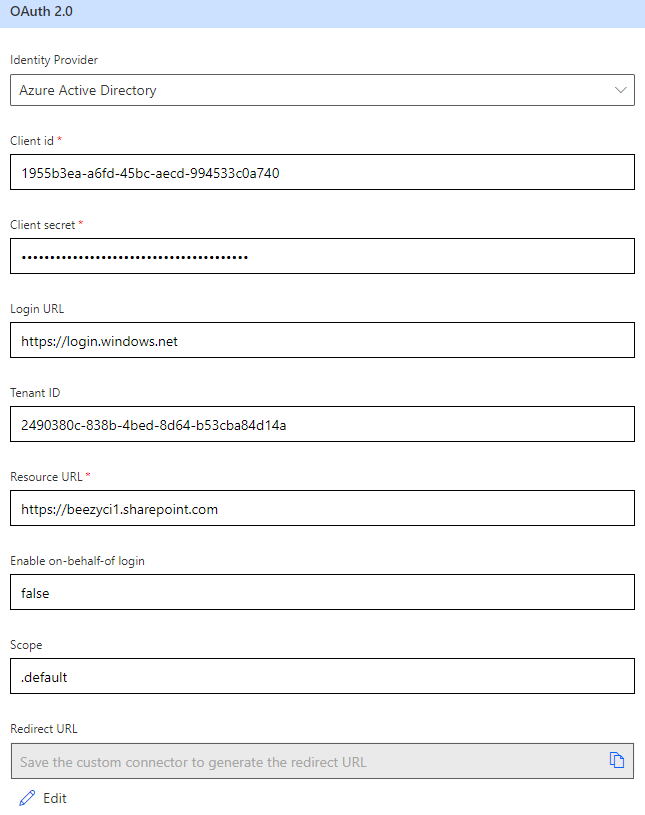
In the next section “Security”, choose “OAuth 2.0” and then “Azure Active Directory” in the selectors.
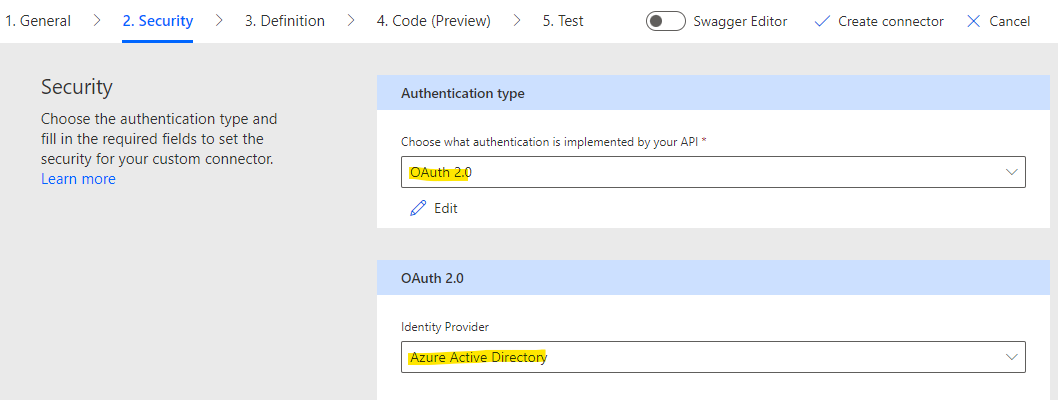
In order to fill the following fields, you will need access to the Azure Active Directory app created during the Beezy installation. Please ask your IT department or browse to your Azure subscription in order to get the following parameters:
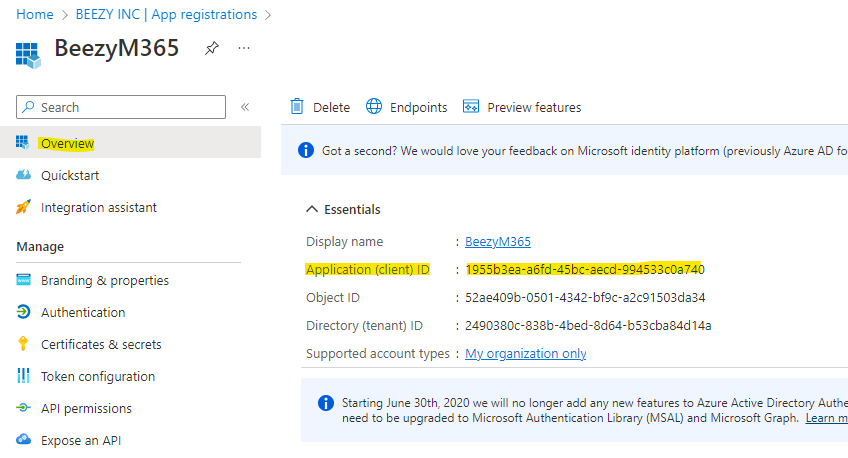
- Client id: you can find it under Azure Active Directory > App registrations > BeezyM365 > Overview > Application (client) ID.
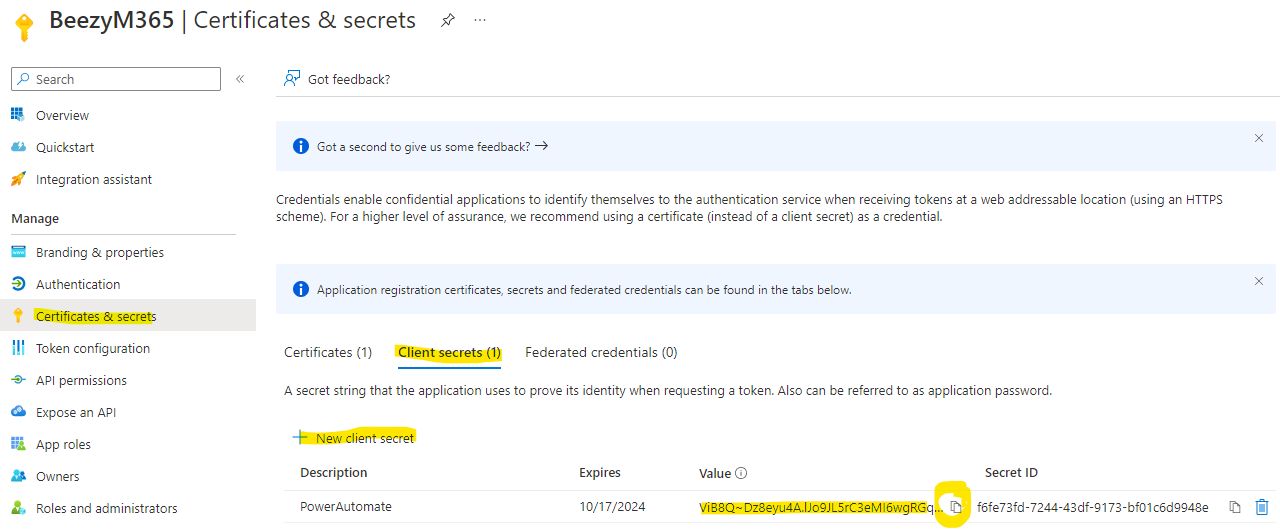
- Client secret: If you don’t have any existing one, it needs to be generated. Go to Azure Active Directory > App registrations > BeezyM365 > Certificates & secrets > Client secrets > New client secret. Type a description and select and expiration date for the secret. Add it and then copy the secret value.
- Login URL: Leave the value https://login.windows.net
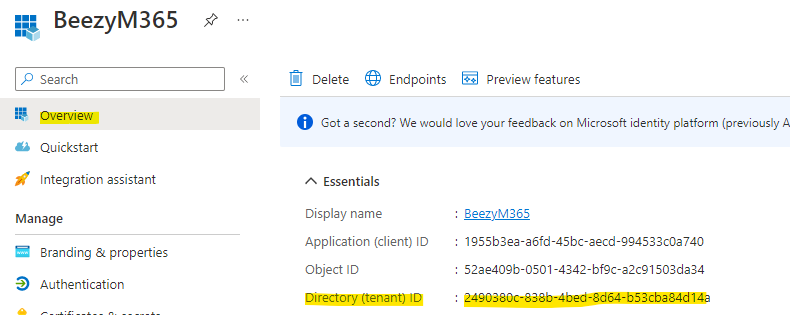
- Tenant ID: you can find it under Azure Active Directory > App registrations > BeezyM365 > Overview > Directory (tenant) ID.
- Resource URL: the root URL of your Microsoft 365 tenant, this is https://your-tenant-name.sharepoint.com
- Enable on-behalf-of login: leave this field to false.
- Scope: set this field to “.default” (do not miss the dot character).
The “Definition” section allows you to change the name of the custom actions that our Custom connector will enable. You can leave them with the default name or change them.
When you are done, click on “Create connector”.
Right after the creation, please copy the value from the field “Redirect URL” and browse to the Azure subscription > Azure Active Directory > App registrations > BeezyM365 > Authentication > Web. Then add a new URI and paste the copied value as a new URL. Finally, press “Save”.

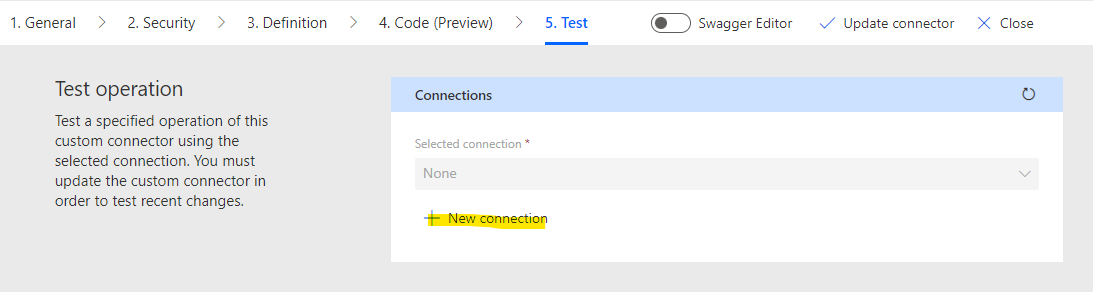
Testing the connection
After the connector has been created, you can switch to the Test section, which will allow us to establish and test the connection to our Beezy installation by introducing a user that will be responsible for posting updates into Beezy.
Click on “New connection”:
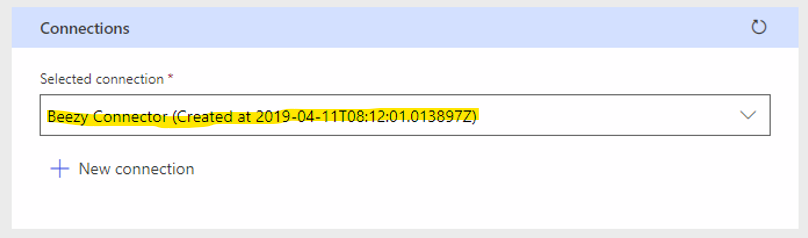
This will launch a new window displaying Microsoft 365 login. Specify the credentials that the workflow is going to use. After that, the connection will be set:
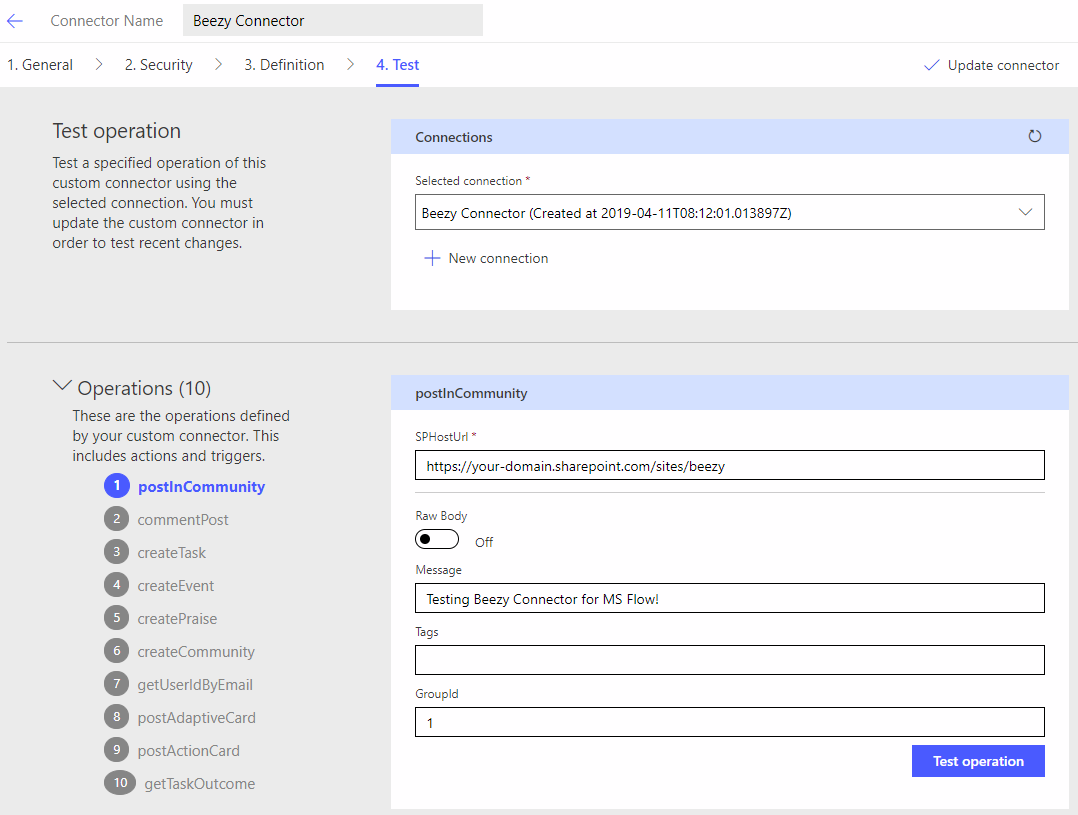
In order to finish the test, fill the fields of the “postInCommunity” operation:
- SPHostUrl: root URL of your Beezy environment.
- Message: text to be posted.
- GroupId: community ID where you want to post
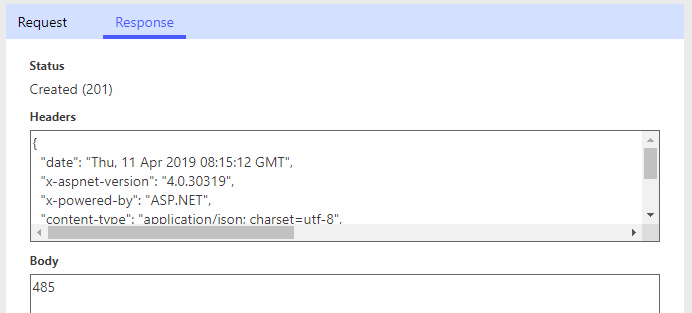
Finally, click “Test operation”:
If the connection is successful, you should see the Response as well as the activity created in Beezy:

Our custom connector is now ready!