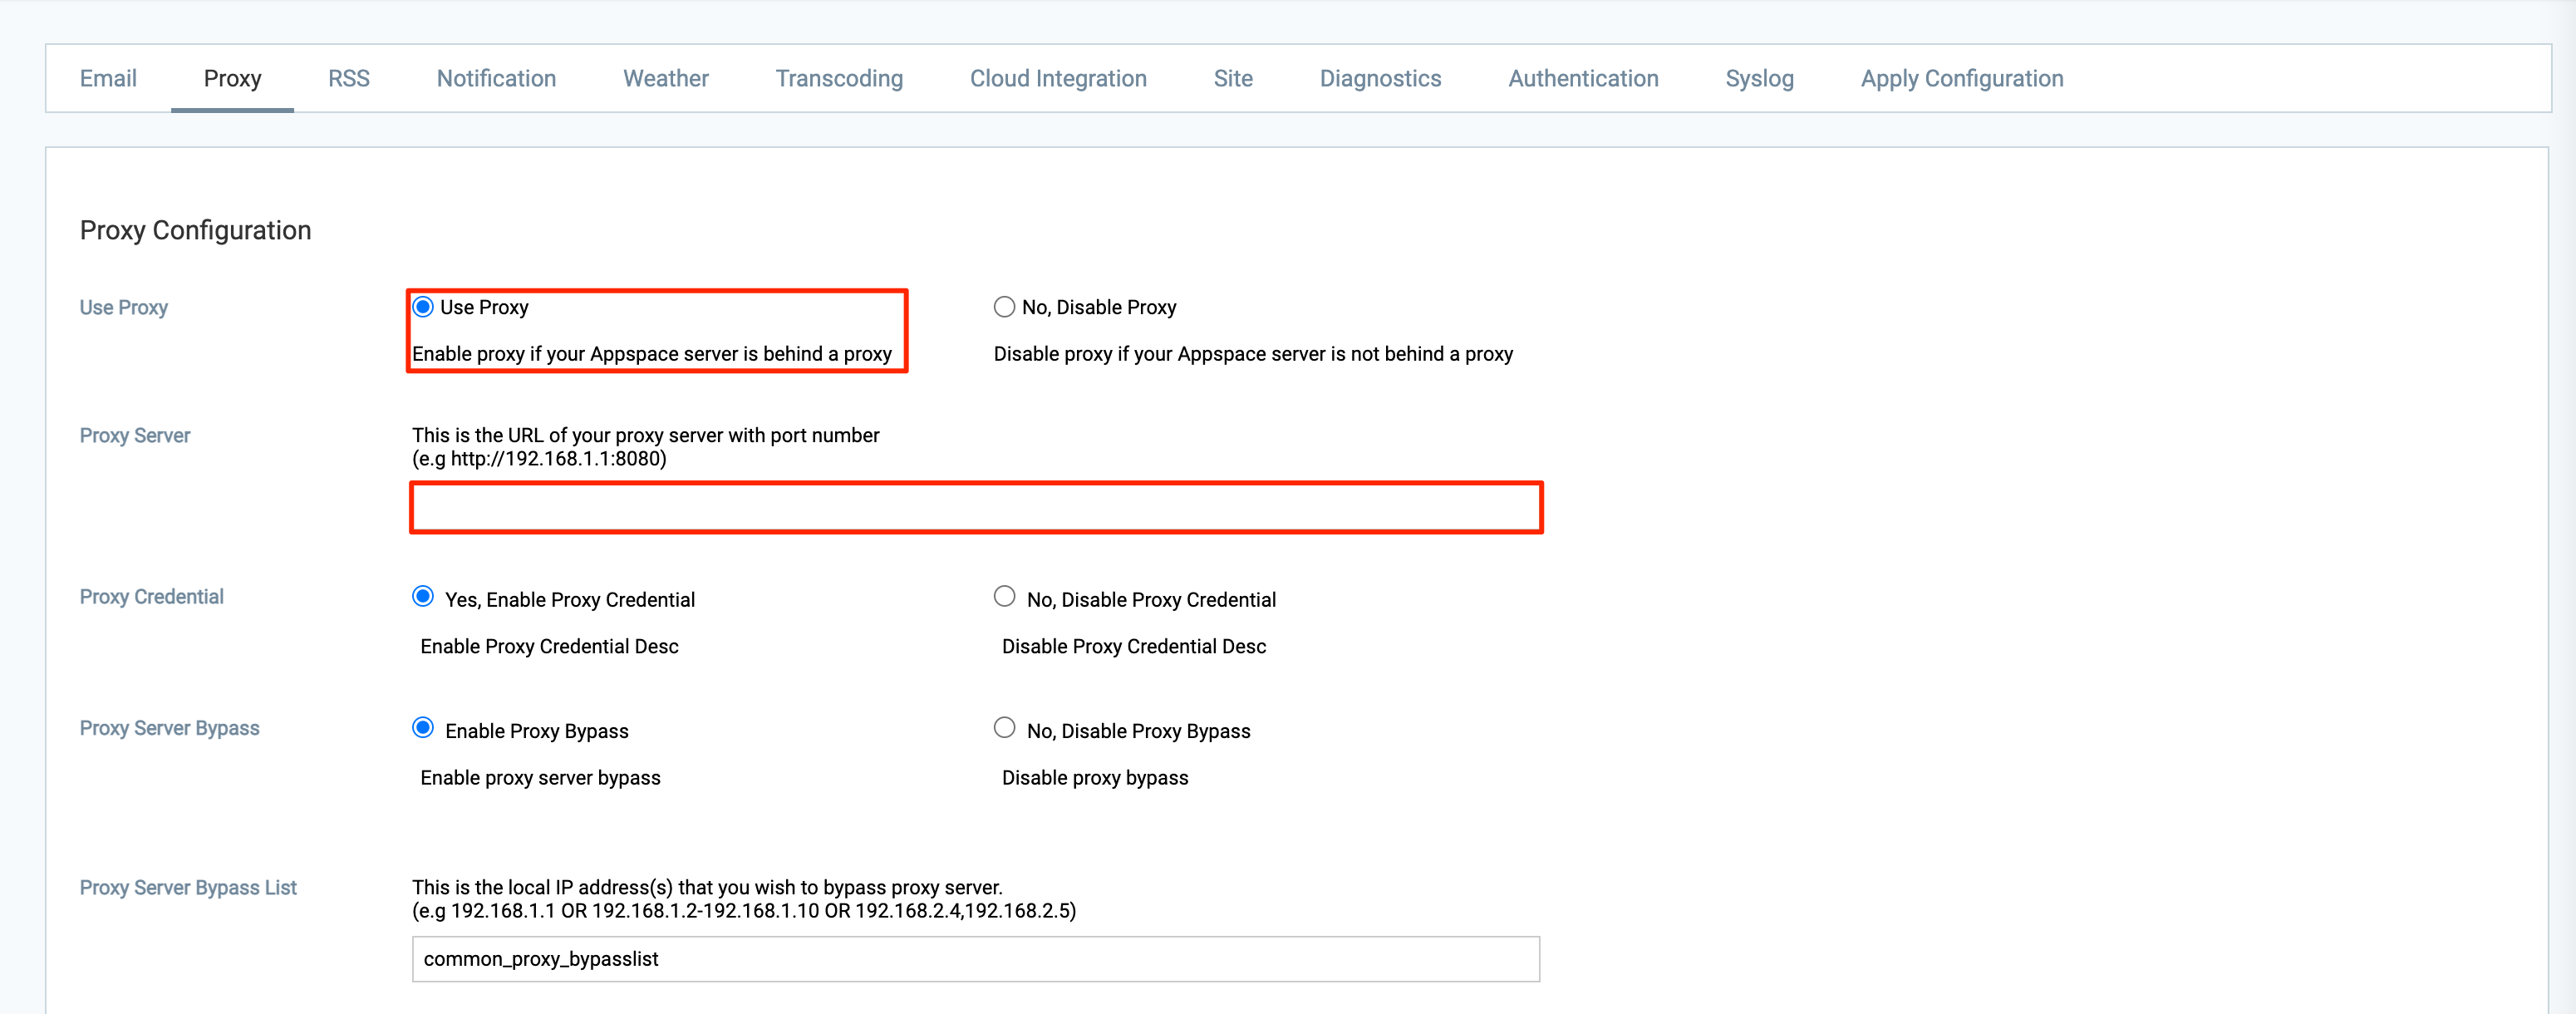
This article provides the instructions to enable and configure the proxy server settings on an Appspace on-prem deployment:
Prerequisites
- Windows Server Administrator permissions.
- Required Appspace roles and permissions: Portal Admin.
- The proxy server network settings, including proxy server credentials and bypass information (if applicable).
Please be informed that once configuration server settings have been saved, a notification is displayed at the top, informing you that the Appspace server has detected changes in the server settings, and to Click Here to apply these settings. Clicking the link will redirect you to the Apply Configuration tab, in which you would be required to enter your Windows Server Administrator credentials for the server settings to be applied. However, you may continue performing other server configurations before finally applying all the server setting changes that have been made.
Warning
Please DO NOT enter your Appspace Portal Admin credentials (Appspace on-prem server administrator) or Appspace Account Owner credentials (Appspace cloud administrator).
Please use your Windows Server Administrator credentials or an account with local administrator privileges when applying the server setting changes.
Enable and Configure Proxy Settings
- Click the ☰ Appspace menu, and click System > Configuration, and click the Proxy tab.
- In the Proxy Configuration section:

- For Use Proxy – Select the Use Proxy option to enable proxy server, and display further configuration settings.
- For Proxy Server – Enter the proxy server hostname URL or IP address, together with the port number (ie. http://192.168.1.1:8080).
- For Proxy Credential – Select if you’d like to Enable Proxy Credential or Disable Proxy Credential, based on your proxy server settings.
- For Proxy Server Bypass – Select if you’d like to Enable Proxy Bypass or Disable Proxy Bypass, based on your proxy server settings.
- For Proxy Server Bypass List – Enter the local IP address(es) that will bypass proxy server, if Proxy Server Bypass is enabled.
- Once done, click Save, and click OK to confirm the settings.
Was this article helpful?