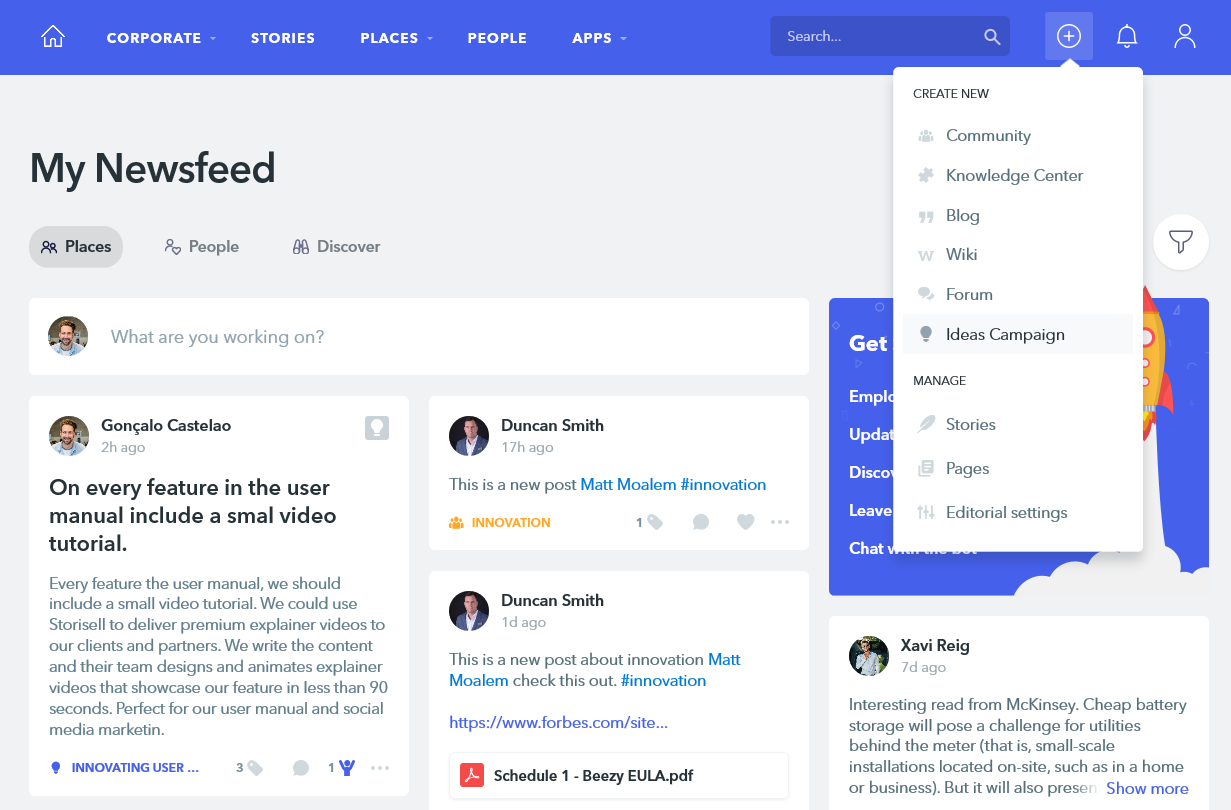
Click on the Quicklinks button and open Idea Campaign settings.
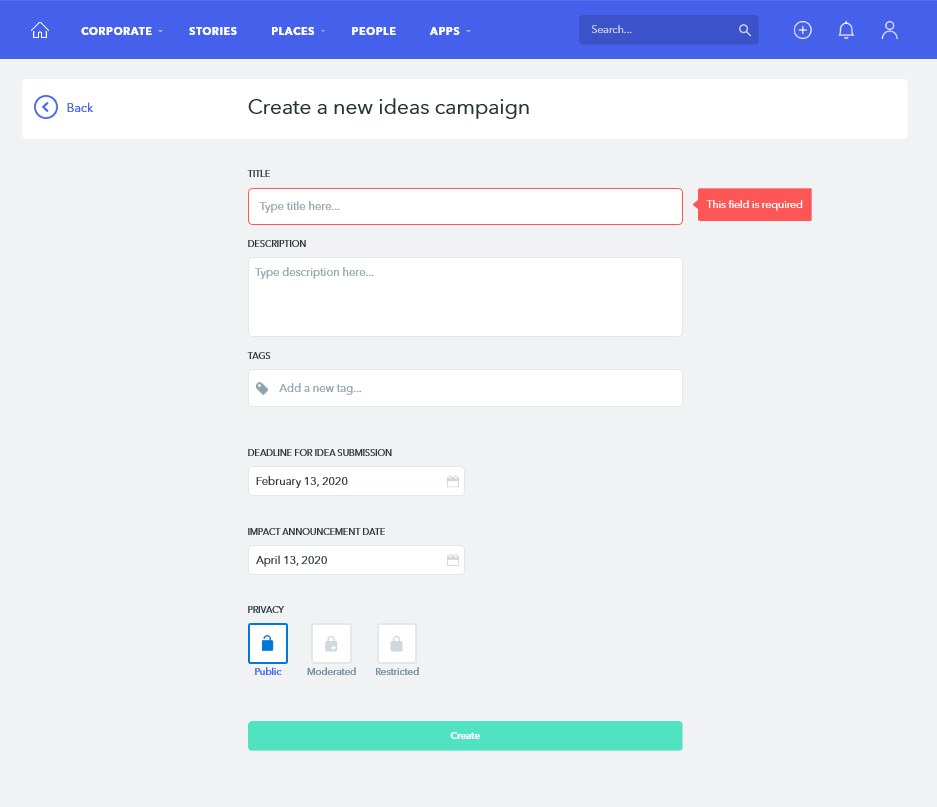
In the Basic settings, insert the Title, Description, Tags, Deadline Submission, Impact Announcement Date, and choose the Privacy level of the campaign. Then, click on Create.
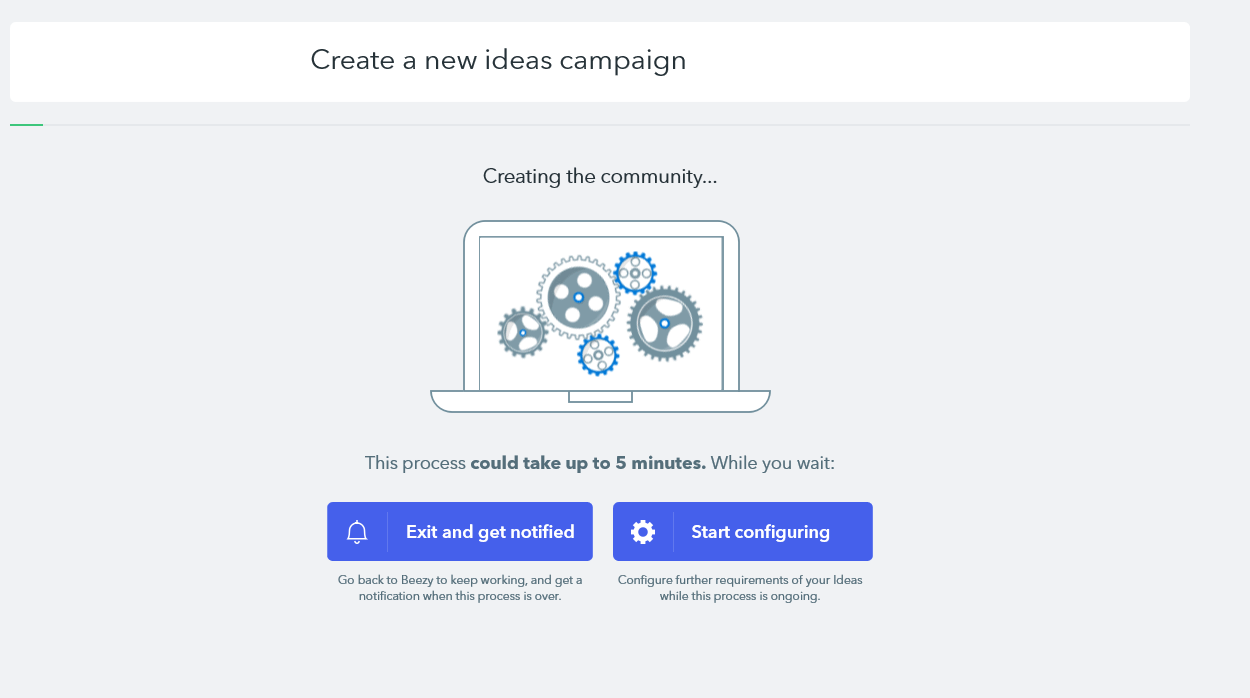
The creation process might take a couple of minutes. You can choose to Exit and Get Notified or Start Configuring while the process is ongoing.
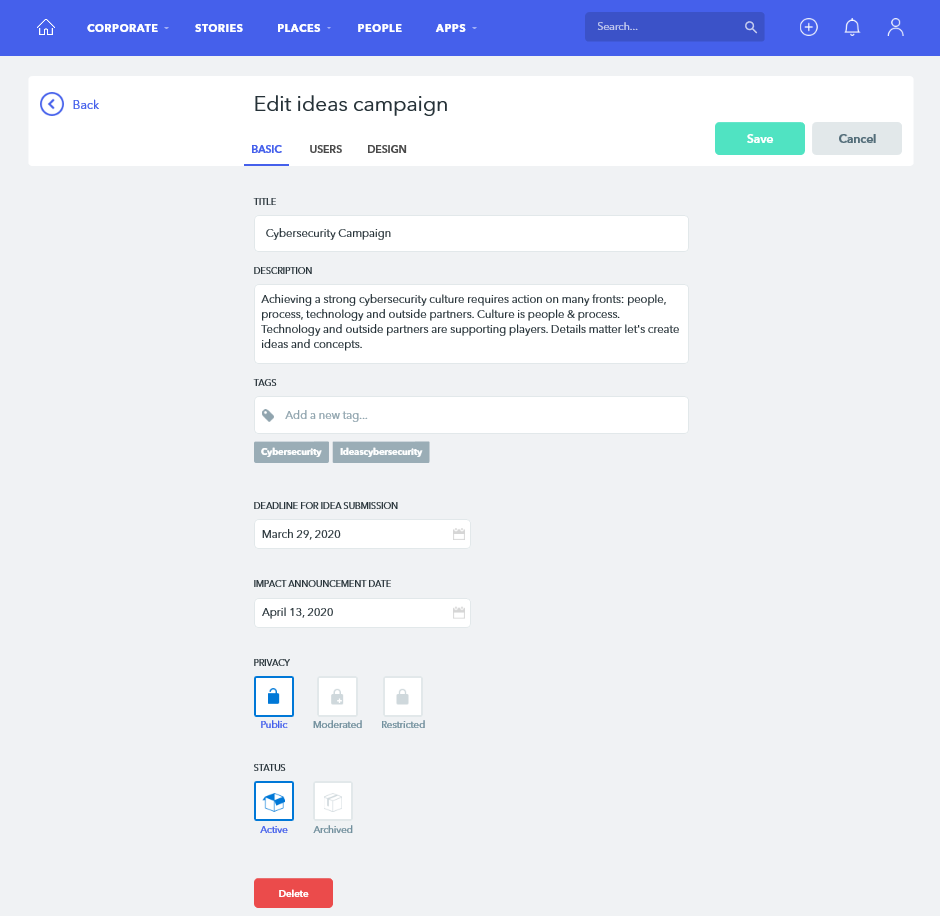
Once the campaign is created, and you’ve become a campaign Owner, select its Status (Active or Archive). As a campaign owner, you now have access to the full Idea campaign settings, allowing the configuration of two more sections: Users and Design.
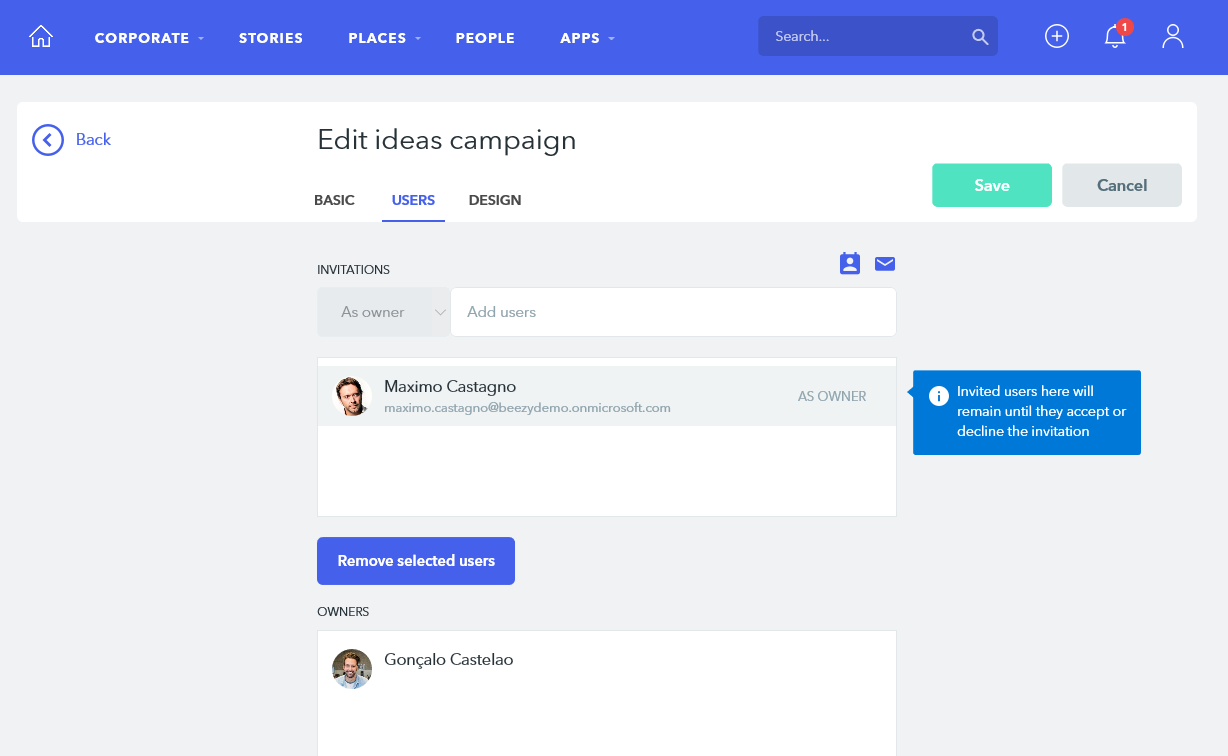
In the Users settings, you can invite other users to be Co-owners of your campaign using the Add Users, the added users will appear below the Add Users text box. If you wish to remove any of the added co-owners, click on the user’s name and then click on Remove Selected Users.
To add several users at once use the Add Active Directory Groups or Add Emails buttons on the top right corners of the Add Users text box.

In the Design settings, edit your idea campaign page by selecting one of the available colors and uploading a banner image.
Was this article helpful?