Appspace SharePoint Intranet has significantly improved the user experience for posting in standalone blogs, enhancing usability in the process of publishing a blog post. This improvement includes the integration of a new “View published blog” notification within the publication workflow.
This article provides instructions on how to create a new blog post in the Appspace SharePoint Intranet.
Create a New Blog Post
Follow the instructions below to create a new blog post.
- Log in to your Appspace SharePoint Intranet account.
- Click the User Menu and select My Blogs.
- Click on your desired blog space where you wish to create a blog post.
- In the blog space, click on the Write a new post.
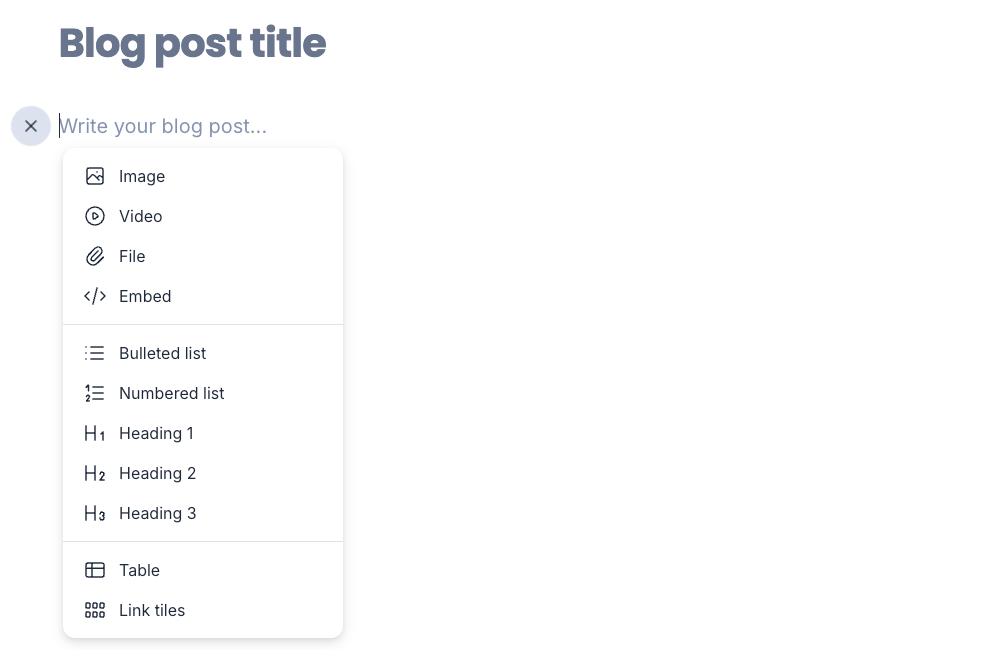
- You may start to write a blog by adding:
- Blog post title – Add a title to the content.
- Write your blog post – Provide content related to your post. When you click on Write your blog post, a plus icon will appear on the left. Clicking the plus icon will display a list of functionalities you can use when writing a blog post, including Image, Video, File, Embed, Bullet list, Numbered list, Heading 1, Heading 2, Heading 3, Table, and Link tiles.

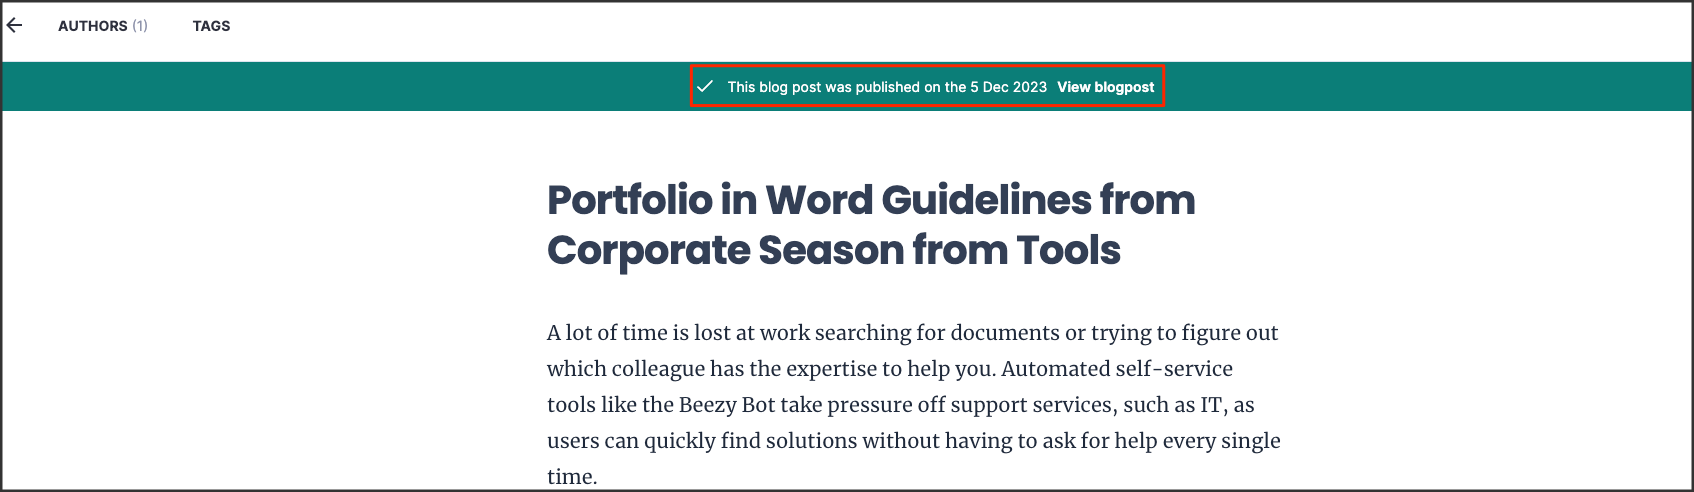
- Once done, select the Save option to keep the content as a draft, or choose Publish if the content is prepared for public sharing.
- Once the content is published, you may see a notification of the blog post.

Auto-Translation for Blog Posts
The Appspace SharePoint Intranet offers an auto-translate feature for blog posts. Follow the steps below to change the language of a blog post.
- Log in to your Appspace SharePoint Intranet account.
- In My Newsfeed, select the desired blog post.
- In the blog post, click on Edit.
- Click on Languages select Auto-translate to all.
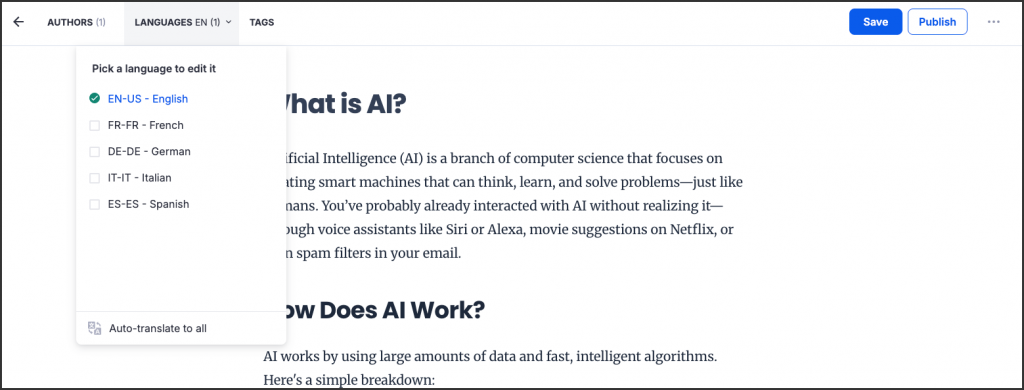
- In the Auto-translate window, select the target languages and click Auto-Translate.
Was this article helpful?