Appspace provides organizations the ability to personalize their Appspace cloud or on-prem instances to match their organization’s branding or theme, giving it that personal touch. The following customizations and instance settings are available:
- Custom Logo Header.
- Header Background Color.
- Time Zone.
- Google Analytics Tracking ID.
Only available on Appspace on-prem servers:
- Appspace Domain.
- Custom Sign In Page.
This article provides the instructions to configure the instance settings to personalize their Appspace cloud or on-prem instances:
Prerequisites
- Required Appspace roles and permissions: Portal Admin and Account Owner.
Customize Header Logo
- Click the ☰ Appspace menu, and click Admin > Settings, and click the Instance Settings tab.
- Click the Custom Logo Header browse button to upload your custom logo image file.

- Once done, click Save.
Customize Header Background Color
- Click the ☰ Appspace menu, and click Admin > Settings, and click the Instance Settings tab.
- Click the Header Background Color color picker, and select your desired header background color.
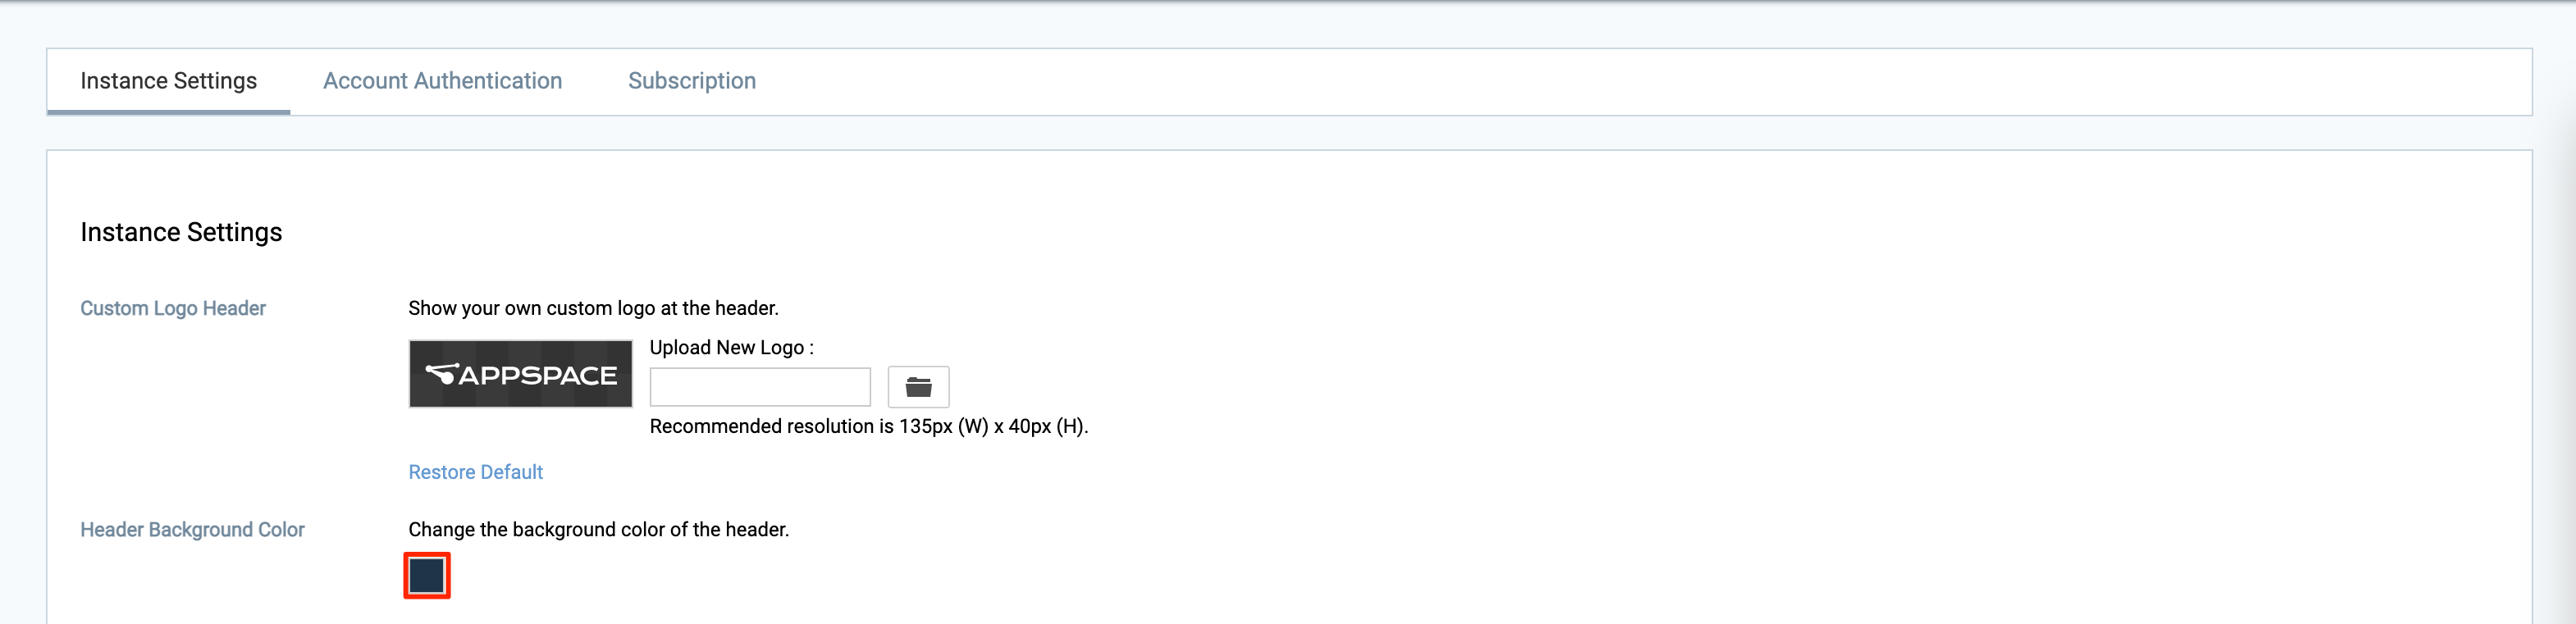
- Once done, click Save.
Configure Time Zone
- Click the ☰ Appspace menu, and click Admin > Settings, and click the Instance Settings tab.
- Select the correct time zone based on your location from the Time Zone drop-down menu.

- Once done, click Save.
Configure Google Analytics
- Click the ☰ Appspace menu, and click Admin > Settings, and click the Instance Settings tab.
- Enter the Tracking ID in the Google Analytics Tracking ID field.

- Once done, click Save.
Customize Appspace Domain
- Click the ☰ Appspace menu, and click Admin > Settings, and click the Instance Settings tab.
- Select one of the following Appspace Domain options:
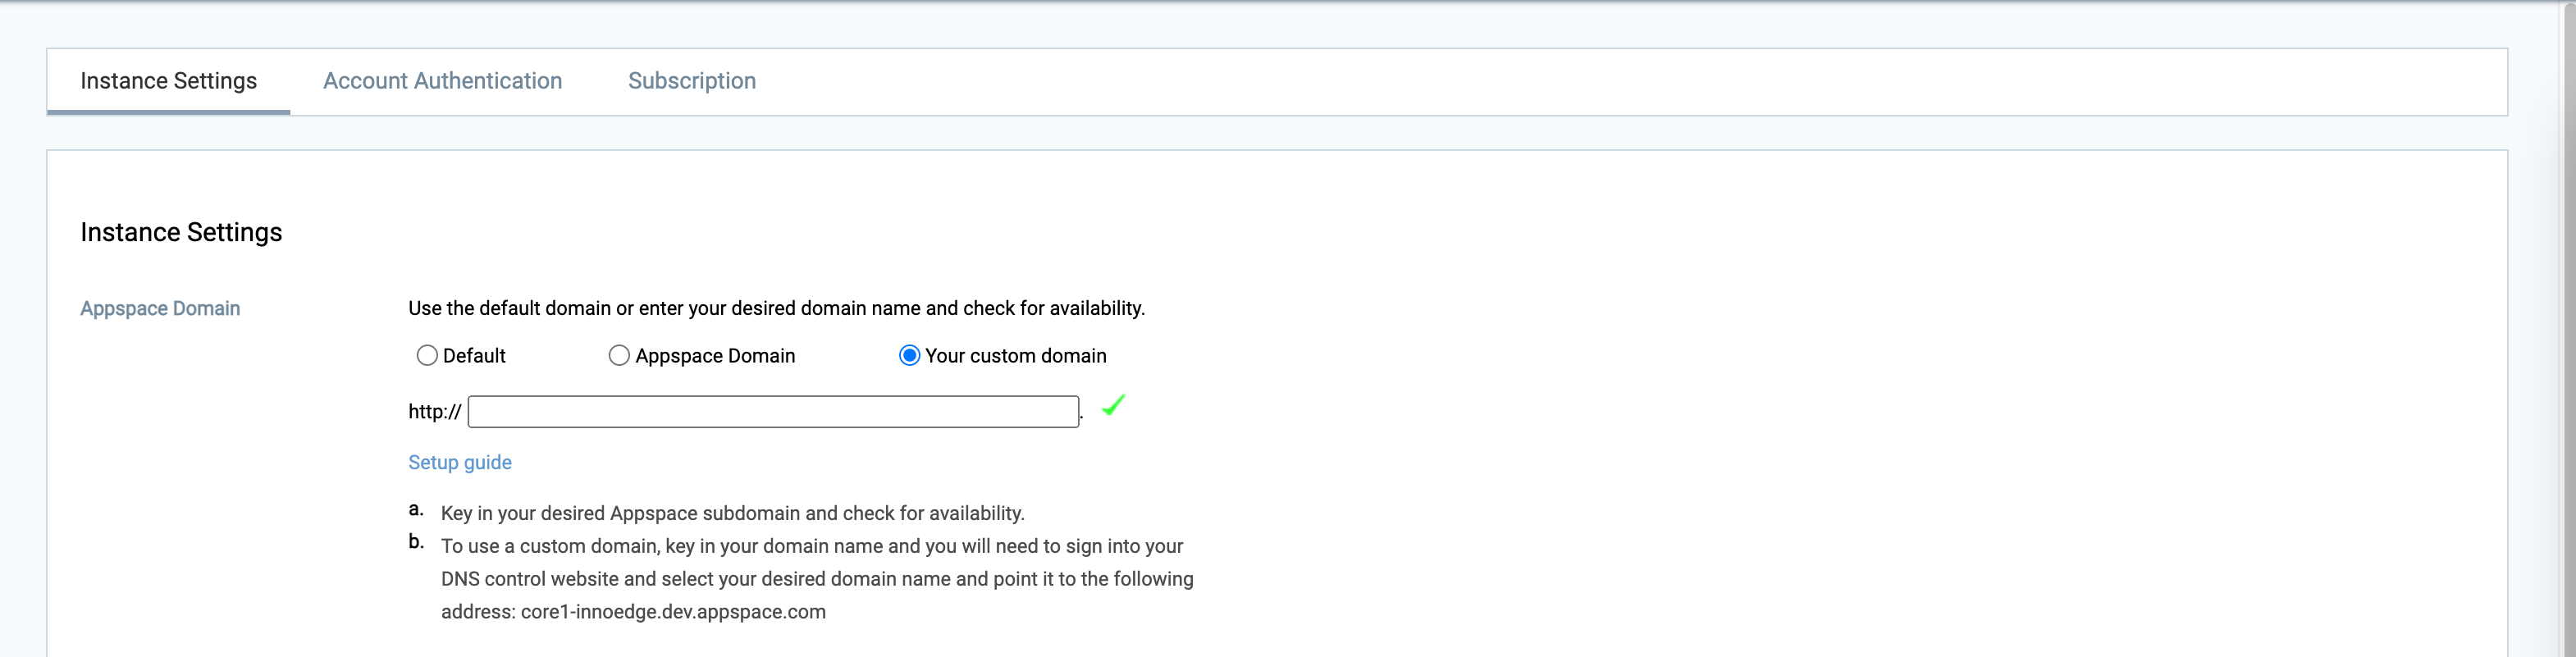
- Default – Use the default Appspace domain (hostname).
- Appspace Domain – Use an Appspace subdomain.
- Enter the desired subdomain, and select the Appspace domain from the drop-down menu.
- Your custom domain – Use a custom domain.
- Enter the desired custom domain, and click the Setup Guide.
- Proceed to configure your DNS control website, and select the domain name entered above, and point it to the following URL address displayed, which would be your default Appspace hostname URL.
- Once done, click Save.
Customize Sign In Page
Important
The custom Appspace sign-in page must be created beforehand and hosted on your web server. The sign-in page must contain the following HTML text inputs in the login form:
- Login ID – <input type=”text” name=”nexuslogin” id=”nexuslogin” />
- Password – <input type=”password” name=”nexuspassword” id=”nexuspassword” />
- Post Method – <form id=”form” name=”form” method=”post” action=”http://<appspace login page URL>/app/login.aspx”>
You may download a sample sign in page by clicking the Sample sign in page link in the Custom Sign In Page section.
- Click the ☰ Appspace menu, and click Admin > Settings, and click the Instance Settings tab.
- Select the Your Custom Login Page option, and enter the sign-in page URL in the respective field.

- Once done, click Save.
Was this article helpful?