This article provides the instructions to install and configure the Microsoft SQL database service with SQL Management Studio for Appspace on-prem.
Prerequisite
- Download MS SQL: Microsoft SQL Server 2019: https://www.microsoft.com/en-us/sql-server/sql-server-downloads
Important
- Links to the installation instructions on the provider’s website are provided.
- Please ensure you take note of and complete the specific configuration required for each application, described in each step below.
- Please right-click each installer file and select Run as Administrator to install.
Install and Configure Microsoft SQL Server
- Install Microsoft SQL Server 2019 on your server, as outlined in the Install SQL Server from the Installation Wizard (Setup) guide here: https://docs.microsoft.com/en-us/sql/database-engine/install-windows/install-sql-server-from-the-installation-wizard-setup?view=sql-server-ver15
- Ensure the following configuration settings are made:
- In the Setup Role window, select the All Features With Defaults option.
- In the Feature Selection window, keep all features that are selected by default.
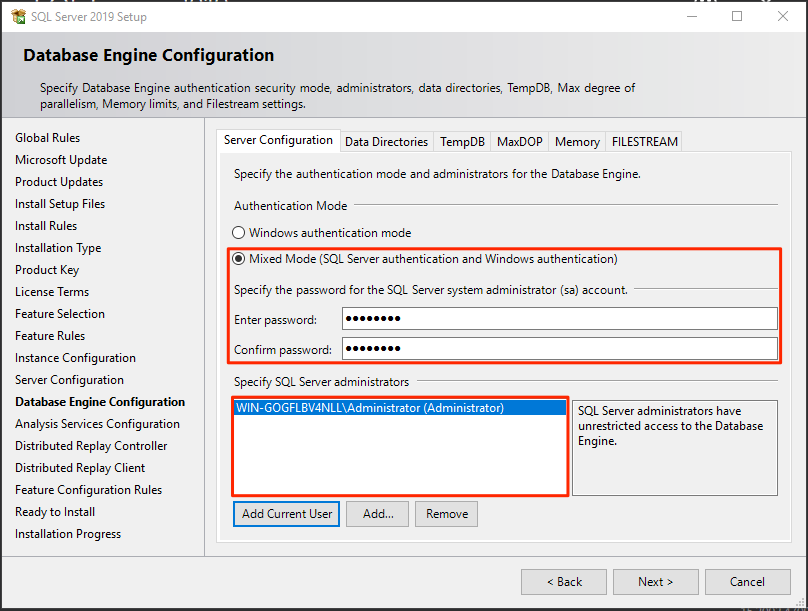
- In the Database Configuration window, select the Mixed Mode option. Ensure that at least one user has been assigned administrative permissions for Analysis Services.
- Proceed to configure the SQL Management Studio by following the instruction in the next section below.
Configure SQL Management Studio
Warning
Ensure the SQL root password created during installation has been granted System Administrator privileges in Windows before proceeding.
Follow the instructions below to configure SQL Server Management Studio:
- Launch the SQL Server Management Studio from the desktop.
- In the Connect to Server window, select Database Engine from the Server type drop-down menu, and Windows Authentication from the Authentication drop-down menu. NoteTake note of the server name value, as it shall be used at a later point.
- Click Connect to connect to the MS SQL server.
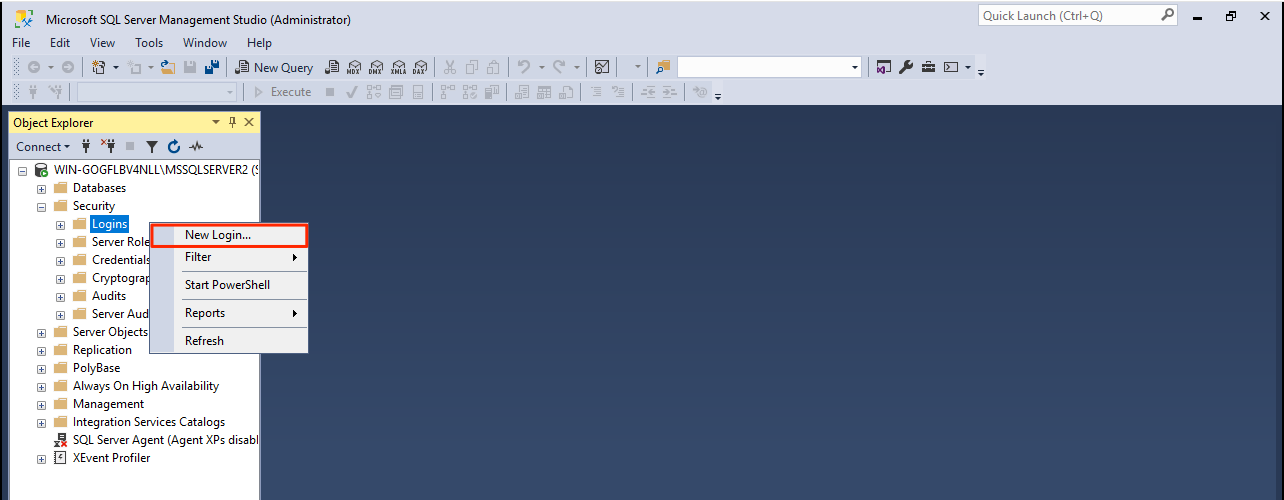
- Once connected, in the Object Explorer pane, right-click the Security > Logins folder, and select New Login.

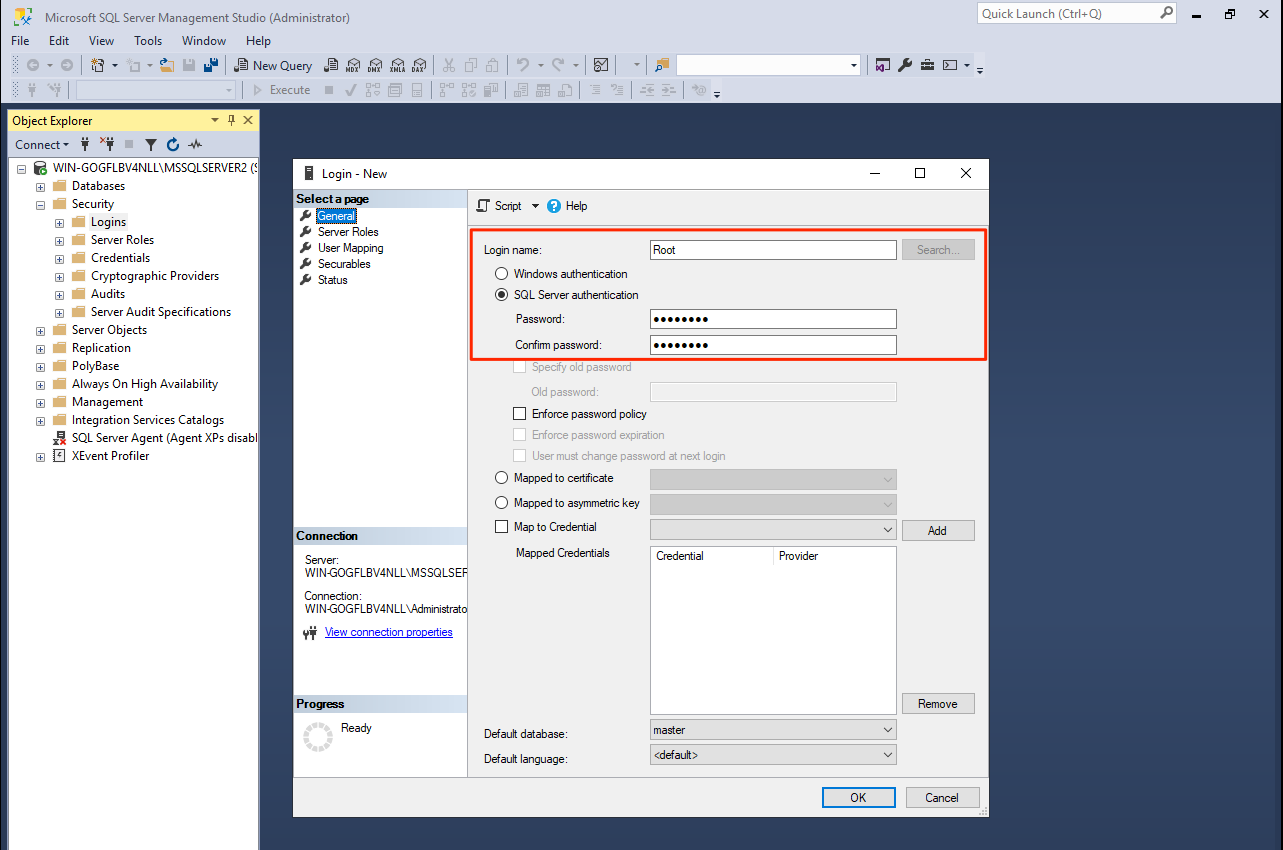
- In the Login Properties window, click General in the Select a page pane, and enter in root as the Login name.
- Select the SQL Server authentication option, and enter in a new password.
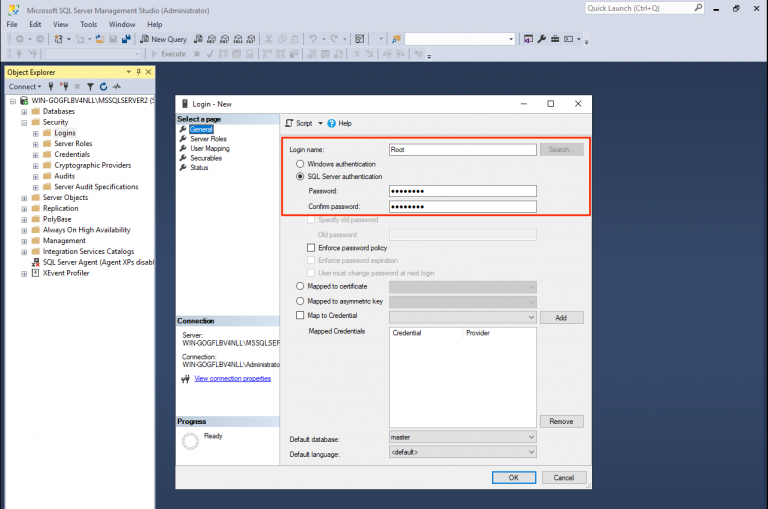 WarningSQL passwords should NOT contain shell metacharacters such as ! # ’ ” ` & ; or spaces.
 - Ensure the Enforce password policy, and Enforce password expiration options are unchecked, and click OK once done.
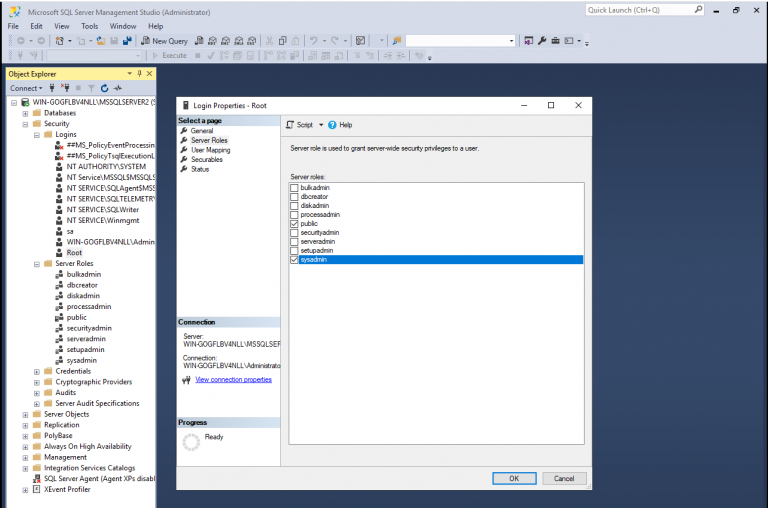
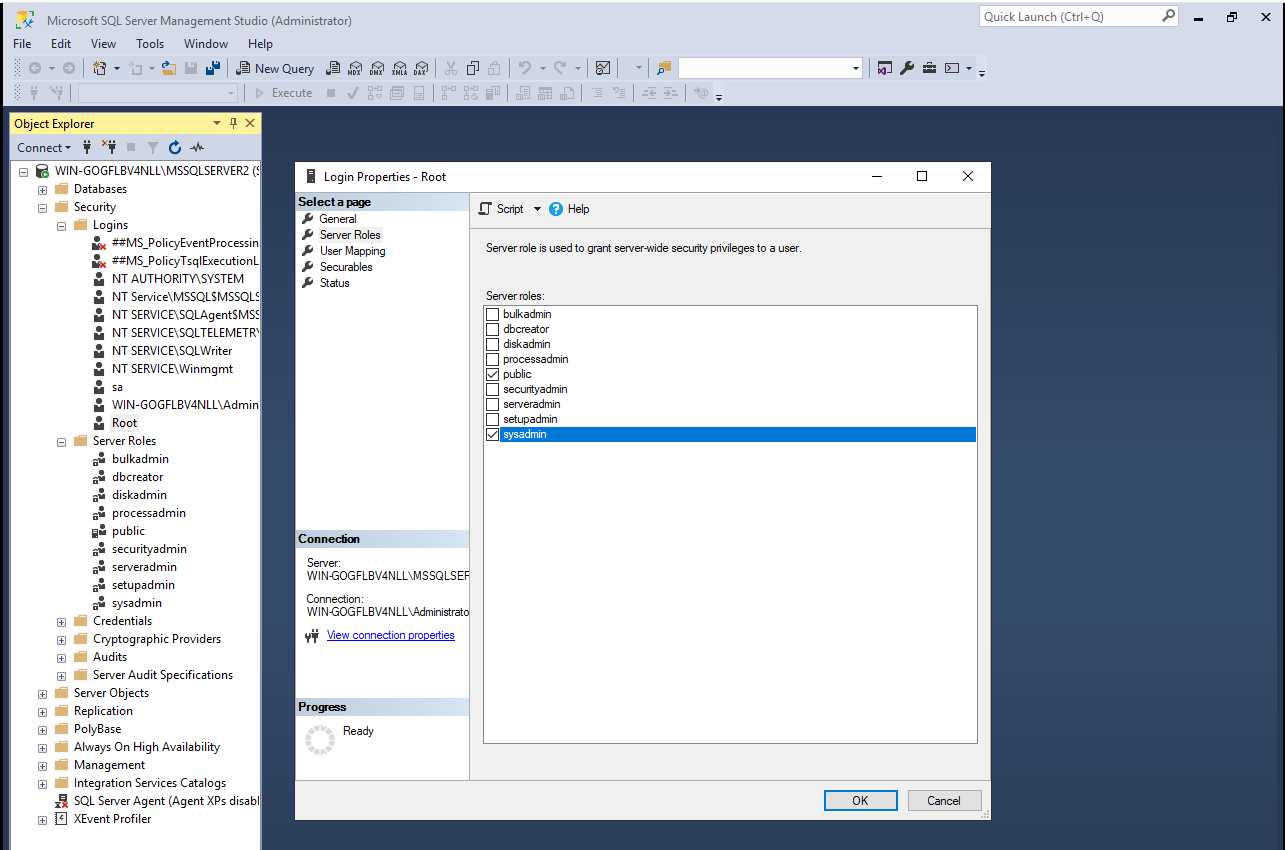
- Proceed to click Server Roles in the Select a page pane, and check the sysadmin checkbox to give the root user System Administrator privileges. Click Ok once done.
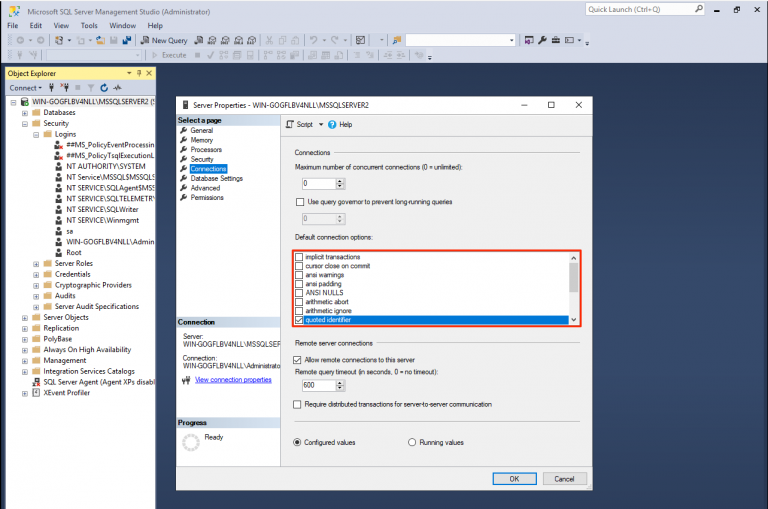
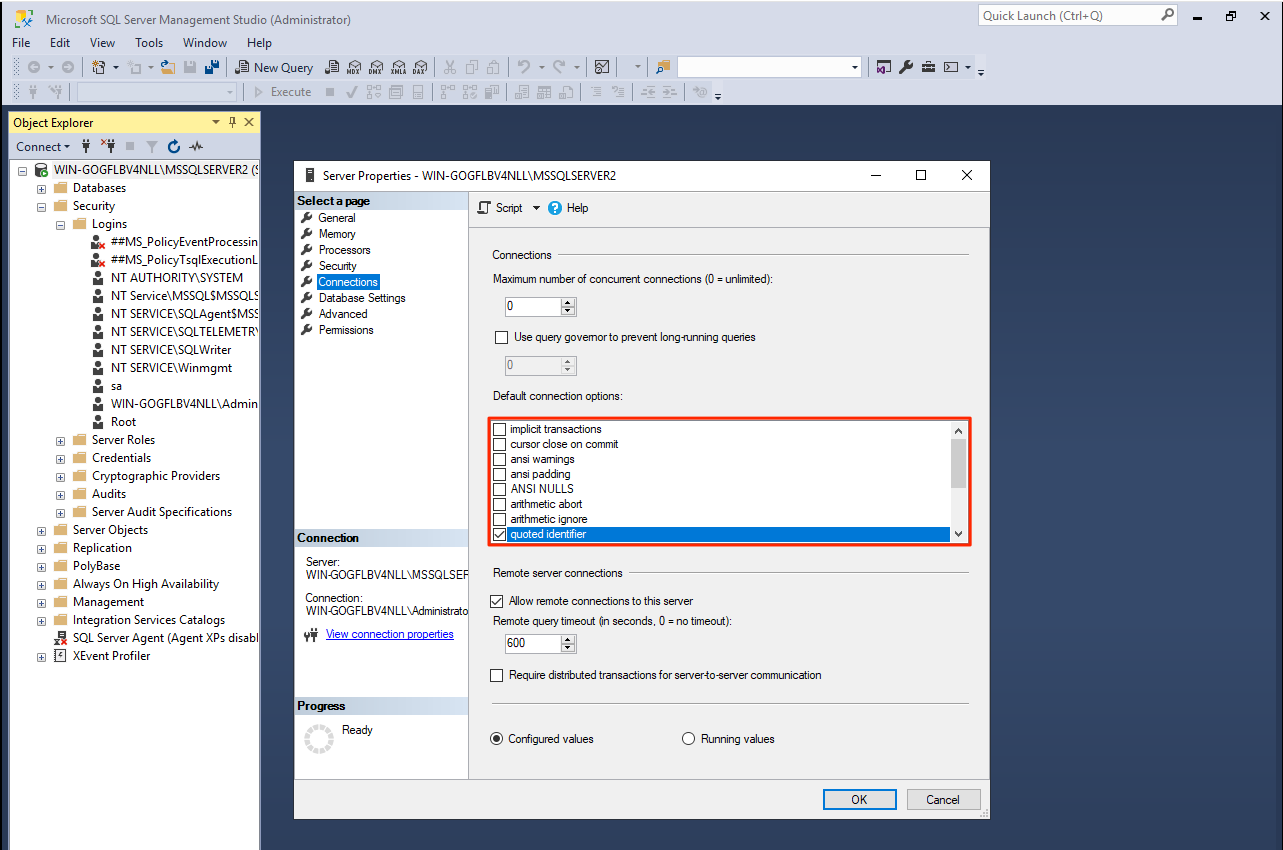
- Back in the Object Explorer pane, right-click the MS SQL server instance, and select Properties.
- In the Server Properties window, select Connections in the Select a page pane, and check the quoted identifier checkbox in the Default connection options section. Click Ok once done.
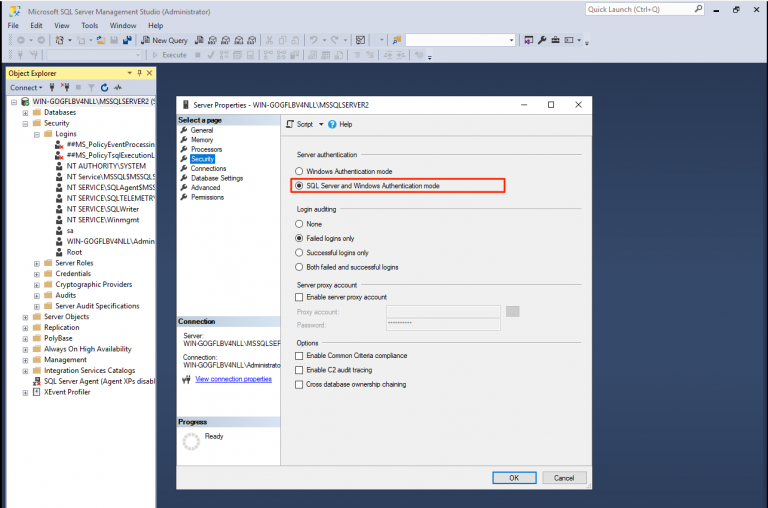
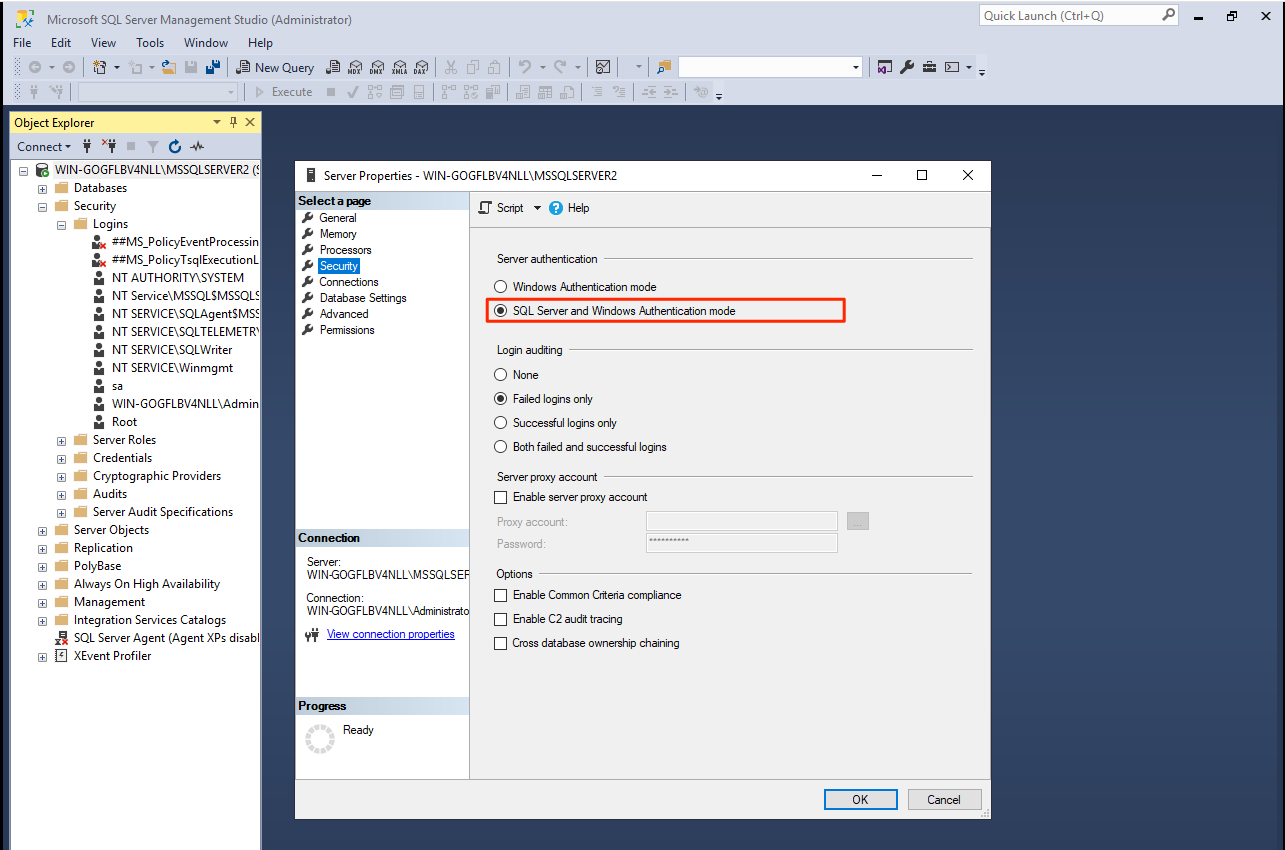
- Proceed to click Security in the Select a page pane, and select the SQL Server and Windows Authentication mode option in the Server authentication section. Click Ok once done.

Next Steps: Proceed back to the Configure Folder Permissions section in the Appspace On-prem installation article.
Was this article helpful?