This article provides instructions to configure expiry dates for content added to the Appspace 8.0 content Library. With the newly redesigned Library module, improved operations and functionality provide the opportunity to add content or folders directly from the Library dashboard in several ways, or whilst editing any content. Thus you may set the expiry date via one of these options.
All content added to the library does not have an expiration date set by default. You may choose to set an expiry date :
- to each individual content
- multiple content in any folder
- by enabling automatic content deletion for unallocated or any content based on age, in a user group library. When any age option is selected, the deletion date will be counted from the date it was created or uploaded to the Library.
When a content item has been deleted, it will no longer be allocated to any channel. All user and system actions related to this feature are logged in the user activity log in Reports.
Prerequisite
- Account Owner, Publisher, Editor, or Content Producer (Author) role to add or edit content in Library.
- Account Owner, Publisher or Editor permissions can add or edit content in Channels.
- Account Owner or Network Administrator role to configure User settings.
Configure Content Expiry Date
Use one of the following instructions to add set the expiry date to any content directly from the Appspace Library.
Set Content Expiry in Library Dashboard
You may use this option to configure one content item or multiple content.- Log in to the Appspace console, and click Library from the ☰ Appspace menu.
- Browse the library and its folders, or simply search for content by name, type, location, or tags.
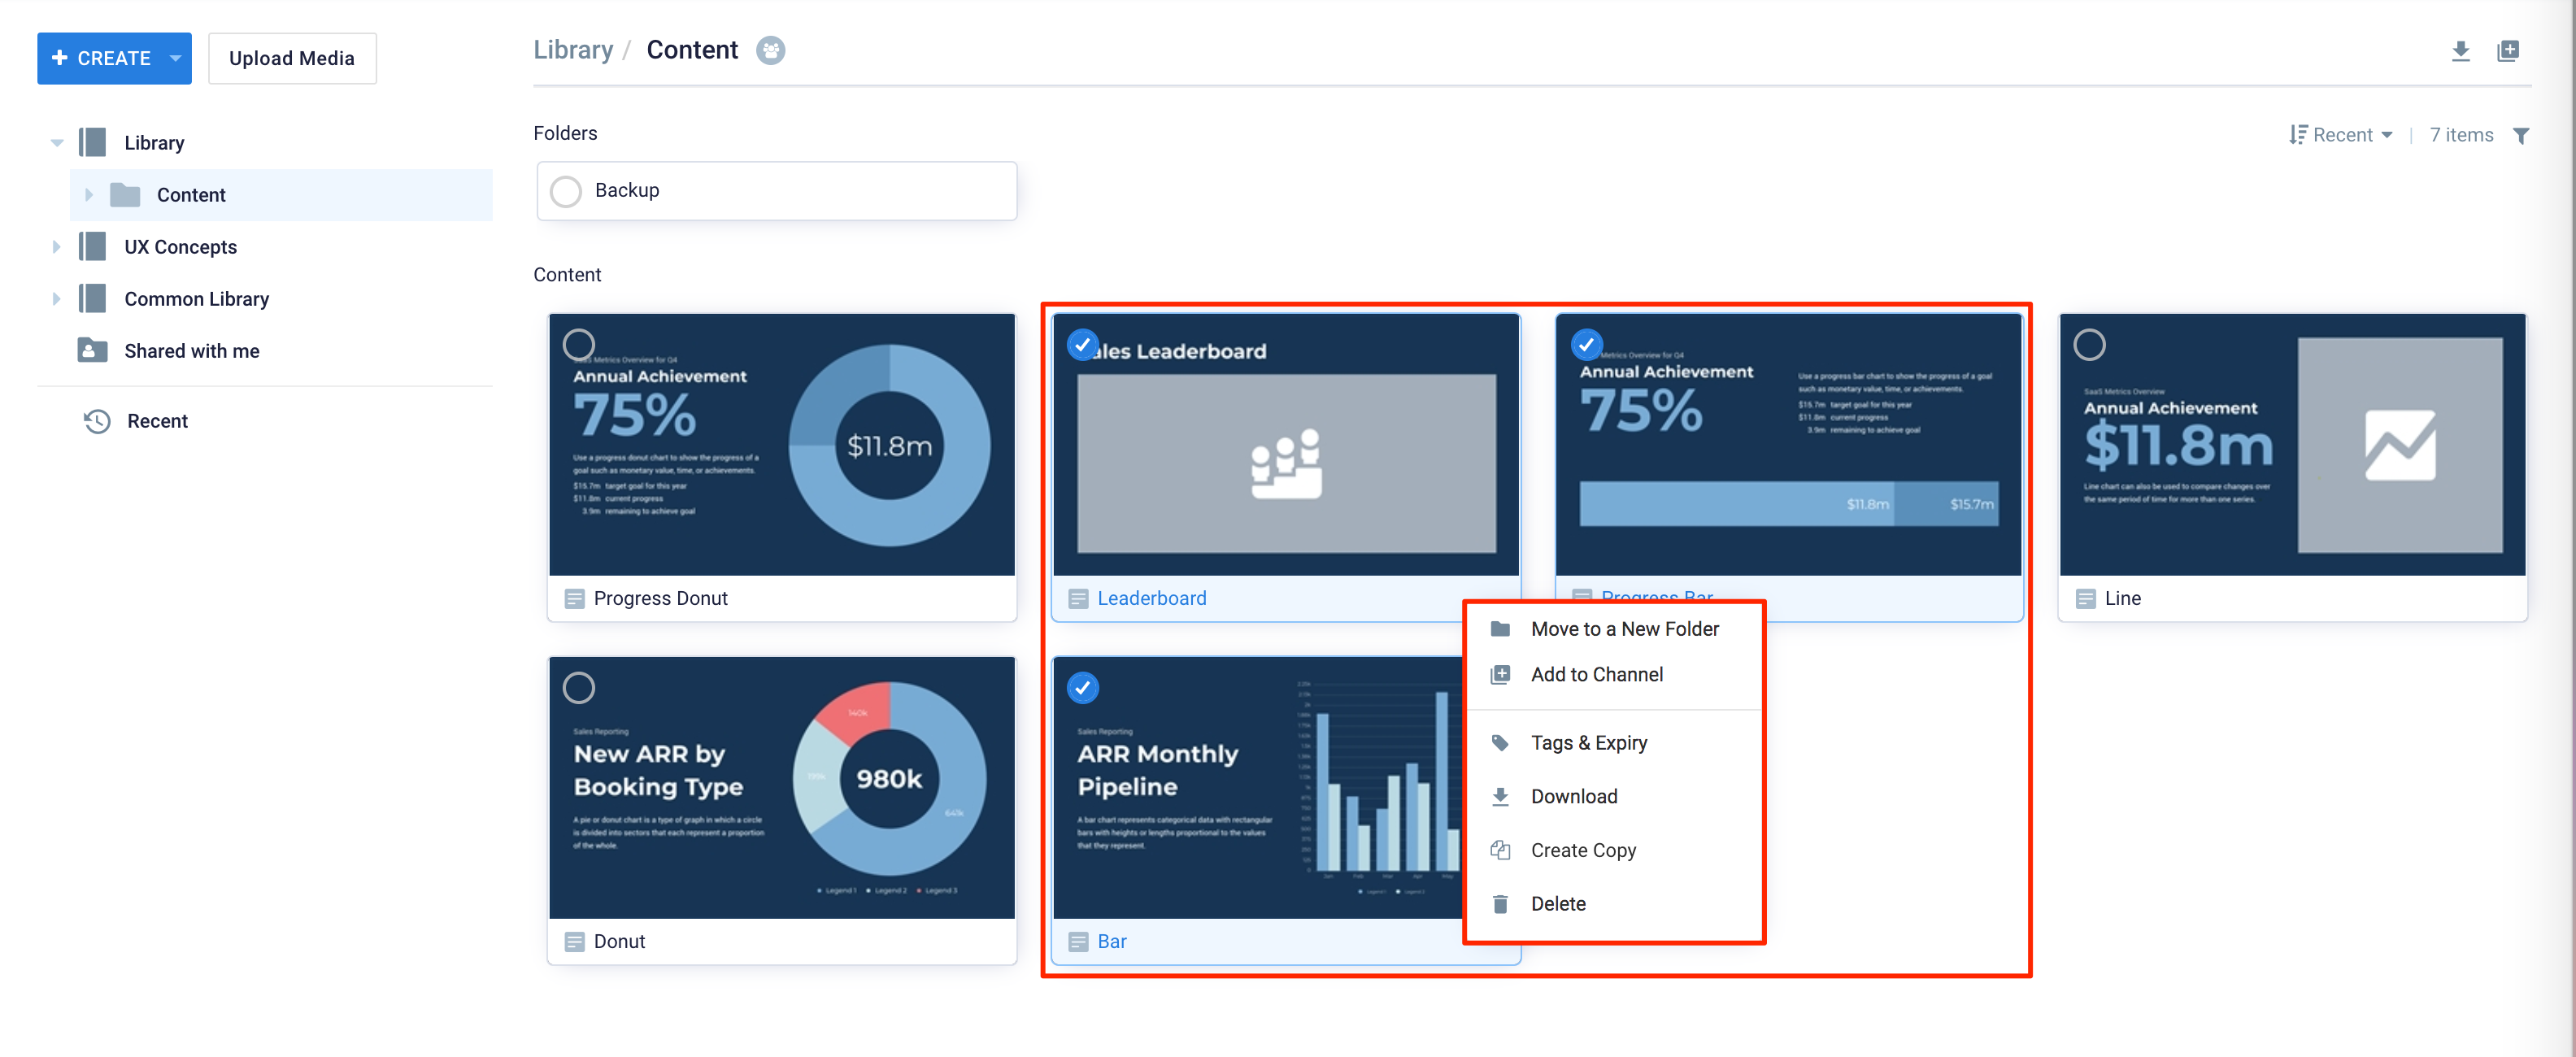
- Select the desired content:
- If a single content is selected, click the ellipsis, and select Tags & Expiry.
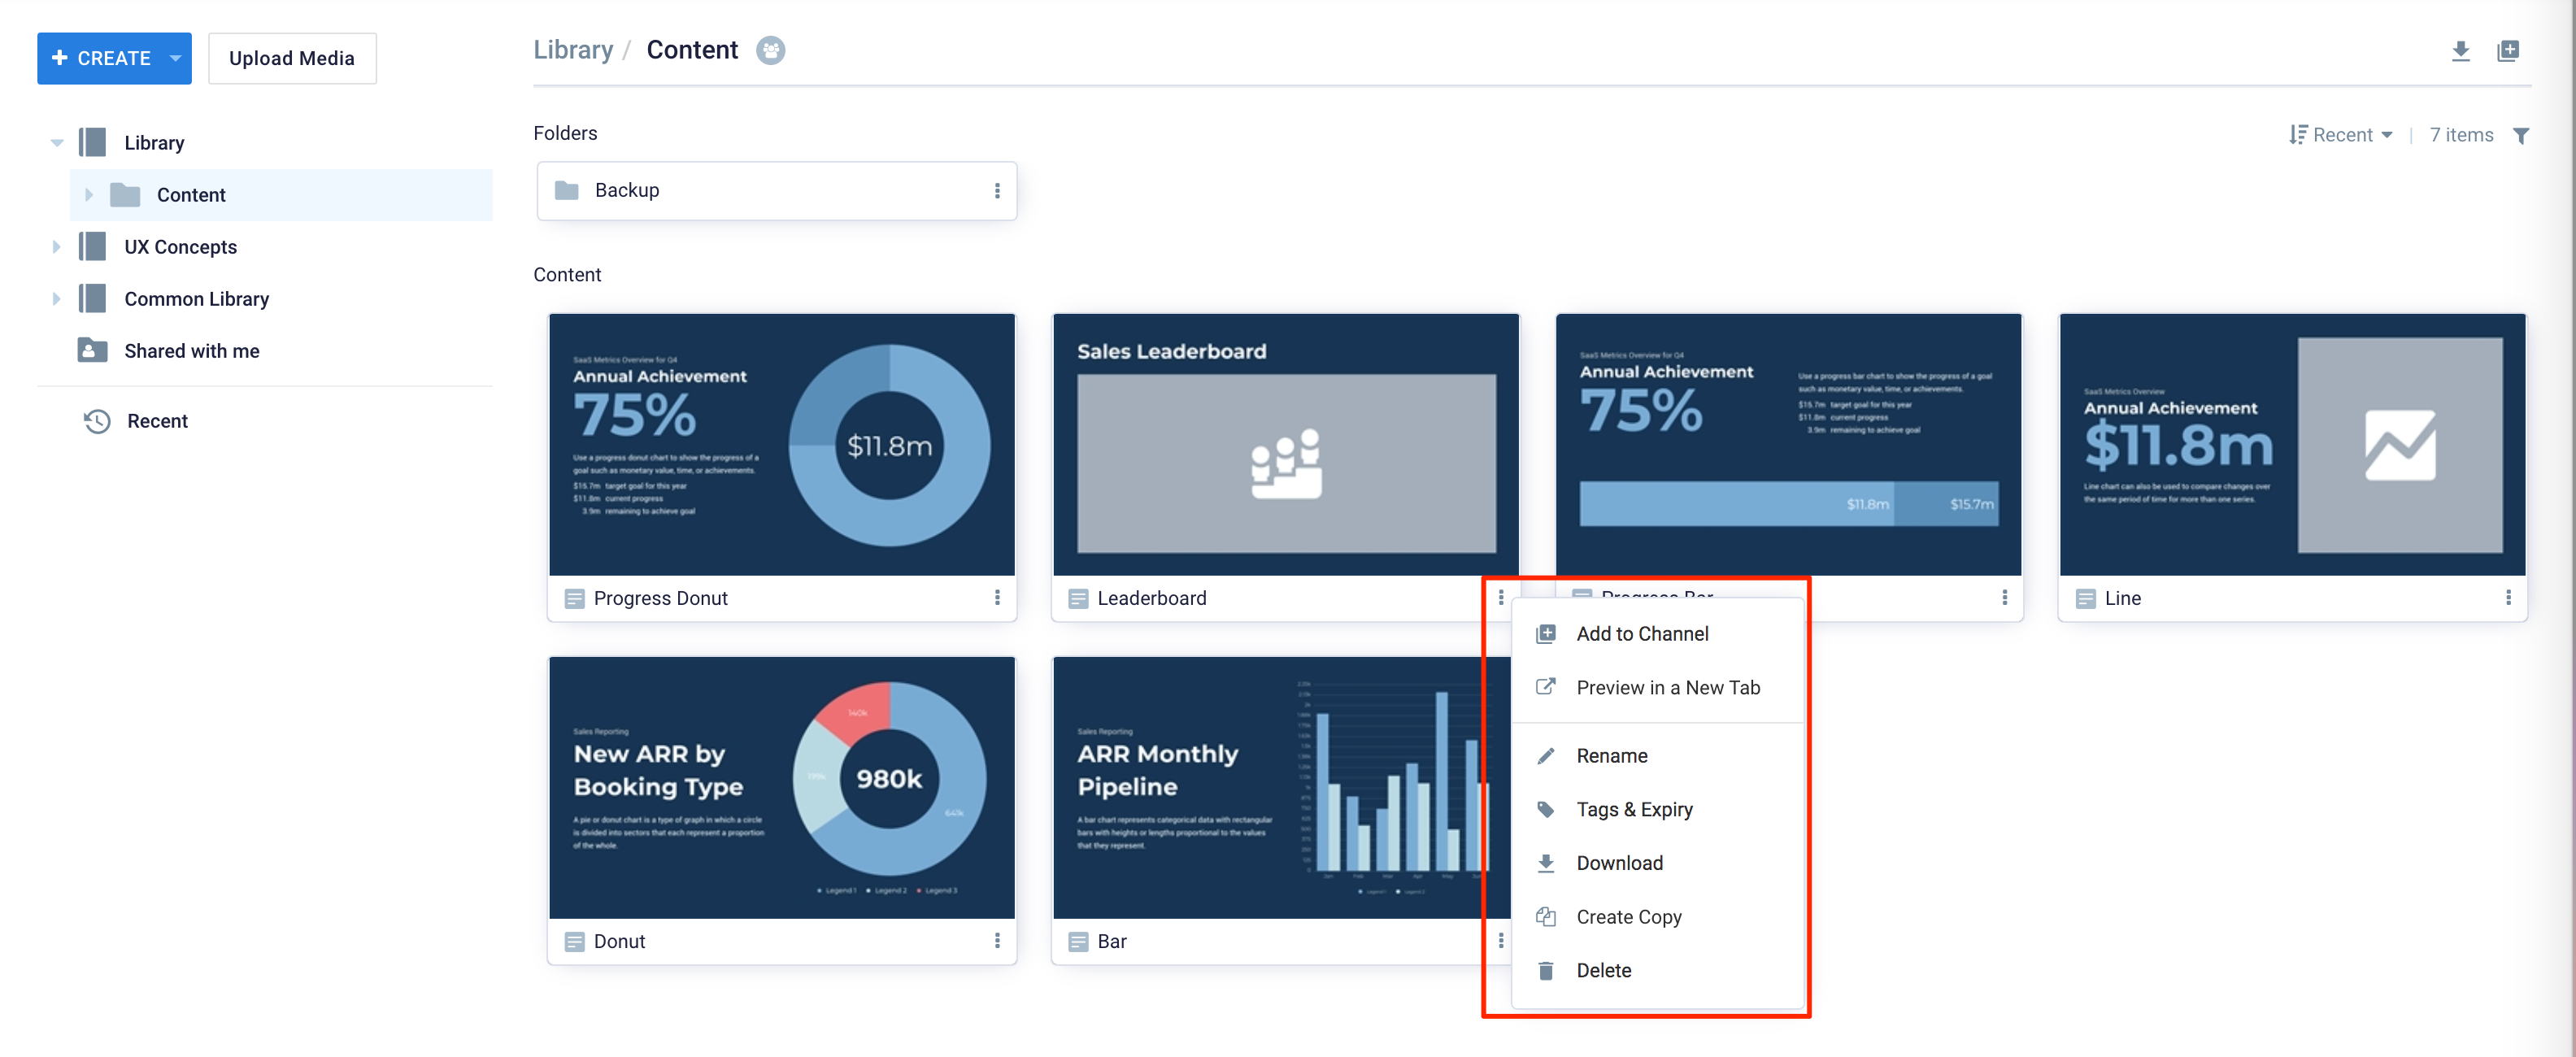
- If multiple content is selected, right-click and select Tags & Expiry.
- If a single content is selected, click the ellipsis, and select Tags & Expiry.
- Click the Expiry Date field, and select an expiry date from the calendar displayed.

- Click SAVE once done.
Set Content Expiry in Content Editor
You may use this option to configure one content item only.- Log in to the Appspace console, and click Library from the ☰ Appspace menu.
- Browse the library and its folders, or simply search for content by name, type, location, or tags.
- Double-click the selected content, and click the Settings tab.
- Select On a specific date from the Auto Delete Content from Library drop-down menu, and select an expiry date from the calendar displayed.

- Click SAVE once done.
Enable Automatic Content Deletion for User Group Library
The instructions below show you how to enable the automatic content deletion option for all content belonging to a user group library.
- Log in to the Appspace console and click Users from the ☰ Appspace menu.
- Select a user group, and click the Edit icon.
- Slide the Enable automatic content deletion slider to YES.
- Select one of the content deletion options below for the user group’s library, and select the deletion age from the drop-down menu.
- Unallocated content based on age
- Any content based on age

Important- Content Age is based on the create date of the content.
- Content Custom Age is defined from 1 – 365 days from the created date.
- Content items that have been set with individual expiry dates, take precedence over user group library expiry dates.
- Content added to cards that have been updated will be considered as new content.
- Click Save once done.
Was this article helpful?