Stories are crafted for timely updates in dynamic work environments, ideal for conveying immediate information that remains relevant for days to weeks. Given their short lifespan, they require minimal to no version control. Stories are categorized into channels, serving as organized containers for content distribution on the Employee App. They cover a range of topics, including events, announcements, team spotlights, employee birthdays, daily quotes, weekly polls, industry news, market trends, and even cafeteria menus.
This article provides Administrators with instructions to create and manage Stories within the Employee App.
Prerequisites
- An Account Owner, Publisher, or Author user role, with the Premium User license assigned.
- Enable Artificial Intelligence Generative AI to utilize the AI features for Stories.
- Enable the AI Translations option in App Configuration settings to use the AI translation feature.
- Supported file formats:
- Image: .jpg, .png, and .webp
- Video: .mp4
Create and Configure Stories
- Log in to the Employee App.
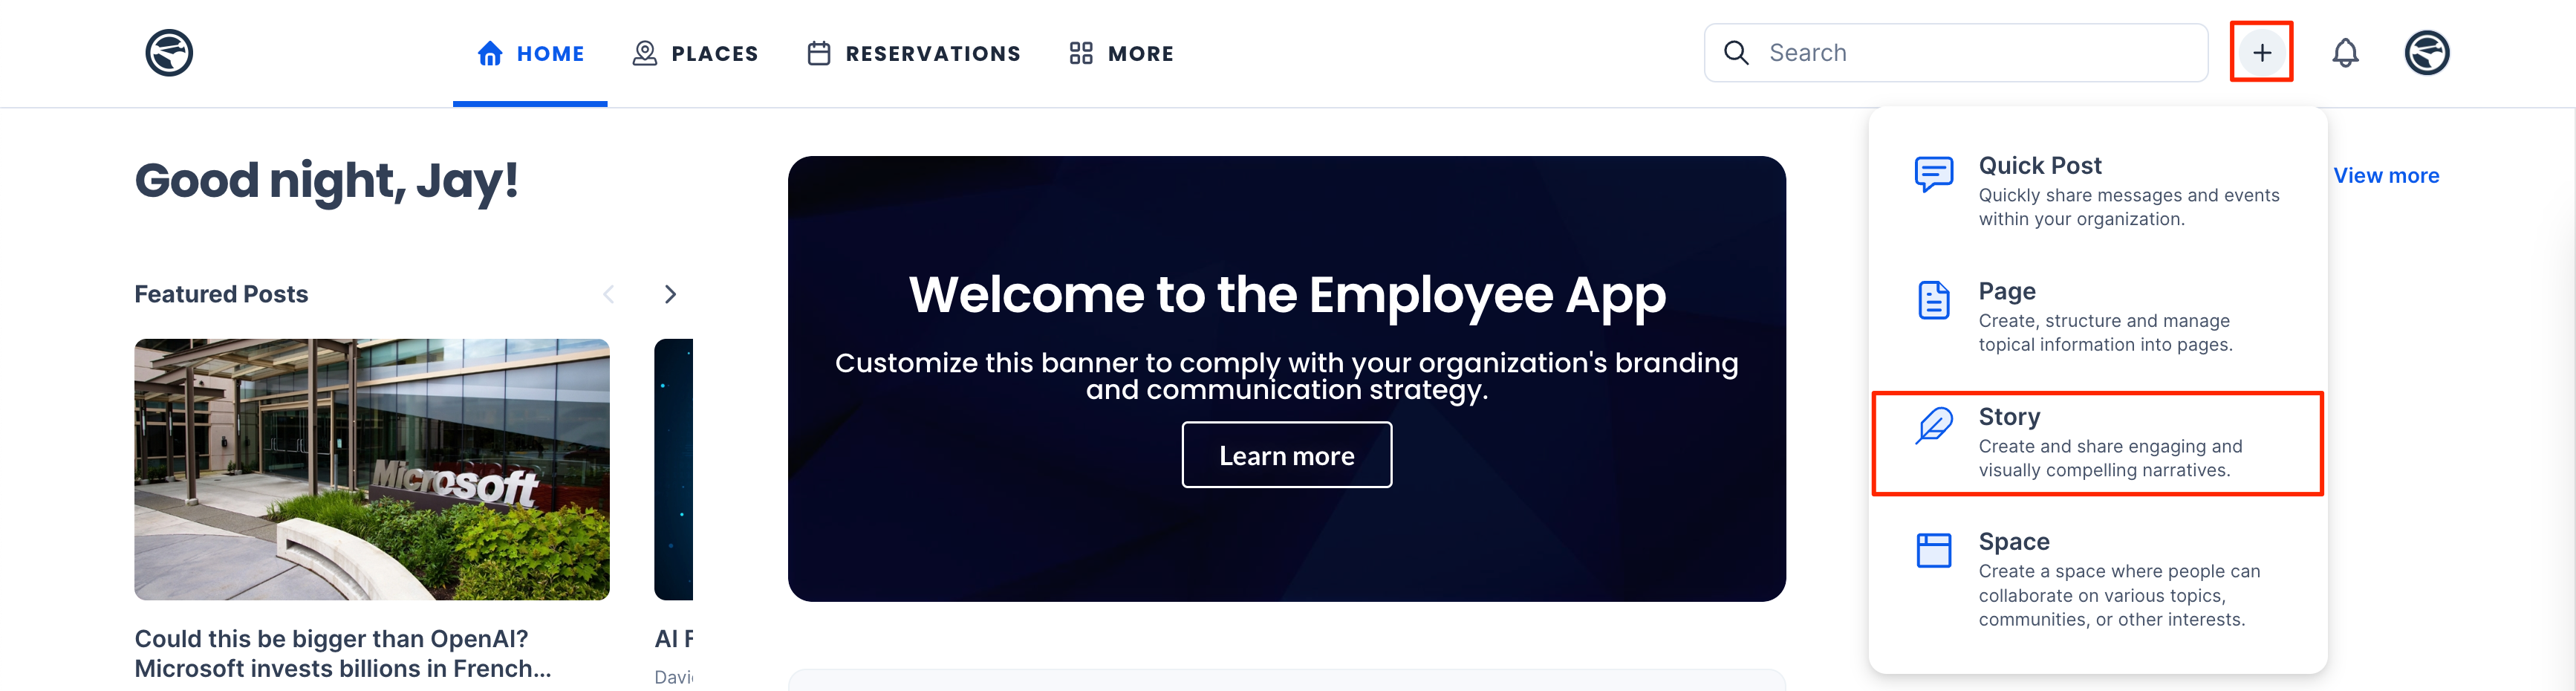
- In the Home screen, click the Plus Sign ( + ) icon, and select Story.
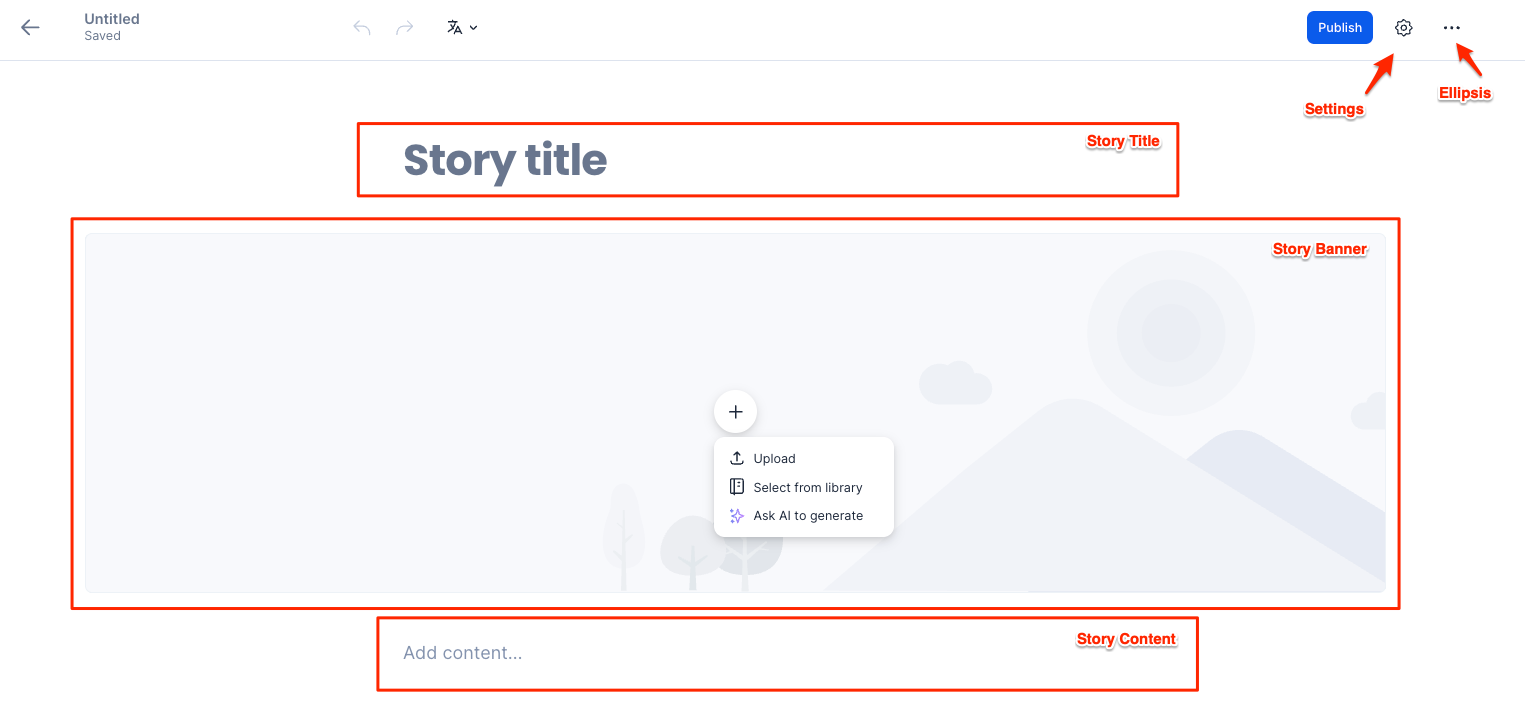
- Enter the Story Title of the article, as this will also act as the filename for the article. This is a mandatory field.
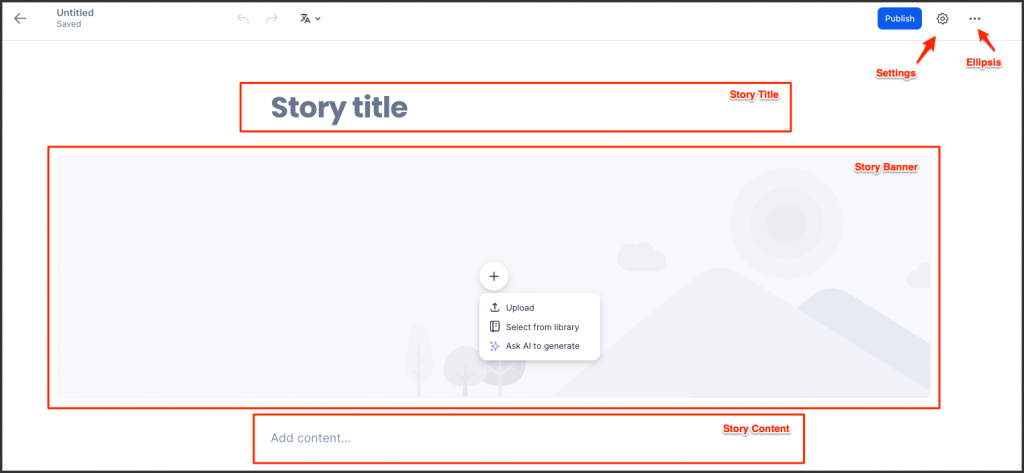
- Proceed to upload, select from the library, or use Ask AI to generate a Story Banner.
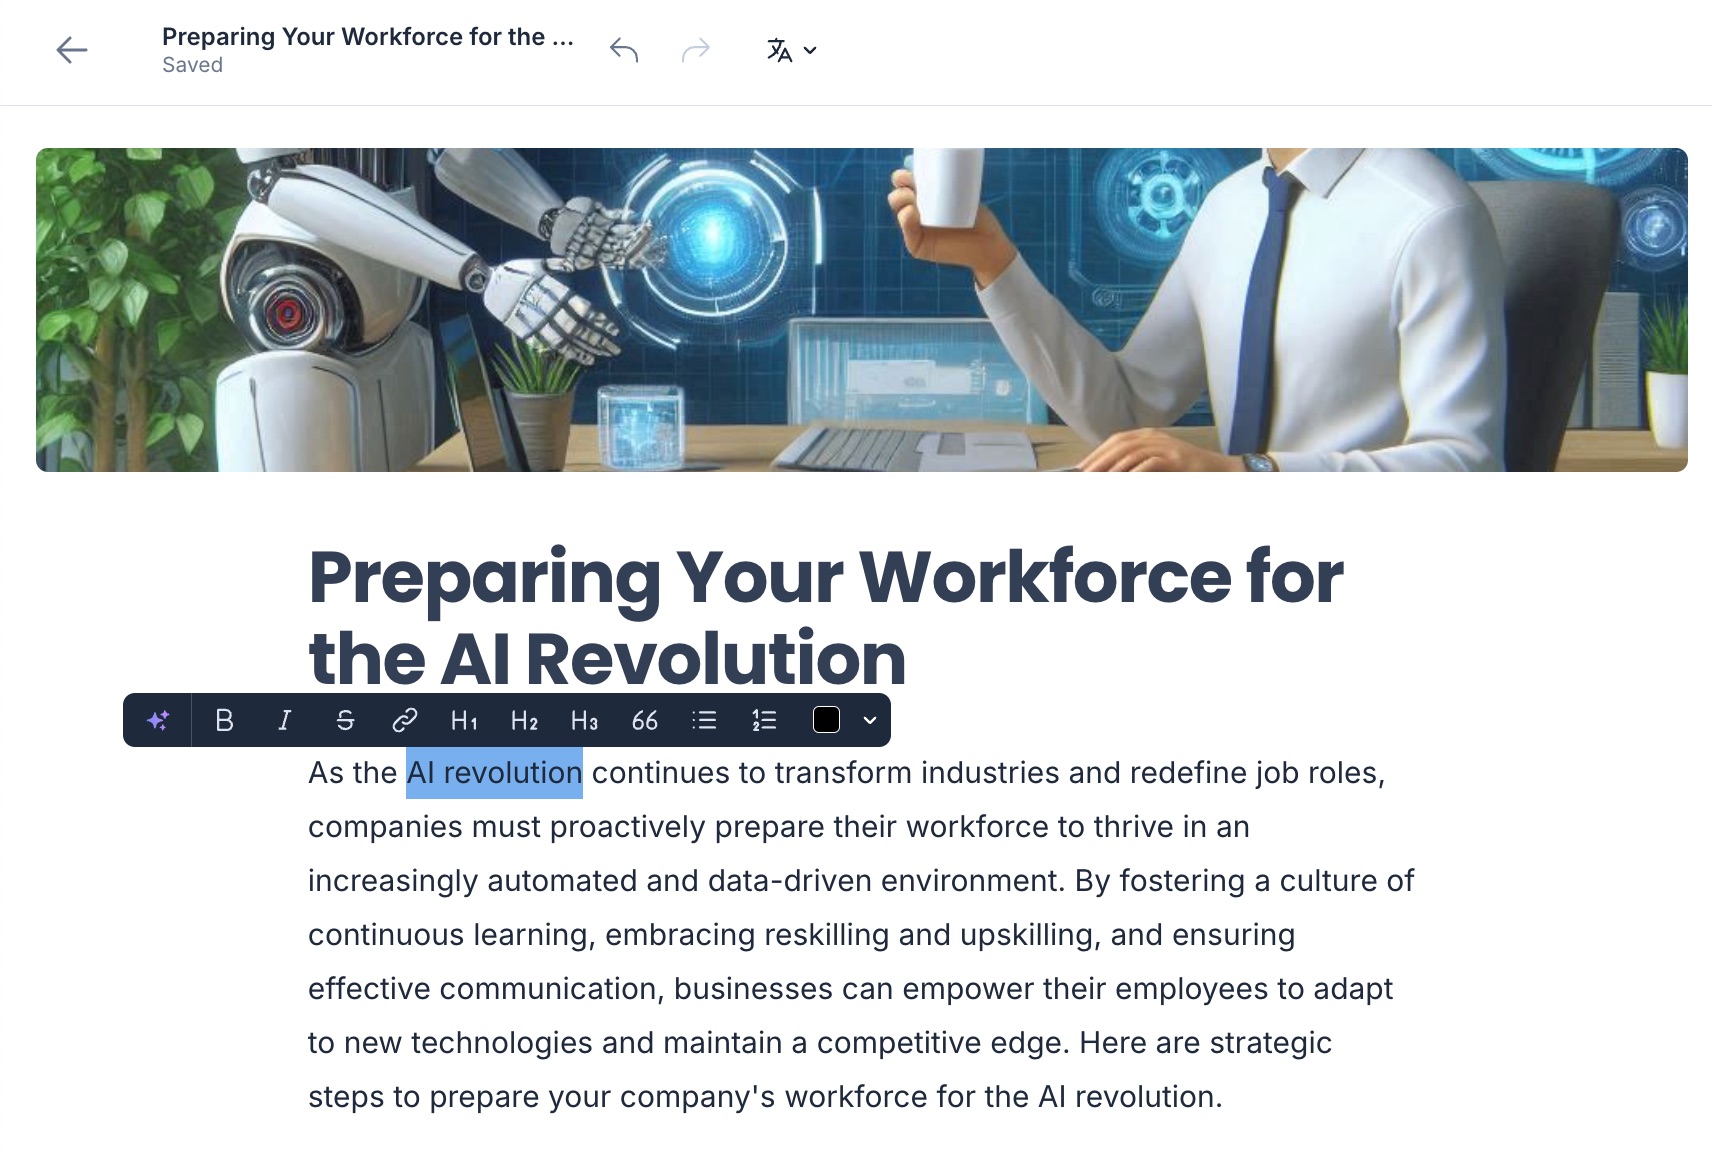
- Click the Add Content section. Type in text for a new paragraph and press ENTER to complete the current paragraph and add a new paragraph. Select any text to apply the following options:

- Ask AI to write content or generate an image. Refer to the Ask AI to write or Ask AI to generate image options below.
- Set Bold, Italic, or Strikethrough text.
- Set the selected text as a URL link.
- Set Heading 1, 2, or 3 for the text.
- Set the text as a Quote.
- Set the text as a List or Numbered list.
- Set a Color or Highlight for the text.
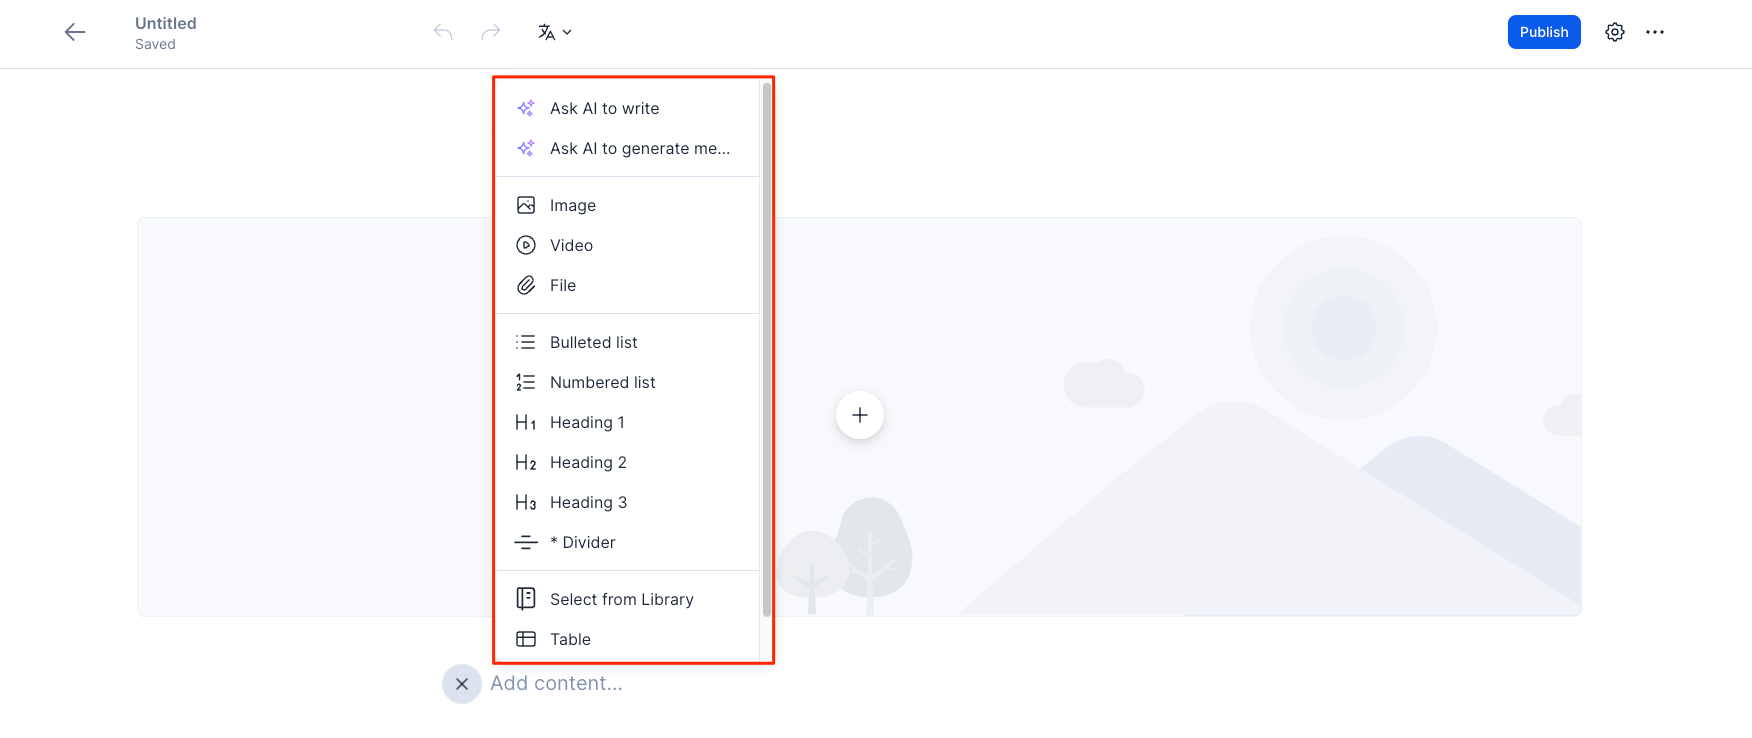
- Alternatively you may click the Insert menu (+) to add the following content to a new paragraph via the following options from the Stories Editor:
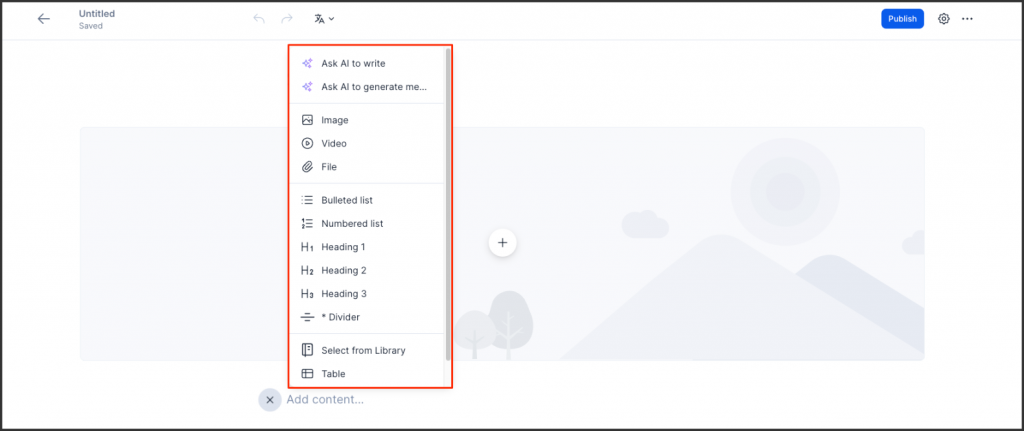
- Ask AI to write – Generate an article with Artificial Intelligence, by simply defining the suggested topic or prompts.

- Enter the desired keywords, topic, or AI prompt to help AI generate the Story article.
- Once generated, you have the following options:
- Change Tone – Select the tone of the article to be Confident, Professional, Friendly, or Straightforward from the drop-down menu.
- Text options – Select the length of the article to Make it Longer, Make it Shorter, or to Simplify it from the drop-down menu.
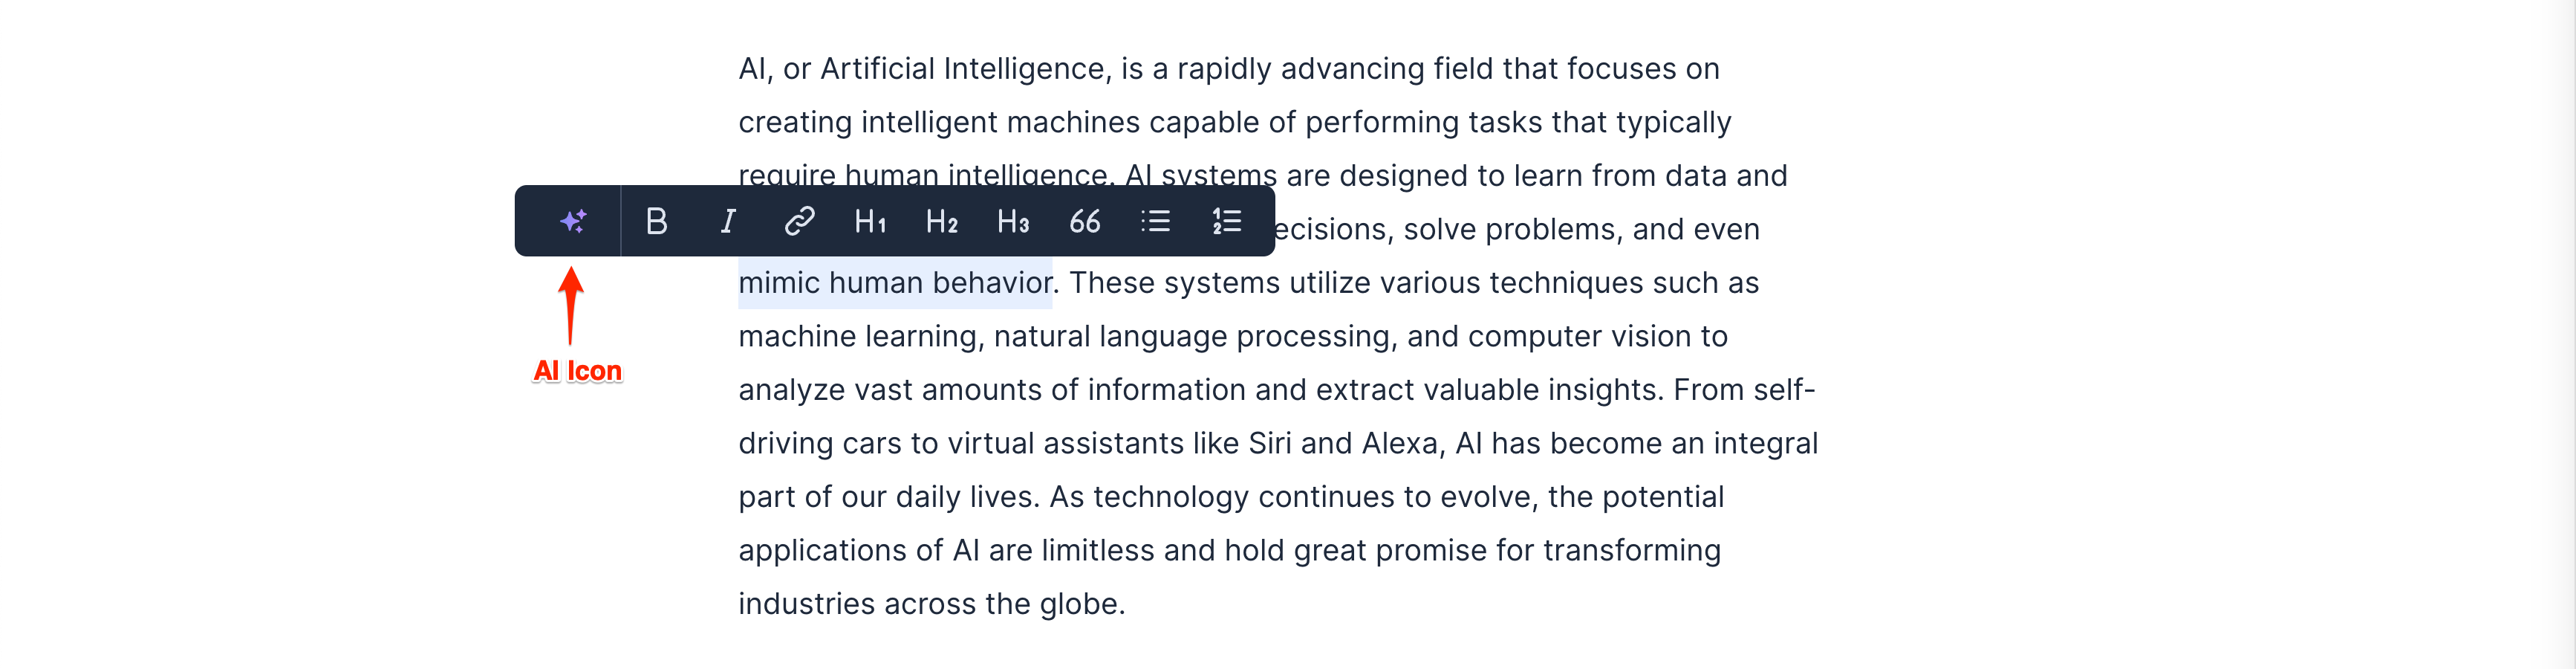
- Generate Text – Highlight an existing sentence or body of text, and click the AI icon from the text toolbar to re-generate that part of the text to be replaced, or inserted in the highlighted section.
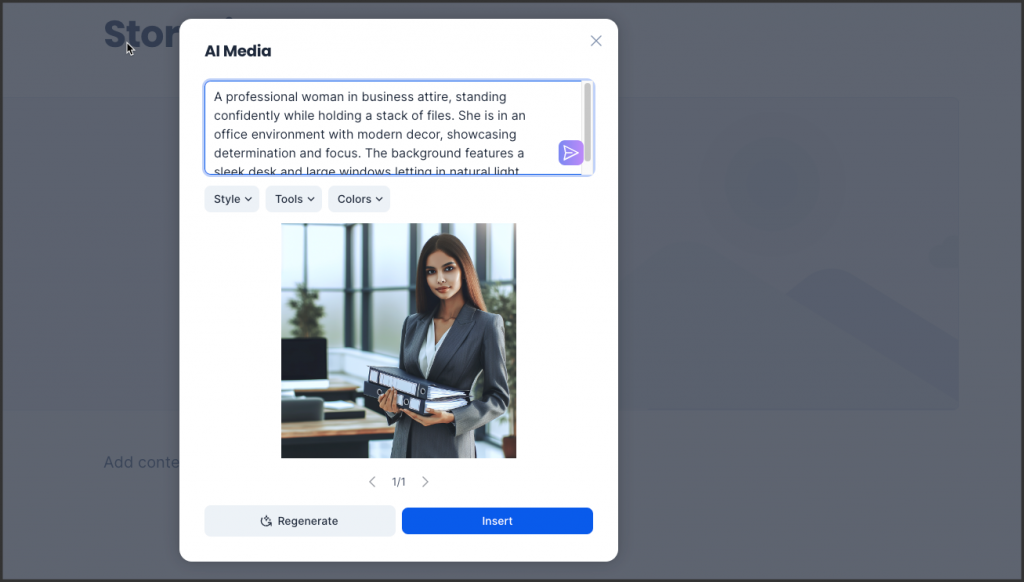
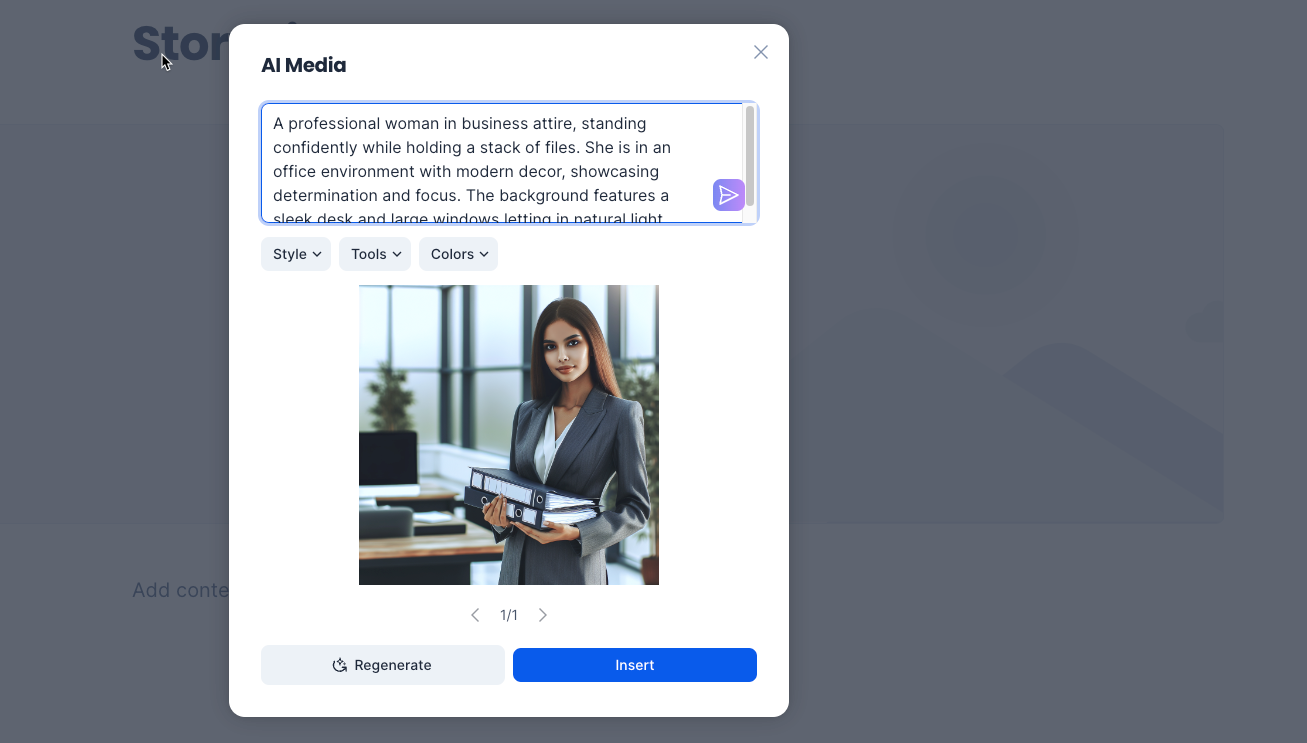
- Ask AI to generate image – Generate an image with Artificial Intelligence, by simply defining the suggested topic or prompts.
NoteThe AI-generated image feature supports banners and content sections.
- Image – Upload an image to be displayed in the article.
- Video – Upload or embed a video to be displayed in the article.
- File – Attach an external file to the article, such as PDFs (.pdf) or Word documents (.docx). (Currently only supports file formats that are compatible with the Appspace Library.)
- Bulleted list – Add a bulleted list in the article.
- Numbered list – Add a numbered list in the article.
- Heading 1, 2, 3 – Add a heading to the article from a selection of three different heading sizes, and customize the font color.
- Divider – Add a divider to separate the sections of the article.
- Select from Library – Add content from the Appspace Library, such as images, videos, and even cards.
- Table – Add a table in the article. (max 6 columns)

- Table layout: Change the layout of the table.
- Add column / delete column: Add or delete columns to the table.
- Add row / delete row: Add or delete rows to the table.
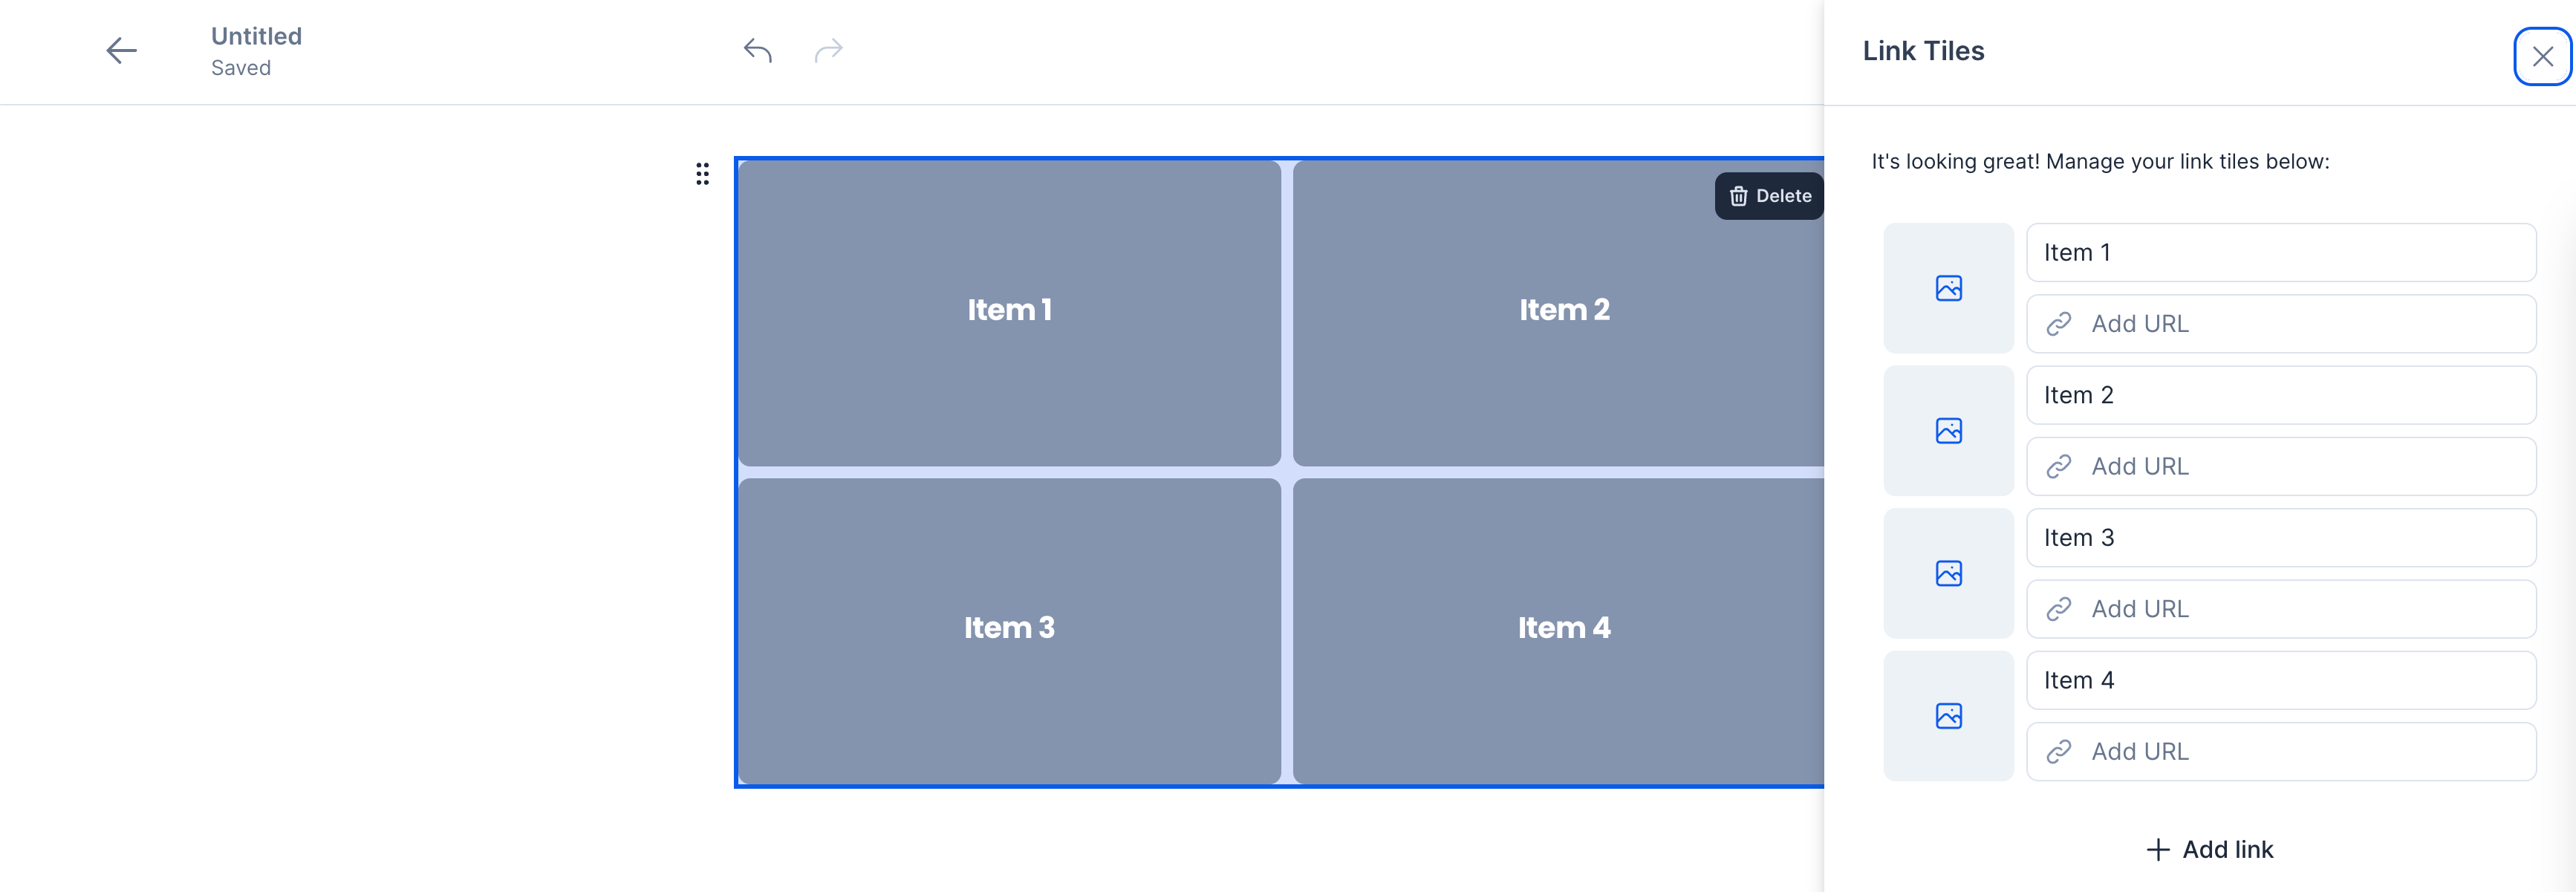
- Link Tiles – Add clickable image tiles to the article, automatically arranged in a tiled layout. (max 9 image tiles)
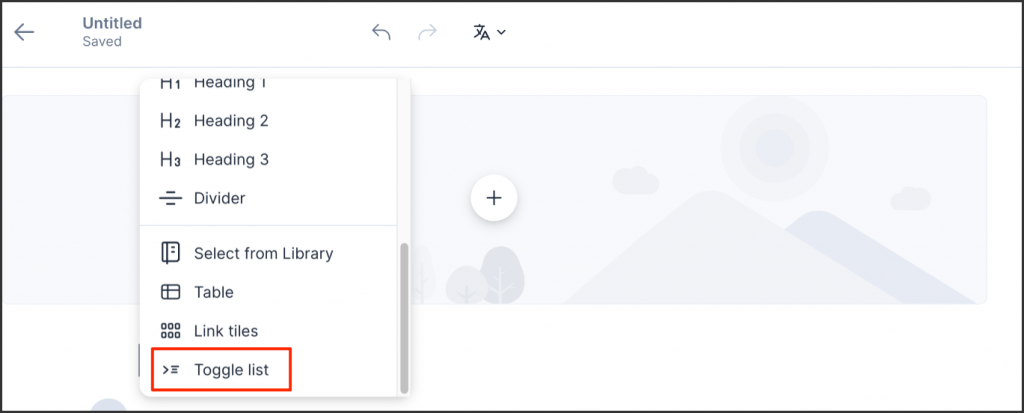
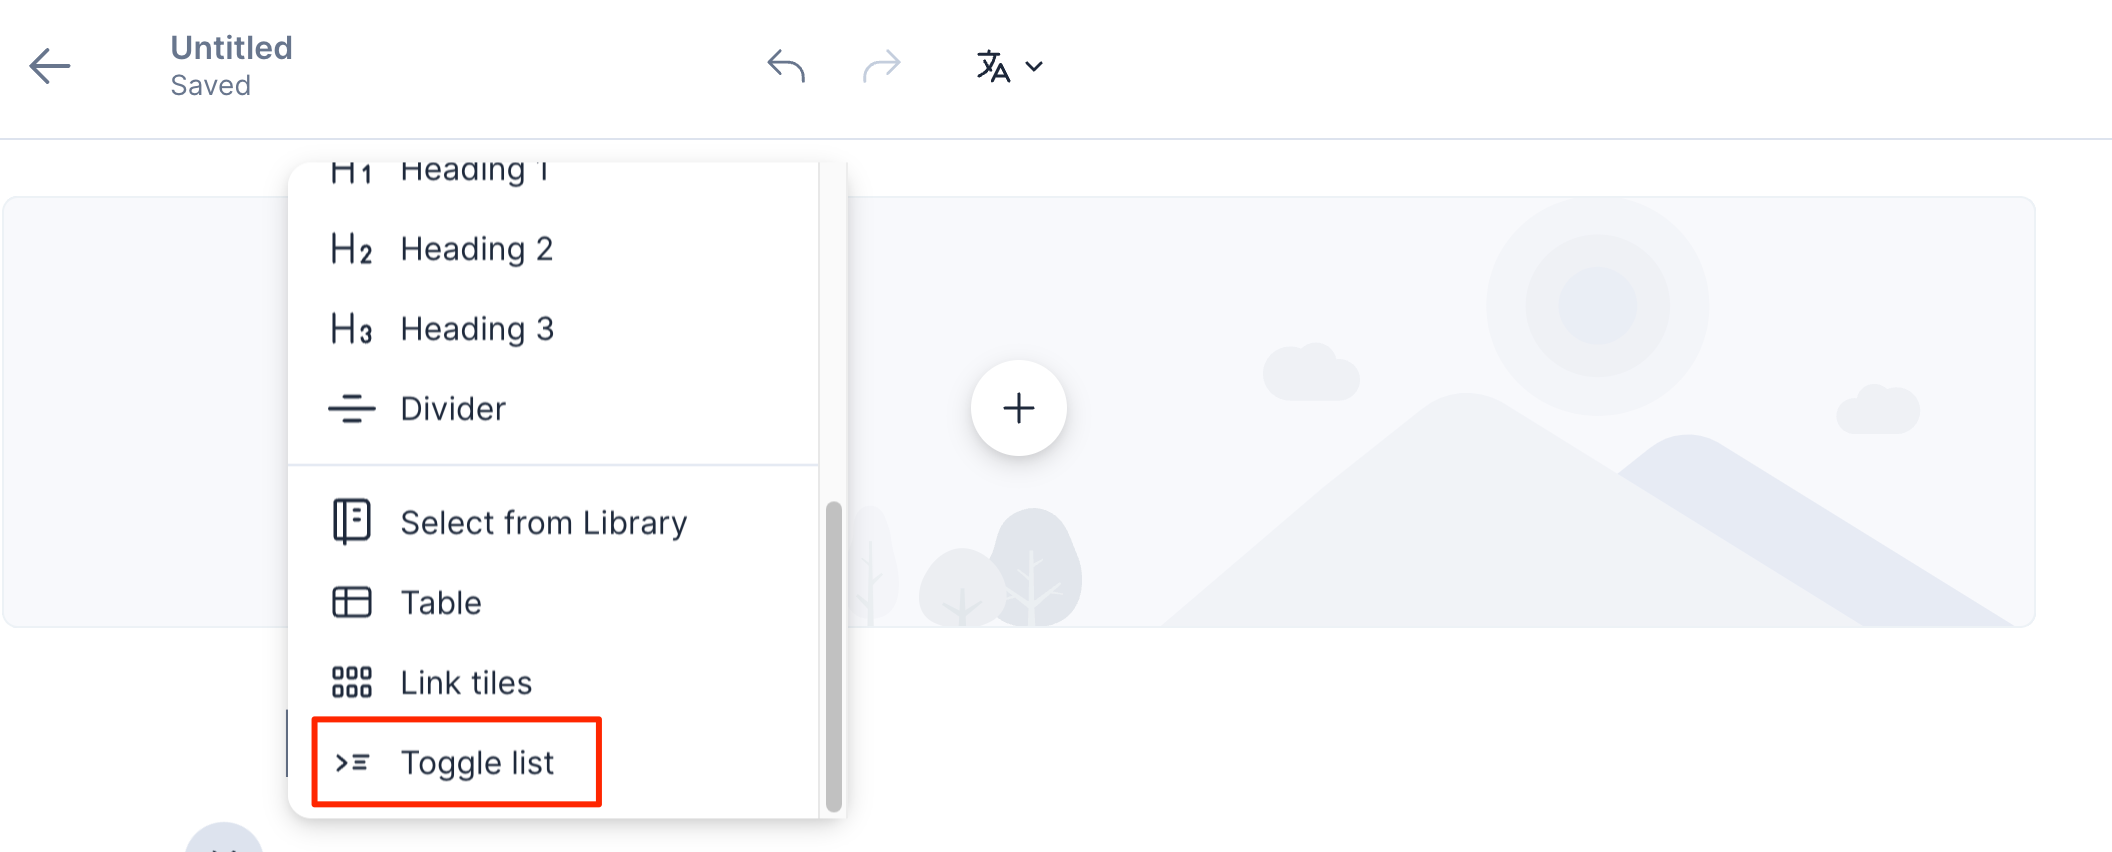
- Toggle list – Add the header and description to the article.
- Ask AI to write – Generate an article with Artificial Intelligence, by simply defining the suggested topic or prompts.
- Once you have completed writing your Story article, click the Settings Gear icon to configure the publishing options and metadata of the Story.
- In the Settings panel, proceed to configure the following:
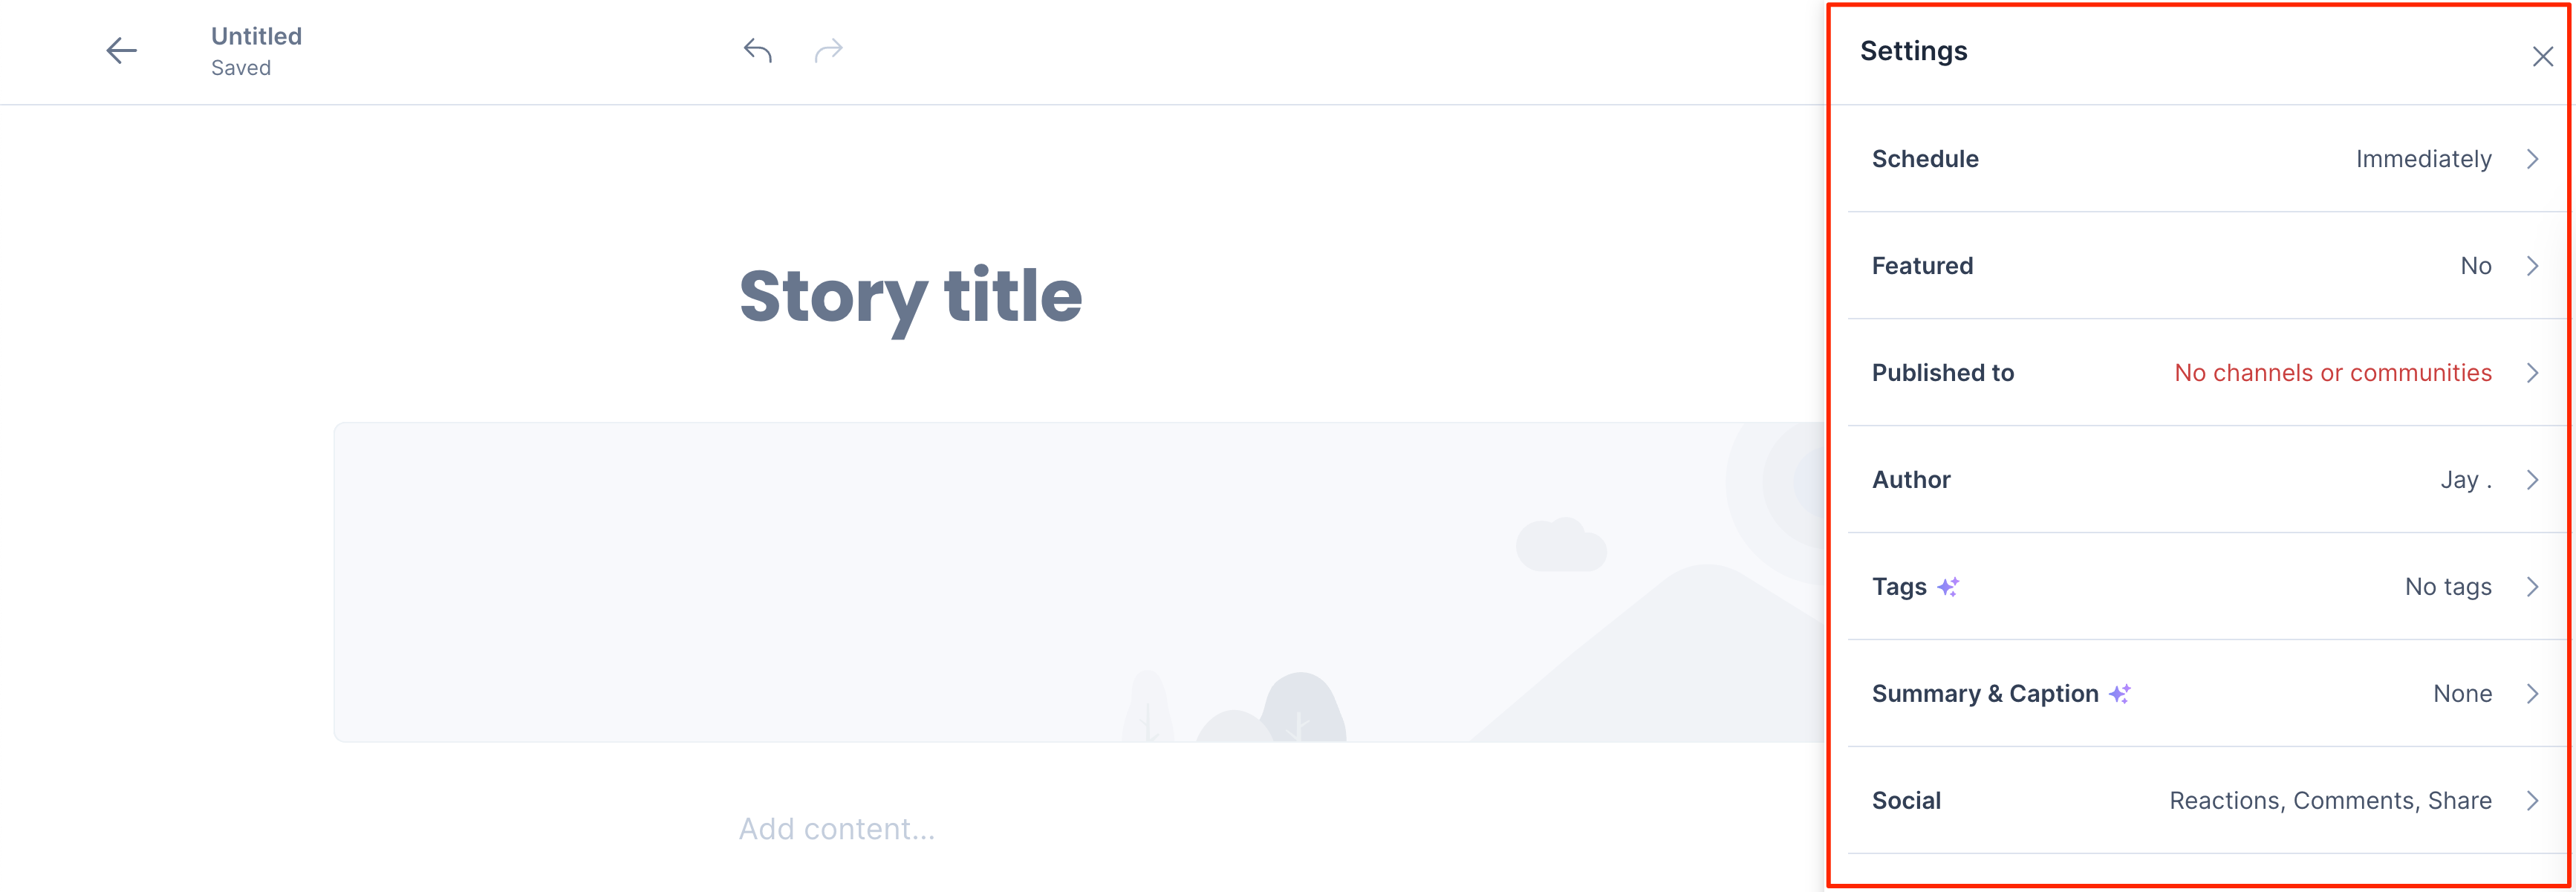
- Schedule – Schedule the Story to be published immediately, or at a later duration.
- Immediately (default): Select this option to publish the Story immediately
- Scheduled: Select this option to publish the Story at a later duration.
- Set the Start and End duration, and ensure the correct Timezone is used.
- Featured – Set the Story to be displayed in the Featured Posts section of the Employee App.
- Not featured (default)
- Featured until: Select until when the Story is to be featured:
- Next week
- Next month
- Custom date
- Published to – Publish the Story to the relevant channels or communities.
- Select the Channels or Communities the Story will be published to from the drop-down menu.
- (New) Author – The default author is set to you. You can add another person or persons as co-author (s), or assign the story to other people and attribute the content to them. You also have the option to hide names in the author list, but at least one author must remain visible.
- Search and add other authors’ names, or click the ellipsis next to an author and click Remove to remove an author.
- (New) After adding more than one author, click the ellipsis on any author and select Unmark as public author to hide the name from the author list. Note that at least one author must remain visible as Public author.

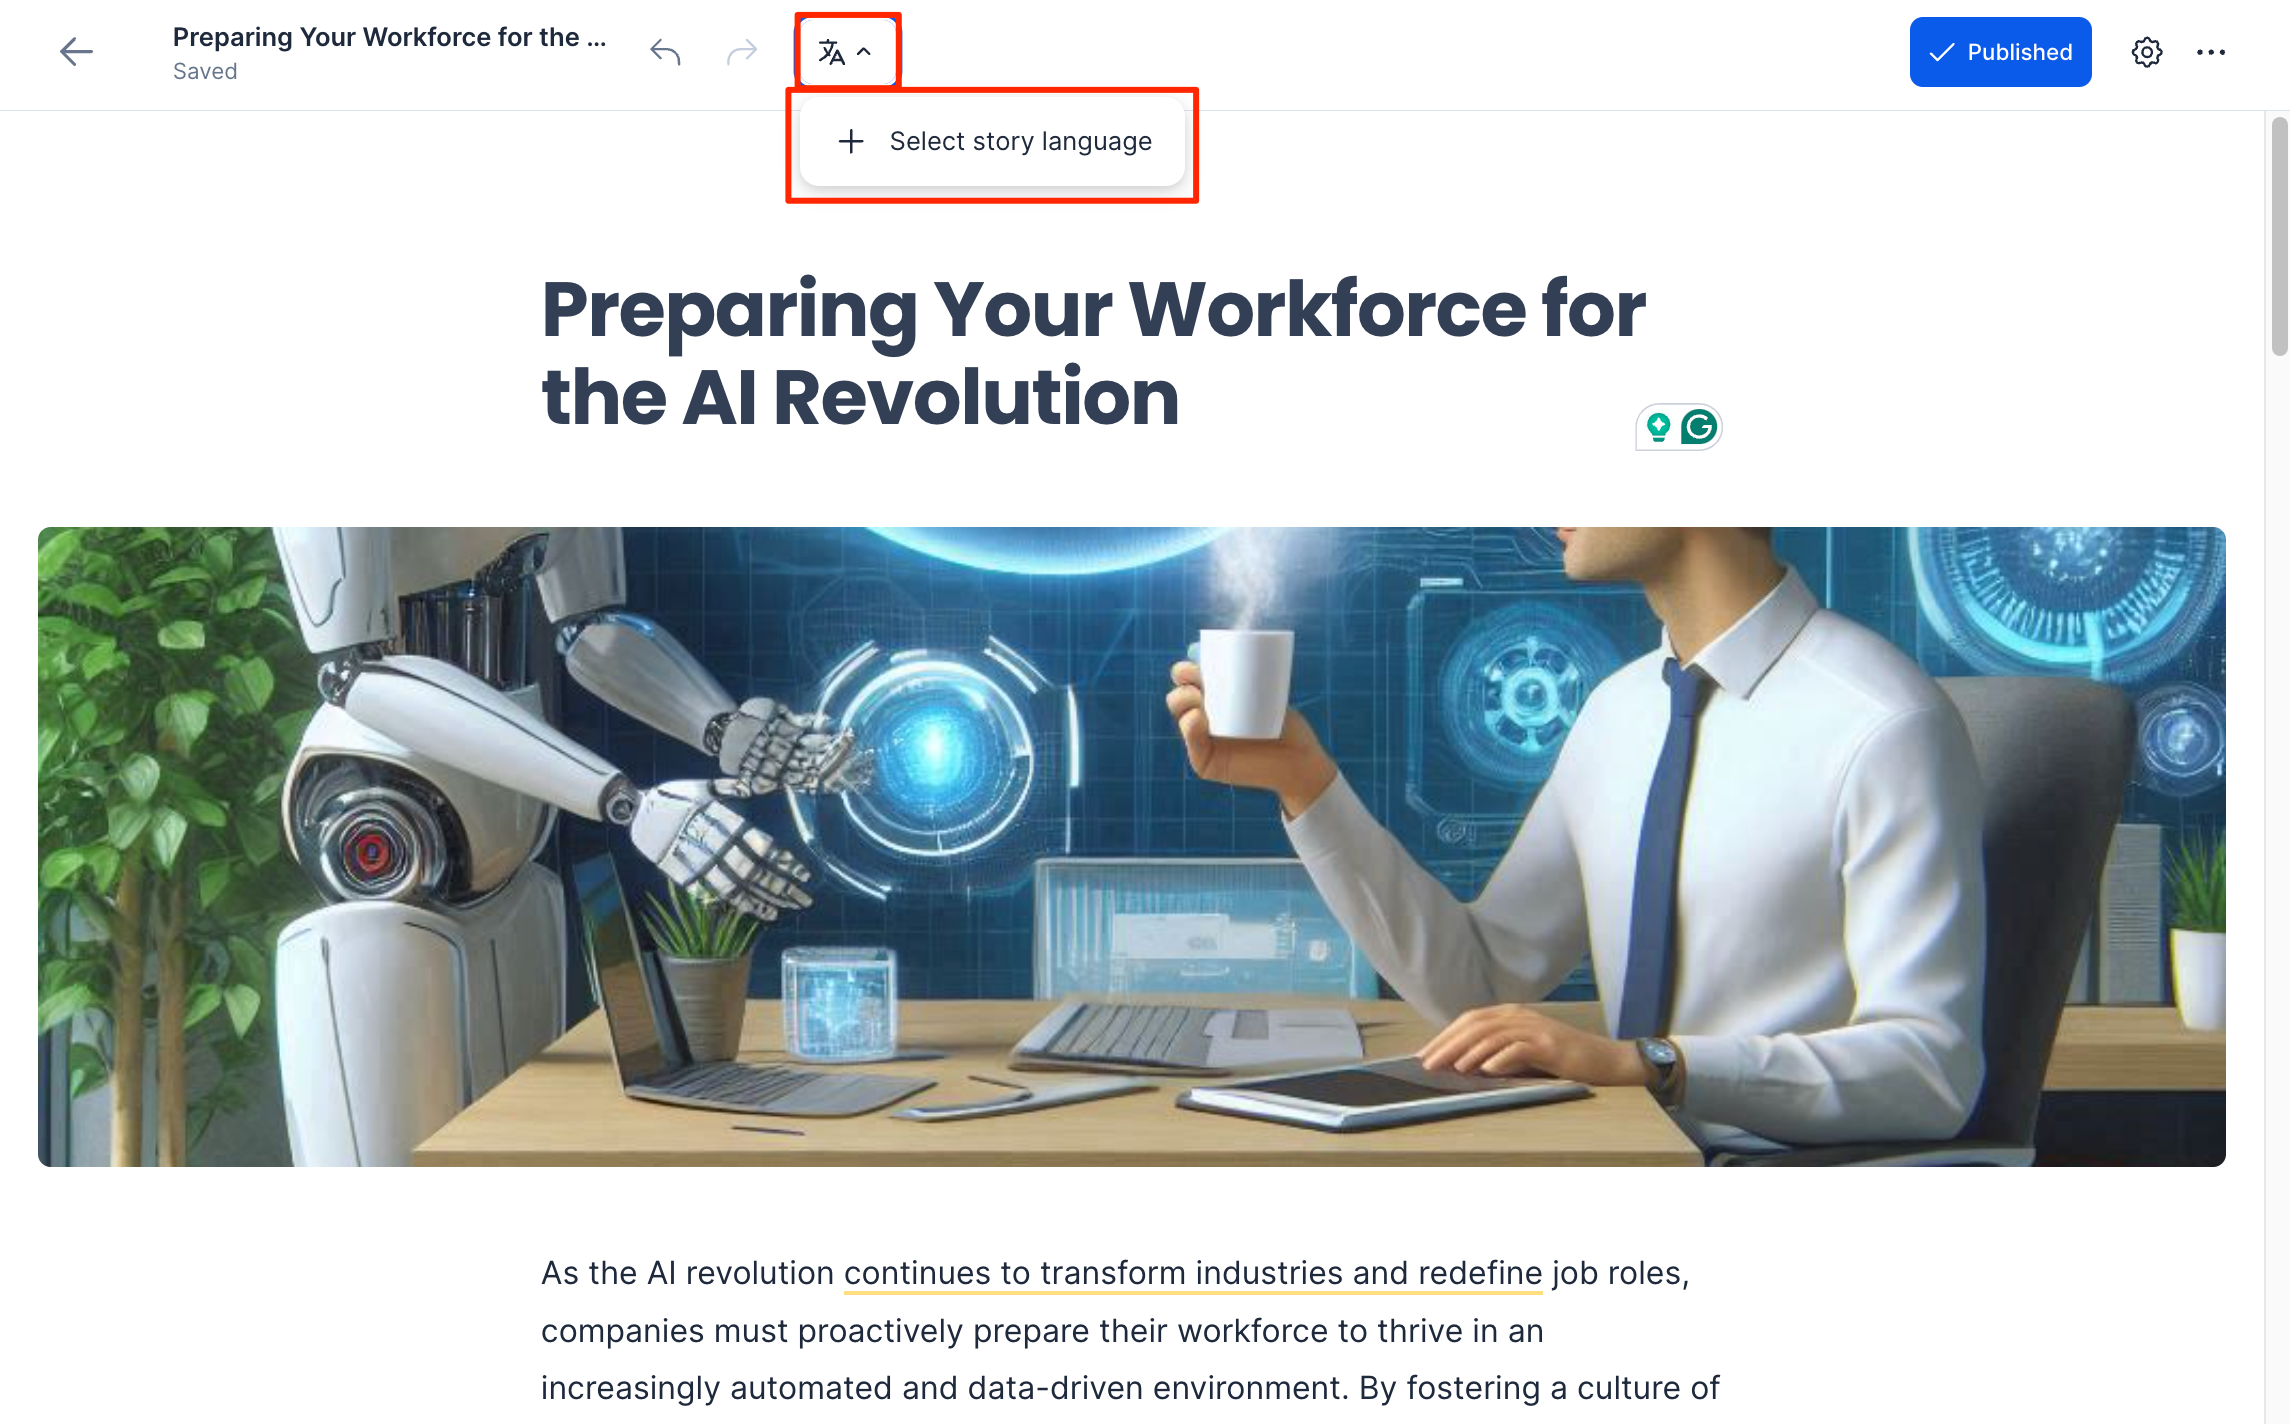
- Translations – Create different language translations for the Story.
- Click Select Story Language to set the Story’s original language. Click Save.
- After that, click Add Translations and select to enable the supported languages in the drop-down list. You can either use AI to translate the selected languages or manually translate the content yourself in the editor.
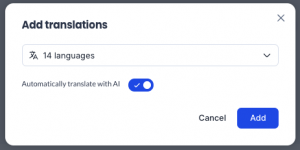
- Select Automatically translate with AI to use Artificial Intelligence and click Add to automatically create translations for each language of the Story article. This process may take several minutes.
- To create translations manually for each selected language, deselect Automatically translate with AI and click Add. Proceed to the Story version of each language by using the Preview option below and edit each content individually. Select Clear story to clear the content in the Story translation and start fresh, or click X to proceed with the existing content.
 Note
Note- To use the AI translation feature, the AI Translations option needs to be enabled in App Configuration settings in the Appspace Administrative Console.
- Stories will automatically be displayed by default in the language set in the Employee App. If a translation is not available, the Story will be displayed in the original language.
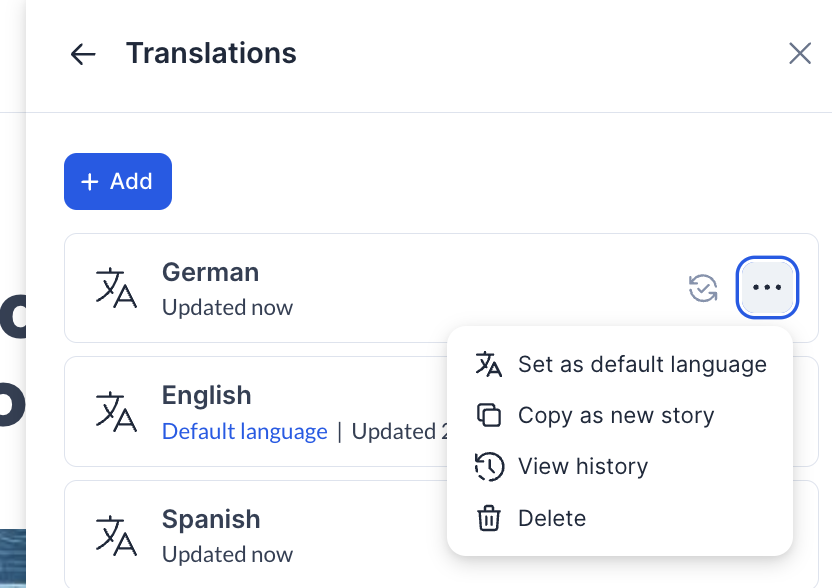
- After creating the translations, click the ellipsis next to each language to perform one of the following options:
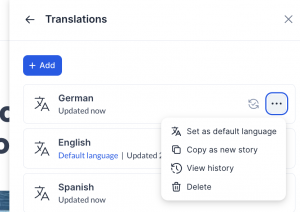
- Sync with default language – This option appears if the content for this translation (such as banner, text, or file attachments) was altered from the original language version. Select this to revert the translated content to match the original.
- Set as default language – Set this translation as the Story’s default language. This option is available for translations other than the default.
- Copy as new story – Copies the content of the translation into a new Story.
- Preview – Preview this language version to edit the translation content manually.
- View history – View the history of translations and versioning of the Story. Refer to the History section below.
- Delete – Removes the language, together with its Story version and translated content.
- Tags – Add tags to the Story for content organization, searchability, and contextualization.

- Add tags manually by entering the desired tags in the text field.
- Utilize Artificial Intelligence to generate tags based on the Story article, by clicking the AI icon.
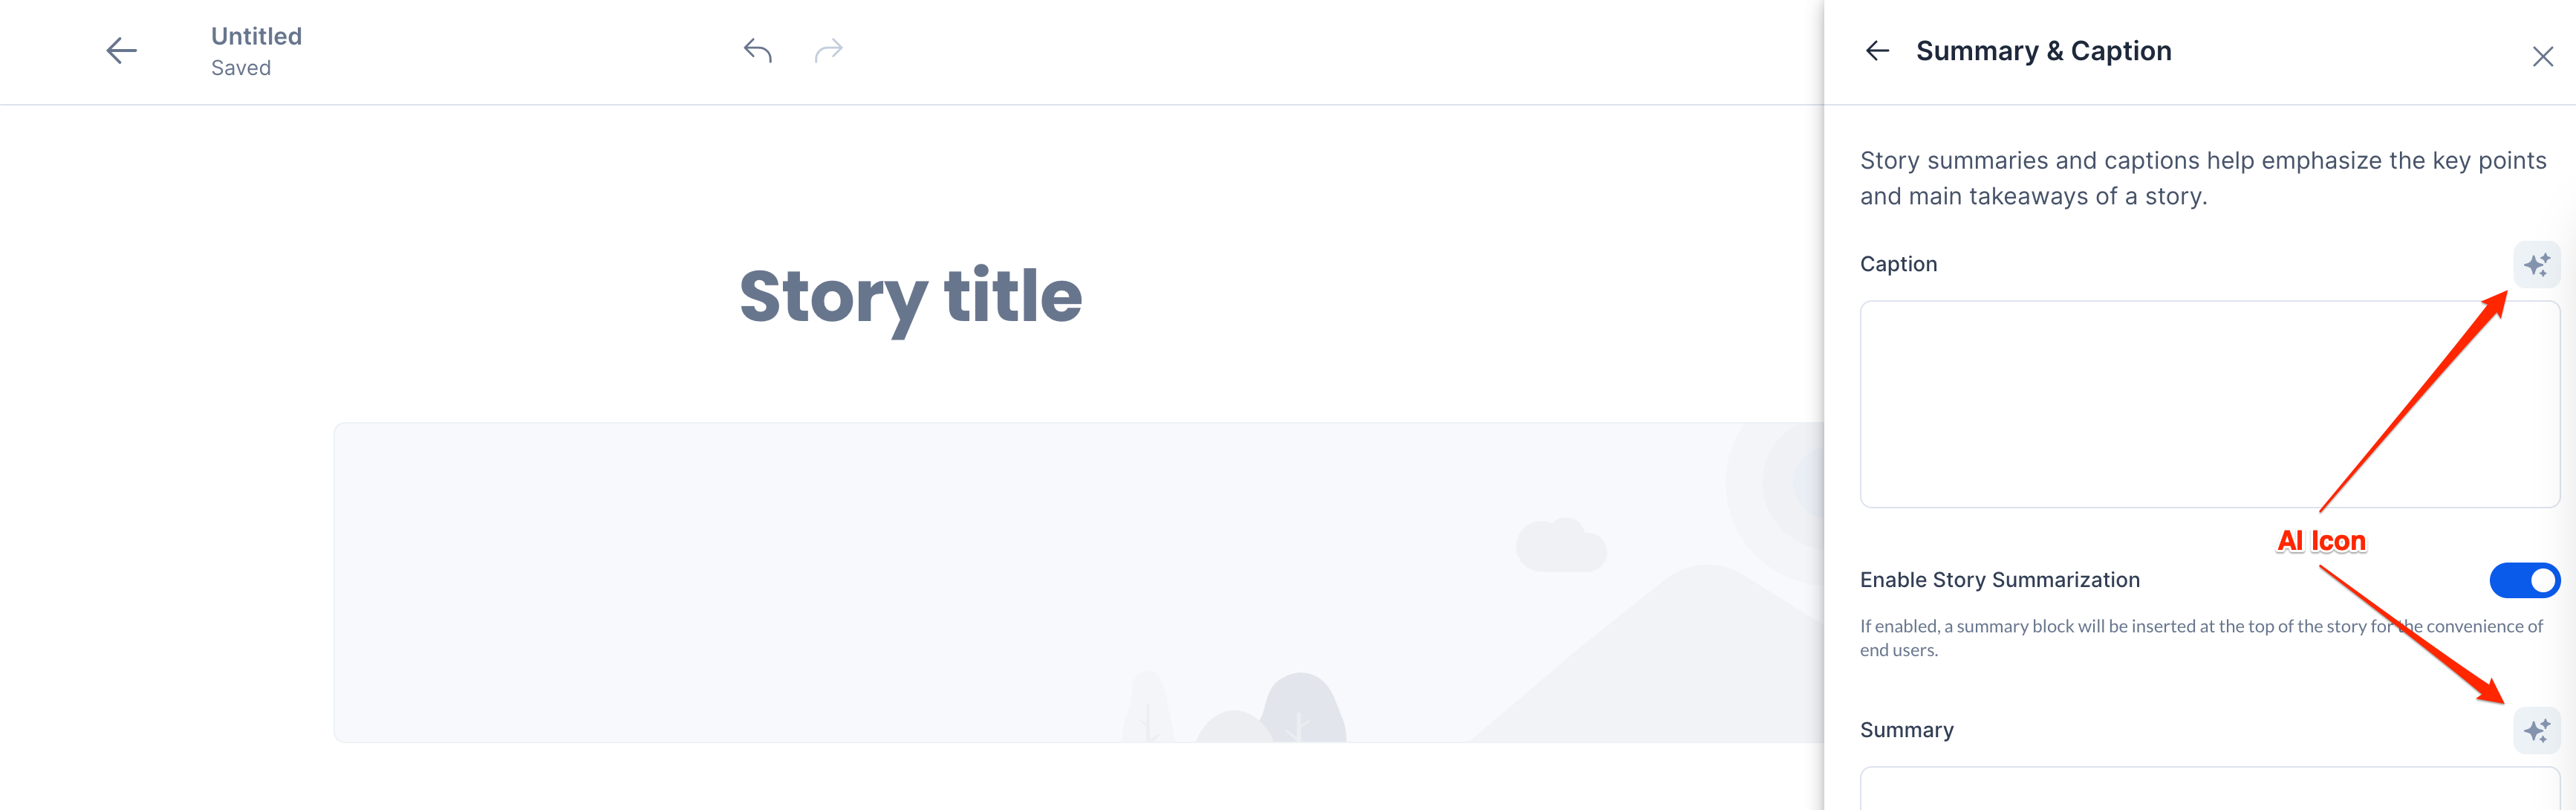
- Summary & Caption – Add a summary or caption to help emphasize key points and main takeaways of the Story.
- Language
- Select the language version of the article that will be captioned and summarized.
- Caption
- Add a caption manually by entering the text within the text field.
- Utilize Artificial Intelligence to generate a caption based on the Story article, by clicking the AI icon. The caption will be generated in the language set above.
- Enable Story Summarization – Insert a summary block at the top of the Story article.
- Enabled by default, toggle the switch to off to disable summarization.
- Summary
- Add a summary manually by entering the text within the text field.
- Utilize Artificial Intelligence to generate a summary based on the Story article, by clicking the AI icon. The caption will be generated in the language set above.
- Language
- Social – Enable Social Features to enhance social engagement, gather feedback, and encourage user participation.
- Reactions – Inherited by default, but can be set to On or Off from the drop-down menu.
- Comments – Inherited by default, but can be set to On or Off from the drop-down menu.
- Share – Inherited by default, but can be set to On or Off from the drop-down menu.
- History – View the history of translations and previously published versions of the Story.
-
- You can click the ellipsis next to each version and select Restore this version to overwrite the current changes with the selected (previous) version.
-
- Schedule – Schedule the Story to be published immediately, or at a later duration.
- Once completed, click Publish.

Assign Reviewers for Feedback on Stories
Before finalizing your story for publication, it is essential to ensure all details are accurate and thoroughly reviewed. Authors now have the ability to invite reviewers to provide valuable feedback directly within the content. Reviewers will receive notifications and can offer their insights, which are then consolidated in the review section for easy access and organization.
Follow the instructions below to assign a reviewer.
- Log in to the Employee App.
- In the Home screen, click the Plus Sign ( + ) icon, and select Story.
- To request a review, follow these steps:
- Select Publish > Request review.
- In the Select reviewers section, search for and add your desired reviewers.
- If you wish to include any notes for the reviewers, add your message in the message box.
- Once you’re ready, click Save.
- Another option to request a review is to click the ellipsis > Request review.
- Follow steps 5 and 6 to proceed.
- Once done, click Save.
Create and Manage Translations of Stories
You can create translations of stories to offer content in multiple languages for international readers. You can also translate stories using AI if the AI Translation setting is enabled in the Administrative Console.
Follow the instructions below to create translations of existing stories.
- Log in to the Employee App.
- On the top menu, click More and select Explore. On the Explore page, select Stories.
- Click the story that you wish to translate. In the Story window, click the ellipsis icon (…) at the upper right corner and click Edit.
- On the Story view, click the language icon at the top of the story. If you have not set the original language for the story, click + Select story language to set the Story’s original language. Select the language for the Story and click Save.

- Click the language icon at the top of the story and click + Add Translations.

- In the Add translations window, click Select a language… and click each language that you wish to enable in the drop-down list. You can then either use AI to translate the selected languages or manually translate the content for each language yourself in the editor.
- Select Automatically translate with AI to use Artificial Intelligence and click Add to automatically create translations for each language of the story article. This process may take several minutes.
- To create translations manually for each selected language, deselect Automatically translate with AI and click Add. Proceed to the Story version of each language by clicking the language icon at the top of the story and selecting each language to edit its content individually. Select Clear story to clear the content in the Story translation and start fresh, or click X to proceed with the existing content.Note
- To use the AI translation feature, the AI Translations option needs to be enabled in App Configuration settings in the Appspace Administrative Console.
- Stories will automatically be displayed by default in the language set in the Employee App. If a translation is not available, the story will be displayed in the original language.
- After creating the translations, click the language icon at the top of the story and click + Manage Translations.
- The Translations panel displays the list of language translations. For each language, you can click the ellipsis to perform one of the following options:
- Sync with default language – This option appears if the content for this translation (such as banner, text, or file attachments) was altered from the original language version. Select this to revert the translated content to match the original.
- Set as default language – Set this translation as the Story’s default language. This option is available for translations other than the default.
- Hide from Employee App – Hide this translation from being published to the Employee App.
- Copy as new story – Copies the content of the translation into a new Story.
- Preview – Preview this language version to edit the translation content manually.
- View history – View the history of translations and versioning of the Story. You can click the ellipsis next to each saved version and select Restore this version to overwrite the current changes with the selected (previous) version.
- Delete – Removes the language, together with its Story version and translated content.
- Click Publish to publish the updated Story.

Was this article helpful?