The Appspace Library supports the usage of Dynamic Media, allowing users to specify content that is located externally on a network, and set a frequency to retrieve new versions of the content, in advanced channels. Its main purpose is to display content that changes frequently without manual uploading it again, such as traffic camera images, weather updates, and server generated graphs.
Refresh Frequency
Appspace background agents work automatically to download the specified content at a user-configurable interval (defaulted at 24 hours) and will then proceed to update an applications’ media zone playlist.
Supported Formats
- Image – PNG, JPG, JPEG, BMP, GIF, TIF, TIFF, ICO
- Flash – SWF
- Video – FLV, WMV, AVI, MPG, MPEG, ASF, TS, OGV
This article provides instructions to create dynamic content for legacy devices in Library.
Prerequisite
- Account Owner, Publisher, Editor, or Content Producer (Author) role to add or edit content in Library.
Create Dynamic Content
The instructions below show you how to create dynamic content for legacy devices in Library.
- Log in to the Appspace console.
- To create content, select one of the following options:

- Click +QUICK ACTION from the Appspace menu bar on the top right, and select Create Content.
- Click Library from the ☰ Appspace menu, and select a library or folder you wish to create the content in. Click +CREATE, and select Content.
- To add content to an existing channel refer to Add Content to Playlist Channels.
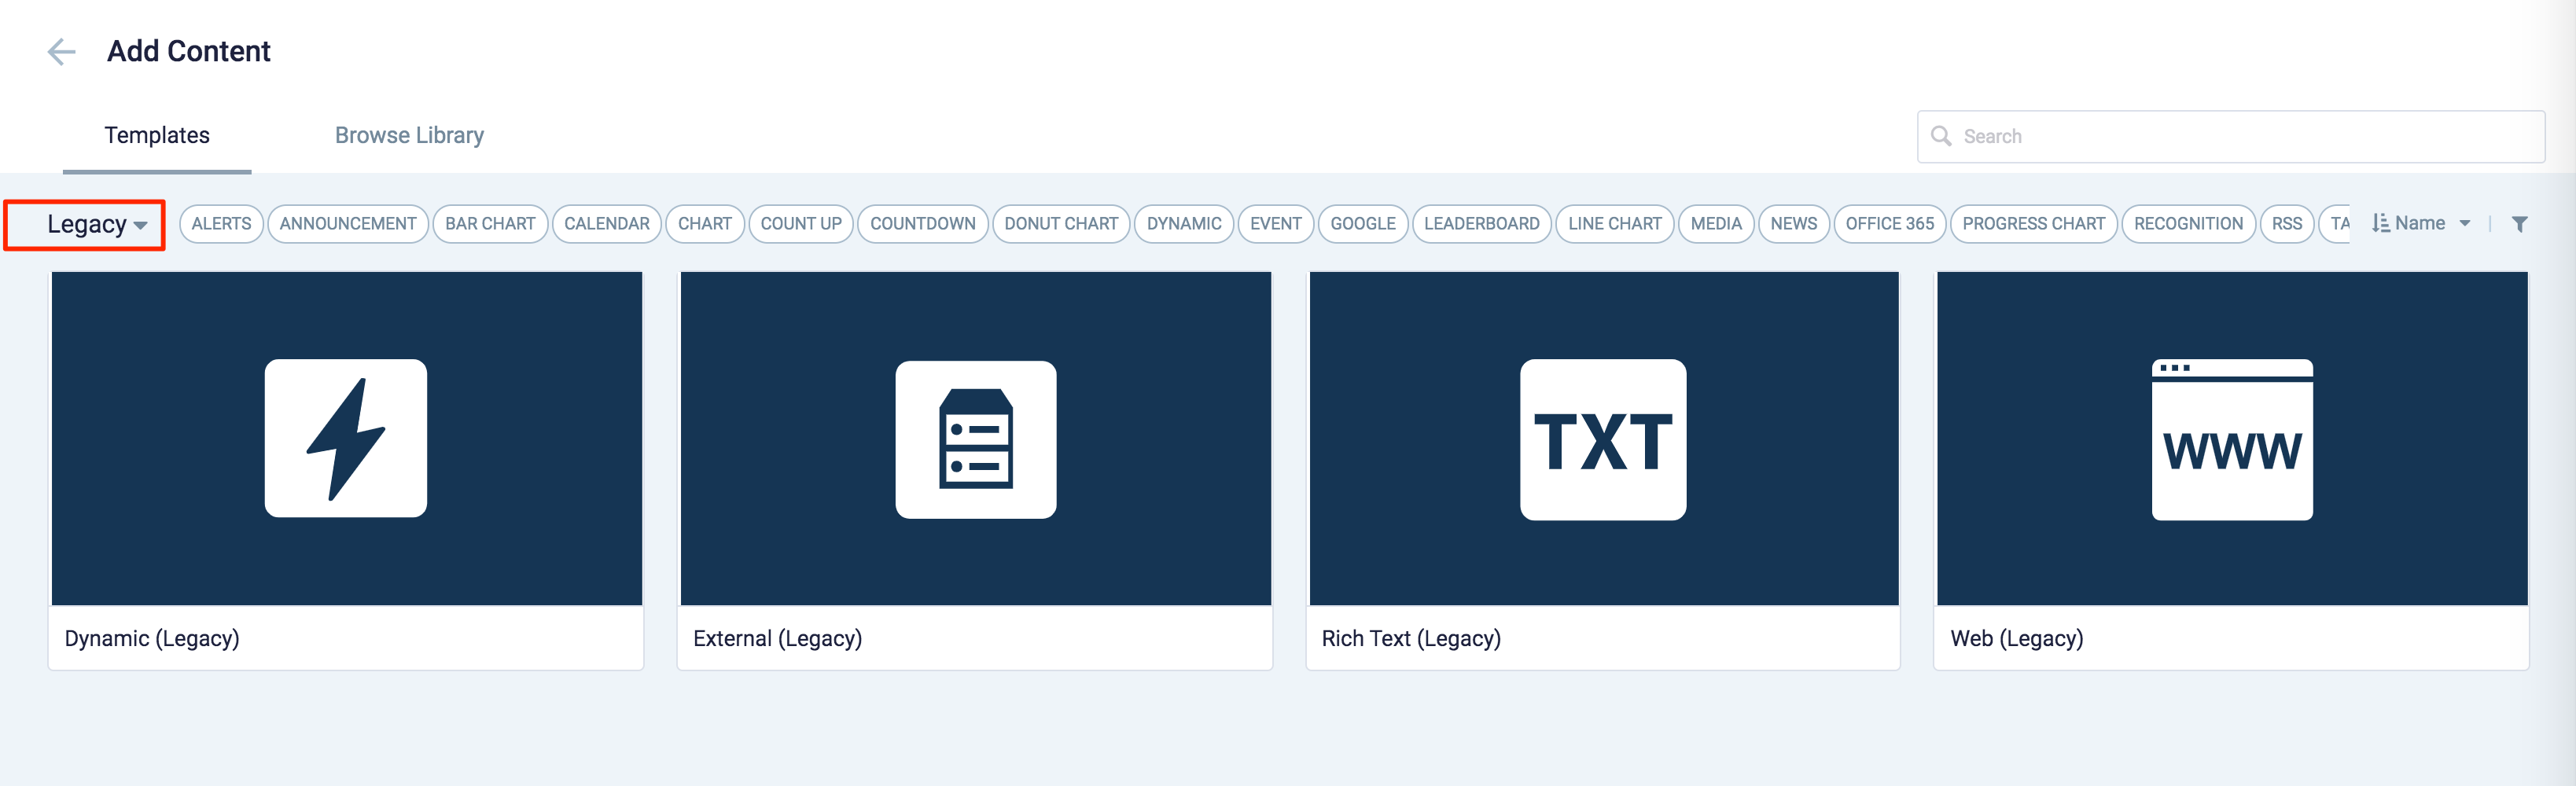
- Select Legacy from the All Templates drop-down menu, and click Dynamic (Legacy).
ImportantIf you are unable to locate the content, try using either the Search bar, the Order by, or Filter icon to narrow down the content that you are looking for. - In the Edit tab;
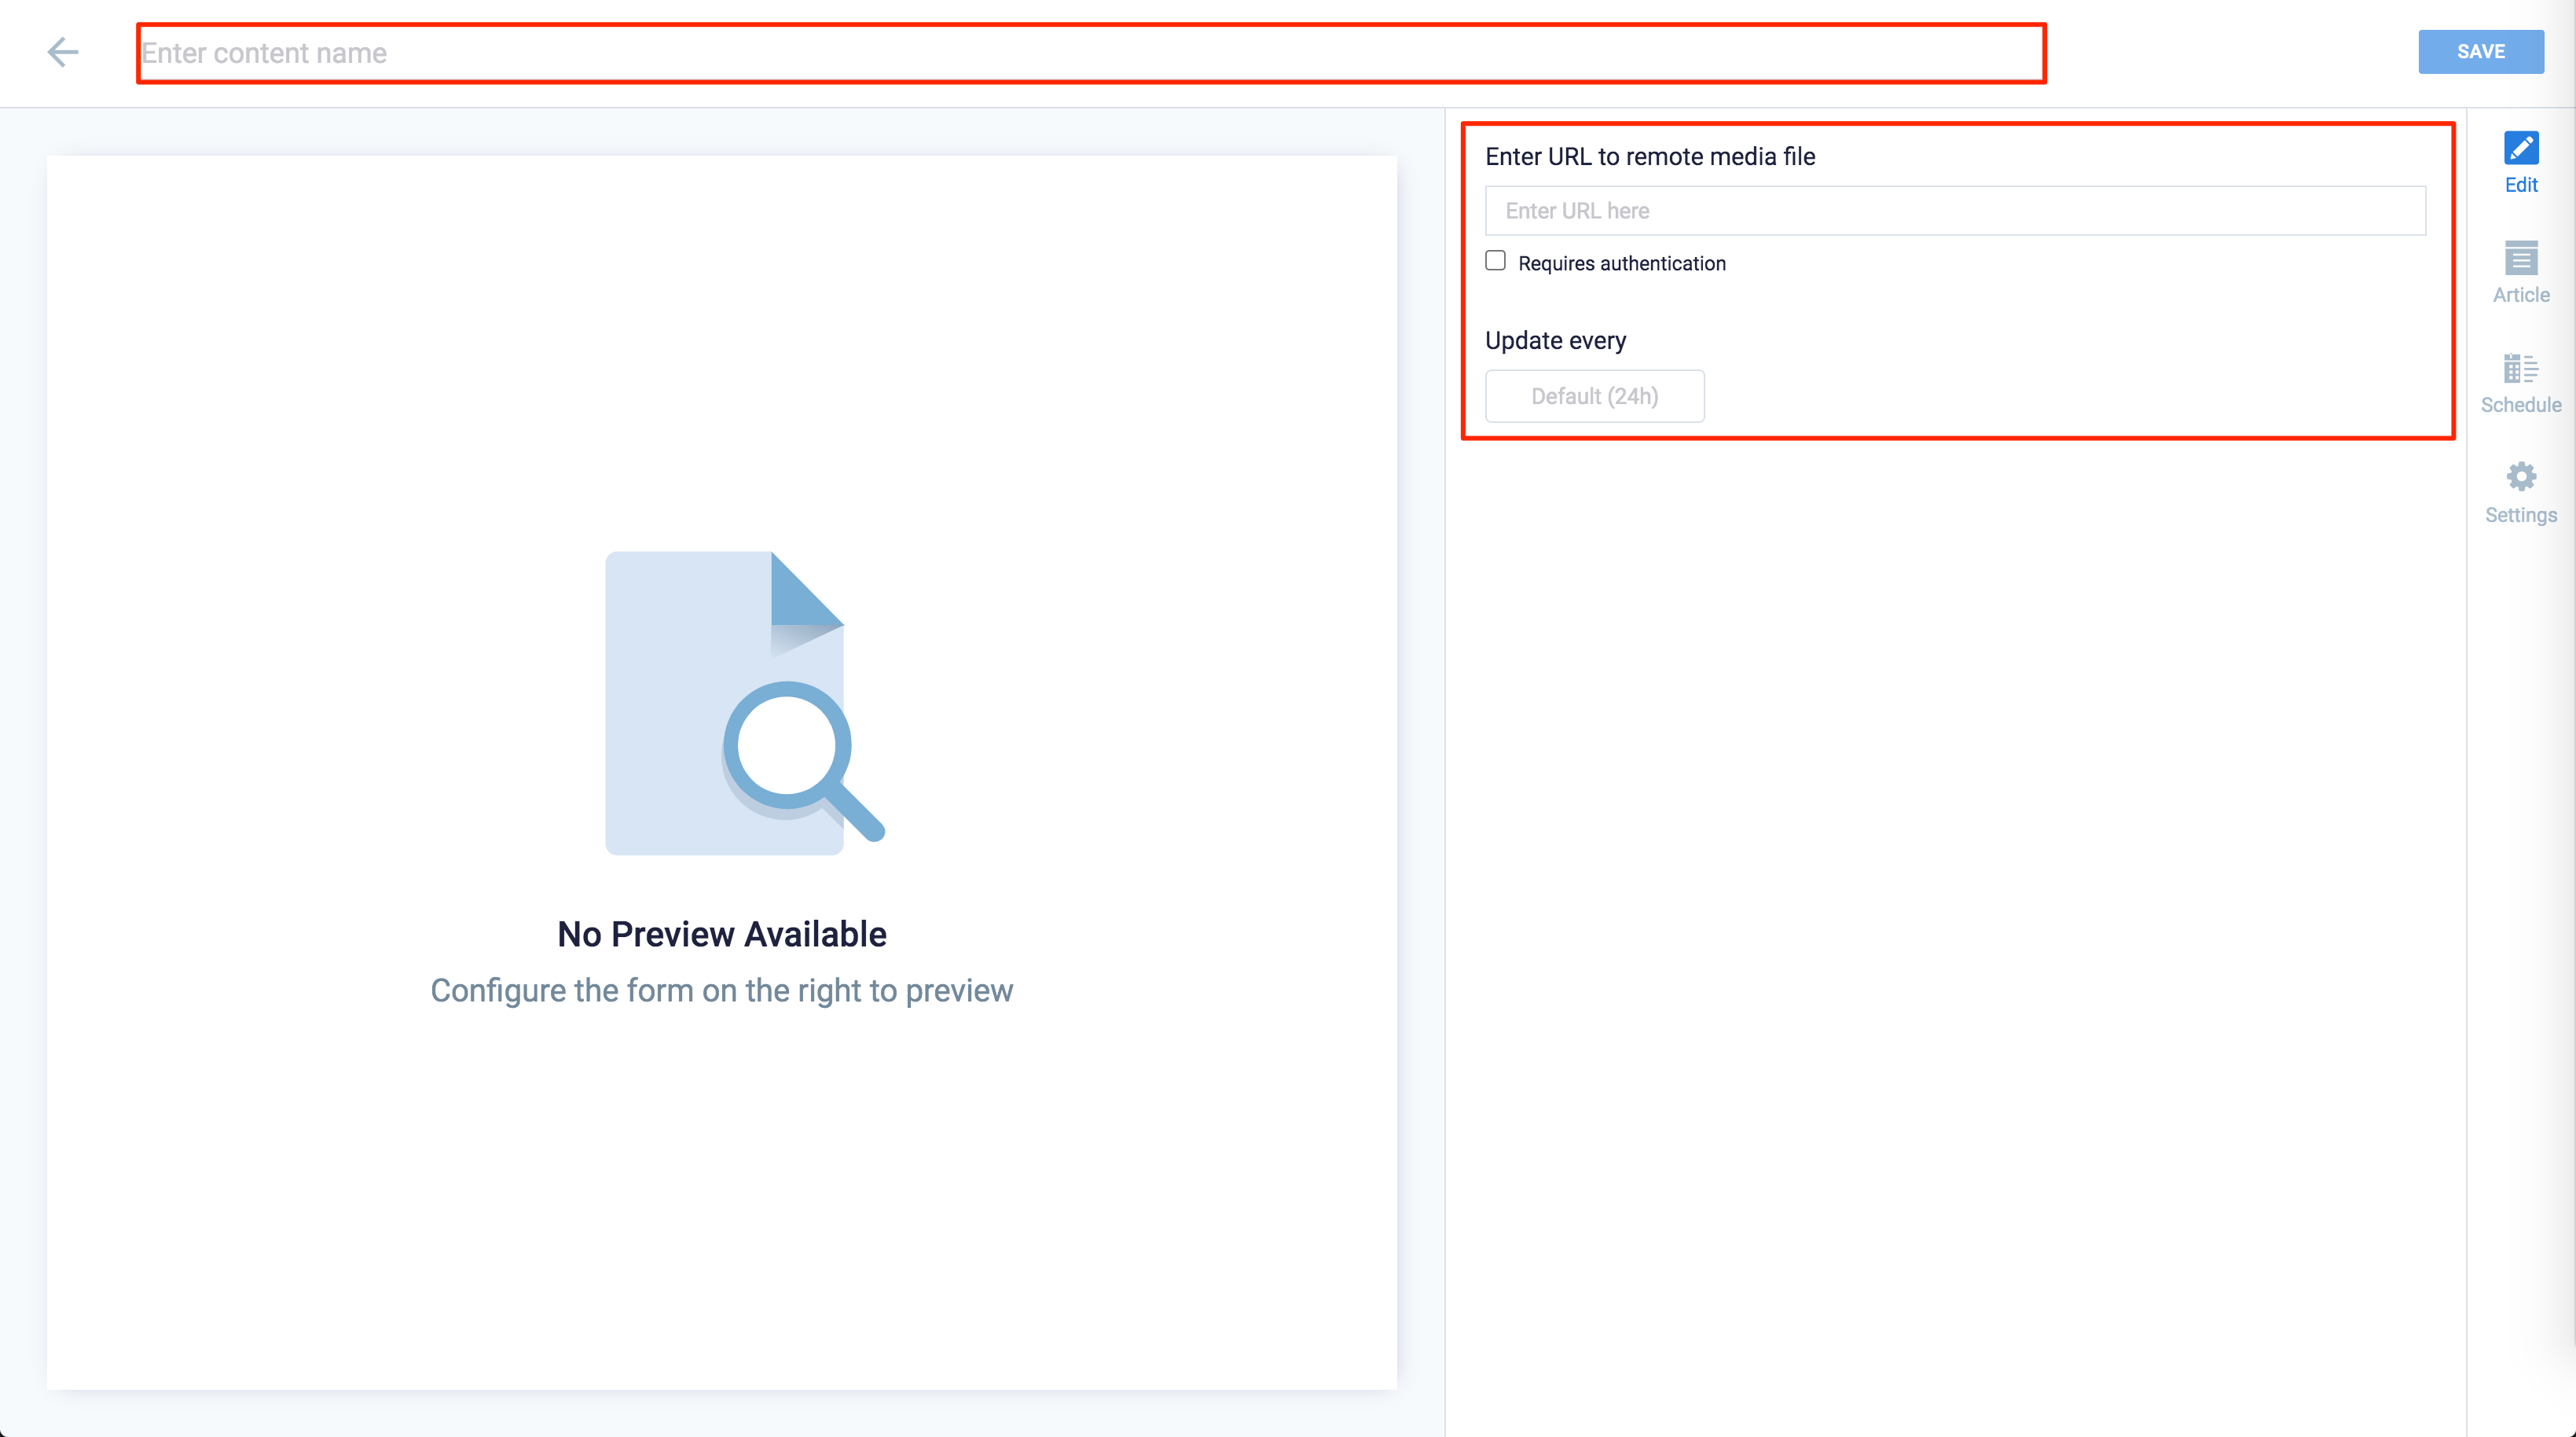
- Enter the Title of the content as this will also act as the filename for the content. This is a mandatory field.
- Enter the URL to the remote media file to be displayed in the address field. If authentication is required, check the Require authentication checkbox, and enter the required credentials.
- The content is updated every 24 hours by default. To change this, click the Update every drop-down menu and select the preferred update duration.
- In the Article tab; This section may be skipped.
- Include an Article or Caption to accompany the content item when being displayed on mobile apps, tablets, and other social collaboration apps.
- Enter a Referral Link to link more information to the content.
- In the Schedule tab; This section may be skipped.
- You may add the content to a channel by selecting the channel from the Add to channel drop-down menu, or leave it unassigned to be added later.
- When the content is assigned to a channel, the SCHEDULING and DISPLAY PROPERTIES options are displayed. Refer to the Configure Content Playback Properties: Dayparting, Frequency, Scheduling, in a Playlist Channel article for detailed configuration instructions.
- In the Settings tab; This section may be skipped.
- The Name field will be auto-populated to match the Title of the content which will also act as the filename for the content. This is a mandatory field.
- Enter any relevant Tags for the content. (Optional)
- Select a folder for the content in the Library Location drop-down menu to change the default folder location.
- Select an expiry date for the content from the Auto Delete Content from Library drop-down menu. (Optional)
- Upload an image to be used as the Thumbnail for the content.
- Once done, click SAVE.
Was this article helpful?