In the Hero blocks, we can configure a Custom Widget called Power Automate.
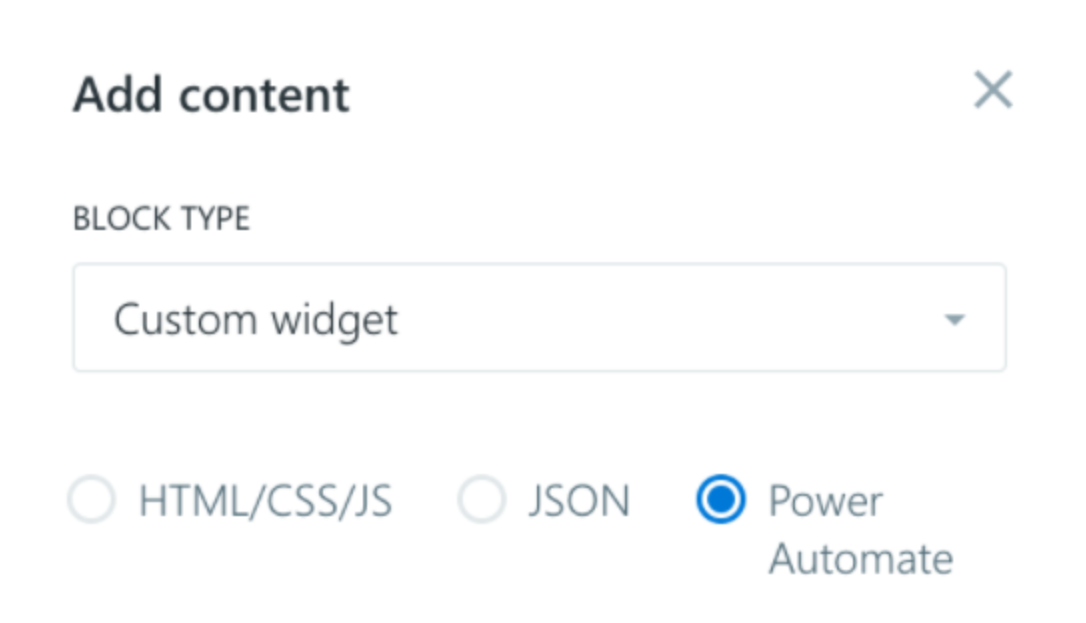
Follow this guide if you want to understand the feature and the whole process to create a Power Automate widget. It applies only to Cloud environments.
For this feature, we are using two Microsoft tools:
- Power Automate (aka Flow): it allows us to perform some action every time some event occurs. In our case, it will create (and update) a widget for the Hero every time something occurs (e.g. we receive an e-mail, a message in Teams, the weather conditions changes, etc.).
- Adaptive Cards: it allows us to create UI widgets in an easy way (even for non-developers). We will use this technology to create the widget that will be shown in the Hero and that will present the info coming from the flow*.
* The flow is the sequence of events and actions created with Power Automate, which will supply the data to the UI widget.
Let’s say we want to create a widget for the Hero that shows the current weather, and we want it to update every 30 minutes. Power Automate will get the weather information every 30 minutes, while adaptivecards.io will create the UI widget that will show the weather info in the Hero.
Let’s see how to do it… ️♀️
The weather widget example
To create a custom widget in some your environment, we need to open the Power Automate website: https://flow.microsoft.com/en-us/ and sign in with a user belonging to that specific Appspace SharePoint Intranet environment (Cloud).
Add the custom connector
Once we are logged in, we have to check that the environment has the Appspace SharePoint Intranet Custom Connector configured. Check in the left bar => Data => Custom connectors => Beezy.
If we find it, all right! Someone has already imported and configured it
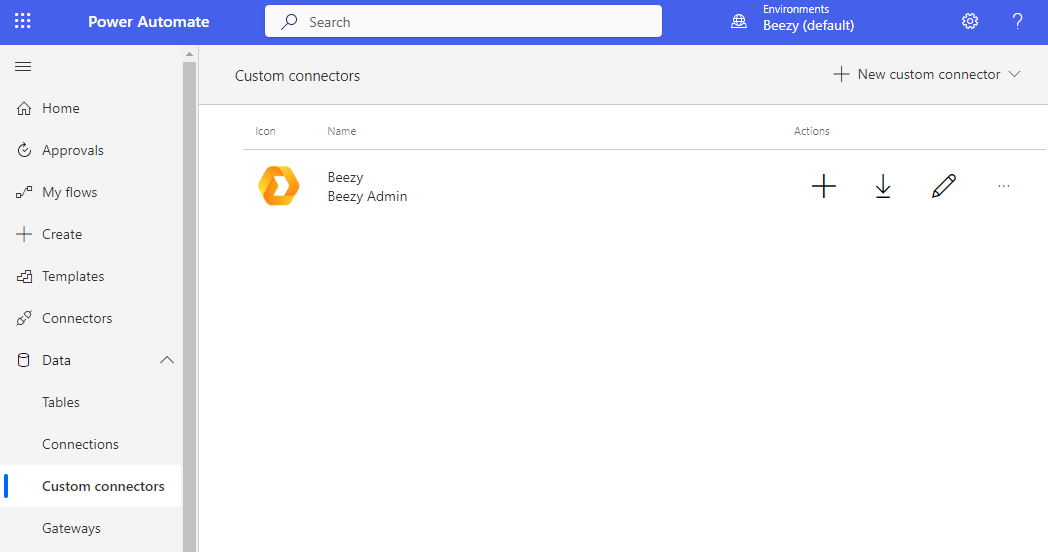
If we don’t find it, no worries, just download the Beezy connector for Power Automate from https://partners.beezy.net/ and follow the instruction in the User Guide PDF.
Once we have the Custom Connector, we can start creating our flow.
Add the event trigger
First of all, we have to choose the event trigger that will start the flow and perform its actions. There are different kinds available, just play with them to know which one is the best for us and our widget.
For our example, the Scheduled flow is the perfect match, because we want to update our weather information every 30 minutes.

Just click on Scheduled flow, fill the form with the basic information, and click the Create button.
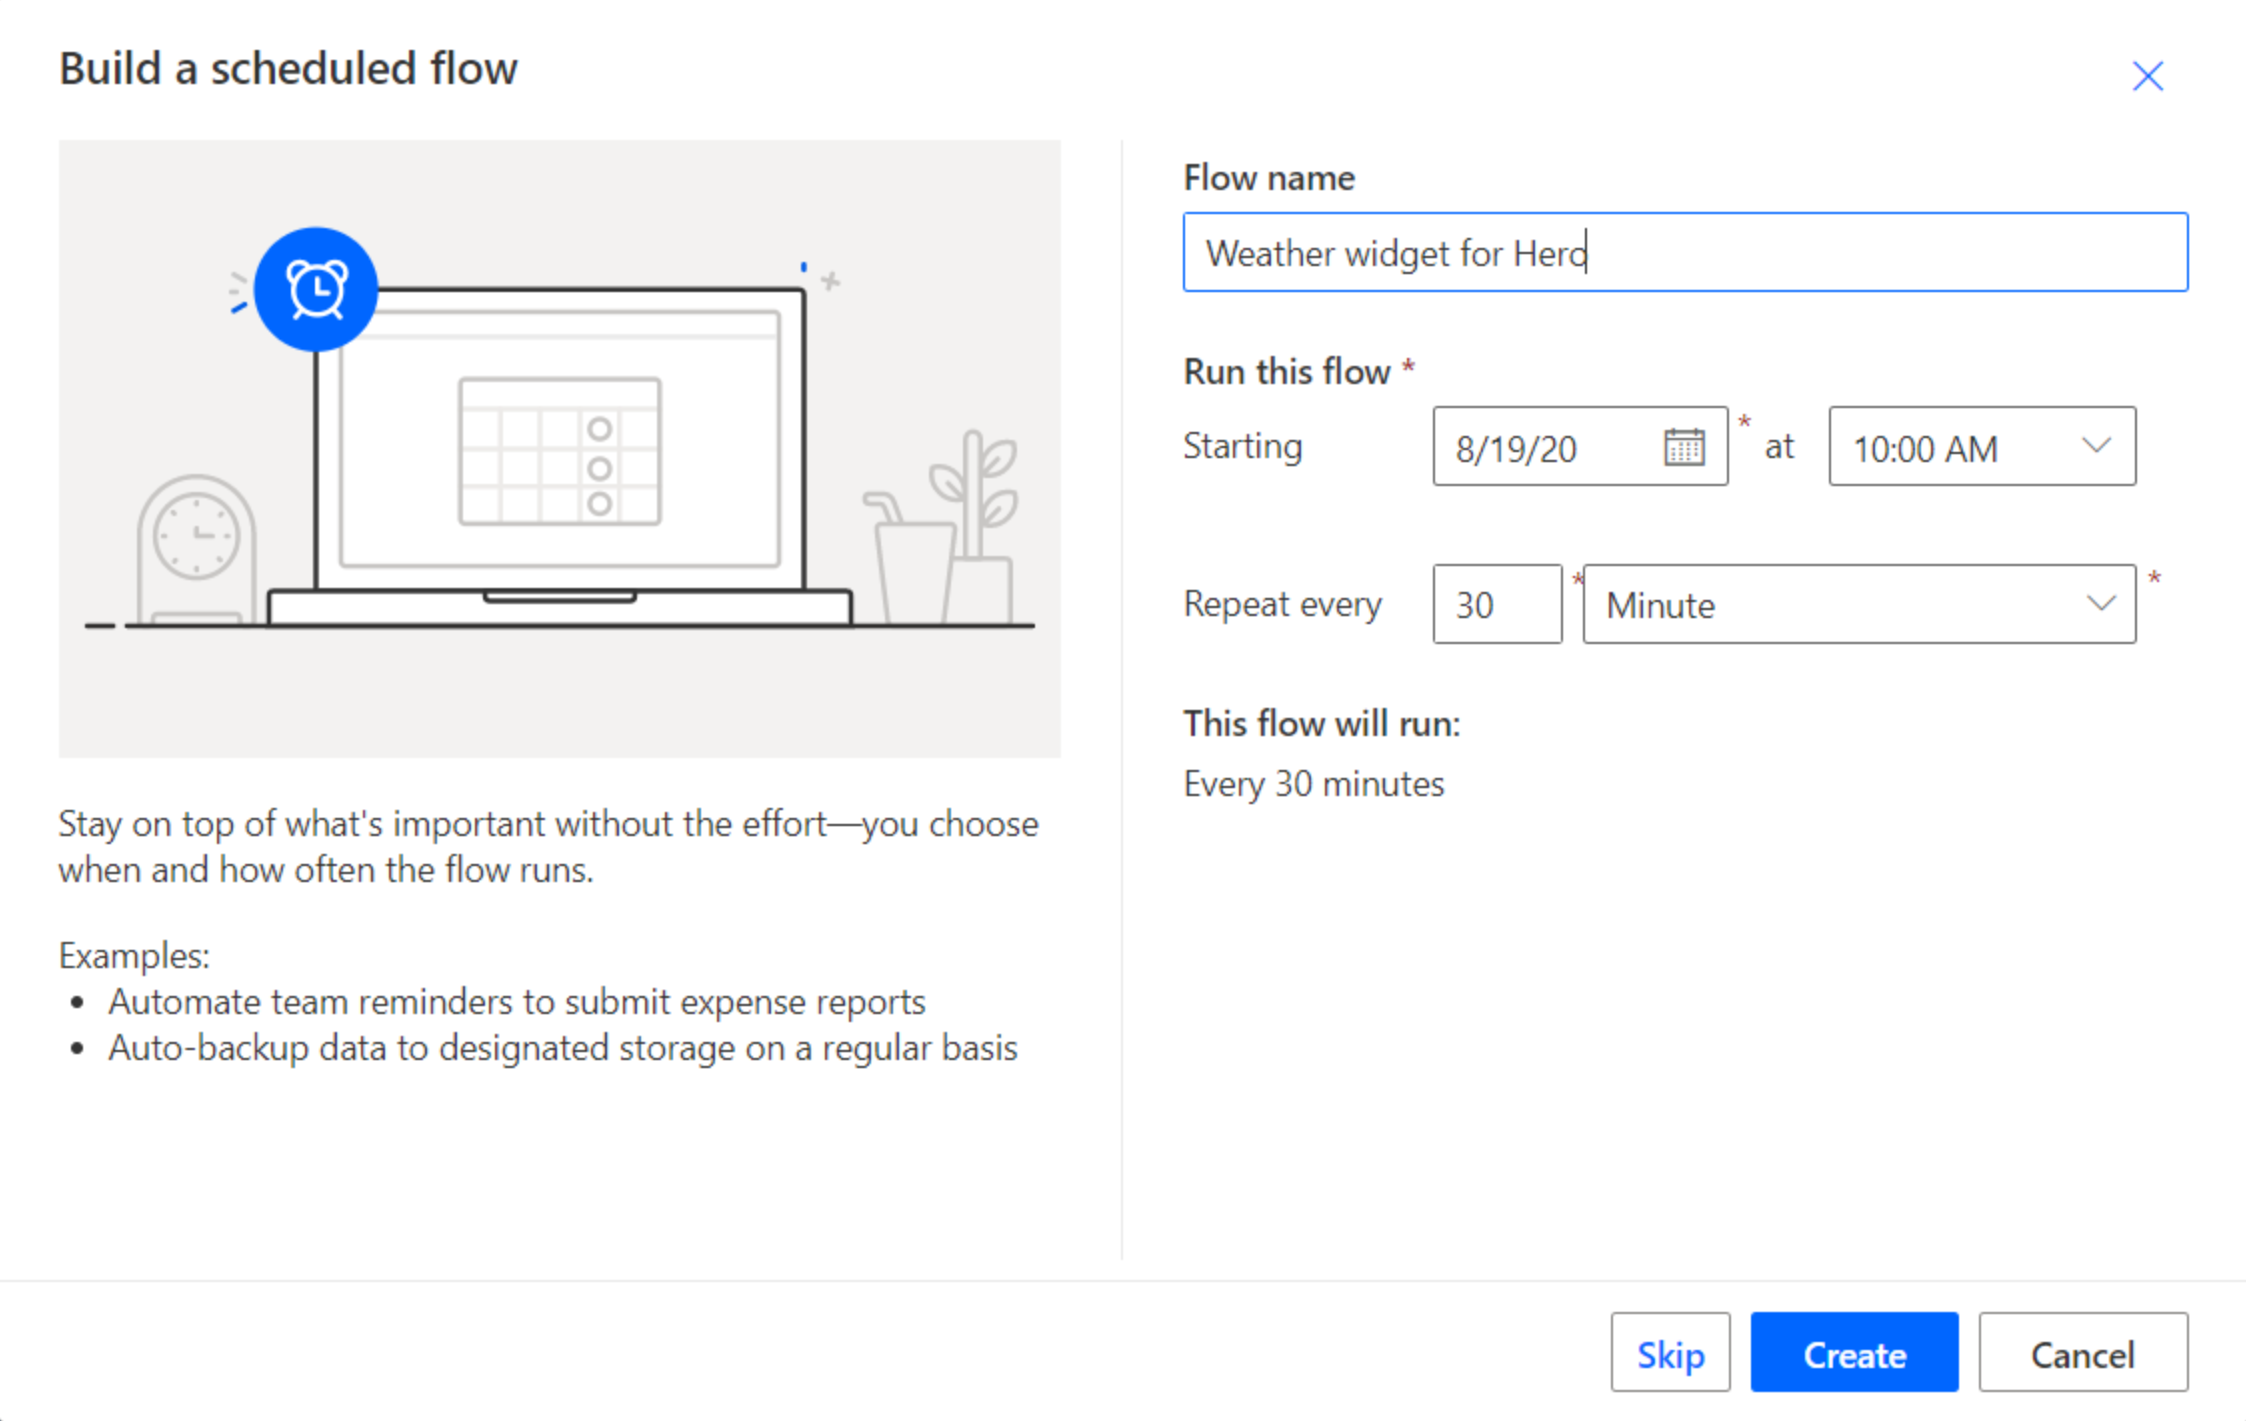
The first step is done!
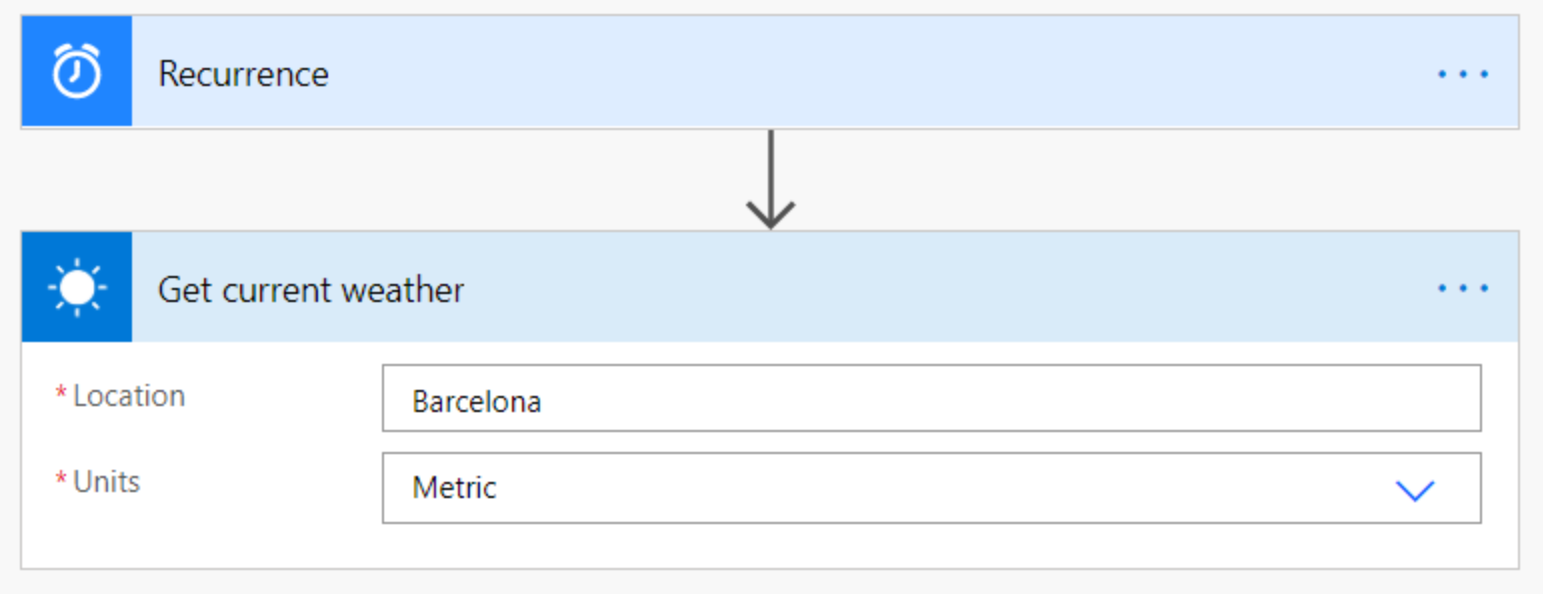
Add the “Get current weather” action
Now click on +New step:

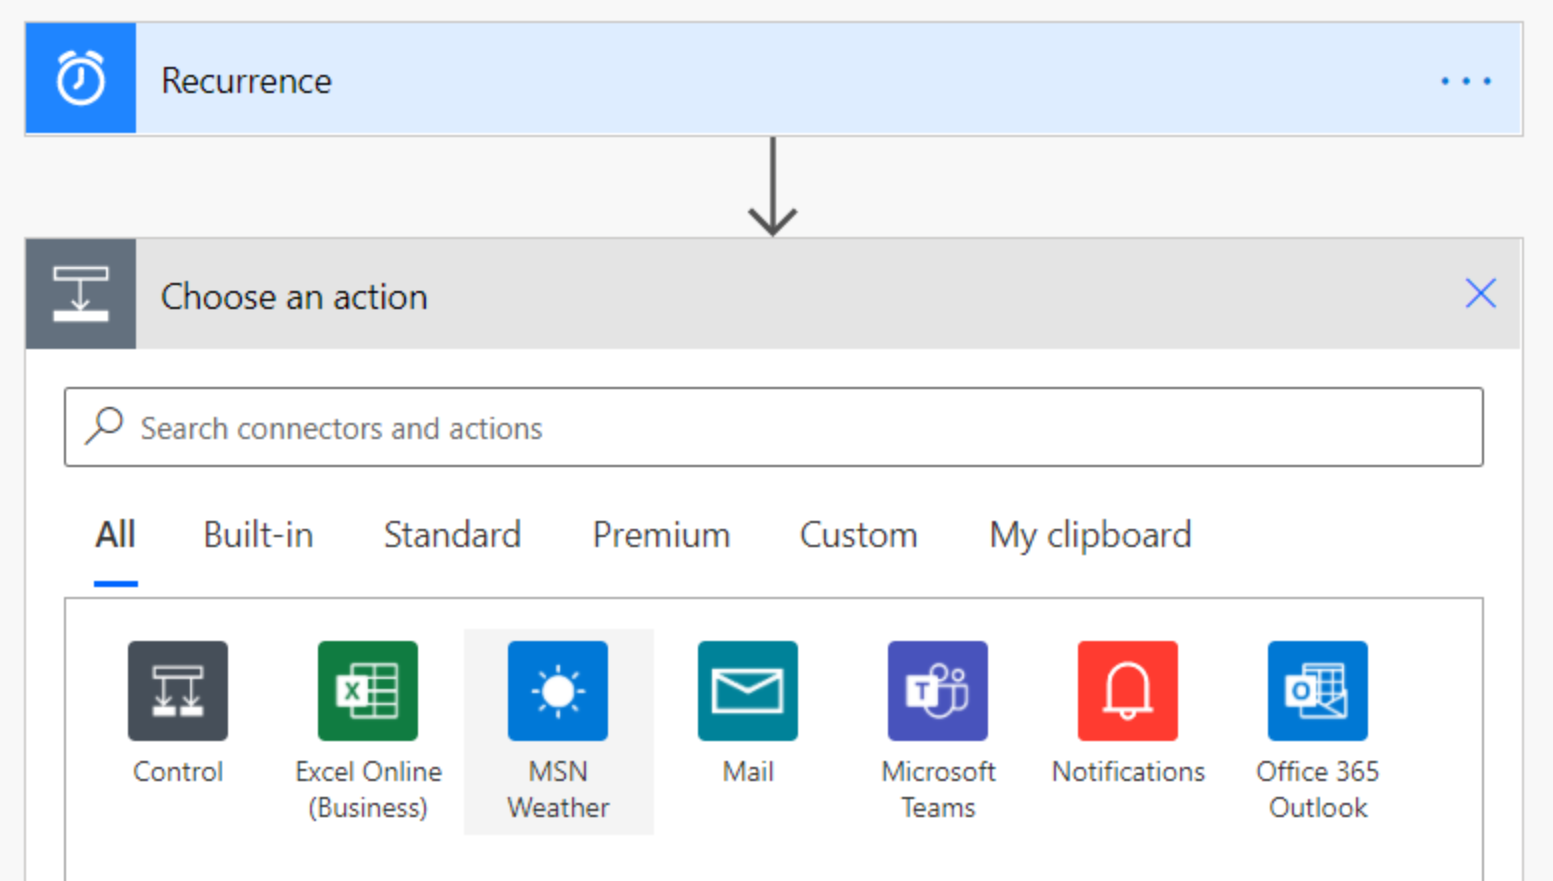
and finally, click on the Get current weather action:
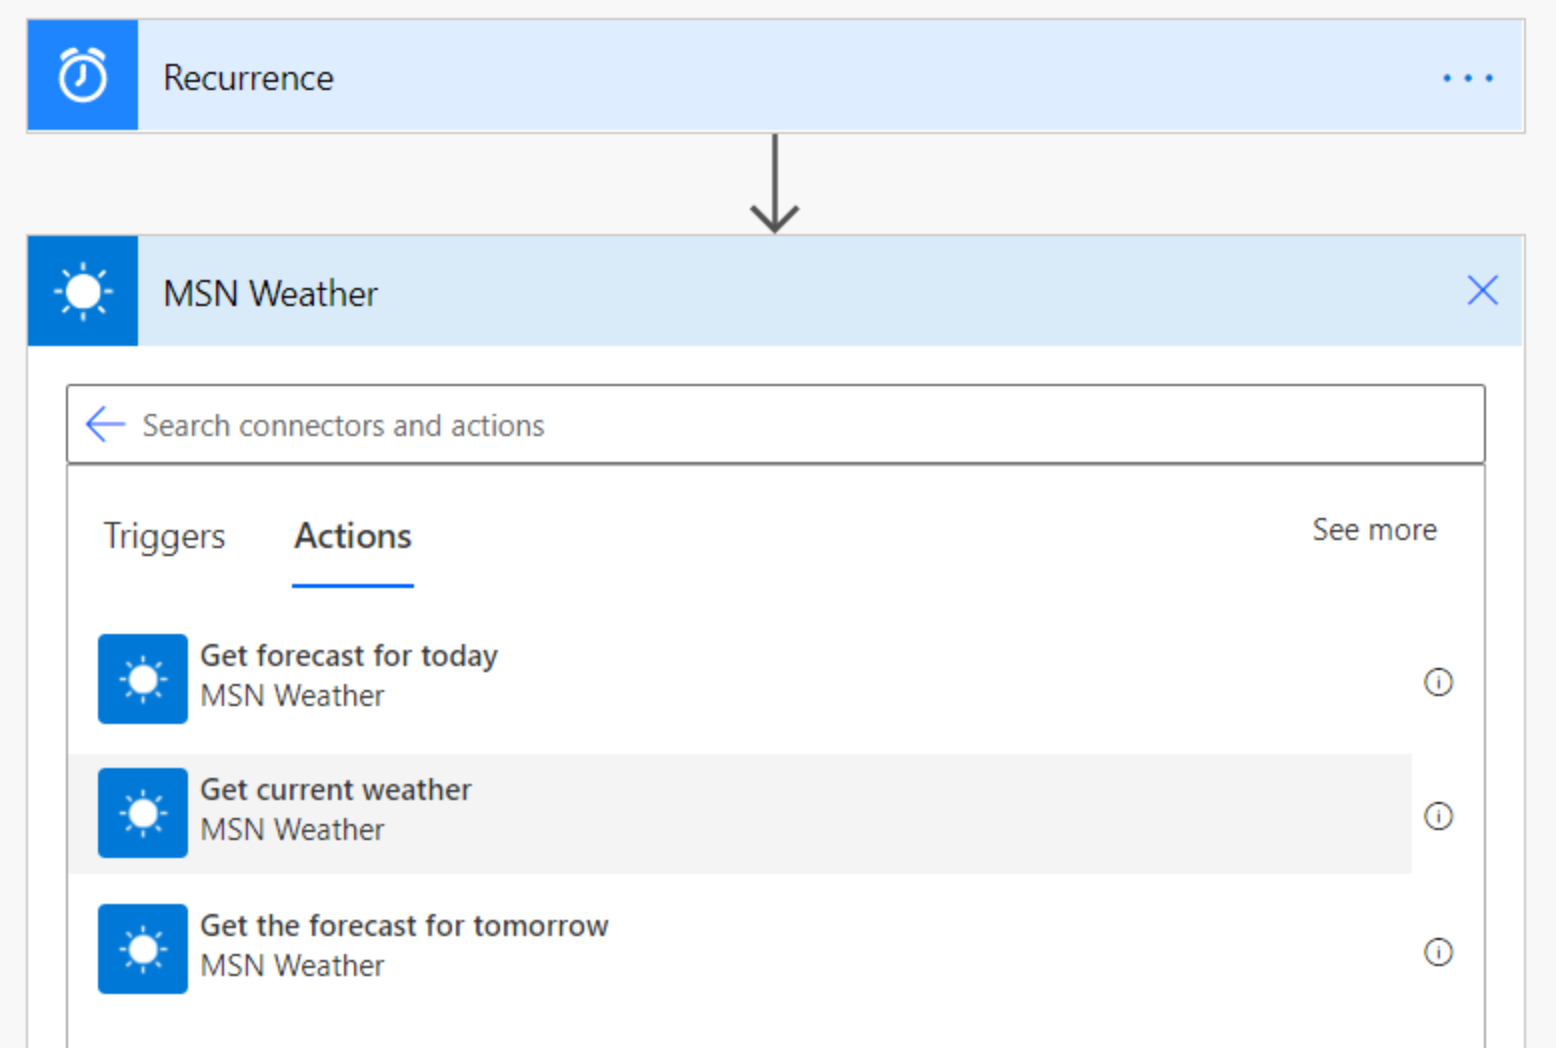
Fill the fields: Location and Units
Add the “Update Widget Block” action
Now that we have our event trigger (recurrence every 30 minutes), and the action that will provide us the information about the current weather, we need to add the last action. The one that will show the weather info in our Hero.
So let’s add a new step, click on Custom connectors and click on Beezy (or just look for “Beezy” in the search bar).
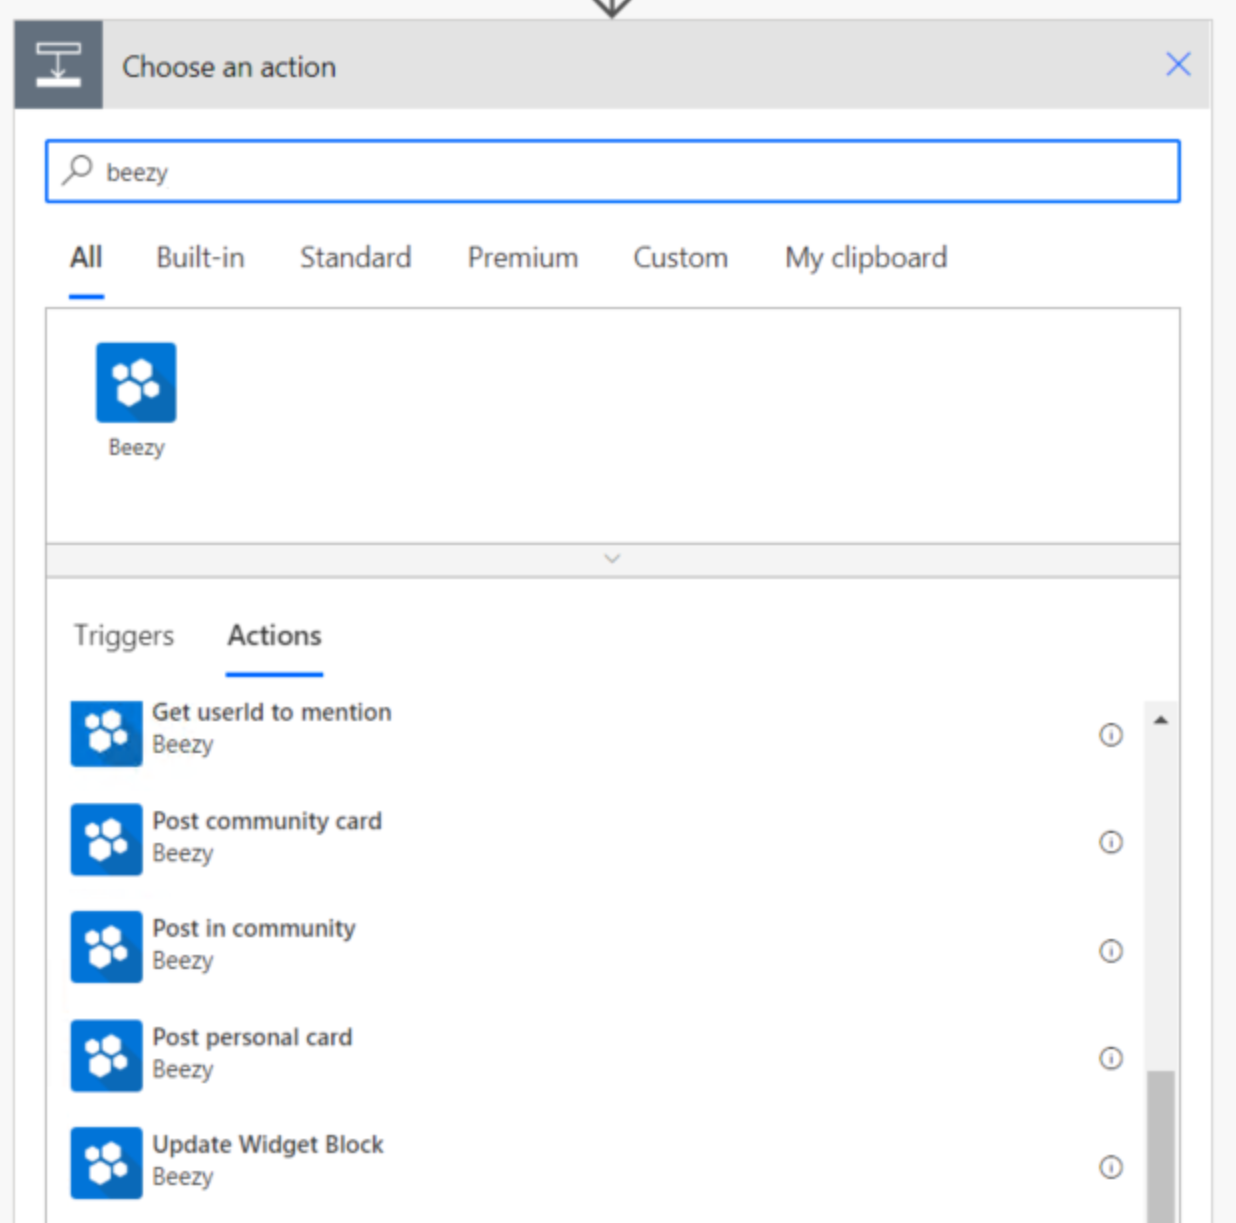
Here we will choose the “Update Widget Block” action.
Add a connection
We need to add a connection. That is, specify the user that will perform the action in our environment (the author of the widget). So click on the three dots button at the connector’s top right, and to +Add new connection at the bottom of the dropdown.
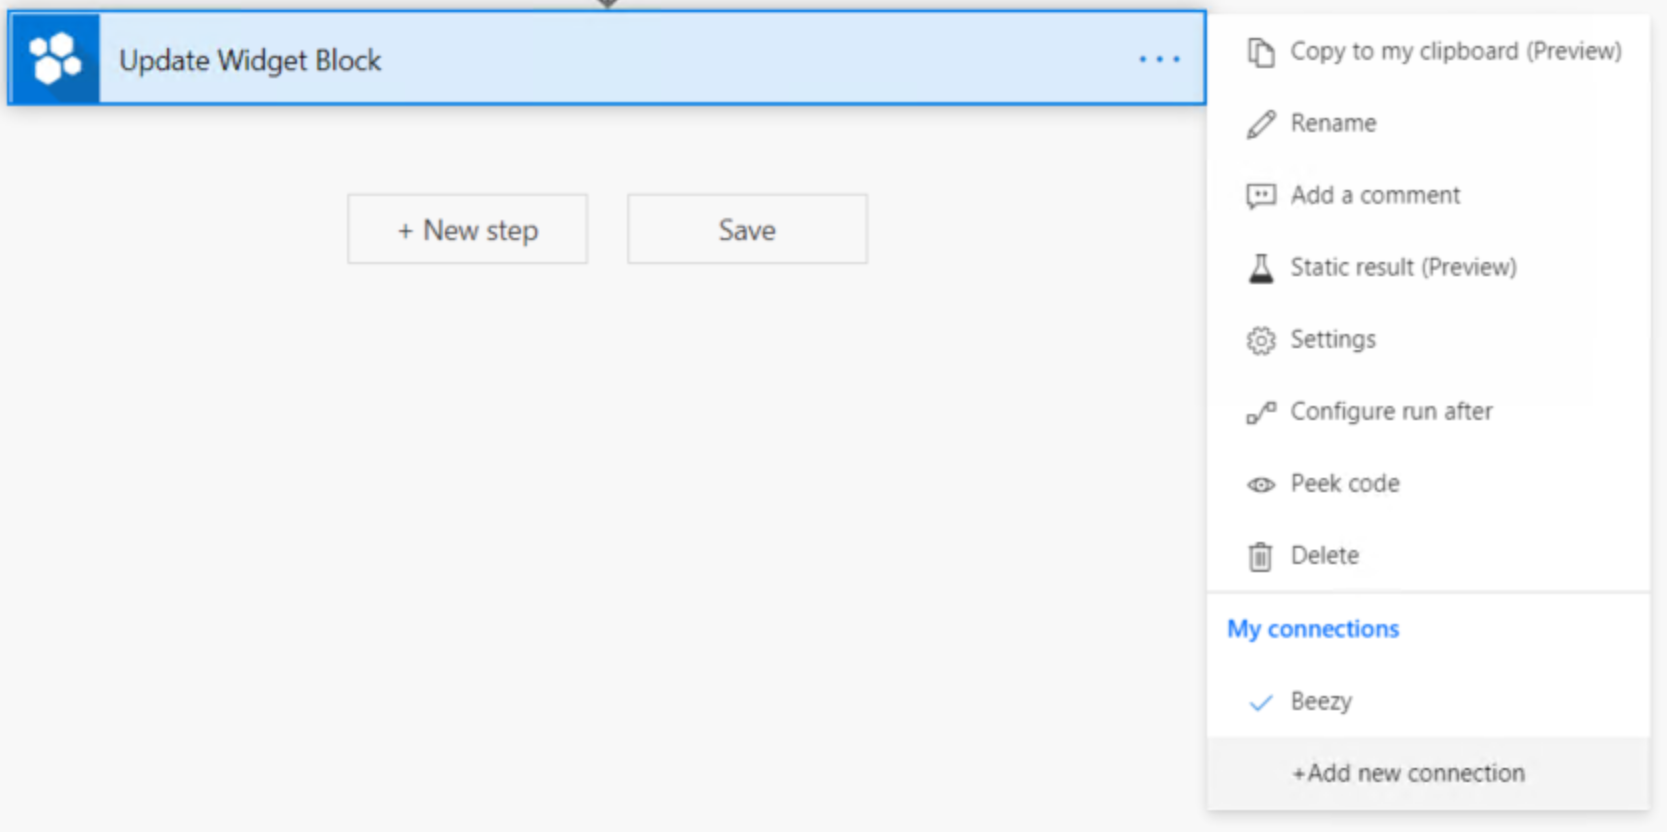
From the opened popup just pick and account or use another one.
Click the Create button.
We don’t need to create a new connection for every widget. We can use the one we just created also for the following widgets unless we want to change their authorship.
Configure the “Update Widget Block” action
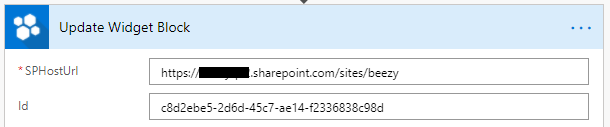
Our action has 5 fields: SPHostUrl, id, code, HostConfig, and CSS styling.
SPHostUrl field
This field is mandatory, here we have to add our environment URL.

Id field
The id is mandatory. It is the id of the block where we want to show our custom widget.
So, to get it, go to Hero settings, click on the block we want to fill with the widget, copy the BLOCK ID, Save and close the block, and Publish or Update the Hero so that id will be assigned to that block.
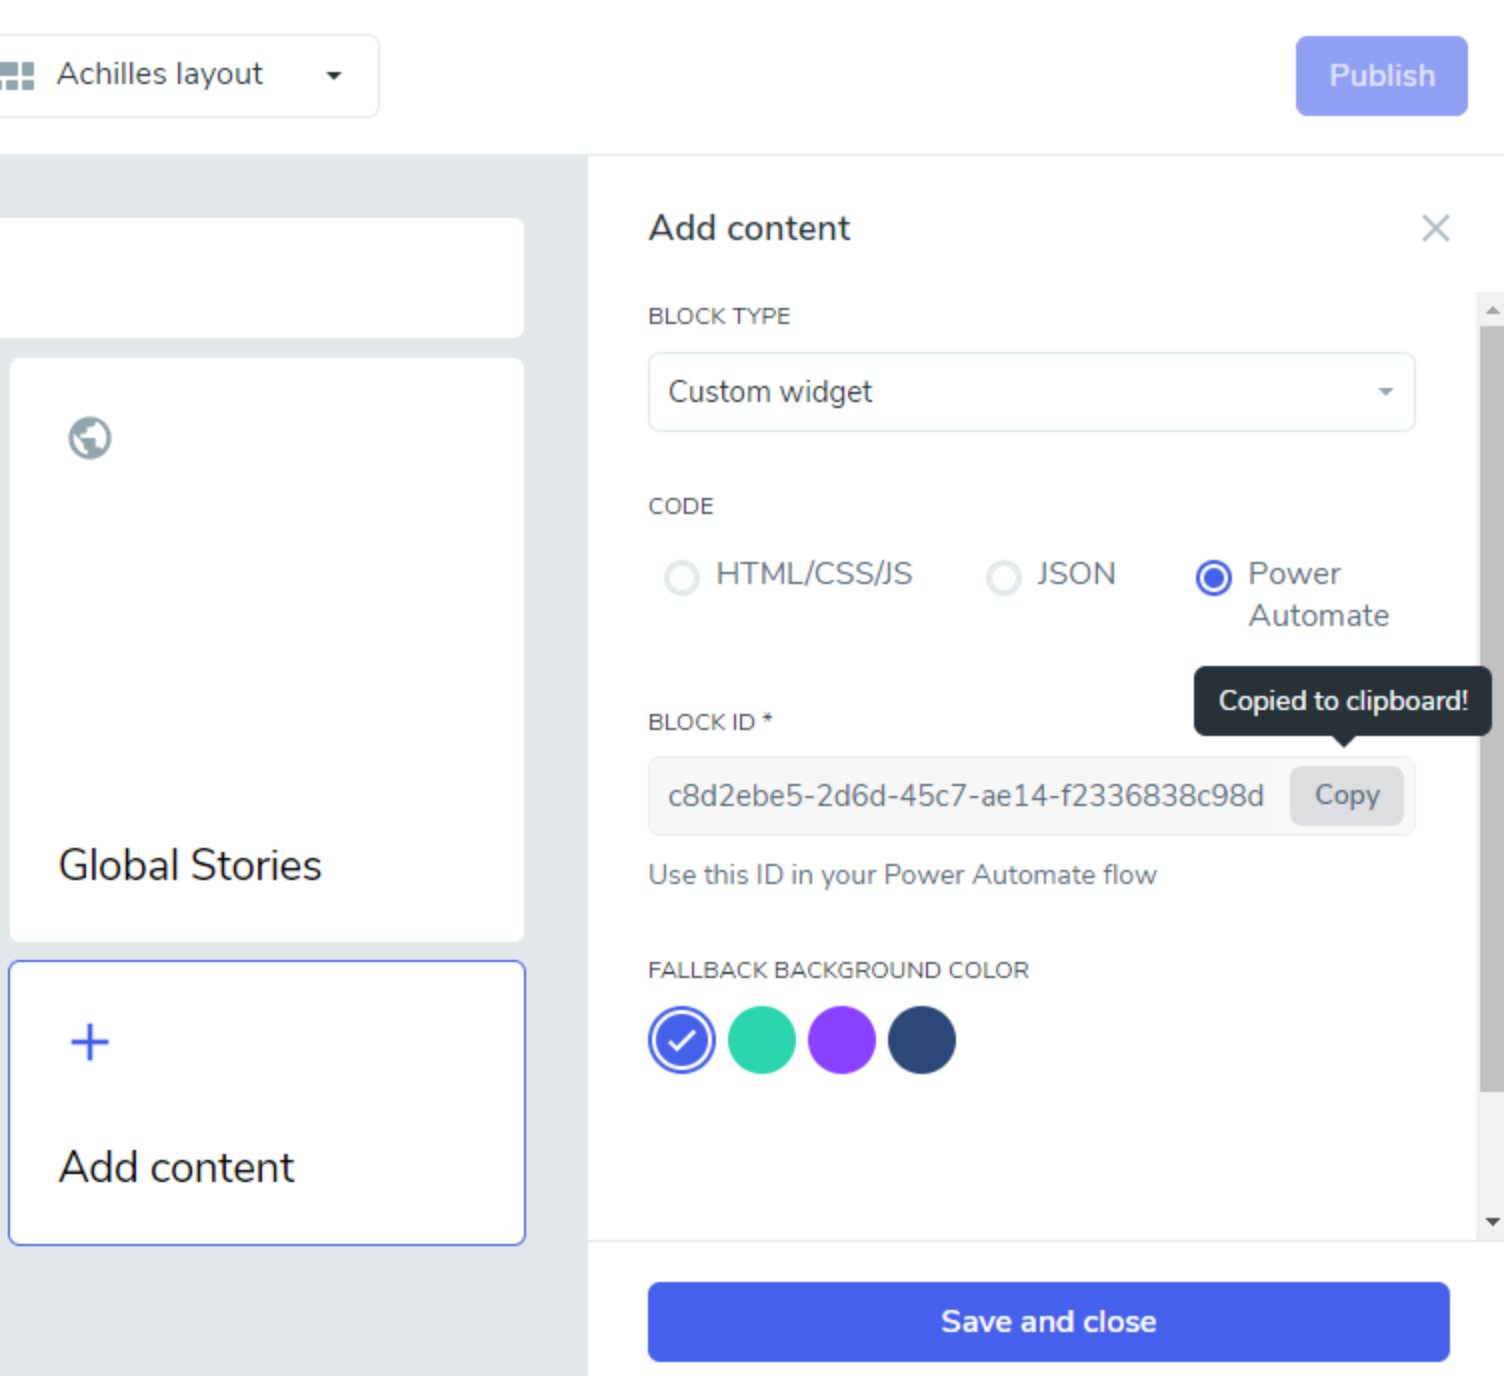
Now go back to our Power Automate and paste the BLOCK ID in the Id field.
Code field
The code field is also mandatory.
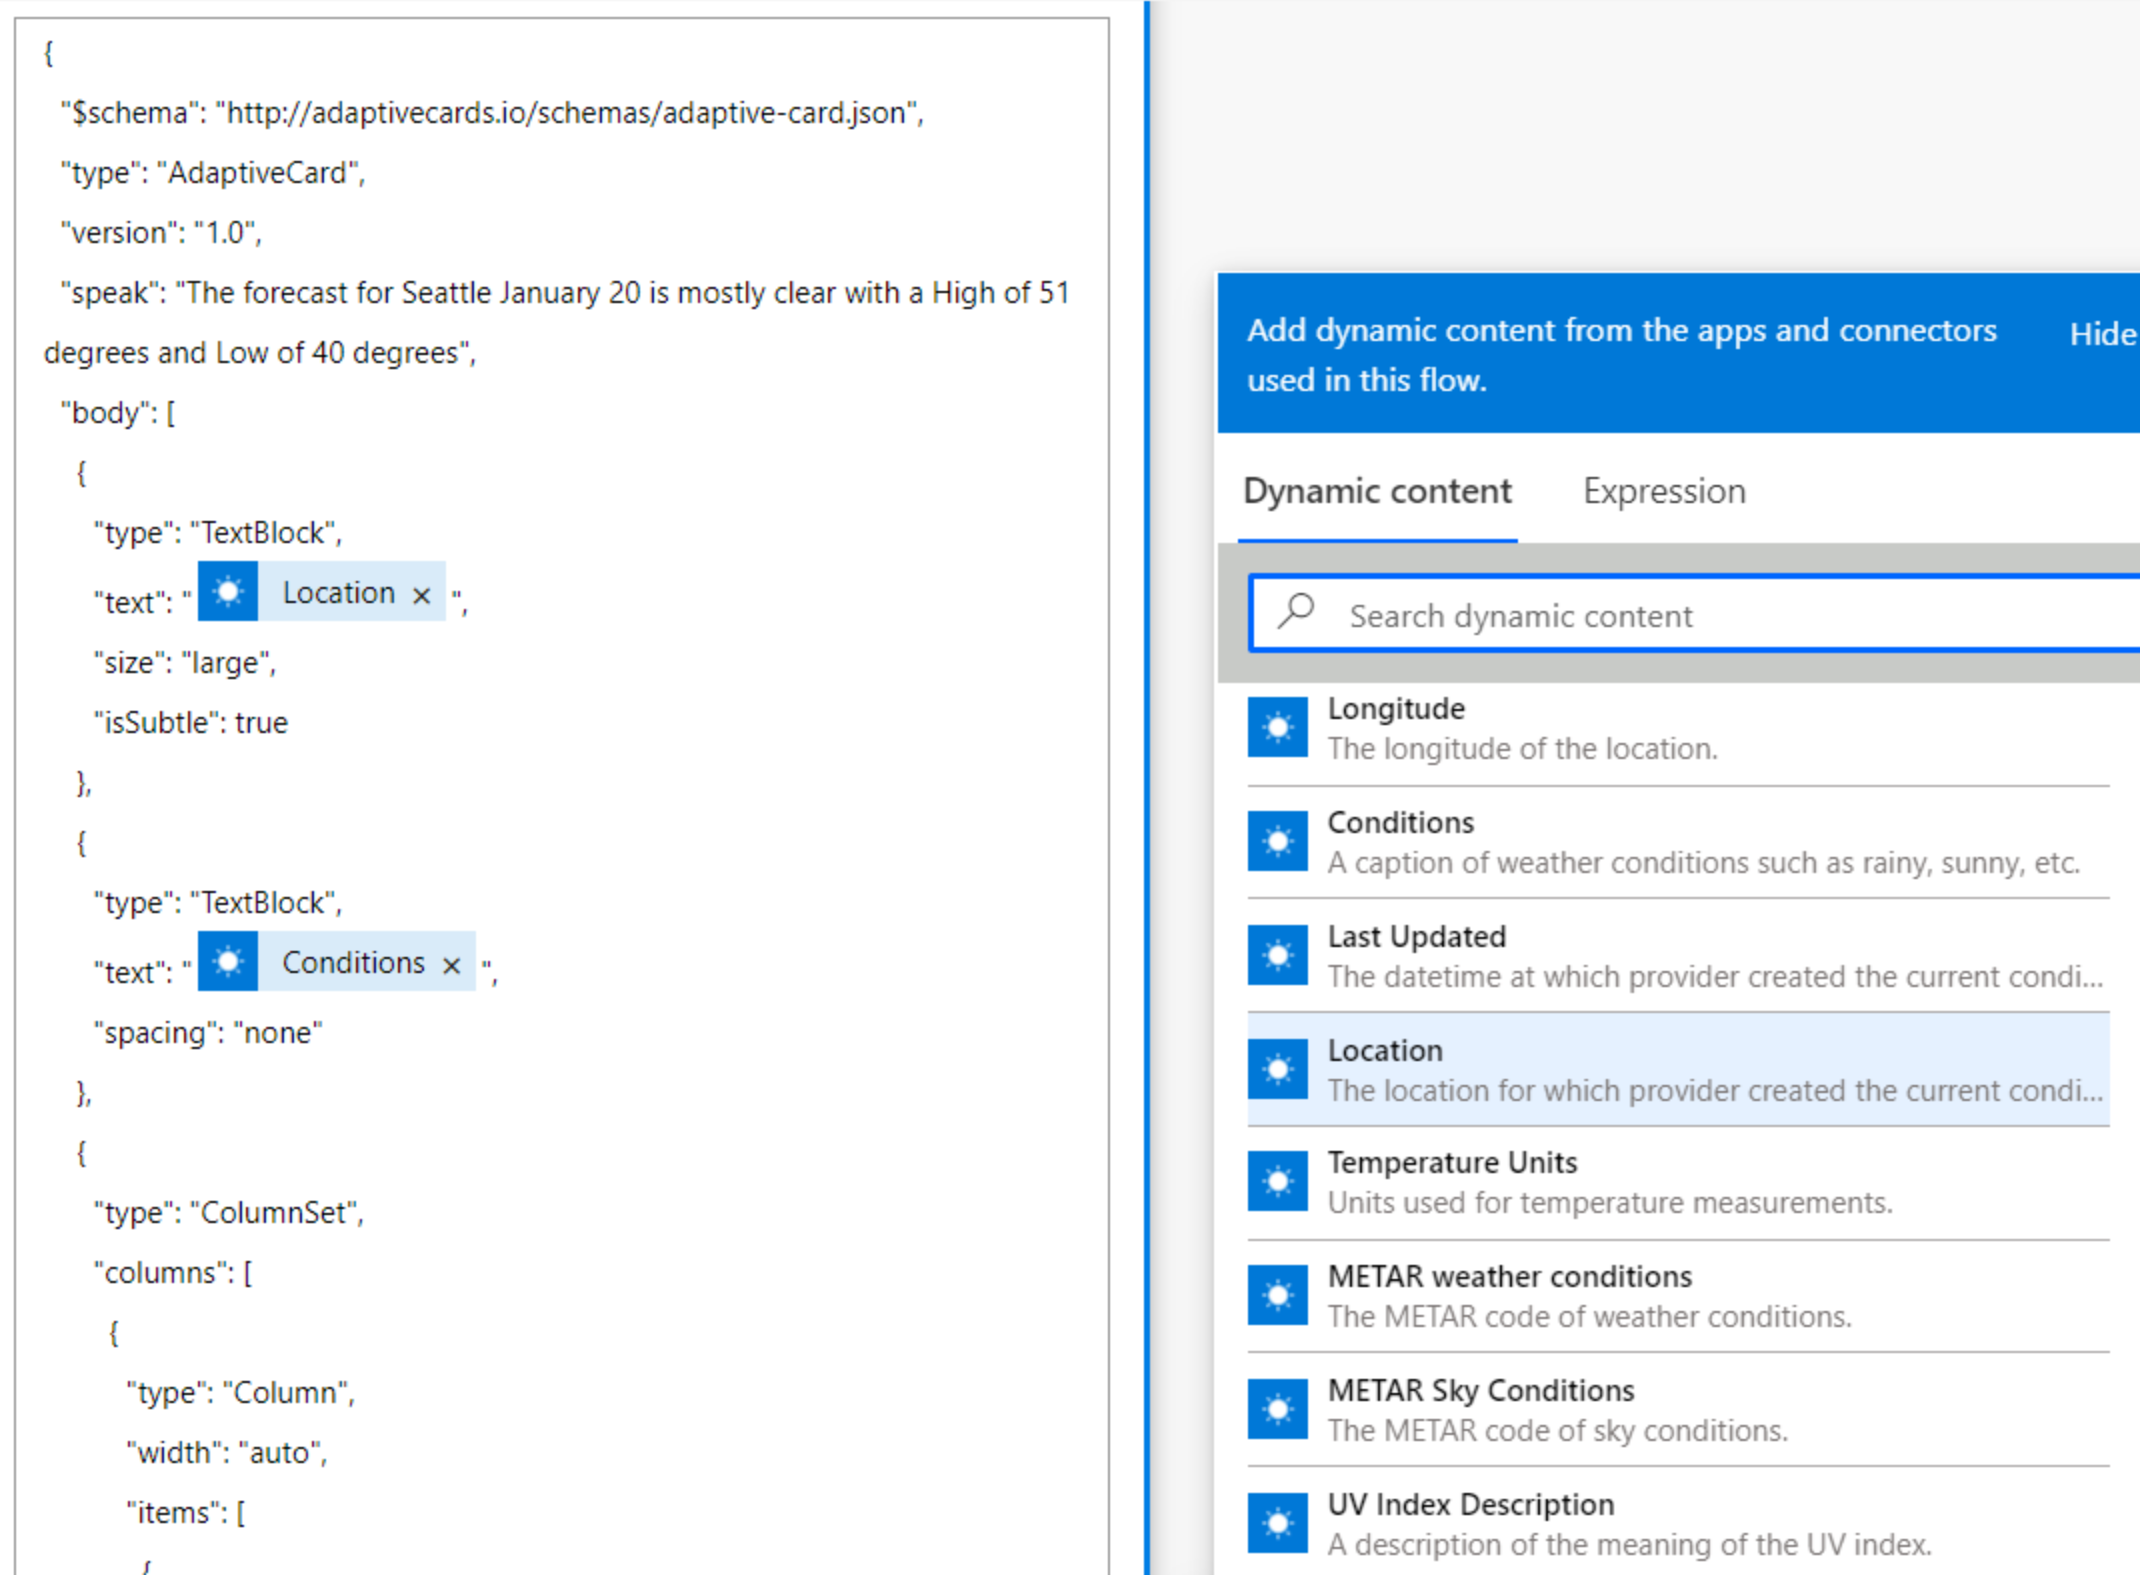
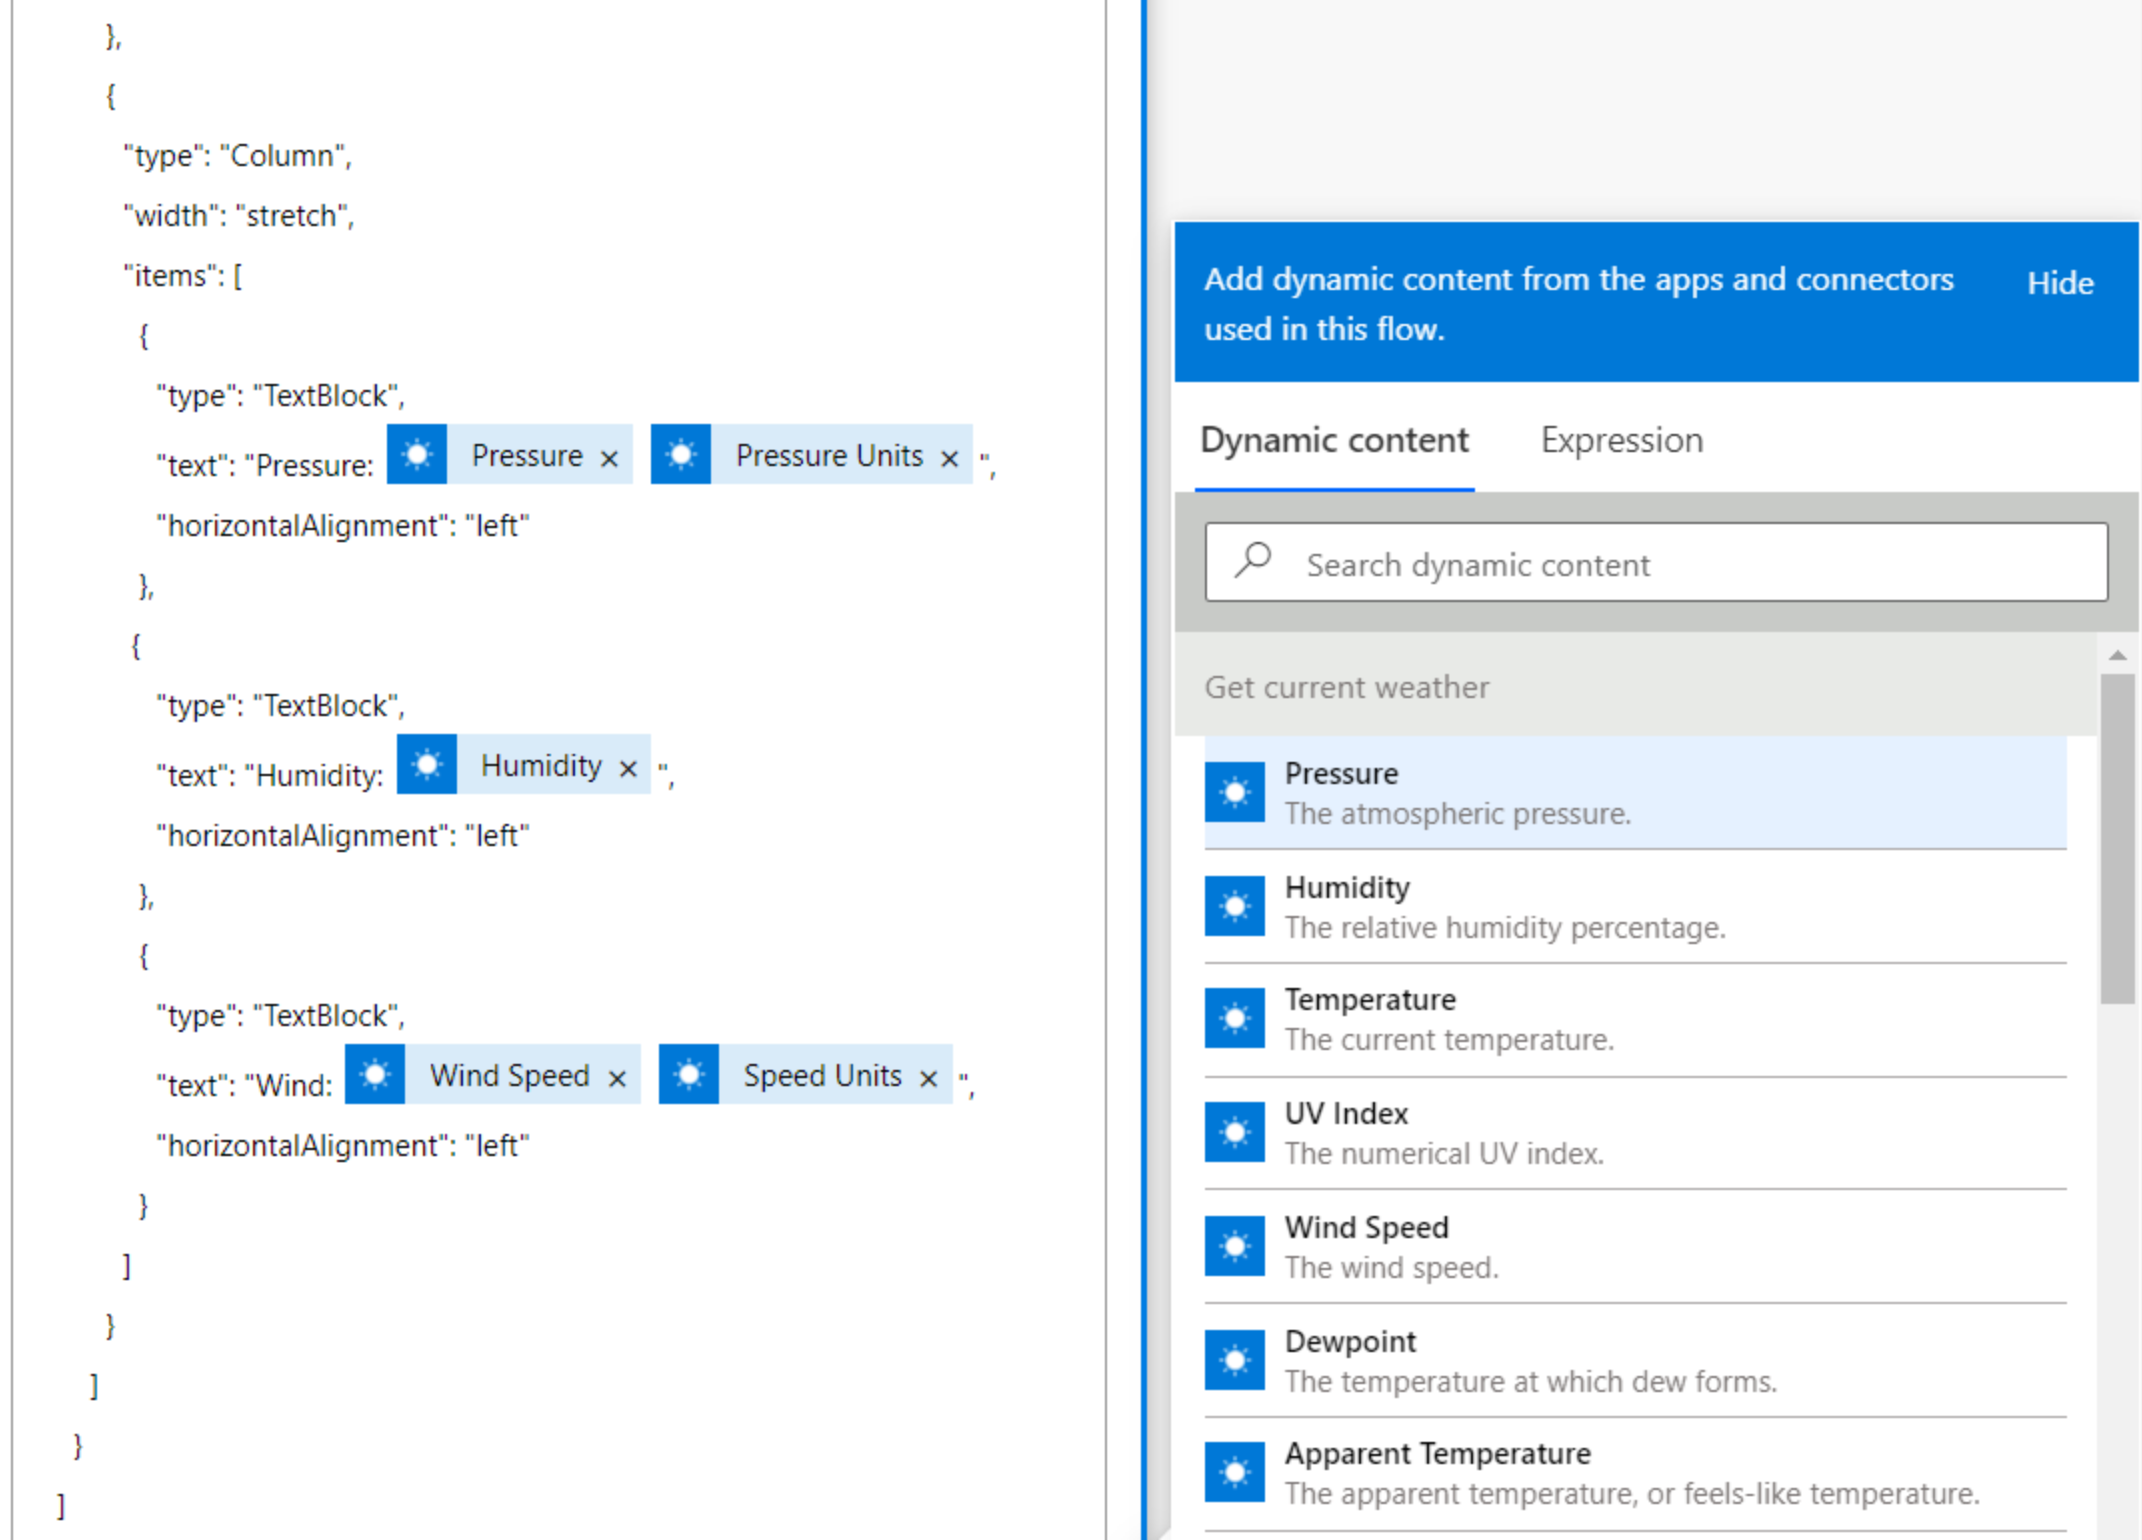
Here we can paste any Adaptive Card JSON template.
For our example, we will use the “Weather compact” sample from https://adaptivecards.io/samples/
Go to https://adaptivecards.io/samples/WeatherCompact.html and copy the JSON of the Weather Compact sample (uncheck the Use Adaptive Card Templating, we don’t need it).
Paste the JSON into our code field.
Replace the template information with the dynamic content that we receive from the Get current weather action.
HostConfig and CSS Styling fields
HostConfig and CSS Styling are not mandatory, so we don’t need to use them to see the widget in the Hero, but they are recommended. Please read the styling guide to learn more about them.

The result
Save, run the flow, and check the Hero.
Here it is our custom weather widget!
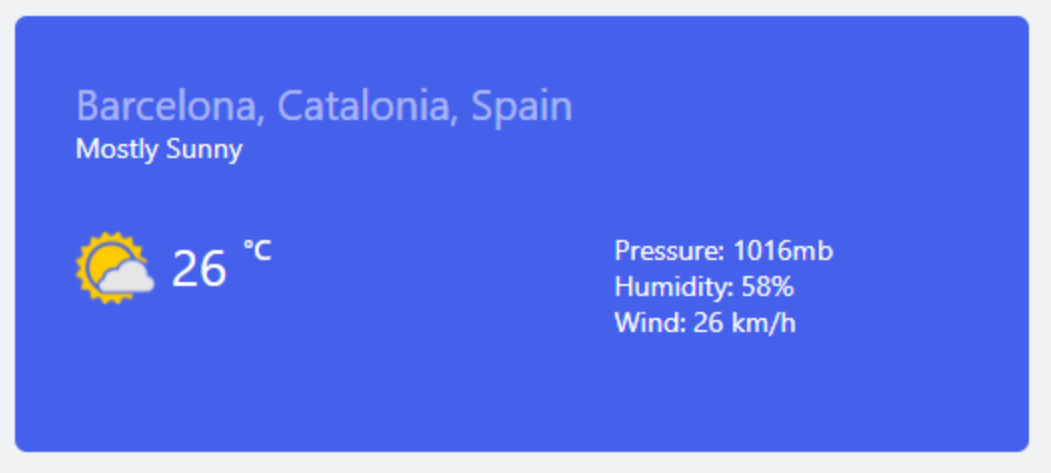
The Power Automate flow will run every 30 minutes to refresh the widget with updated weather information. The changes will not be pushed to the Hero directly but will be visible after a browser refresh.
Was this article helpful?