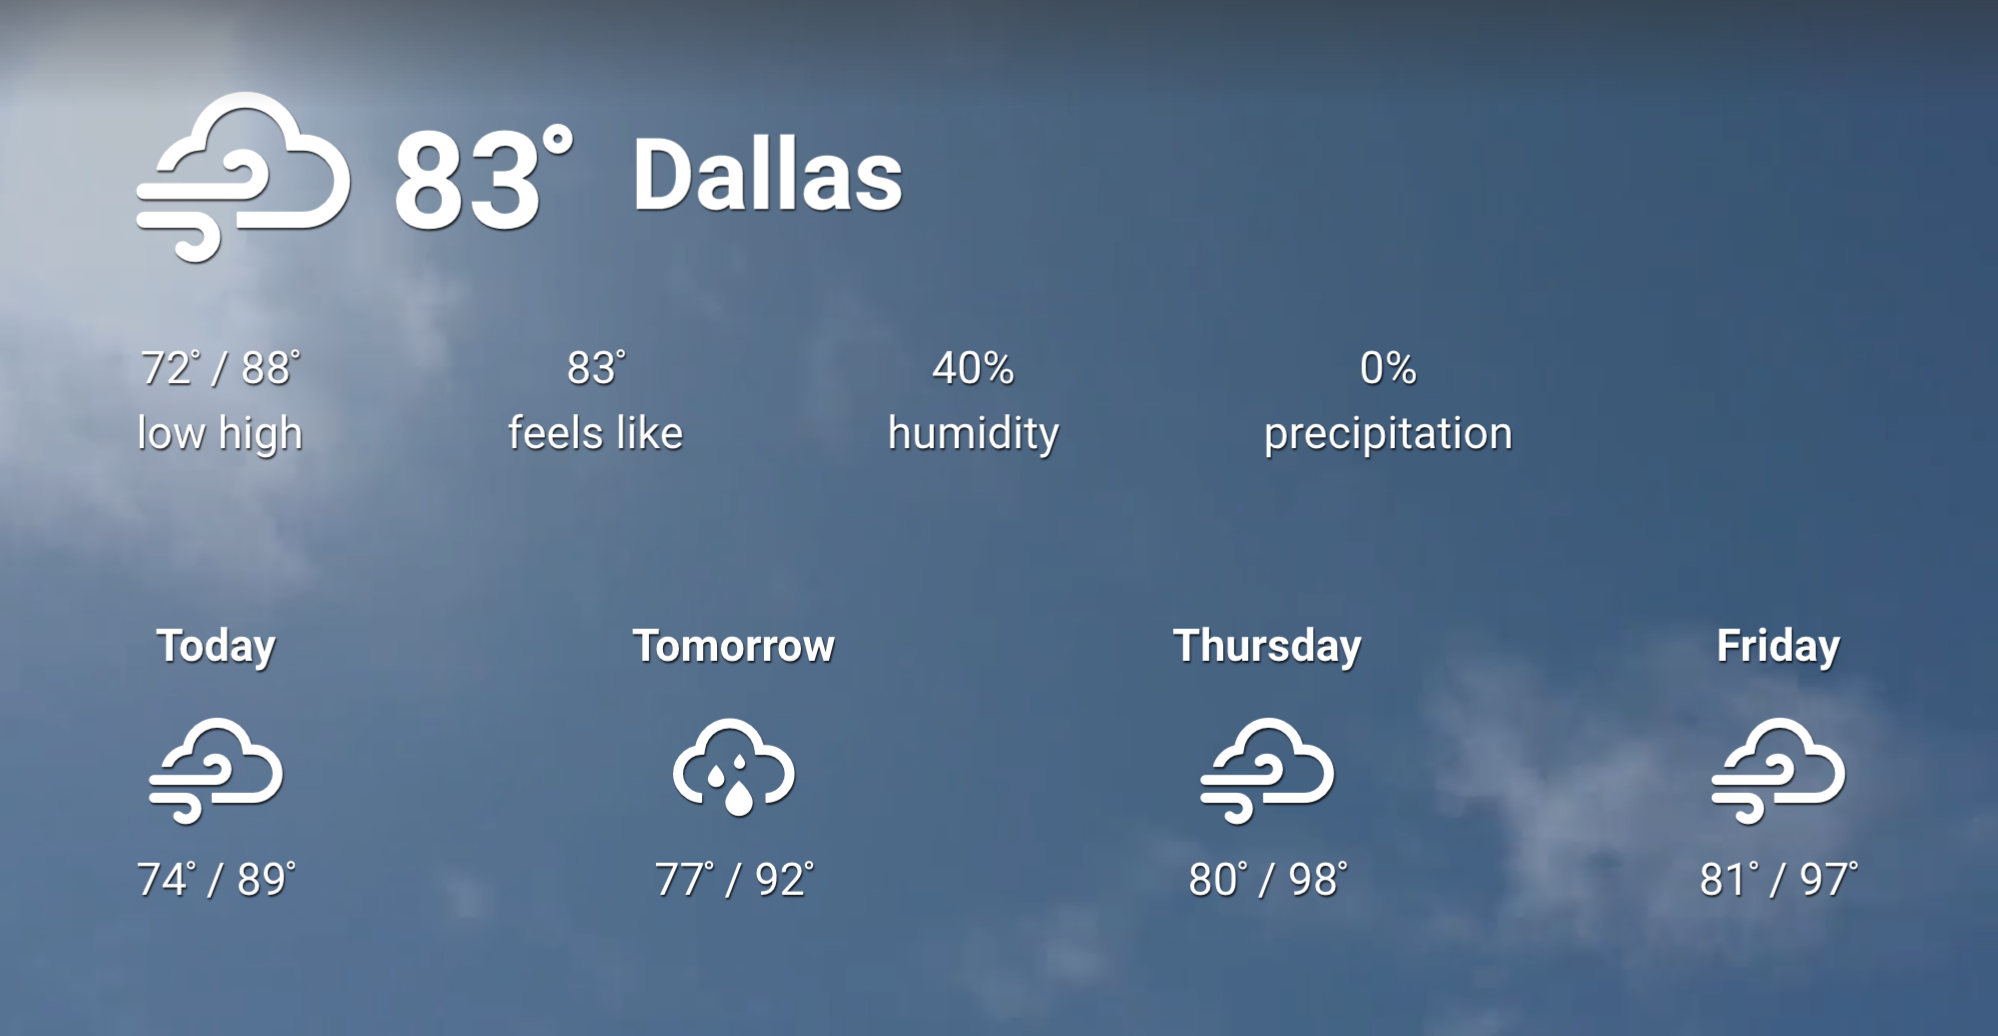
The Weather card is perfect for businesses that rely on the weather, allowing employees to prepare for the weather in advance, or if certain outdoor tasks can be scheduled on that particular day.
It can display either a 1-day or a 5-day weather forecast of your selected location.

The following customizations and features are available on the Weather card:
- Configure the temperature unit in Fahrenheit or Celsius.
- Display temperature unit.
- Display motion background.
- Display the layout forecast.
- Display advanced weather information.
- Display the country or state of the location.
- Configure text color.
- Configure background color.
With the introduction of Content Categories in Appspace 8.0-ac.22, the Weather card template is assigned with the Productivity & Engagement content category.
This article provides the instructions to create and configure a Weather card.
Prerequisites
- Ensure your device is compatible. Refer to the Supported Appspace Cards article.
- Account Owner or Publisher role to add or edit content in Library.
Create and Configure Weather Card
Follow the instructions below to display weather content:
- Log in to your Appspace console.
- To create this card, select one of the following options:
- Click +Quick Action from the Appspace menu bar on the top right, and select Create Card.
- Click Library from the ☰ Appspace menu, and select a library or folder you wish to create the content in. Click +CREATE, and select Card.
- To create and add the card directly to an existing channel, refer to Add Content to Playlist Channels.
- Select Feeds from the All Templates drop-down menu, and click Weather. ImportantIf you are unable to locate the content, try using either the Search bar, the Order by, or Filter icon to narrow down the content that you are looking for.
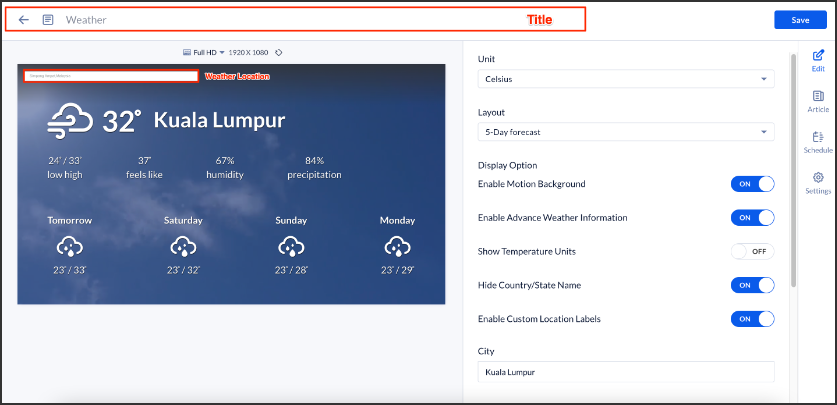
- Enter the Title of the content as this will also act as the filename for the content. This is a mandatory field.

- Enter the location of the weather to be displayed in the location field on the card. ImportantLeaving the location blank allows the card to display the weather of the display device’s current location. This enables users to configure a single Weather card and deploy it to multiple devices on different locations quickly eliminating the need to configure each location manually. In the event that the search function is unable to locate the entered location, or has a location selected, users may override it by using the “card.weather.location” device property, and manually entering the location by setting the value to “City name, State/Country”. The system will then try to map the closest location at its best effort.
- In the Edit tab:
- Select the Unit for the temperature to be displayed:
- Fahrenheit
- Celsius ImportantUsers may also use the device property “card.weather.units”, with the values to “c” or “f” to override the selected temperature unit on the card.
- Select the forecast Layout type:
- 5-Day forecast
- 1-Day forecast
- Select the display options for the Weather card:
- Enable Motion Backgrounds (selected by default) – Display a video background that represents the weather.
- Enable Advanced Weather Information (selected by default)- Display extra weather information, such as the high/low temperature, humidity, precipitation, and how the temperature feels.
- Show Temperature Units – Displays the temperature units.
- Hide Country/State Name (selected by default) – Hides the country or state of the weather location.
- Enable Custom Location Labels – Display the name of the precise location, such as the name of a building, in place of the city and country or state.
- Customize the City name, if you would like to replace the default city displayed by the weather provider.
- Customize the Country name, if you would like to replace the default country displayed by the weather provider. Ensure to first uncheck the Hide Country/State Name display option from the drop-down menu above.NoteBoth the Country and City fields have a 255-character limit on user input. If the user attempts to enter more than 255 characters, the error message “Maximum characters limits” will be displayed.
- Customize the Text Color, and the Background Color or Media. Note
- When a user selects a background color with video-enabled, the background color is rendered with 30% opacity by default. However, users can manually change the opacity levels.
- When a user uploads an image with video-enabled, the image is displayed at 100% opacity by default, which blocks the motion background from being viewed. This can be fixed by uploading a PNG image with transparency levels managed by the user from the source file.
- The Weather Card only supports the following file types for custom backgrounds: .jpg, .png, and .bmp.
- Select the Unit for the temperature to be displayed:
- In the Article tab: This section may be skipped.
- Include an Article or Caption to accompany the content item when being displayed on mobile apps, tablets, and other social collaboration apps.
- Enter a Referral Link to link more information to the content.
- In the Schedule tab: This section may be skipped.
- You may add the content to a channel by selecting the channel from the Add to channel drop-down menu or leave it unassigned to be added later.
- When the content is assigned to a channel, the SCHEDULING and DISPLAY PROPERTIES options are displayed. Refer to the Configure Content Playback Properties: Dayparting, Frequency, Scheduling, in a Playlist Channel article for detailed configuration instructions.
- In the Settings tab: This section may be skipped.
- The Name field will be auto-populated to match the Title of the content which will also act as the filename for the content. This is a mandatory field.
- Select the Content Category from the drop-down menu to match the focus of the message, or leave it at the default content category.
- Enter any relevant Tags for the content. (Optional)
- Select a folder for the content in the Library Location drop-down menu to change the default folder location.
- Select an expiry date for the content from the Auto Delete Content from Library drop-down menu. (Optional)
- Upload an image to be used as the Thumbnail for the content.
- Once done, click SAVE.
Edit Weather Card
The instructions below show you how to edit a Weather card.
- Log in to your Appspace console.
- Click Library from the ☰ Appspace menu, and select a folder containing the content you wish to edit.
- Select and click the Weather card to edit, and select the desired tab to edit or view.
- In the Edit, Article, and Settings tabs:
- You may edit the content the same way as it was configured. For detailed instructions on how to do this, please refer to the Create and Configure Weather Card section above.
- In the Preview tab:
- Preview how the content is displayed on your device.
- In the Channels tab:
- You may add the content to a channel by selecting the channel from the Add to channel drop-down menu or leave it unassigned to be added later.
- When the content is assigned to a channel, the SCHEDULING and DISPLAY PROPERTIES options are displayed. Refer to the Configure Content Playback Properties: Dayparting, Frequency, Scheduling, in a Playlist Channel article for detailed configuration instructions.
- In the Analytics tab:
- View the individual content analytics in this tab. For more information, please refer to the Individual Content Analytics section of the Analytics article.
- In the Edit, Article, and Settings tabs:
- Once done, click SAVE.
Was this article helpful?