This article provides the instructions to configure and register BrightSign devices with local policy file, an advanced device registration method ideal for cloud or on-prem. Users on devices with USB or SD cards, may utilize this method if they would like to register their device with local policies in place. You can only register one device at a time.
- If you wish to upgrade existing BrightSign devices running the Appspace App to OS version 8.0, the Appspace App must be updated to version 1.46 first, before the device firmware is updated to version 8. This is crucial to prevent the local storage from being wiped off due to the architectural changes on the location of the local storage for BrightSign OS 8.
- BrightSign devices are unable to update the Appspace App versions automatically. Please refer to the Update Appspace App on BrightSign section below for workarounds.
- DHCP Option 43 is supported on Appspace App 1.36 and above.
Prerequisites
- An Appspace App supported device installed and configured with the Appspace App.
- An active Appspace account, with sufficient Device IDs to register the device.
- Account Owner or Network Administrator privileges in Appspace.
- A USB keyboard.
- A BrightSign compatible SD card/USB drive/SSD storage device.
Register BrightSign Devices with Local Policy File
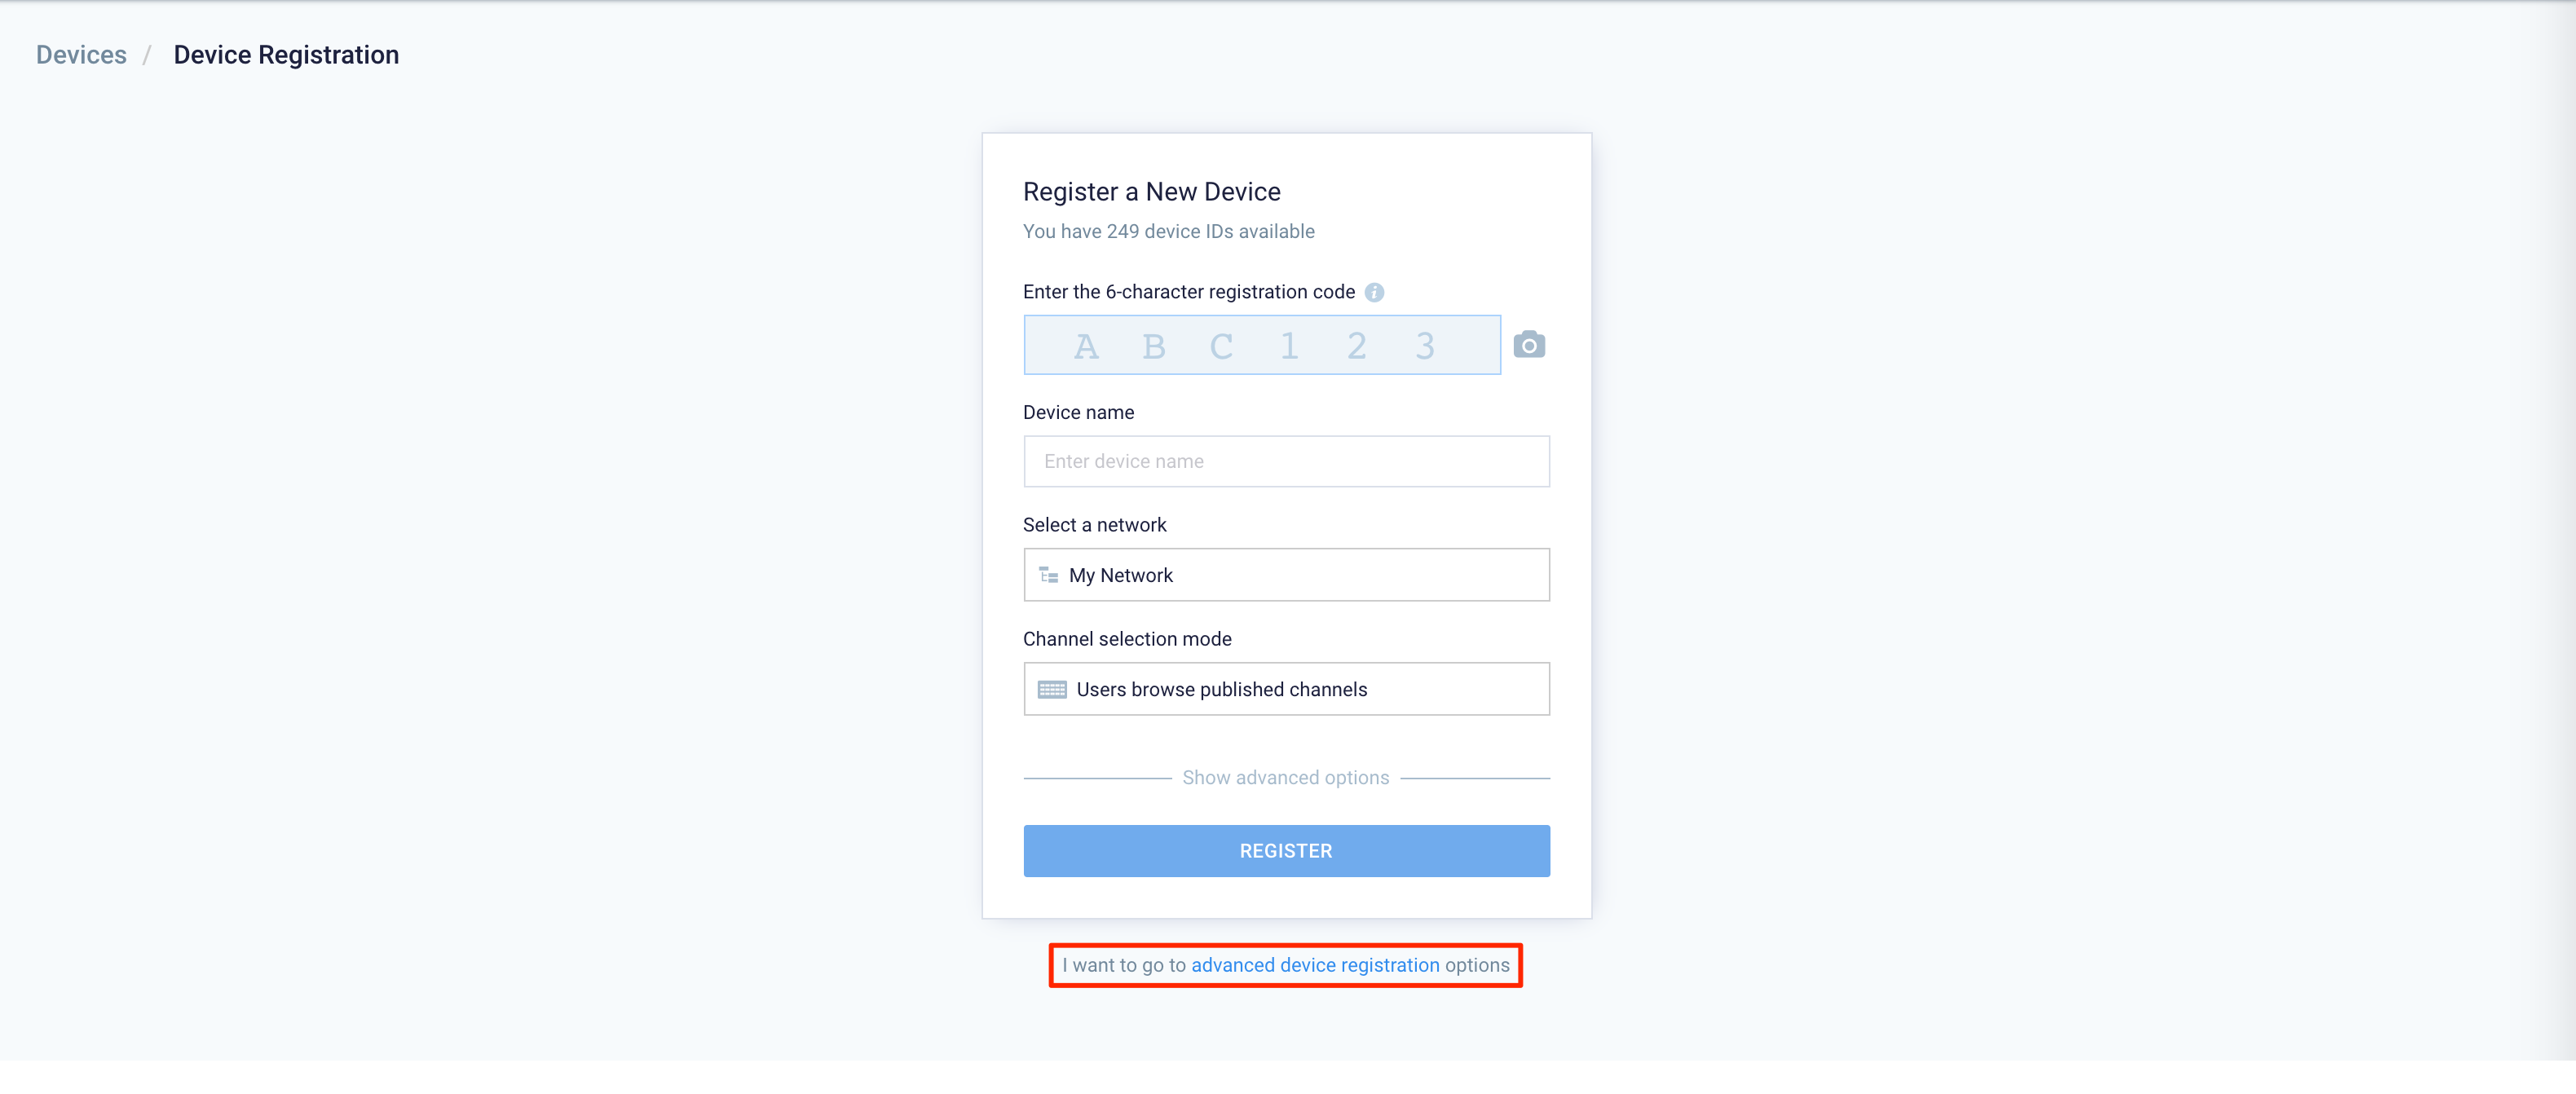
- Log in to the Appspace console.
- Launch the device registration page via one of the following methods:
- Click the Quick Actions menu and select Register a Device.
- Go to the Device Registration widget on the Dashboard.
- Click the ☰ Appspace menu, select Devices, and click the Add button in the Devices tab.

- In the Register a New Device window, click the advanced device registration link.
- In the Configure Advanced Registration window, select BrightSign Package for the Deployment method drop-down menu.
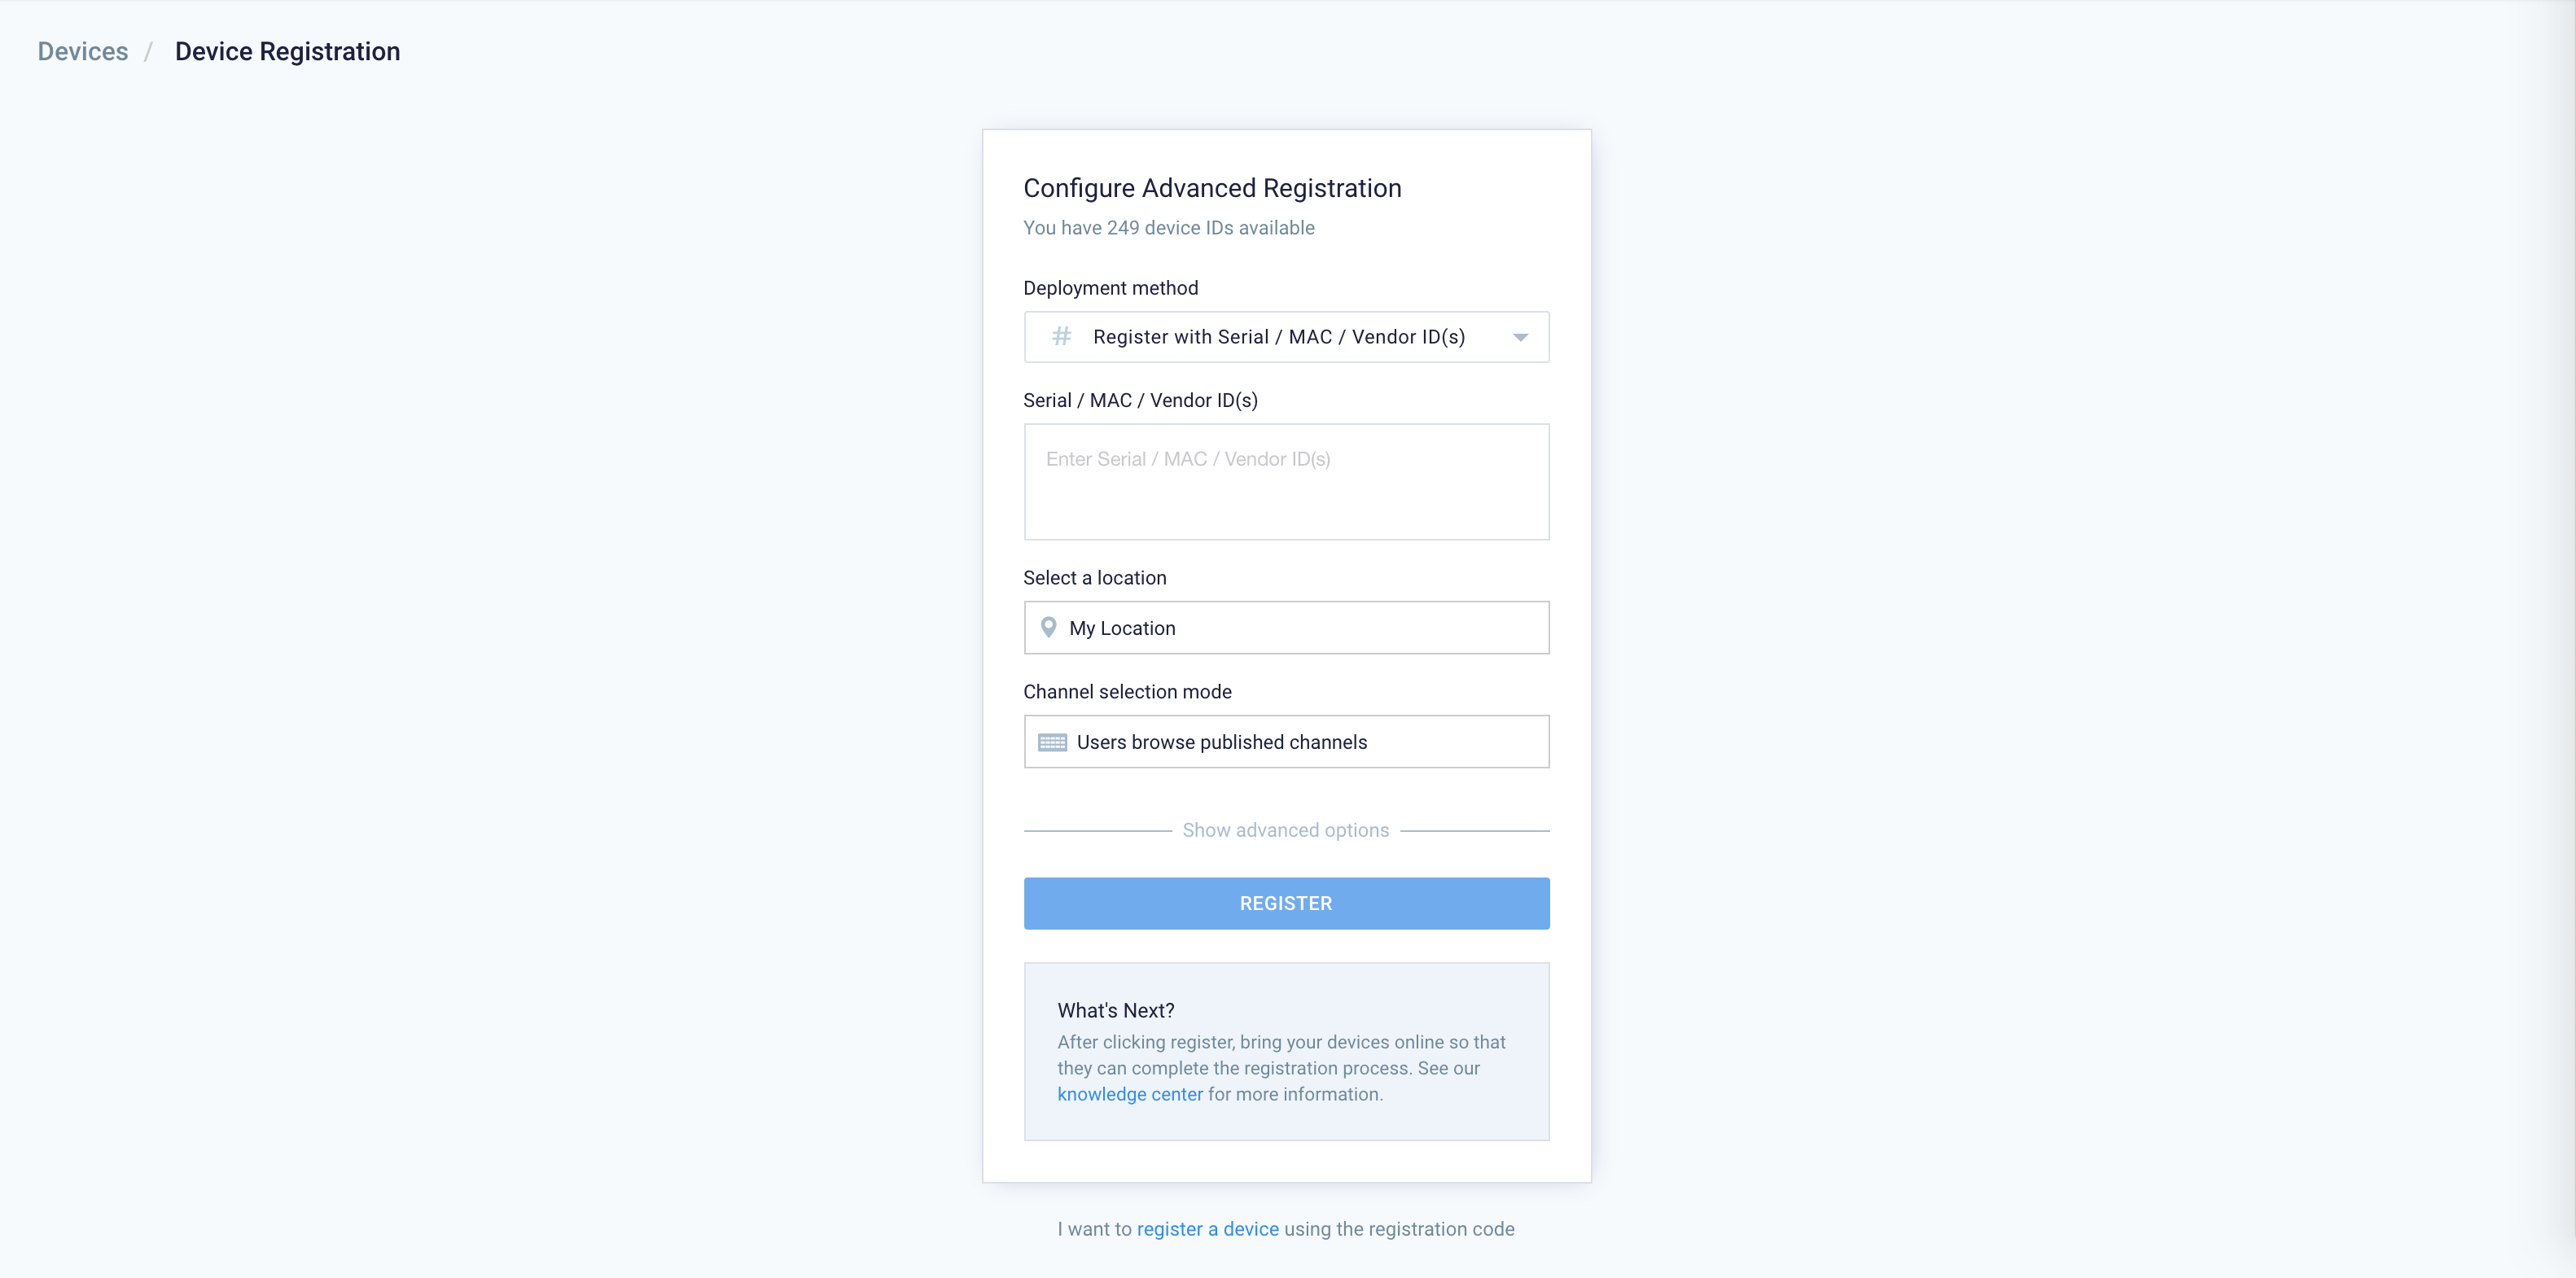
- Proceed to enter the Device name and Select a network. If a network has not been created, you may skip this step and assign a network later.
- In the Channel selection mode field, select one of these playback options and assign a channel (if already created):
- Users can browse published channels – this is the interactive mode or channel browsing mode, ideal for TVs or displays with touch-screen, or with a mouse/keyboard attached.
- Channels will autoplay sequentially – this option is currently available only for playlist channels. Channels with autoplay based on the playlist sequence or any scheduling or dayparting settings configured.
- Administrators can select a single channel – ideal for signage, you may select either a playlist channel, an advanced channel or a live channel. However to select a channel here, the channel must already be created prior to this registration. If the channel has not been created, you may skip this step and assign a channel later.

- Click the Save button.
- Configure fields such as DHCP, NTP server, Timezone, and Proxy Server. You can also perform custom scripting in the Script Configuration section.
- Back in the Register a New Device window, click Show advanced options and enter:
- Device description – type a brief description for the device such as its location or its function.
- Device group – select an exiting device group. Skip this step if there is no device group created. You may assign a device group later.
- Device tag – select from exiting tags or type in new tags.
- Click the DOWNLOAD AUTORUN.ZIP button to download the autorun.zip file to your default download folder.
- Copy and paste the autorun.zip file to a SSD storage, SD card, or USB drive according to your preference. If using SD card or USB drive, plug in the devices into the BrightSign device.
- The Appspace App BrightSign installation package will be automatically extracted to the relevant storage on the device. NoteThe autorun.zip file is automatically deleted from the storage device after the extraction.
- Connect the BrightSign device to a display screen.
- Ensure network connectivity is active, and switch on the BrightSign device.
- Wait for the BrightSign device to boot-up. The Appspace App will begin registering the device, and the selected channel will be displayed.
- If using an SSD, once the initial installation and registration process is complete, you may remove the SD card or USB drive, as the Appspace App will operate solely from the SSD storage hereafter.
Using DHCP Option 43 provisioning for BrightSign
Typically, we download and store the autorun.zip file that contains a policy file on a SSD or SD card and manually register each device. If you have DHCP Option 43 enabled on your network, you can now leverage this option to allow all devices plugged-in to the network, to auto-register the devices and begin playing the assigned channels, without user intervention via a provisioning script.
Prerequisites
- A DHCP server on the local network configured with DHCP Option 43.
- A provisioning server to handle the recovery request from the device.
- A provisioning script that will download the autorun.zip file and reboot the device.
Automatic Device Registration using DHCP Option 43
Follow the instructions below to setup the device for automatic registration with DHCP Option 43:
- Follow steps 1-4 in the Register BrightSign with Local Policy File section above to configure the policy file.
- Click Download to download the autorun.zip file.
- Place the autorun.zip file on any desired web server.
- Define the URL path to the autorun.zip file in your provisioning script.
- Connect the BrightSign device to a display screen.
- Ensure network connectivity is active, and switch on the BrightSign device. Once the device boots-up, the device will automatically install, and register the Appspace App. NoteThe BrightSign device will restart a couple of times to complete this process.
- If you did not select a channel during the policy file configuration in step 1 above, you may:
- Assign channel to each device.
- Assign default channel to a network .
Was this article helpful?